Living Tastefully
  • Home
  • PAINTINGS
  • About
  • Passions-to-Pastry Blog
  • Contact
  • Recipes

Peach & Honeydew Salad with Prosciutto

8/2/2016

2 Comments

 
Picture

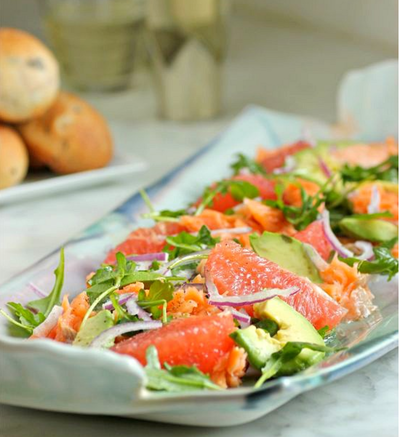
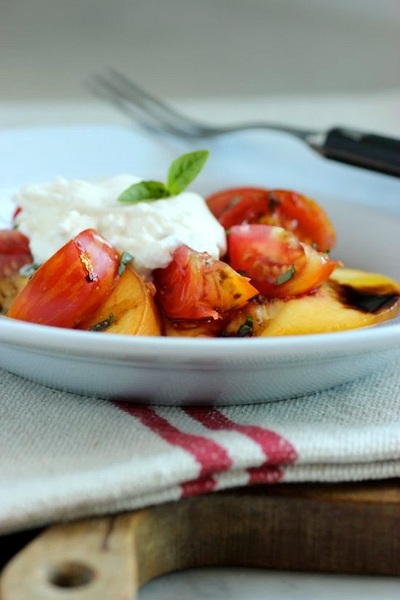
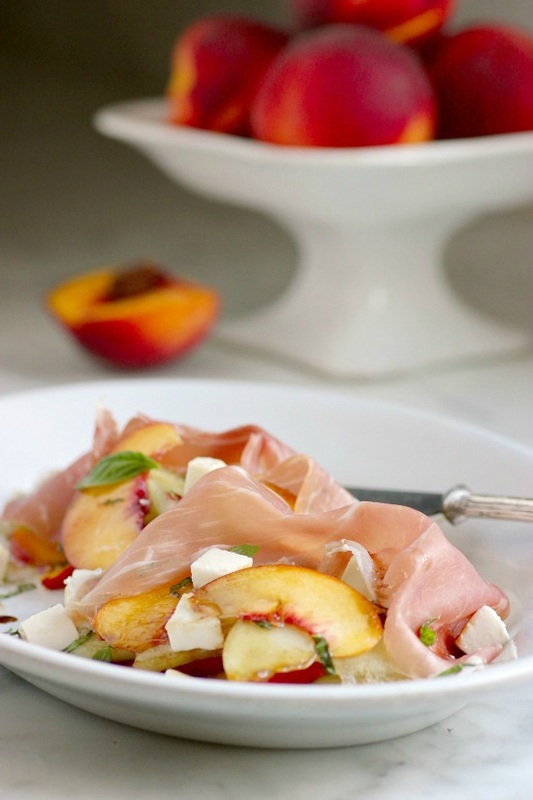
     Wow... this is my kind of meal!  I absolutely loved this Peach and Honeydew Salad with Prosciutto.  In addition to this salad, I roasted chicken breasts and seared a large pan of green beans from my garden.  I, however, didn't eat any of that. I started out with this salad and ended with this salad.  And when it was gone, I was very sorry I didn't have more.  I don't purchase honeydew often -- usually cantaloupe instead.  I'm now craving it; along with peaches...
     Next time, it will be only this salad.  A very large salad.  And there will be baguettes with French salted butter... perfect!  Make it now.  It's a summer salad.


Picture
Picture

•
recipe (adapted) from Chef Andy Glover of Mission Estate Winery
  SERVES 4

• One 1 1/2-pound honeydew melon -- seeded, peeled, and thinly sliced
• 1 ripe peach, thinly sliced
• 1 tablespoon extra-virgin olive oil
• 2 teaspoons balsamic vinegar
• Sea salt and freshly ground pepper
• 2 tablespoons chopped basil
• 1/2 pound fresh mozzarella, small cubes
• 8 thin slices of prosciutto (2 ounces)

1.  Arrange the honeydew melon and peach slices on a platter.  Drizzle with the olive oil and balsamic vinegar.  Sprinkle with salt and pepper.  Scatter the basil and fresh mozzarella over the fruit; drape the slices of prosciutto over the top.  ENJOY


TAKE a LOOK:


2 Comments

Peach, Prosciutto & Homemade Fresh Ricotta Crostini

7/18/2015

0 Comments

 
Picture

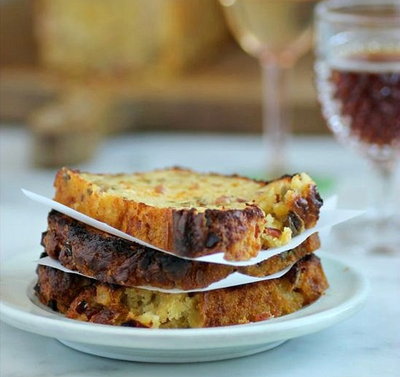
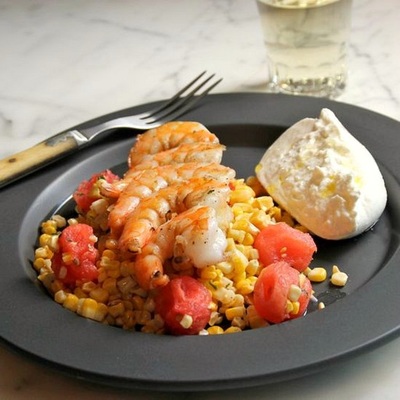
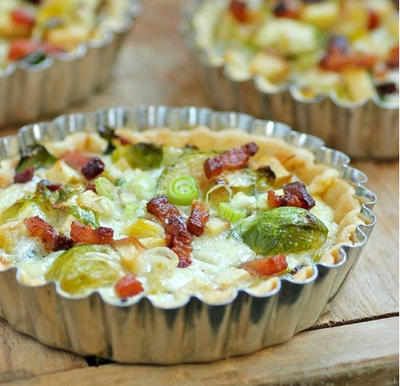
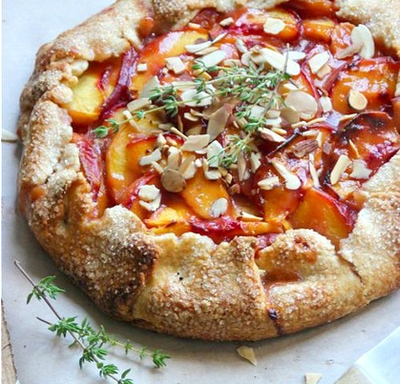
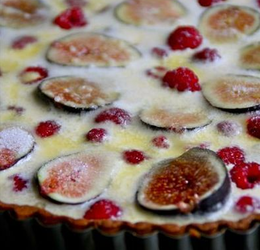
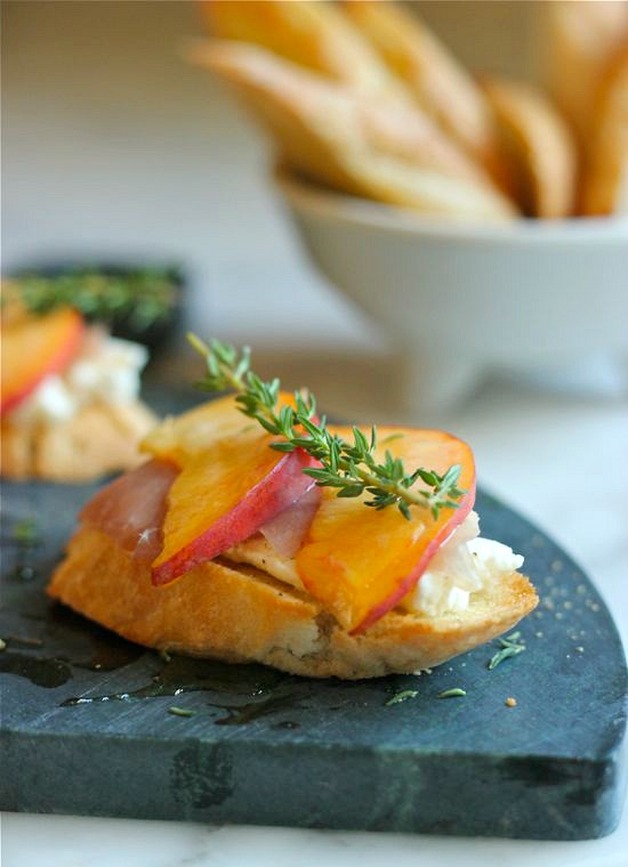
     This Peach, Prosciutto & Fresh Ricotta Crostini was such a sweet surprise.  The combination of peaches and prosciutto is always a winner, but the homemade fresh ricotta, spread onto my grilled baguette slices, was the real star of this appetizer. 
     A couple of weeks ago I purchased fresh ricotta for the first time ever.  It was baked and served with peas from my garden (recipe HERE).  A comment by a reader suggested that I try making my own ricotta.  I make my own Crème Fraîche, which is easy and a huge cost saver, and decided this was the time to make the ricotta as well, for the same reasons.  I was blown away by the flavor!  My homemade ricotta was so superior to the expensive fresh ricotta I purchased previously -- I just wasn't expecting it to be as good as it was. In fact, it had such a creamy texture and sweet taste, my husband said this crostini could pass as dessert. 
     Taking the time to make the ricotta, in addition to using fresh, flavorful peaches and an excellent bread for a base makes all the difference.  I bake my own baguettes weekly using a heritage flour from Sunrise Flour Mill in North Branch, Minnesota.  This organic flour has taken my breads to another level and it's all I use now in my baking.  But don't feel like you need to make the bread for this appetizer.  The recipe suggests a ciabatta -- purchase a good, flavorful, hand-crafted bread. 

Picture


Picture

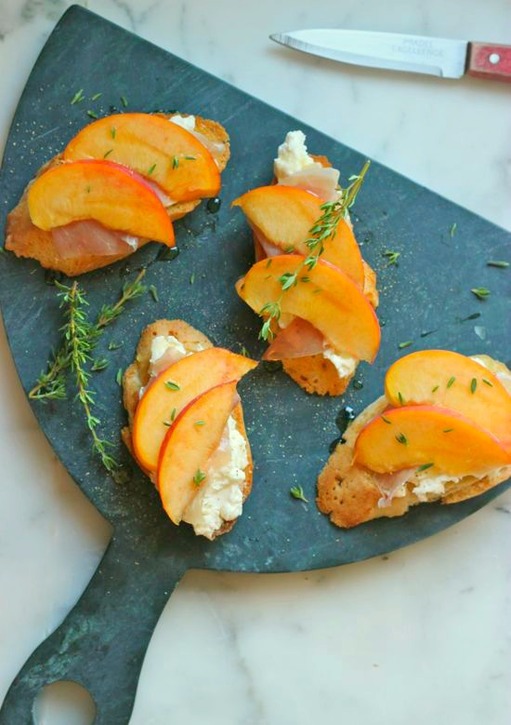
HOMEMADE FRESH RICOTTA
•
recipe from Ina Garten, adapted

• 4 cups whole milk (preferably organic)
• 2 cups heavy cream (preferably organic)
• 1 teaspoon kosher salt
• 3 tablespoons good quality white wine vinegar
1.  Set a large sieve over a deep bowl.  Dampen 2 layers of cheesecloth with cold water and line the sieve with the cheesecloth.
2.  Combine the milk and cream in a deep stainless steel or enameled pot (when at a boil, the milk and cream can overflow if the pot isn't deep enough).  Stir in the salt.  Bring liquids to a full boil over medium heat, stirring occasionally.  Turn off the heat and stir in the vinegar.  Allow mixture to set for 1 minute until it curdles.  It will separate into thick parts (the curds) and milky parts (the whey).
3.  Slowly pour the mixture into the cheesecloth-lined sieve and allow it to drain into the bowl at room temperature for 20 to 25 minutes, occasionally discarding the liquid that accumulates in the bowl.  The longer you let the mixture drain, the thicker the ricotta will be ( I went for the longer drain time).  Transfer the ricotta to a bowl or plate and discard the cheesecloth and any remaining whey.  (I flipped my ricotta onto a large plate and peeled off the cheesecloth).  Use immediately or cover with plastic and refrigerate.  The ricotta will keep, refrigerated, for 4 to 5 days.


PEACH, PROSCIUTTO & FRESH RICOTTA CROSTINI
• recipe Bon Appetit | June 2011, adapted

• 12 slices good quality baguette, sliced at an angle to provide length, or ciabetta bread
•  Extra-Virgin olive oil for brushing
• 1 ripe peach
• Fresh ricotta
• Freshly ground black pepper
• 6 thin slices of prosciutto or speck
• Honey for drizzling
• Fresh thyme leaves for sprinkling

1.  Lightly brush the bread slices with olive oil.  Grill until lightly toasted.
2.  Thinly slice the peach.  Instead of halving and pitting the peach, I will hold the peach and make slices down to the stone.  They should drop out nicely.
3.  Spread about 1 tablespoon (or more!) of the fresh ricotta onto each toast.  Cut prosciutto slices into lengthwise halves and drape over ricotta on each slice of bread.  Drizzle with honey and top with 2 peach slices.  Scatter some fresh thyme leaves over the top.


TAKE a LOOK:


0 Comments

Burrata with Speck, Peas, and Mint

6/30/2015

1 Comment

 
Picture

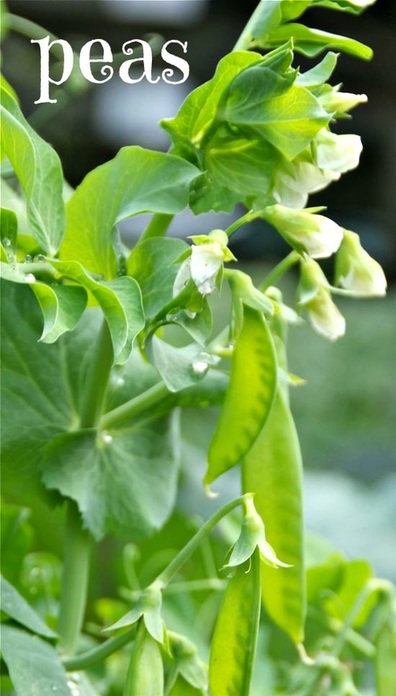
   Aside from the heirloom tomatoes in my vegetable garden, peas have become my favorite crop.  I planted English shelling peas for the first time last year and this spring doubled the amount with half climbing peas, half bush.  When I was a little girl, I would sit in the middle of my aunt's pea patch (and it was huge), shelling pea after pea, eating all the contents and saving none.
   Last year I made pea risotto over and over; sometimes with prosciutto, sometimes using bacon.  This time around, I'm stuck on Burrata with Speck, Peas, and Mint.  I found Nancy Silverton's recipe for this in the cookbook, Harvest to Heat by Darryl Estrine and Kelly Kochendorfer.  I have checked this book from the library so often, my husband is saying... Just buy it!

Picture

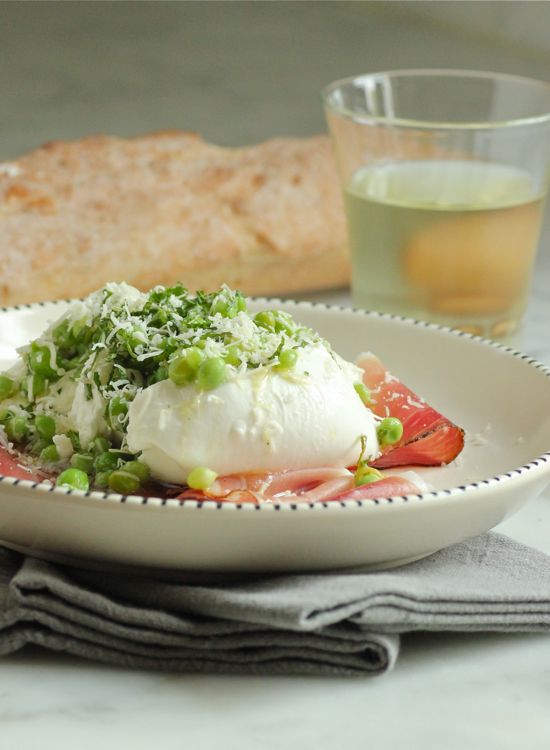
     I'm loving speck, an air-dried ham from northern Italy, and may substitute it for prosciutto from now on.  My understanding is, both prosciutto and speck are salt cured, but speck is also smoked.  And... there is less fat on the slices!
     The combination of sweet peas, burrata, and speck are fantastic.  I'm hoping the harvesting of peas from my garden continues for a long while.  I need to make this (often) a few more times.

Picture
Picture
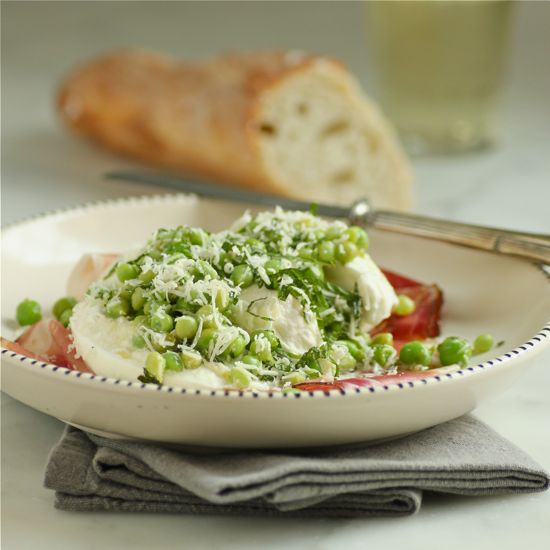
• 1 1/2 cups fresh peas
• 1/2 cup mint leaves, julienned
• 2 tablespoons fresh lemon juice
• 4 tablespoons extra-virgin olive oil
• 8 tablespoons freshly grated Parmigiano-Reggiano
• Coarse salt and freshly ground black pepper
• 1 pound speck (about 16 slices)
• 1 pound fresh burrata, cut into 8 slices

1.  Fill a small saucepan with cold water and place over medium-high heat.  Add the peas and cook for 2 minutes.  Drain peas in a mesh strainer and place under cold running water to cool.  Shake strainer to remove as much water from peas as possible.
2.  In a medium bowl, combine the peas, mint, lemon juice, olive oil, 4 tablespoons of the Parmigiano-Reggiano, and salt and pepper to taste.  Gently mix ingredients until thoroughly combined.
3.  Arrange 4 slices of speck in a spoke pattern onto 4 plates.  Place 2 slices of burrata in the center of each plate of speck.
4.  Divide and scoop the pea mixture over the burrata.  Sprinkle 1 tablespoon of Parmigiano evenly over the top of each plate.


TAKE a LOOK:


1 Comment

My Latest Obsession... Spaghetti with Brussels Sprouts

3/8/2015

3 Comments

 
Picture

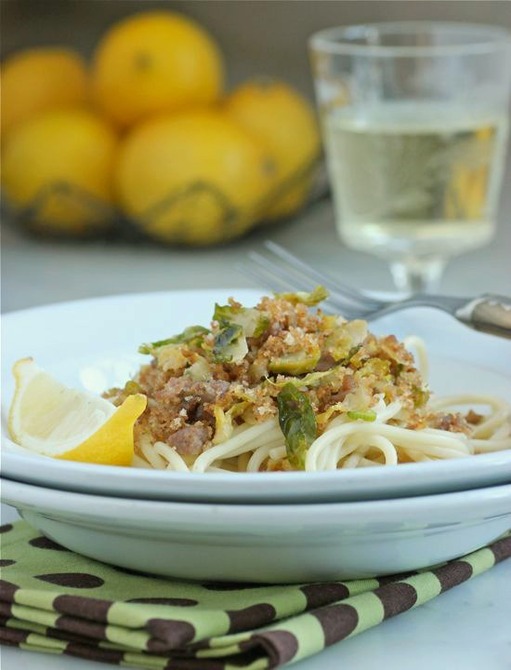
      In my early twenties, I worked at a gourmet kitchen store with a woman who had just tasted olive oil for the first time on a trip to Greece.  She told me she didn't like it at all. The flavor was "overwhelmingly strong", and emphasized the nastiness through a hard squint of her eyes. That was back in the early '70s, and olive oil wasn't a mainstream ingredient yet... at least at the Kansas City grocery stores I frequented and within my group of friends.  I had never used olive oil, and after my co-worker's critique wasn't in any hurry to do so. The same imprint was made on my brain at some point to dislike Brussels Sprouts.
It's a vegetable I don't remember my mother ever making.  And hearing negative comments from others about Brussels Sprouts, I decided I probably would not care for this little cruciferous vegetable myself.  No need to even try them.  Fortunately, I have learned and changed much over the years.  I don't let people influence me anymore.  At least when it comes to food. 
     I finally cooked Brussels Sprouts for the first time about seven years ago.  Since then, it's grown into a full-blown love affair.  When I found this recipe for Spaghetti with Brussels Sprouts and Sausage Bread Crumbs, I made it immediately.  Then I made it again, and again one more time, all in the span of two weeks.  I absolutely love this pasta dish. The squeeze of fresh lemon juice just before serving is the crowning jewel.  My husband, unfortunately, doesn't share my ability or desire to eat the same foods over and over again.  What's up with that?  He likes a dish, but is then ready to move on to something else.  I, on the other hand, would be quite satisfied having this pasta once a week (at least).


Picture
+ adapted recipe from Food & Wine
   recipe serves 4


• 1/2 pound spaghetti
• 1 pound Brussels Sprouts, cleaned and sliced
• 1/2 pound bulk pork sausage
• 1/4 cup olive oil
• 1 cup panko breadcrumbs
• 2 to 3 scallion, white and light green parts sliced thin
• Salt and freshly ground pepper
• Good quality extra-virgin olive oil, for finishing
• Fresh lemon juice

1.  Bring a large pot of water to a boil.  Add a large pinch of salt and cook the pasta until al dente.
2.  In the meantime... warm the olive oil in a medium sauté pan.  Add the pork sausage and Brussels Sprouts to the pan.  Over medium heat, cook the mixture until the the pork sausage is cooked through and beginning to brown.  Add the panko and cook until crisp.
  Stir in the sliced scallion and season to taste with salt and freshly-ground pepper.
3.  Drain the spaghetti and divide between four bowls.  Drizzle each with some extra-virgin olive oil and top with the Brussels Sprouts and Sausage Breadcrumb mixture.  Finish with a good squeeze of fresh lemon juice and serve.


TAKE a LOOK:


3 Comments

Grilled Peach, Onion, and Bacon Salad with Buttermilk Dressing

8/27/2014

1 Comment

 
Picture

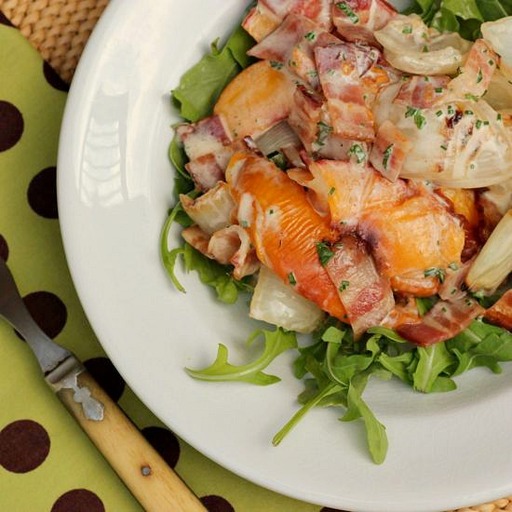
     Hardly a day goes by without peaches playing a starring role in one of our meals.  I loved this salad and thought the leftovers the next day were as good if not better.  Had there been goat cheese or some Maytag Blue in my refrigerator that day, I would have crumbled some over the top of the salad... yum!
Picture

+ adapted -- recipe by Linton Hopkins | Food & Wine, July 2012
SERVES 4

• 1/8 cup mayonnaise
• 1/8 cup sour cream
• 1/8 cup buttermilk
• 1 tablespoon fresh mint
• 1 tablespoon fresh parsley
• 1 tablespoon fresh chives
• 1/2 teaspoon apple cider vinegar
• Salt
• Freshly ground pepper
• 1/2 pound thick-slice bacon
• 1/8 cup brown sugar
• 1/4 teaspoon cayenne pepper
•
1 1/2 pounds Vidalia or other sweet onions cut into 1-inch slabs
• Extra-virgin olive oil for brushing
• 2 large, ripe peaches, cut into 1/2-inch wedges

•  Arugula, for serving

1.  PREHEAT OVEN to 325˚F.
2.  In a small bowl, whisk the mayonnaise with the sour cream, buttermilk, mint, parsley, chives and vinegar and season with salt and pepper. Refrigerate.
3.  Line a large rimmed baking sheet with parchment paper. Arrange the bacon slices on the sheet in a single layer and sprinkle with the brown sugar and cayenne. Bake for about 25 minutes, until caramelized (the bacon will crisp as it cools). Cut the bacon into bite-size pieces.
4.  Meanwhile, light a grill. Brush the onions with olive oil and season with salt and pepper. Grill over moderate heat, turning occasionally, until softened and browned. Separate the onions into rings. Brush the peaches with olive oil and grill over moderately high heat until tender, about 2 minutes. Transfer to a plate.
5.  In a large bowl, toss the onions with the peaches and bacon. Add the buttermilk dressing and toss to coat. Serve right away...  But like I said, it's really good the next day!


TAKE a LOOK:


1 Comment

Prosciutto, Ham, and Gruyére Tarts

3/6/2014

1 Comment

 
Picture

     If you've been following Passions to Pasty for a while, you know how much I love making tarts.  It's my favorite thing to do in the kitchen.  Hardly a week goes by that I do not bake a sweet or savory tart.  Today I made individual Prosciutto, Ham, and Gruyére Tarts -- tres à la Francaise! 
     The recipe is from the short-lived magazine, TASTE, by Williams-Sonoma.  I've held onto the all-things-French, Fall 2002 special issue, "Paris in the Fall", and still peruse it regularly.  Why I sat on this recipe so long, I'll never know.  Anything made with crème fraîche is a winner...

Picture
    
     And speaking  of tarts... if you happen to be in Europe this spring, check out the German desserts magazine, Sweet Dreams.  My photo and recipe for Pink Grapefruit and Meringue Tarts is featured in the quarterly publication. 
Picture


            Prosciutto, Ham, and Gruyére Tarts
                                   • an adapted recipe

 
• Pâte Brisée (recipe
HERE)
• 3 ounces prosciutto, small dice
• 3 ounces ham, small dice
• 3 ounces Gruyére cheese, small dice
• 3/4 cup milk
• 3/4 cup crème fraîche
• 2 eggs, lightly beaten
  Salt and freshly ground pepper

1.  On a lightly floured surface, roll out Pâte Brisée to fit seven 3 3/4-inch tart pans (or use one 10-inch tart
pan).  Place pastry-lined tart pans in freezer and preheat oven to 400˚F.  Once the oven is up to temperature, remove tarts from freezer and line pastry with foil and fill with dried beans or rice.  Place tart pans on a rimmed baking sheet and bake for 15 minutes.  Remove beans and foil and continue to bake the shells until golden brown.
2.  Reduce oven temperature to 375˚F.  Divide the prosciutto, ham, and Gruyére between the individual tart shells.
3.  Beat milk, crème fraîche, eggs, and salt and pepper to taste until combined.  Pour evenly over the ham and cheese fillings.
4.  Bake until just set and golden brown on the surface, about 30 minutes.  Let cool slightly before serving.


TAKE a LOOK:


1 Comment

A Winter Salad

12/5/2013

7 Comments

 
Picture
    
    As is the case every December, I feel like I'm behind.  Behind on baking.  Behind on shopping.  Behind on decorating for the holidays.  I've been a little busy with other things... 
    
Picture

 1.  I just finished cutting and sewing the Christmas stockings above.  My sister, Antique-of-the-Week Susan, sent me old German grain sacks made of handwoven linen with black printing that she envisioned as Christmas stockings for her five grandchildren.  And now they are.  Check that off my list of things to do...
 2.  The drapes I mentioned I'm making for my daughter's new, old house in a previous post are practically completed.  The drapery hardware just needs to be installed, allowing me to sew the hems in place.. the last step.  Finally!

Picture


3.
  And then... well, there's Midge.   Midge visits me for 8 hours each and every weekday.  Midge likes to take long walks... even when it's cold.
 

Picture

   I have yet to even begin everything I plan to do in my kitchen during the month of December.  But yesterday, deciding to take some time to relax, I made what I consider to be a perfect winter salad.  I poured some wine, called a friend, and had a very nice evening.  The greens of the winter salad are topped with wedges of baked, French Brie.  It seems as though every grocery store I enter in December has rounds of Brie on sale during the month, and I stock up.  Crisp, cold apples are the perfect partner to the creamy cheese.  I used organic Gala apples in my salad but any variety will do.

Picture

   Right before the Brie is placed in the oven it's sprinkled with chopped, toasted walnuts.  I, fortunately, have a freezer full of black walnuts that my husband gathered this fall on his father's farm.  He has spent many a day shelling and picking the nut meat from the large bucket of walnuts he brought back from Iowa.  When he finally finishes the black walnuts, there are also English walnuts waiting for him.

Picture

   The only thing I served with the salad was a crusty baguette and glasses of wine, but a little seared steak would be an awfully good follow-up!

Picture
6 SERVINGS

• 2 organic Gala apples, or other apple of your choice, sliced into thin wedges
• Apple cider
• 4 slices apple-smoked bacon
• 1/4 cup apple cider
• 1/4 cup balsamic vinegar
• 1 tablespoon brown sugar
• kosher or sea salt

• 1 8-ounce round Brie
• 2 tablespoons brown sugar
• 1/4 cup black or English walnuts, coarsely chopped and toasted
• 5 ounces mixed salad greens

1.  Dip
apple slices into apple cider to prevent browning; set aside.
2.  Dice bacon and cook in a small skillet until crisp.  Remove bacon and set aside, reserving 1 tablespoon of the drippings in skillet. 
Add 1/4 cup apple cider, balsamic vinegar, and 1 tablespoon brown sugar to the drippings; cook over medium heat, stirring constantly, until brown sugar dissolves, sprinkle with a little salt and set aside. 
3.  Preheat oven to 450˚F.  Remove top rind from Brie.  Cut the cheese into 6 wedges.  Place wedges on a parchment paper lined baking sheet and sprinkle  with the remaining 2 tablespoons brown sugar and walnuts.  Bake Brie for 3 to 4 minutes or just until soft.
4.  Toss the greens with a portion of the reserved apple cider-balsamic vinegar mixture.  Arrange lettuce greens, apple slices, and the wedges of walnut-baked Brie on plates.  Drizzle with a little more apple cider-balsamic dressing, if needed and sprinkle with bacon.


TAKE a LOOK:


7 Comments

Red Cabbage Braised with Maple Syrup

10/30/2013

1 Comment

 
Picture


Picture


"Remember my cabbage?" has become a reoccurring theme for me.  Every spring I plant blue cabbage throughout my vegetable garden for additional color.   Every fall I search for recipes, plus friends and neighbors, to help reduce my inventory; this year amounting to 30 large heads of cabbage.

I made Red Cabbage Braised with Maple Syrup twice within two days, reducing the amount of bacon and maple syrup, and doubling the number of apples originally called for.  I thought it was pretty perfect.


Picture


 +  Red Cabbage Braised with Maple Syrup
                                   adapted
                          original recipe | Yves Labbé

• 3 strips apple-smoked bacon, minced
• 1 medium onion, minced
• 2 medium firm, tart apples, peeled, cored, and sliced
• 1 1/2 to 2 pounds red (or blue) cabbage, cored, outer leaves removed, and remainder shredded
• 1 bay leaf
• 1/3 cup maple syrup
• Salt and freshly ground pepper to taste

1.  PREHEAT OVEN to 350˚F
2.  In an ovenproof saucepan of a flameproof casserole large enough to hold all the ingredients, sauté the bacon until crisp.  Add the onion and sauté until translucent.  Add the remaining ingredients, cover, and place in the oven; bake for 30 minutes.


SERVES 4


TAKE a LOOK:


1 Comment

breakfast at my house...

10/10/2013

3 Comments

 
Picture

     I've been thinking lately about New Year's Day brunch.  It's a tradition my husband and I have celebrated for twenty-five years with the same three couples.  I usually don't start planning my menu until December, but these early musings must be due to our opting out last year, for the first time ever.  Our daughter was married in November, and after the wedding I was totally burned out (I made over 1,000 marshmallows as guest favors).  I felt awful cancelling the brunch, but I just didn't have it in me.  This year, however, it will be different.  Today I made Baked Eggs with Serrano Ham, Creamed Spinach, and Parmesan, and I am thinking this could be a possible contender for one of the brunch courses come January 1st.  Other than the simple preparation of the creamed spinach, this recipe goes together quickly. 

Picture


  < Paper-thin slices of Serrano ham are used to line the muffin cups.  The 3-ounce, 5-slice packages I purchased  will each make five baked egg cups.  Each slice is cut in half, with the halves criss-crossing to line one cup.


     Nests of creamed spinach are formed on top of the ham.  Creamed spinach has been a favorite of mine for as long as I can remember.  On a family vacation to Chicago when is was eight years old, we dined at the historic Berghoff Restaurant for dinner.  When my mother didn't see creamed spinach on the menu, she called over the waiter and told him that the kitchen needed to make some for me... They did.

Picture


+Baked Eggs with Serrano Ham, Creamed Spinach & Parmesan

RECIPE MAKES 6 BAKED EGGS
• 6 slices Serrano ham
• Creamed Spinach (recipe follows)
• 6 large eggs

• Freshly-ground pepper
• Grated Parmesan cheese
• Chopped fresh chives, for finishing

PREHEAT OVEN to 350˚F
1.  Grease 6 muffin cups (non-stick preferred) with butter.  Slice a strip of Serrano ham in half and line a muffin cup by criss crossing the halves.  Repeat with the remaining ham. Fill each muffin cup with 3 generous tablespoons of creamed spinach.  Using a small spoon, gently press the spinach into the mold forming a nest.  Crack an egg into each spinach "nest"; sprinkle with freshly-ground pepper and Parmesan cheese.
2.  Place the muffin tin on the middle rack of the preheated oven.  Bake for 20 to 25 minutes, until eggs are just set (or to your liking).  Remove from oven and let cool briefly before unmolding.  Use a sharp knife to pry the baked eggs from the mold.  Sprinkle with chopped chives before serving.

CREAMED SPINACH
+inspired by a recipe from Emeril Lagasse

• 2 pounds frozen chopped spinach
• 2 tablespoons unsalted butter
• 1/3 cup chopped shallots
• 1 teaspoon finely chopped garlic
• 1 teaspoon salt
• 1/2 teaspoon freshly ground black pepper
• 1/4 teaspoon nutmeg
• 3/4 cup heavy cream

1.  Defrost the spinach; squeeze as much moisture as possible from the spinach.
2.  Melt the butter in a 2 quart sauté pan over medium heat.  Add the shallots and garlic; cook, stirring often until softened, about 2 minutes.  Add the spinach and cook, stirring, for about a minute.  Stir in the salt, pepper, nutmeg, and heavy cream.  When heated through, remove from heat and serve immediately.


TAKE a LOOK:


3 Comments

Blue Cheese Stuffed & Prosciutto Wrapped FIGS!

8/16/2013

3 Comments

 
Picture

     It's been a hectic few days.  There have been numerous photo shoots in my kitchen and kitchen garden recently, the results of which will be in two publications this October/November -- more info on that this fall. 
     An alfresco dinner on the patio was yesterday evening's staging and shoot.  With appetizers, numerous main course salads, and dessert, I was thrilled to have so many options for LivingTastefully.  But like I said, it was hectic, and little time was left to take photos after I prepared the meal and before our guests and the photographer arrived.  I also thought it would be awkward photographing the meal while the photographer was photographing me.  Bad idea.  So there are no photos of what we ate for dinner, except for this appetizer -- Figs Stuffed with Blue Cheese, Wrapped with Prosciutto, and drizzled with a Balsamic Reduction.


Picture

     I just found figs for the first time this week at our local Whole Foods market and purchased two cartons.  It's such a short season.  We need to enjoy them often!

Picture
                                                  recipe inspired by The Olives Table

• Fresh Black Mission Figs
• Any good quality Blue Cheese
• slices of Prosciutto, cut in half lengthwise
• salt and pepper
• balsamic reduction (recipe HERE)

1.  Quarter the figs through the stem end, leaving the root end intact.
2.  Crumble blue cheese into small pieces.  Shape crumbled cheese into small balls the size of a large gumball and stuff into the center of each fig.
3.  Take a lengthwise slice of Prosciutto and wrap it around one of the cheese-filled figs.  Repeat until all of the figs have been wrapped in Prosciutto.
4.  At this point, the figs can be covered and kept refrigerated until needed.
5.  Preheat oven to 450˚F.  Place the wrapped figs on a baking sheet or in a baking dish.  Sprinkle with salt and freshly ground pepper.  Place on the middle rack of the oven and bake until the cheese is melted and the Prosciutto is starting to sear in spots, about 15 minutes.
6.  Meanwhile, on top of the stove or in the microwave, heat the balsamic reduction.  Drizzle lightly over the top of the figs when removed from the oven.  Serve immediately.


TAKE a LOOK:


3 Comments
<<Previous
    Picture


    Picture
    Picture
    Enter your Email

    Preview | Powered by FeedBlitz


    Categories

    All
    Amana
    Appetizers
    Beef
    Breads
    Breakfast
    Cakes
    Chocolate
    Condiments
    Cookies
    Daring Bakers Challenge
    Desserts And Sweets
    Drinks
    Eggs
    Espresso
    Etcetera
    Fish
    French Bulldogs
    Friday Night Dinner
    Fruit
    Germany
    Gratins
    Great Kitchens
    Grilling
    Ice Cream
    Lamb
    Main Dishes
    Muffins
    My Garden
    My Kitchen Renovation
    New Years Day Brunch
    Paris
    Pasta
    Pork
    Poultry
    Provence
    Restaurants
    Rhubarb
    Rice
    Salads
    Scones
    Seafood
    Side Dish
    Soup
    Sunday Mornings
    Sweet And Savory Tarts
    Thanksgiving
    Tomatoes
    Vegetables
    Vegetarian

  • Home
  • PAINTINGS
  • About
  • Passions-to-Pastry Blog
  • Contact
  • Recipes