Living Tastefully
  • Home
  • PAINTINGS
  • About
  • Passions-to-Pastry Blog
  • Contact
  • Recipes

Baby Shower Luncheon

6/14/2017

7 Comments

 
Picture

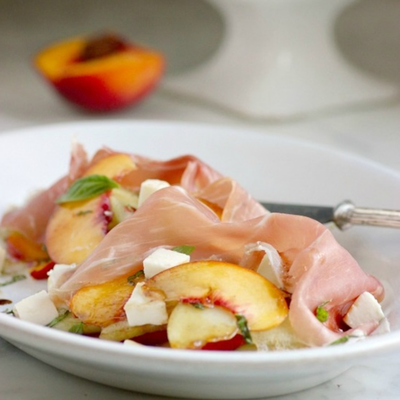
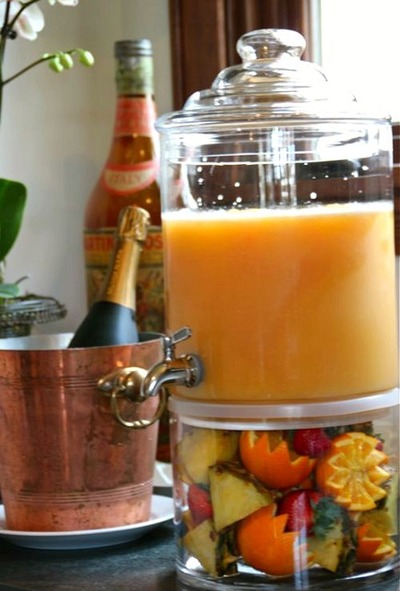
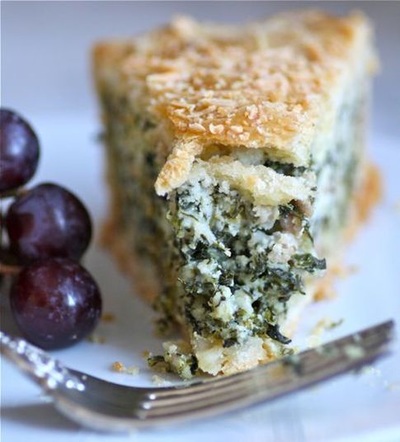
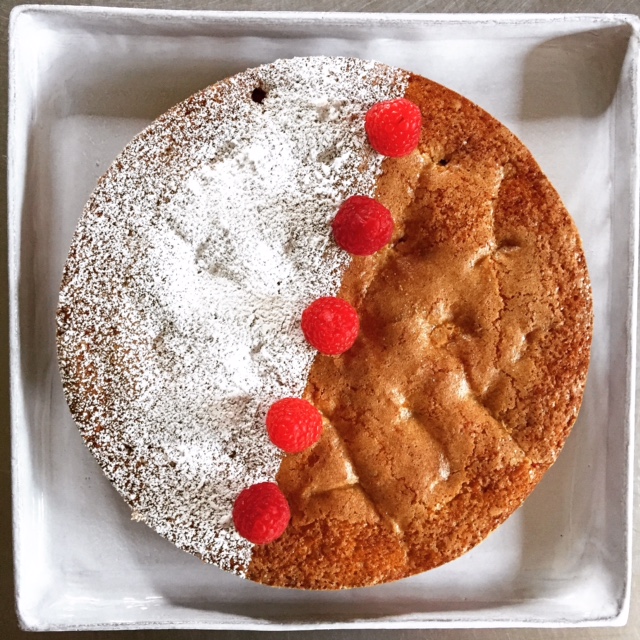
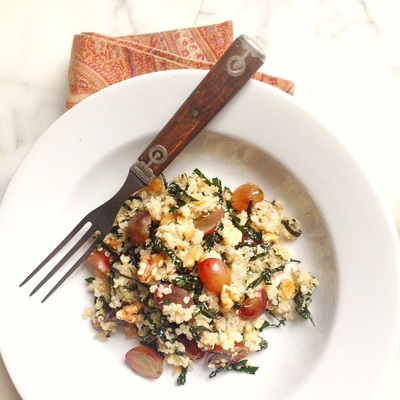
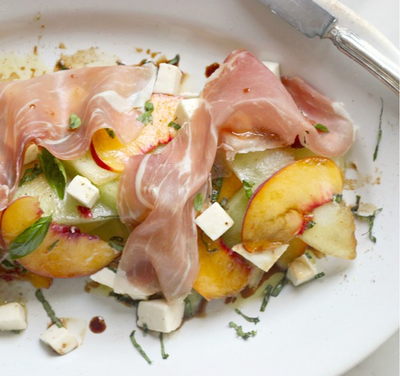
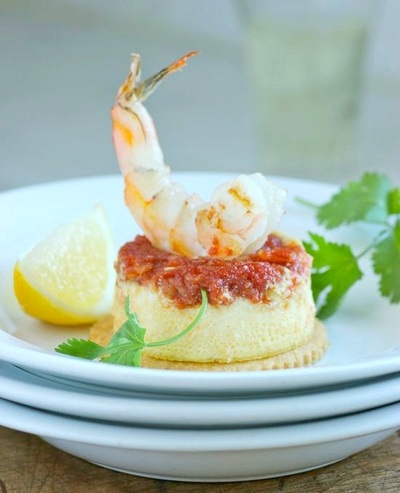
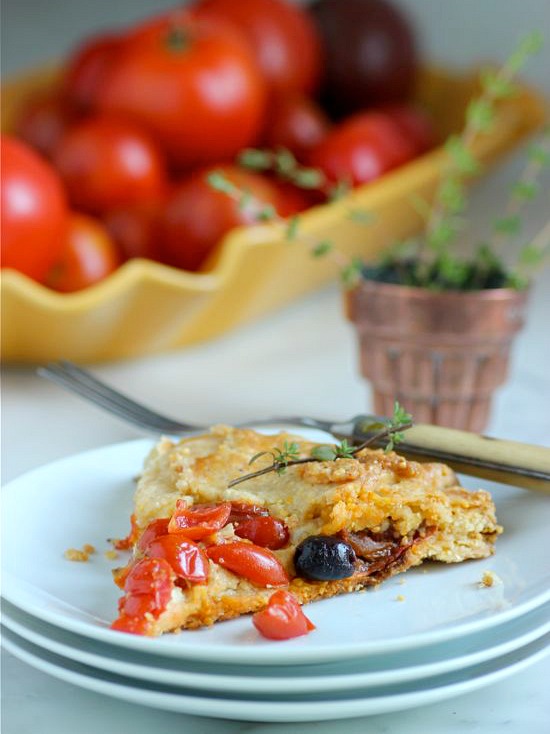
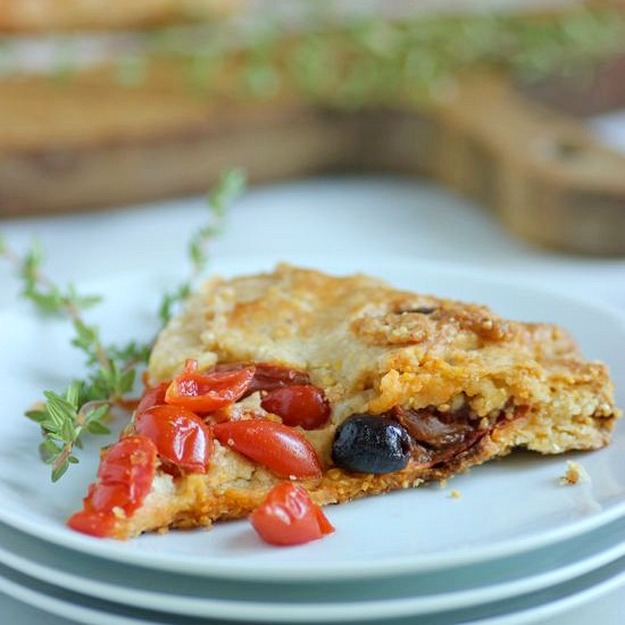
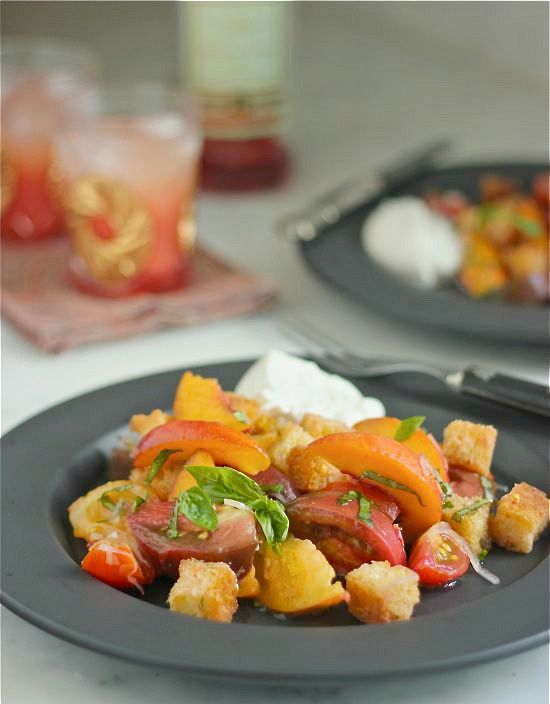
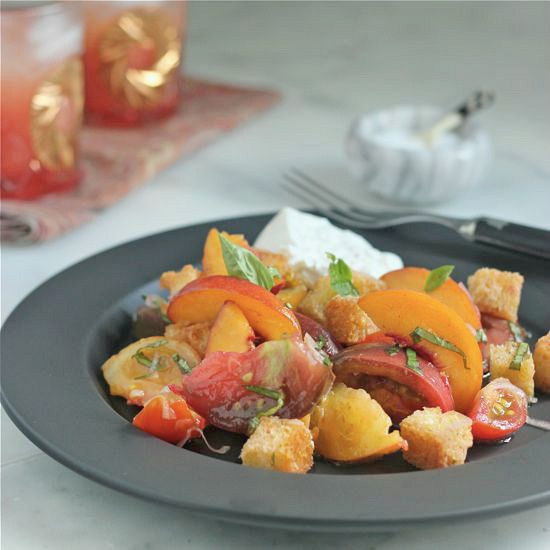
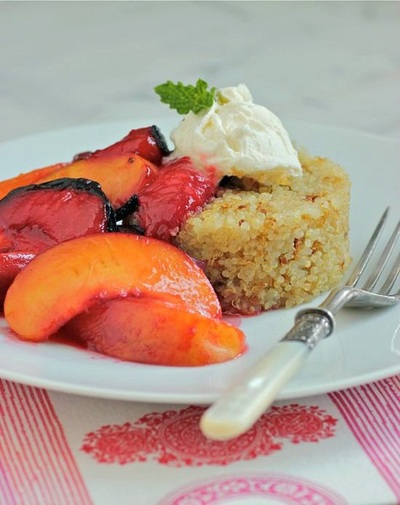
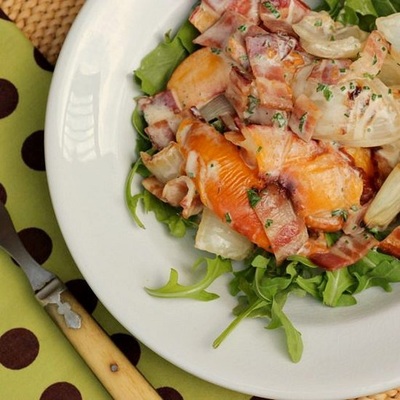
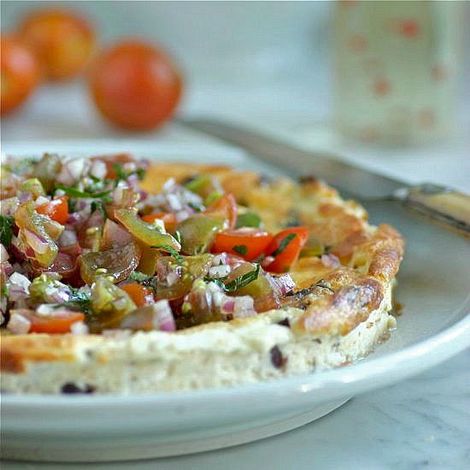
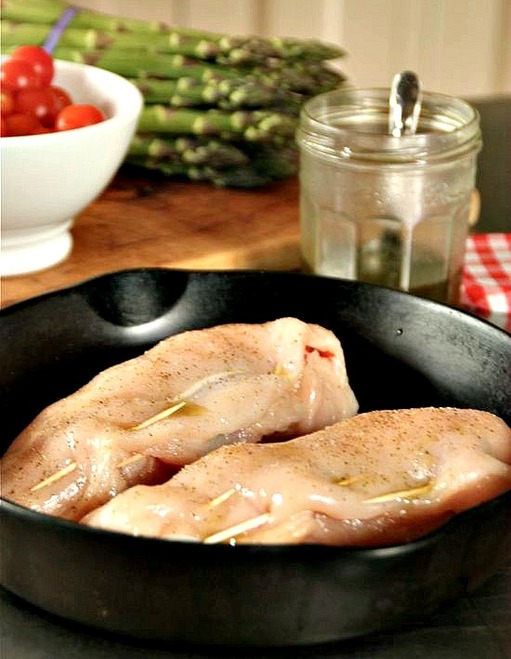
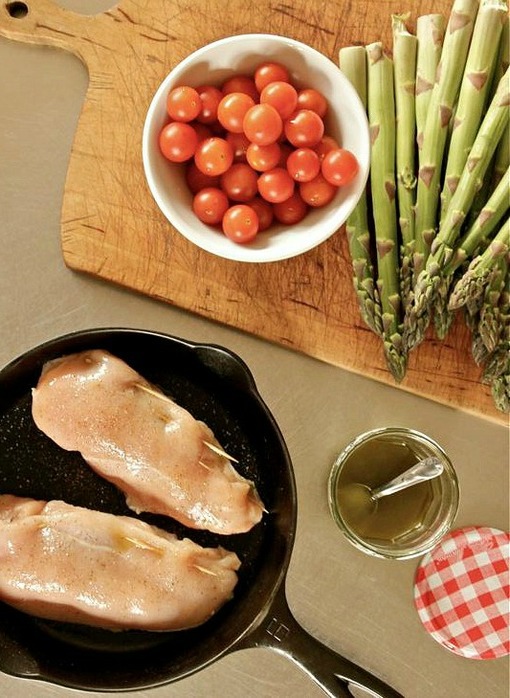
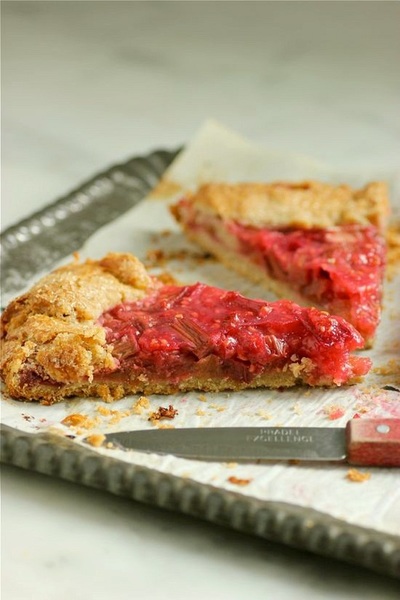
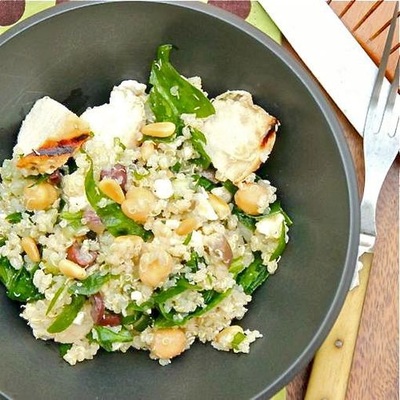
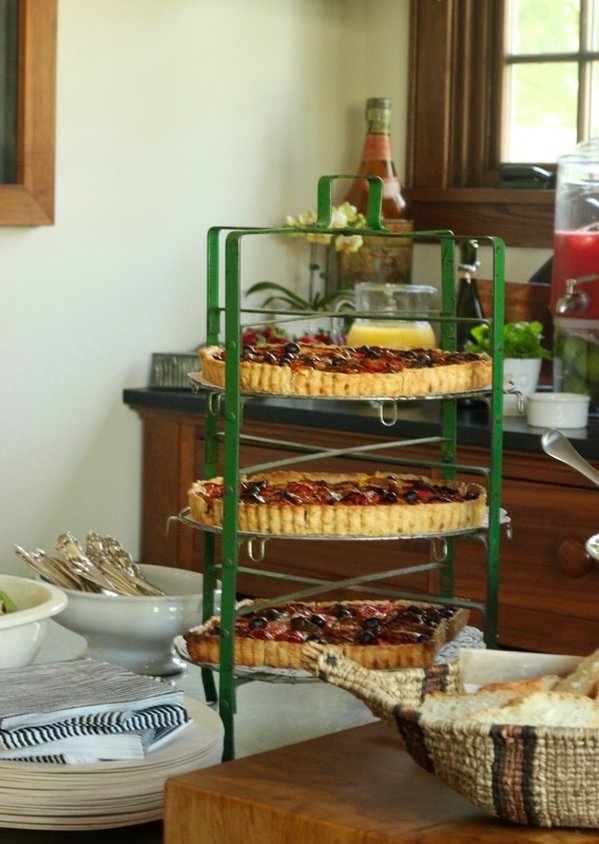
     This past weekend my daughter Claire hosted a baby shower for her sister, Whitney, along with Whitney's close friend, Allison.  Yes... I'm going to be an Oma.  The event took place in my home, and my contribution for this gathering was lunch.  The plan (for months) had been a luncheon outdoors on the patio and in the garden, of course!  But the weather turned against us with 90+ degree heat and unbearable dew points that forced everyone attending inside; not ideal in our minds, but we made it work...

Picture

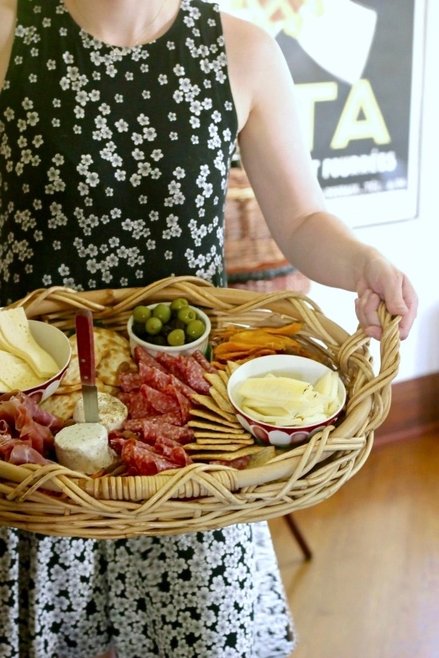
     Appetizers were placed in the living room. 

Picture
Picture

 Tomato tarts (recipe HERE) and main course salad were served in the kitchen.

Picture

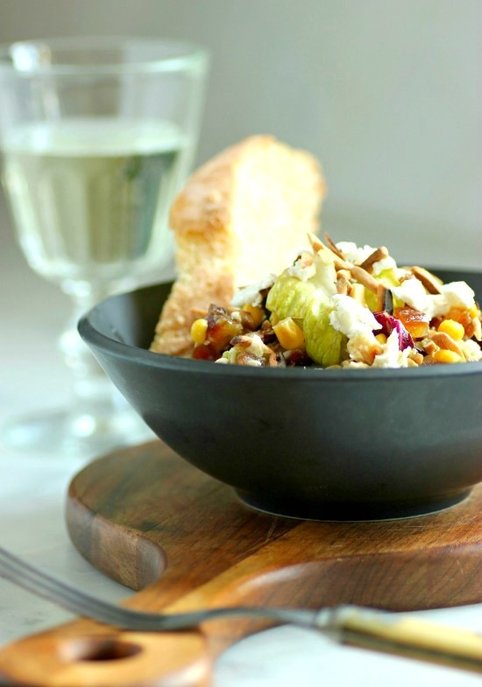
     I have been making my version of this chicken, corn and avocado salad (recipe below) since eating it at a local restaurant this spring.

Picture
Picture

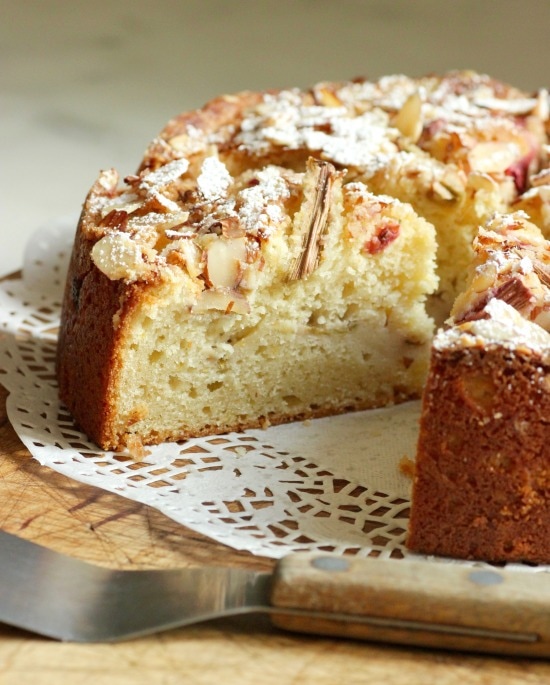
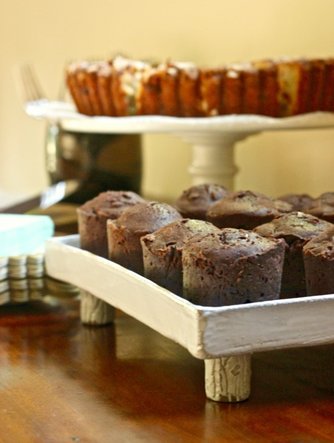
    Dessert was 3 Rhubarb and Almond Cakes and Chocolate Bouchons (recipe HERE)  Yes... I always prepare more than we need.
    Drinks consisted of Mimosas made with Prosecco, Rosé, and non-alcoholic Watermelon-Ginger Spritzers (recipe HERE), which were just the thing on a hot, sultry day.
     The baby girl is due in September... a sister for Midge the French Bulldog.


Picture

CHICKEN, CORN, and AVOCADO SALAD
The ingredients of the salad below are approximate
Serves 4
• 1 Rotisserie chicken, skin removed and meat from the bones cut into bite-size pieces
• 16-ounce can organic corn, drained
• a handful of Medjool dates, pitted and diced
• 1-2 avocados, cut into 1/2-inch dice
• 5-ounce bag of Italian greens (or combine romaine, butter lettuce, and radicchio)
• 1/4 cup sliced or slivered almonds, toasted
• goat cheese, as much as you like for tossing on top of salad
• apple cider vinegar
• extra-virgin olive oil
• salt and freshly ground pepper

1.  In a large bowl, gently combine the chicken, corn, dates, avocado and greens. 
2.  In a small bowl, whisk together equal amounts of apple cider vinegar and olive oil.  Add salt and pepper to taste.  Poor dressing over salad and gently toss.  Add additional salt and pepper if needed.
3.  Sprinkle almonds and goat cheese over the top of the salad and serve.


RHUBARB and ALMOND CAKE
adapted recipe from The Floating Kitchen
10 servings

• 1 cup sugar
• 1/2 cup unsalted butter, at room temperature
• 2 large eggs
• 1 cup plain Greek yogurt
• 1 tablespoon grated orange zest
• 3/4 teaspoon vanilla extract
• 1/4 teaspoon almond extract
• 1 1/2 cups unbleached all-purpose flour
• 1/2 cup almond meal
• 1 teaspoon baking powder
• 1/2 teaspoon baking soda
• 1/2 teaspoon ground cardamom
• 1/4 teaspoon salt
• 3/4 pound rhubarb
• 1 tablespoon turbinado sugar
• 1/3 cup sliced almonds
• Confectioners' sugar for serving

1.  Preheat oven to 350˚F.  Line the bottom of a 9-inch springform pan with a round of parchment paper.  Generously coat the parchment paper and the sides of the pan with non-stick cooking spray.  Set aside.
2.  In the bowl of a stand mixer and using the paddle attachment, beat 1 cup of the sugar and the butter together on medium speed until light and fluffy.  Add the eggs, one at a time, mixing after each addition.  Add the yogurt, orange zest and extracts and beat until just incorporated. 
3.  In a medium bowl, combine the flours, baking powder, baking soda, cardamom and salt.  Add dry ingredients to the cake batter, adding in one-third at a time, mixing on low speed until none of the white streaks remain.  Set aside. 
4.  Trim rhubarb of leaves and if the stalks are wide, slice them in half lengthwise.  Cut the rhubarb stalks into pieces 1 1/2-inches in length.
5.  Spread about half of the cake batter evenly over the bottom of the prepared springform pan.  Layer about half of the rhubarb over the batter in a single layer, leaving a half-inch space uncovered around the edges of the pan.  Spread the remaining cake batter over the rhubarb and arrange rhubarb pieces on top.  You may not need all of the rhubarb.  Sprinkle the sliced almonds and turbinado sugar over the cake.
6.  Place the cake on the middle rack of the preheated oven.  Bake for approximately 50-60 minutes, or until a toothpick inserted into the middle comes out clean.  Remove cake from the oven and set it on a wire rack to cool.  Once cooled, run a knife around the outer edge of the cake and release the sides of the springform pan.  Cut into slices and dust with the Confectioners' sugar.
• The cake can be stored at room temperature in an airtight container for up to 2 days.


TAKE a LOOK:


7 Comments

Mexican Tortilla Casserole

9/7/2016

2 Comments

 
Picture

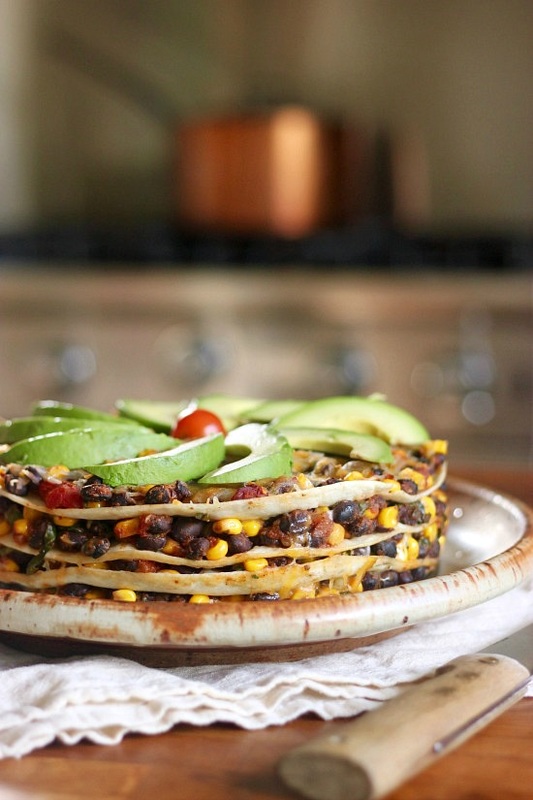
     There's an obvious shift this week to how and what I'm making for our dinner.  Over the past couple of months, every meal consisted largely of produce from the vegetable garden.  With this Mexican Tortilla Casserole, the only home-grown ingredient was the lone cherry tomato on the top.  My garden still boasts kale, some beans, and an occasional cucumber... and, don't let me forget red cabbage!  My husband also planted watermelon radishes and a second crop of lettuces;  but for the most part, it's coming to an end. 

Picture

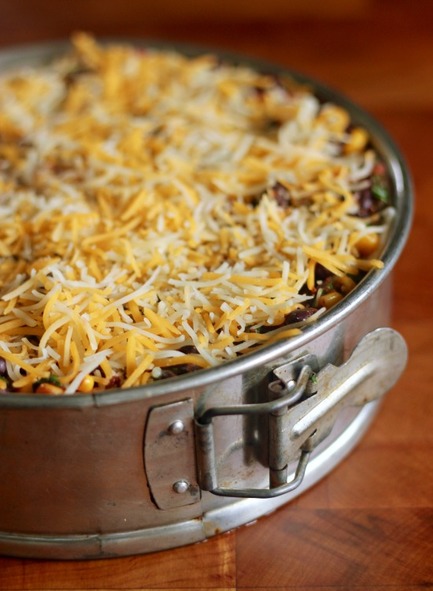
     As much as I miss my garden vegetables when I no longer have them, I am always ready for cool weather meals that simmer on my stove throughout the day.  Desserts that consist of stone fruit and berries (most likely tarts and galettes) are replaced by apples, pears, and a good amount of chocolate... I love fall!
     This Mexican Tortilla Casserole is simple and quick to assemble.  And, feel free to swap out ingredients to your liking. 
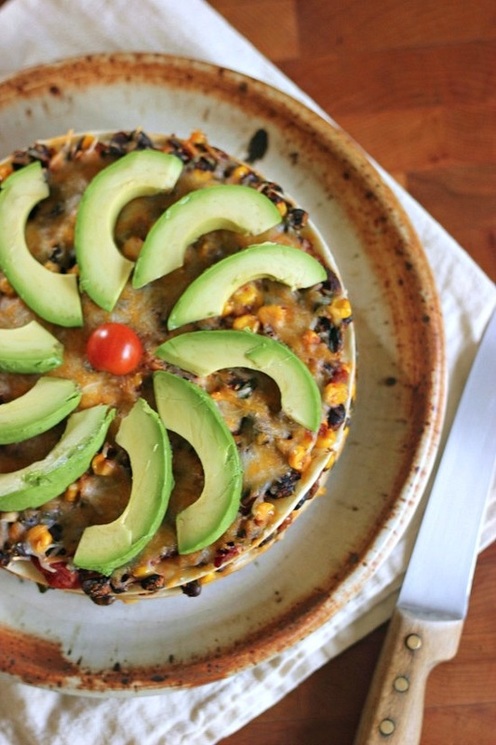

Picture


 • Mexican Tortilla Casserole •

• recipe via The Splendid Table | from the cookbook, The Mom 100 Cookbook:  100 Recipes Every Mom Needs in Her Back Pocket
• Nonstick cooking spray
• 1 tablespoon olive oil
• 1 onion, chopped
• 1 teaspoon ground cumin
• 1  1/2 teaspoon chili powder
• 1 teaspoon minced garlic
• 1 can (14 ounces) chopped tomatoes, drained, with 1/3 cup juice reserved
• 1/4 cup tomato paste
• 2 cans (15.5 ounces each) white, black, or kidney beans (or a mixture of any two), rinsed and drained
• Kosher or coarse salt and freshly ground black pepper
• 1  1/2 cups frozen corn thawed
• 3 cups coarsely chopped spinach
• 4 medium-size (8-inch) flour tortillas
• 2 cups (8 ounces) shredded Monterey Jack or Cheddar Cheese, or a mixture of the two
• Sliced avocados, fresh cilantro, cherry tomatoes, etc., for garnish
• Sour cream, for serving (optional)
• Salsa, for serving (optional)
1. Preheat the oven to 400°F. Spray an 8 1/2 to 9-inch springform pan with nonstick cooking spray.
2. Heat the oil in a large skillet over medium heat. Add the onion, cumin, chili powder, and garlic and cook until the onion is softened, about 3 minutes. Stir in the tomatoes with the 1/3 cup of reserved juice and the tomato paste, then stir in the beans. Season with salt and pepper to taste. Let the bean mixture simmer until everything is hot, about 3 minutes. Add the corn and spinach and stir until the spinach has wilted and everything is well blended and hot, about 3 minutes. Taste for seasoning, adding more salt and/or pepper as necessary.
3. Place 1 tortilla in the prepared pan. Spread one fourth of the bean and vegetable mixture evenly over the tortilla, then sprinkle 1/2 cup of the shredded cheese evenly over the top. Repeat with 3 more layers, ending with the last quarter of the bean mixture and then the last 1/2 cup of shredded cheese.
4. Bake the tortilla casserole until it is hot throughout and the top is lightly browned, about 20 minutes. Let the casserole sit for about 5 minutes. Top with sliced avocados and cherry tomatoes, if desired.  Cut it into wedges and serve.  Serve with sour cream and/or salsa on the side, if you like.
Cooking Tip: You can make the tortilla casserole a day ahead of time, cover it with plastic wrap or aluminum foil, and put it in the fridge overnight; just take it out and let it sit at room temperature for about 20 minutes while the oven preheats to 400°F. Bake the casserole uncovered. You can also reheat the cooked casserole at 350°F for 15 to 20 minutes, until warm.


TAKE a LOOK:


2 Comments

What have I been up to...?

8/28/2016

4 Comments

 
Picture

I'm not here :(

Picture

nor here :(

Picture

or even here :(

     It probably seems like I've been gone for awhile...  So, what have I been doing?  Not traveling.  I wish I could say I spent the summer in the south of France, but that didn't happen.  No surprise to most of you, I've been spending a LOT of time with my Frenchie puppy, Bisous.  Right before I lost my Frenchie, Pipi, just a year ago, my vet tried to help me put her life into perspective.  She told me, "Pipi is like 110 in people years and has had a better life than most children".  I'm embarrassed to say, the vet was probably 100% right.  I'm very devoted to my dogs and that's one reason I've been staying close to home with "B".  No major trips.  If any traveling is done anytime soon, it will be by car so Bisous can accompany us.  So right now, there's no France in my future.  Life is currently all about Bisous...
     And lately, most of my days are spent in my kitchen, trying to make sense of the ridiculous amount of produce from my vegetable garden.  I'm thankful our backyard isn't any larger.  If it were, my gardens would certainly be larger also, and there would be even more vegetables!  Right after I finish this post, I will begin chopping tomatoes for a fresh pasta sauce we will eat for dinner tonight.  We've had some wonderful dinners on the patio this summer, and I'm hoping warm weather will continue into October.  I'm not ready to give up alfresco dining with friends and family quite yet...
     There have also been out-of-town visitors recently.  This has all kept me busy. Plus, you would probably find my meal rotations rather boring.  Not much experimenting this summer for me.  I tend to make many of the foods we eat over and over during the growing season... because I love them.  I wait months in Minnesota for the tomatoes, beans, zucchini, beets, etc., from my garden,  and I'm perfectly happy eating them, much of the time, the same way.  I will never tire of fresh tomato pasta sauce, Caprese salads, seared beans, zucchini-walnut bread... experimenting can wait! 
     If you follow my posts on Instagram, you will most likely know what I've been cooking and baking in my kitchen.  Below are a few iPhone photos of things I've made recently, along with links to the recipes.  Photo shoots with my SLR camera seem like a luxury this time of year.  It's all about sitting down and eating (immediately!) when the food is ready.  No one wants to wait while I photograph.

Picture


Stuffed Zucchini... recipe HERE

     (almost ready for the oven)  The only thing I did differently was to fill the zucchini shells with tiny cubes of fresh mozzarella before I finished filling with the rice, ground beef and tomatoes.  I highly recommend the addition of the mozzarella!


Picture


Yotam Ottolenghi's "Very Full Tart"... recipe HERE


     This savory tart recipe is from Ottolenghi's cookbook PLENTY, and a great way to use up some of that vegetable garden produce!  Loved that sweet potato added to the mix.  The one thing I'll do the next time I make this tart is add one more egg, for a total of three.  It will help that one cup of heavy cream set up better.  Also, I recommend using a 9-inch deep-sided tart pan with a removable bottom.


Picture


Raspberry Buttermilk Cake... recipe HERE


     I posted the recipe for this Raspberry Buttermilk Cake several years ago.  Every time I make this cake I ask myself... Why don't I make it more often?  It is extremely easy and delicious!


TAKE a LOOK:


4 Comments

My Favorite Time of the Year

7/21/2016

1 Comment

 
Picture

     Yesterday I finally had enough tomatoes to make my first French Tomato Tart (recipe HERE) of the summer. Shown above ready for the oven, I could eat this tart everyday through the end of tomato season.  Really, I could.  This is the earliest I ever remember my  heirloom tomatoes ripening.  Some past years I have waited until August for my first Purple Cherokee.  The plants are loaded and the tomatoes are BIG!
     All week I've been baking cakes to take to Iowa this weekend for my father-in-law's 90th birthday.  The cakes will be assembled Sunday, the day of the party.  If they're as good as I'm expecting them to be, I'll let you know and share the recipe ;-)
     And just in case you're anxious to see a recent photo of Bisous...

Picture


1 Comment

Celebrate Our Fleeting Summer

9/3/2015

0 Comments

 
Picture

     I've been trying hard to make the most of what is left of a Minnesota summer.  And that means spending as much time as possible on the patio with family and friends, eating end- of-the-season fruits and vegetables.  This week I've been serving up Olive Oil Toasts with Peaches, Cherry Tomatoes and Fresh Ricotta.  A platter of these plus a glass of crisp white wine is all I need to be content.
     Just don't do as I did... When my husband asked me this morning what I was grilling, I realized I never turned off the burners on the gas grill last night.  What was I thinking?  Or maybe I should rephrase that... Why wasn't I thinking?

Picture
Picture

• Baguette slices, angular cut approximately 1/2-inches thick
• Extra-virgin olive oil
• Sea salt
• Fresh ricotta
• Freshly ground black pepper
• Peaches, cut into thin wedges
• Cherry tomatoes, preferably heirloom, halved
• Fresh basil

1.  Lightly brush both sides of the baguette slices with olive oil.  Grill the slices over medium-low heat until golden.  Remove and sprinkle sea salt over the grilled bread.
2.  Spread the baguette slices generously with fresh ricotta,  Sprinkle the ricotta lightly with freshly ground pepper.
3.  Gently press peaches and cherry tomatoes onto the ricotta and garnish with basil.
4.  Enjoy summer!!


TAKE a LOOK:


0 Comments

Tomato Galette with Fresh Ricotta and a Cornmeal Crust

8/13/2015

0 Comments

 
Picture

     The morning began with thoughts of tomatoes.  It is after all, August.  I also had a pound of fresh ricotta that I made the day before.  I was already thinking, ricotta and tomatoes.  Colorado peaches were initially considered. Tomatoes combined with fresh peaches are one of summer's highlights for me.  I wanted to make a free-form tart,  but the peaches might be too juicy.  Scratch the peaches.  So, this is what I ended up with for our dinner last night on the patio (along with that ratatouille I made the day before) -- a galette of just tomatoes and ricotta (with a few Nicoise olives thrown in).  Can't go wrong with that! 


Picture


   I stirred fresh thyme leaves from my garden into the fresh ricotta that was combined with Parmesan.  The mixture was spread over the most delicate coarse-ground cornmeal crust.  I'm crazy about baking cornmeal pastry with fruits and vegetables, but this one does take patience.  If you don't feel like tackling a crust this delicate, eliminate the cornmeal and substitute with flour... or, use 1/4 cup cornmeal instead of the 1/2 cup I call for in the recipe.  But I'll walk you through it.  Like I said... it just takes patience.


Picture

      I'm making this galette again this upcoming weekend, and I may add those peaches...

Picture


Picture

CRUST:
• 1 cup all-purpose unbleached flour
• 1/2 cup cornmeal
• 1/2 teaspoon kosher salt
• 1/2 cup (8 tablespoons) cold, unsalted butter, cut into 1/2-inch cubes
• 4 tablespoons ice water
FILLING:
• 1/2 cup fresh ricotta
• 1/2 cup grated Parmesan
• 1 teaspoon fresh thyme leaves
• 2 pints cherry tomatoes, mixed varieties, preferably heirloom
• 1 egg whisked, for brushing
• 15 (more or less) Nicoise olives
• Kosher or sea salt
• Extra-virgin olive oil, for drizzling

1.  Combine the flour, cornmeal, and salt in the bowl of a food processor and pulse 2 or 3 times.  Add the butter and pulse again until the size of small peas.  While pulsing, slowly add the ice water until the mixture just starts to come together.  Transfer the dough to a sheet of plastic, press into a disk and wrap.  Chill dough for at least 2 hours.
2.  Take dough from refrigerator.  Cut a piece of parchment paper; place on a work surface and lightly dust with flour.  Center the dough on the parchment, dust lightly with flour and cover with the plastic wrap.  Roll the pastry into a round just under 1/4-inch, dusting with flour as needed.   Slice the parchment and pastry onto a baking sheet and place in refrigerator while you prepare the filling.
3.  Preheat oven to 400˚F.  In a medium bowl, mix the ricotta, Parmesan, and thyme leaves with a wooden spoon until smooth; set aside.   Slice tomatoes in half. 
4.  Remove the baking sheet with pastry dough from the refrigerator.  Spread the cheese filling evenly over the dough, leaving a 2-inch border bare around the edges.  Spoon the halved cherry tomatoes over the cheese filling.  Sprinkle with salt and arrange Nicoise olives on top.
5.  Using a small, metal spatula, get underneath an edge of the pastry and gently lift over the filling.  Brush the pastry with the beaten egg and again lift more pastry over the filling, pleating the dough as you go.  The pastry is delicate and may break somewhat as you lift and pleat, but pressing with your fingers and brushing with the beaten egg will help it to adhere to itself.  When finished, lightly brush any exposed pastry with the egg.  Drizzle the tomatoes with a little olive oil.
6.  Transfer the baking sheet to the preheated oven and bake for approximately 30 minutes, or until the crust is a deep golden color.  Remove galette from oven and cool for 10 minutes before slicing, or allow to rest longer and serve at room temperature.


TAKE  a LOOK:


0 Comments

Tomato & Peach Panzanella with Burrata

8/11/2015

0 Comments

 
Picture

     It is again, thankfully, that time of year when I wake up in the morning and ask... what will I do with all of my tomatoes today?  It's a dilemma I embrace.  And yesterday, I did nothing but tackle the produce that fills bowls, colanders, and baskets throughout my kitchen.  I started off with ratatouille (that is now aging in my fridge, waiting for another day), and finished with this panzanella salad of heirloom tomatoes, Colorado peaches, olive oil-soaked croutons, and the beloved fresh Burrata.  It was a dinner last night that started off with Campari cocktails on the patio. 
     Two of us devoured a recipe meant to serve four.  And both of us were sadly looking at the empty bowl, wishing there had been more.   I purchased another bag of peaches yesterday, and have a feeling I'll be making this salad again before week's end.  Ripe garden tomatoes, fresh peaches and creamy, rich Burrata... what could be better? 
Unfortunately, these days won't last forever.

Picture


Picture
+  recipe from Fabian von Hauske and Jeremiah Stone | via The Wall Street Journal
• serves 4 as a first course or 2 as a main course

• 2 cups cubed sourdough, ciabatta or country bread
• 6 tablespoons extra-virgin olive oil, plus more for drizzling
• Kosher salt and freshly ground black pepper
• 1 1/4 pound heirloom tomatoes, cut into 1/2-inch wedges
• 1 large peach or nectarine, cut into 1/2-inch wedges
• 1/4 cup thinly sliced basil
• 1 small shallot, thinly sliced
• 1 teaspoon Sherry vinegar
• 2 balls burrata (about 1 pound total)
1.  Preheat oven to 375˚F.  In a medium bowl, toss the croutons with 4 tablespoons olive oil, salt and pepper.  Spread the croutons (making sure to get every drop of oil) on a baking sheet and bake, tossing halfway through, until golden and crisp on all sides, about 13 minutes.
2.  Meanwhile, in a large bowl, gently toss together the tomatoes, peaches and basil.  Season with salt and set aside for 10 minutes.  Place shallots in a small bowl and cover with ice water.  Allow the shallots to crisp for about 8 minutes; drain shallots, pat dry with a paper towel, and set aside.
3.  Just before serving, toss shallots, croutons, remaining 2 tablespoons olive oil and sherry vinegar with the tomato and peach mixture.  Season with extra salt and let croutons absorb some of the fruits' juices, about 5 minutes.  Divide salad between two plates and place a ball of burrata on each plate (if serving 4, slice balls of burrata in half).  Season burrata cheese with a pinch of salt and drizzle with additional olive oil.  Serve immediately. 


TAKE a LOOK:


0 Comments

Baked Fresh Ricotta with a Tomato Herb Salsa

7/30/2015

0 Comments

 
Picture

     The recipe I use for making my ricotta (get it  HERE) gives me about one finished pound of fresh ricotta.  You will need slightly more than that for this recipe, so if making your own, make two batches -- it's easy enough!

• an adapted recipe from Marie Claire Seasonal Kitchen by Michele Cranston

• 1 pound, 5 ounces (2 1/3 cups) fresh ricotta cheese
• 1 teaspoon fresh thyme leaves
• 1/4 cup Nicoise olives (or possibly more!), pitted and roughly chopped
• 2 tablespoons grated Parmesan cheese
• 1 egg
• 2 ripe tomatoes, or comparable amount of cherry tomatoes
• 1/2 red onion, finely diced
• 6 large basil leaves, thin julienne
• small handful of flat-leaf parsley, roughly chopped
• 1 teaspoon balsamic vinegar
• 2 tablespoons extra-virgin olive oil
• bruschetta, crostini, or purchased brioche toasts, for serving


TAKE a LOOK:

1.  PREHEAT OVEN to 350˚F.  Line a sheet pan with parchment paper.
2.  In a mixing bowl, combine the ricotta, thyme, olives, Parmesan, and egg.  Place an 8-inch springform pan on the sheet pan (I used an 8-inch baking ring) and spoon the mixture into the pan or ring,  Smooth out the top.
3.  Bake the ricotta for 35 to 40 minutes, or until firm and lightly golden.  Remove from oven and allow to cool to room temperature.
4.  MAKE the SALSA... Slice the tomatoes in half and scoop out the seeds.  Finely chop the tomatoes and mix in a bowl with the onion, basil, and parsley.  Add the balsamic and olive oil.  Stir together until combined.
5.  Carefully unmold the ricotta and (carefully) transfer to a serving plate.  Spoon the salsa over the top.  Serve with toasts.


Picture

      I hope you're not tiring of my fresh ricotta postings, because I'm sure not.  I've been having a great time in my kitchen making ricotta about every 4 or 5 days.  I veered at the last minute from mixing some fresh ricotta with a bit of honey and orange zest and topping with blueberries, to baking this Fresh Ricotta served with a Tomato Herb Salsa instead.  Now that my garden tomatoes are finally ripening on their vines, I'm incorporating them into every meal!  This baked ricotta makes a really great appetizer for summer al fresco entertaining.


     I ran out of time to grill my own crostini, so I used purchased brioche toasts that were topped with the ricotta and salsa.  I served them alongside a pasta filled with roasted eggplant, sweet onions, and grilled chicken and finished the pasta off on a suggestion from Stacey Snacks.  I tossed the pasta with butter, a splash of really good balsamic, and a few tablespoons of capers.  Yes Stacy, you were right -- very delicious!  The ricotta-tomato salsa toasts and eggplant pasta were a really nice combination.  Leftovers today -- YAY!

Picture
Picture


+ Baked Fresh Ricotta with a Tomato Herb Salsa +


0 Comments

Stuffed Caprese Chicken

6/16/2015

2 Comments

 
Picture

       I made this Stuffed Caprese Chicken twice in the past two days.  It's that good and better yet, extremely easy.  This stuffed chicken was the end product of a day when my choices were few; a partial carton of grape tomatoes, half a log of fresh mozzarella, chicken breasts in the freezer and a garden full of parsley and basil. 

Picture

     Individually frozen chicken breasts will defrost quickly when placed in a zip-lock bag and plunged into a large bowl of cold water.  The amount of filling you will need depends on the number and size of the breasts.  Cut thin slices of fresh mozzarella, quarter grape or cherry tomatoes, clean basil leaves and halve if large; set all aside.  Using a sharp knife, cut into the side of the chicken breast and make an opening similar to a pita pocket.  You want to open up the center of the breast as much as possible without cutting through to the other side.  Line the back of the breast pocket with small, thin slices of mozzarella.  Layer onto that pieces of tomatoes.  Finish by running basil leaves across the tomatoes.  The basil leaves at the opening of the slit will help keep the cheese and tomatoes inside while baking. Just do not over stuff.  You want to be able to close the slit.  Use about three toothpicks to close and secure the opening.  Rub each breast with some olive oil and sprinkle with sea salt and freshly-ground pepper.  At this point the chicken breasts can be finished in the oven or refrigerated until you're ready to proceed.  Preheat the oven to 375˚F.  Place chicken breasts in a heavy, cast iron skillet (One night I made four in a 10-inch skillet. The second night I made two in an 8-inch).  Right before baking, I drizzled my chicken with a little parsley oil I had made (recipe HERE).  If you want to pass on the parsley oil, I suggest drizzling a little really good balsamic vinegar over the chicken breasts when pulled from the oven.  Bake the chicken on the middle rack for 30 minutes.  They should be perfectly juicy!
    
Picture


TAKE a LOOK:


2 Comments

Savory Tomato-Thyme Shortbread with Olive Gremolata

9/9/2014

2 Comments

 
Picture

     No... I didn't drop off the face of the earth.  I have been turning out meals and desserts daily, but lately it seems like everything is eaten before I even have a chance to pull out my camera. 
     The Savory Tomato-Thyme Shortbread and Olive Gremolata is a fabulous appetizer.  I'm paraphrasing here... but a friend that joined us for dinner remarked that the savory shortbread and olive gremolata on their own are amazing, but combined they're magical.  I have to agree.  I also made this appetizer more labor-intensive than need be.  I rolled the dough and used a round cutter to stamp out the savory cookies -- but if you follow the original recipe and form the dough into a sliceable log, the baking of this shortbread will take you (almost) no time at all.  I'll even go out on a limb here to say that if you are really short on time, just make the olive gremolata and serve with purchased (buttery) crackers.  It's pretty delicious.

    
Picture


Tomato-Thyme Shortbread with Olive Gremolata
 • recipe by Melia Marden | Food & Wine • April 2014


SHORTBREADS:
• 1 cup all-purpose flour
• 1/4 cup tomato paste
• 1 tablespoon sugar
• 1 tablespoon finely grated Parmigiano-Reggiano cheese
• 1 tablespoon fresh thyme leaves
• 1/2 teaspoon kosher salt
• 1/4 teaspoon cayenne pepper
• Pinch of finely ground black pepper
• 1 stick (8 tablespoons) cold, unsalted butter, cubed
GREMOLATA:
• 1/2 cup finely chopped pitted, green olives, such as Castelvetrano
•
1/2 cup finely chopped pitted kalamata olives
• 3 tablespoons extra-virgin olive oil
• 2 tablespoons finely chopped flat leaf parsley
• 1 1/2 teaspoon finely grated lemon zest
• 1 teaspoon fresh lemon juice
• 1 small garlic clove, minced
• Kosher salt
• Freshly ground black pepper

1.  TO MAKE THE SHORTBREAD:  In the bowl of a food processor, combine the flour, tomato paste, sugar, Parmigian-Reggiano cheese, thyme leaves, kosher salt, cayenne, and black pepper.  Pulse the mixture until the tomato paste is evenly distributed throughout.  Add the butter and pulse until the dough starts to come together.  Transfer to a sheet of plastic wrap and roll the dough into a log 8-inches long and 1 1/2-inches in diameter.  Wrap in the plastic and chill in the refrigerator for at least one hour.
2.  MAKE THE GREMOLATA:  Combine all of the ingredients in a medium-size bowl.  Season with salt and black pepper.  Set aside.
3.  PREHEAT OVEN to 350˚F.  Line 2 baking sheets with parchment paper.  Slice the shortbread log into 1/4-inch thick rounds (I rolled my shortbread dough just a little over 1/8-inch thick and used a round cutter, instead).  Place shortbread rounds on prepared baking sheets. Bake the shortbreads on upper third and center racks of oven for about 18 minutes, or until edges are lightly browned; rotate the baking sheets from top to bottom and front to back halfway through baking.  (If baking a thinner, rolled shortbread as I did, bake for 12 -15 minutes.)  Transfer the shortbreads to a wire rack and allow to cool completely.  Serve as an appetizer with the olive gremolata.


TAKE a LOOK:


2 Comments
<<Previous
    Picture


    Picture
    Picture
    Enter your Email

    Preview | Powered by FeedBlitz


    Categories

    All
    Amana
    Appetizers
    Beef
    Breads
    Breakfast
    Cakes
    Chocolate
    Condiments
    Cookies
    Daring Bakers Challenge
    Desserts And Sweets
    Drinks
    Eggs
    Espresso
    Etcetera
    Fish
    French Bulldogs
    Friday Night Dinner
    Fruit
    Germany
    Gratins
    Great Kitchens
    Grilling
    Ice Cream
    Lamb
    Main Dishes
    Muffins
    My Garden
    My Kitchen Renovation
    New Years Day Brunch
    Paris
    Pasta
    Pork
    Poultry
    Provence
    Restaurants
    Rhubarb
    Rice
    Salads
    Scones
    Seafood
    Side Dish
    Soup
    Sunday Mornings
    Sweet And Savory Tarts
    Thanksgiving
    Tomatoes
    Vegetables
    Vegetarian

  • Home
  • PAINTINGS
  • About
  • Passions-to-Pastry Blog
  • Contact
  • Recipes