Living Tastefully
  • Home
  • PAINTINGS
  • About
  • Passions-to-Pastry Blog
  • Contact
  • Recipes

Lemon Meringue Cake... for a birthday

4/8/2017

3 Comments

 
Picture
Picture

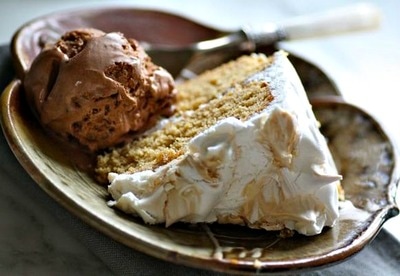
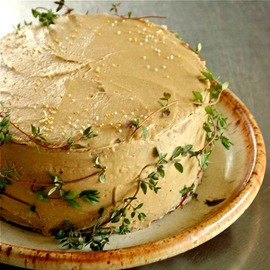
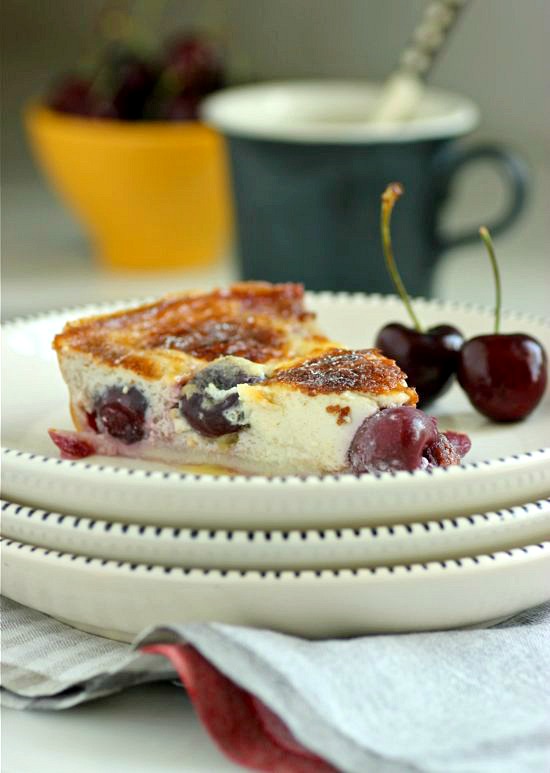
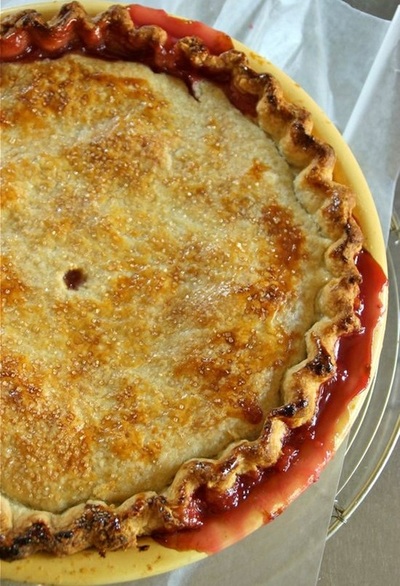
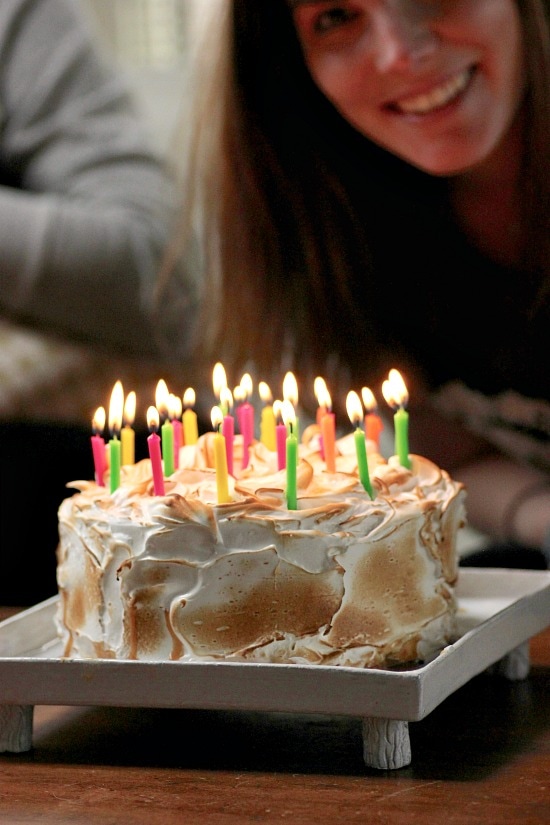
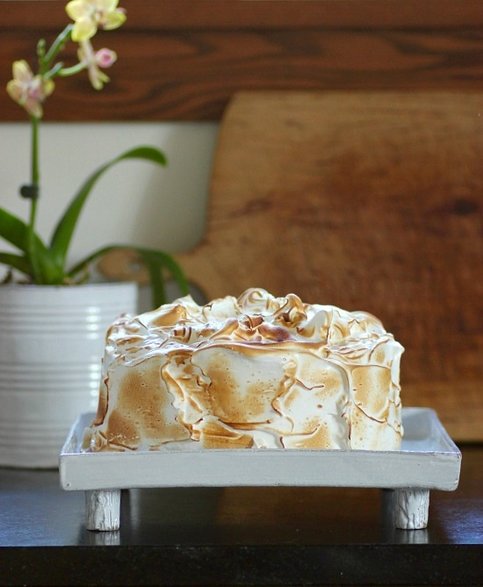
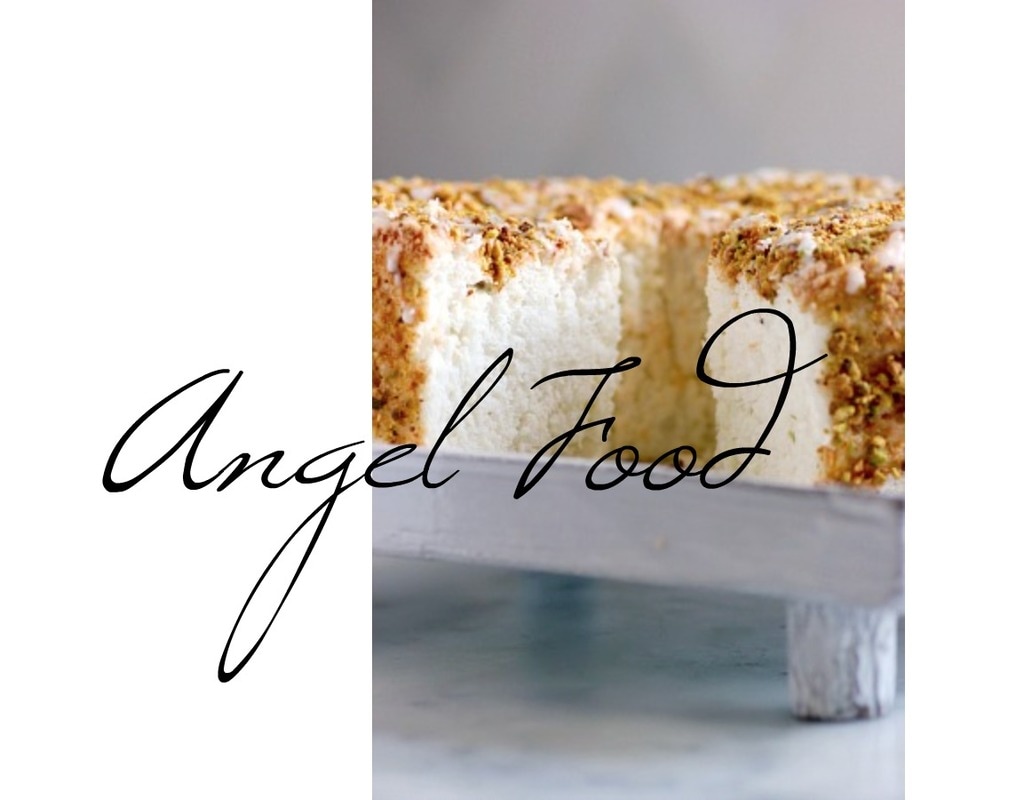
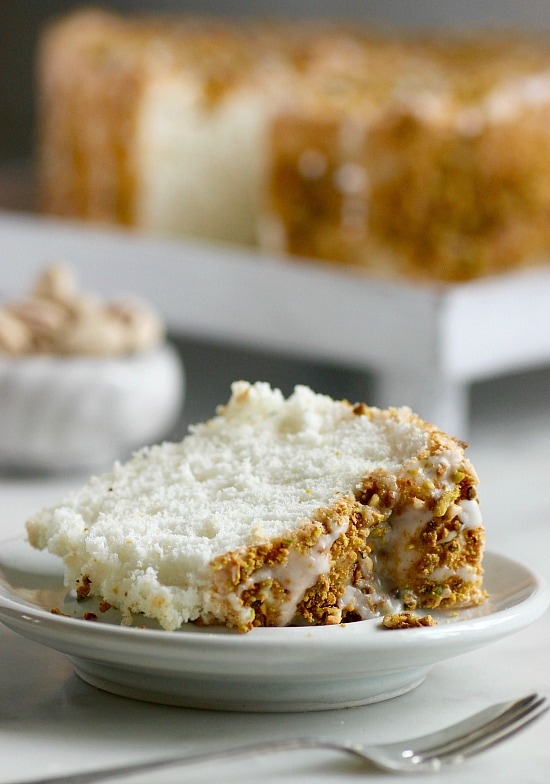
  Today is my youngest daughter's 24th birthday.  Yes... time flies. 

Picture

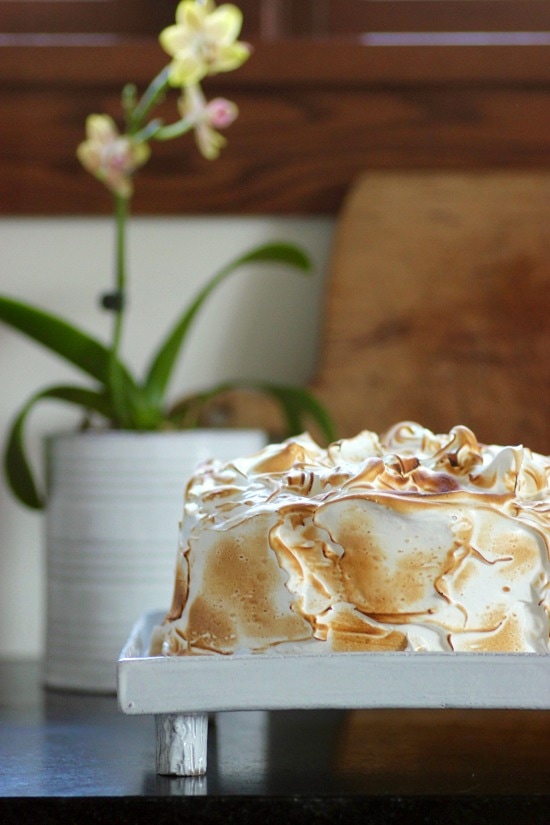
     The driving force behind choosing this cake recipe, from Liz Pruitt's TARTINE, was the large bag of lemons in my refrigerator.

Picture

     As you can see in this photo, I went a bit overboard with the caramel spread between the cake layers, resulting in a gentle oozing that bothered no one but me.  And with any recipe from TARTINE, you can't go wrong.

Picture
Picture

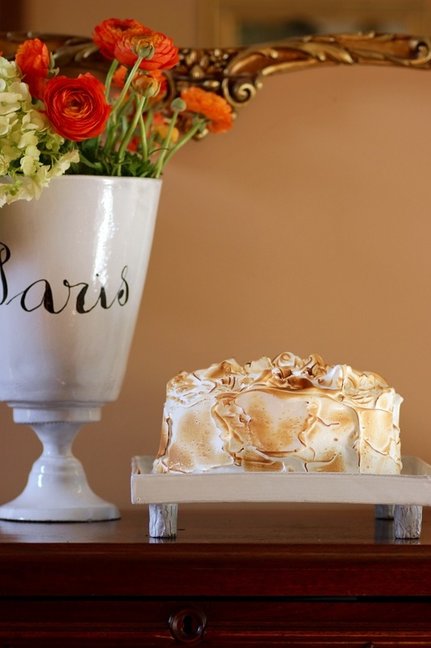
•
TARTINE'S
recipe calls for using a 10-inch springform pan with 3-inch sides.  I used two 8-inch pans with 2-inch sides, and one 8-inch pan with 1 1/4-inch sides to bake.  I split the two taller cakes in half to use in this recipe.

CAKE:

• 2¼ cups  all-purpose flour
• 2 teaspoons baking powder
• 1½ cups sugar
• 3/4 teaspoon salt
• 1/2 cup vegetable oil
• 6 large egg yolks, at room temperature
• 1/2 cup water
• 1/4 cup lemon juice
• 1 1/2 teaspoon grated lemon zest
• 10 large egg whites, at room temperature
• 1./4 teaspoon cream of tartar
1.  Preheat the oven to 325F. Line the bottom of a 10-inch cake or springform pan with 3-inch sides with parchment paper cut to fit exactly; don’t grease the pan.  (• See above for what pans I used in this recipe.)
2.  Sift together the flour and baking powder into a large mixing bowl. Add 1 1/4 cups of the sugar and the salt and whisk to combine. In a small bowl, whisk together the oil, egg yolks, water, lemon juice, and lemon zest. Make a well in the flour, add the yolk mixture, and then whisk thoroughly and quickly for about 1 minutes until very smooth.
3.  In another large mixing bowl, beat the egg whites until frothy, then add the cream of tartar and beat on medium-high speed until it holds soft peaks. Add the remaining 1/4 cup  sugar slowly while beating on medium-high speed until the whites hold firm, shiny peaks. Add a third of the egg whites and fold into the yolk mixture to lighten, then fold in the rest of the whites until just combined.
4.  Pour the batter into the pan, smoothing the top if necessary. Bake until a toothpick inserted in the center comes out clean, about 45-55 minutes. (About 40 minutes if you use 8-inch cake pans).  Let cool in the pan on a wire rack. Once completely cool, run a thin knife around the sides of the pan to loosen the cake an then release and lift off the pan sides. Invert the cake and peel off the parchment.

CARAMEL:
• 2/3 cup heavy cream
• 1/4 vanilla bean
• 1 1/4 cup sugar
• 1/4 cup water
• 1/4 teaspoon salt
• 2 tablespoons light corn syrup
• 3/4 teaspoon lemon juice
• 4 tablespoons unsalted butter
1.  Pour the cream into a small, heavy saucepan. Split the vanilla bean in half lengthwise and use the tip of a sharp knife to scrape the seeds from the pod halves into the milk. Place over medium-high heat and bring to just under a boil, stirring occasionally. Reduce the heat to low to keep the cream warm.
2.  In a medium, heavy saucepan, combine the sugar, water, salt, and corn syrup. Bring to a boil over medium heat, stirring to dissolve the sugar. Then cook, without stirring, until the mixture is amber colored, 5 to 8 minutes. Remove from the heat.
3.  The mixture will continue to cook off the heat and become darker, so make sure to have your cream close by. Carefully and slowly add the cream to the sugar syrup. The mixture will boil vigorously at first. Let the mixture simmer down, and then whisk until smooth. Add the lemon juice. Let cool for about 10 minutes.
4.  Cut the butter into 1-inch chunks and add to the caramel one at a time, whisking constantly after each addition. Then whisk the caramel periodically as it continues to cool.

LEMON CREAM:
• 1/2 cup, plus 2 tablespoons lemon juice
• 3 large eggs
• 1 egg yolk
• 3/4 cup sugar
• pinch salt
• 16 tablespoons unsalted butter
1. In a heatproof bowl set over a saucepan of simmering water, combine the lemon juice, eggs, yolk, sugar, and salt (make sure the bottom of the bowl doesn’t touch the water). Whisk them together constantly until very thick, or 80°C (180°F) on an instant-read thermometer. Remove from the heat and let it cool down until warm to touch (60°C or 140°F on a thermometer). Place the lemon cream in a blender and with the motor running, add the butter in small pieces. Allow to cool completely. (You may refrigerate it, but allow to come to cool room temperature before using.)

LEMON SYRUP:
• 1/3 cup sugar
• 1/3 cup water
• 1/3 cup lemon juice

1. In a nonreactive saucepan, combine the sugar and water and bring to a boil over medium heat. Transfer to a cool bowl, let cool for a bit, then chill for half an hour. Stir in the lemon juice.
ASSEMBLY:
1.  Split the chiffon cake horizontally into four equal layers. Place one layer on your serving plate (which I lined with wax paper around to cake) and moisten evenly with ¼ of the lemon syrup. Spread 1/3 of the caramel over the cake, then 1/3 of the lemon cream. Repeat with 2 more layers, using up the remaining caramel and lemon cream. Top with the fourth cake layer and moisten with the remaining lemon syrup. Cover the cake completely with plastic wrap and refrigerate for at least four hours or overnight.
NOTE:  If using smaller cake pans than the 10-inch springform pan used in this recipe, reduce the amount of caramel and lemon cream between the layers.

SWISS MERINGUE:
• 7 egg whites
• 1 3/4 cup sugar
• pinch of salt
1.  In a heatproof bowl over a pan of simmering water, combine the egg whites, sugar, and salt and whisk until the whites are hot to the touch, about 120F, about 5 minutes. Beat on high speed until the mixture is very thick and holds stiff, glossy peaks.
2.  Unmold the cake and spread the meringue all over. Use a spatula or a spoon to create dramatic swirls. Using a propane torch if available, scorch the meringue, blackening the tips and swirls.


TAKE a LOOK:


3 Comments

Lime Angel Food Cake with Pistachios

3/21/2017

1 Comment

 
Picture


Picture

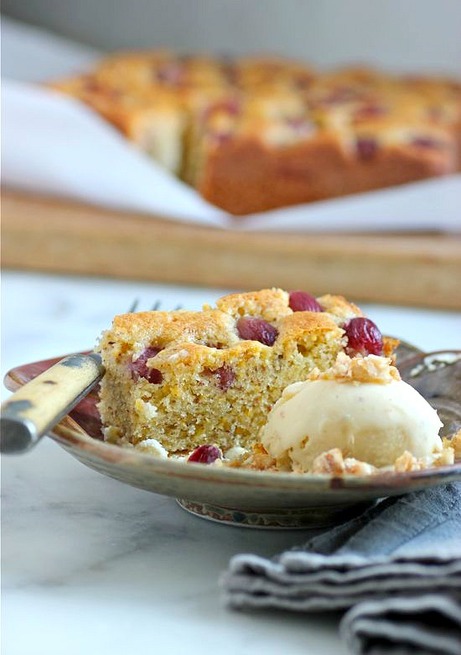
     I felt like eating cake today.


Picture


Lime Angel Food Cake with Lime Glaze & Pistachios
Matt Lewis & Renato Poliafito | Bon Appétit, April 2010


CAKE:
• 1 cup cake flour
• 1  1/2 cups superfine sugar, divided
• 1/4 teaspoon salt
• 10 large egg whites, room temperature
• 2 teaspoons finely grated lime peel
• 1 teaspoon vanilla extract
• 1 teaspoon cream of tartar

LIME SYRUP and LIME GLAZE:
• 1/2 cup sugar
• 4 tablespoons fresh lime juice, divided
• 1/2 cup unsalted raw pistachios (about 2 ounces), finely chopped in food processor
• 1/2 cup powdered sugar

SPECIAL EQUIPMENT: 
• 10-inch-diameter angel food cake pan with 4-inch-high sides and removable bottom (do not use a nonstick pan)


FOR CAKE:
1.  Place rack in center of oven and preheat to 350˚F.  Sift flour, 1/2 cup superfine sugar, and salt into medium bowl; repeat sifting 3 times. Using electric mixer, beat egg whites, lime peel, and vanilla on medium speed in large bowl until frothy.  Add cream of tartar; increase speed to high and beat until soft peaks form. Gradually add remaining 1 cup sugar, 2 tablespoons at a time, beating until stiff peaks form. Sprinkle 1/3 of flour mixture over whites and gently fold in until incorporated. Fold in remaining flour mixture in 2 more additions just until incorporated. Transfer to an ungreased 10-inch angel food cake pan with 4-inch-high sides and removable bottom (do not use a nonstick pan); smooth top.

2.  Bake cake until pale golden and tester inserted near center comes out clean, about 38 minutes. Immediately invert cake onto work surface if pan has feet, or invert center tube of pan onto neck of a bottle and cool cake completely.

3.  Using a long thin knife, cut around cake sides and center tube to loosen. Lift out center tube with cake still attached; run knife between cake and bottom of pan to loosen. Invert cake onto rack, then turn cake over, rounded side up. Set rack with cake atop a rimmed baking sheet.

FOR LIME SYRUP & GLAZE:
1.  Combine sugar and 3 tablespoons lime juice in small saucepan; stir over medium heat until sugar dissolves. Brush syrup all over top and sides of cake. Immediately press pistachios onto top and sides of cake, pressing to adhere.
2.  Stir powdered sugar with remaining 1 tablespoon lime juice in small bowl until smooth. Drizzle glaze over top of cake. Let stand until glaze sets, about 10 minutes.
3.  Transfer cake to platter and serve.


TAKE a LOOK:


1 Comment

Fresh Ricotta Tart

1/13/2017

6 Comments

 
Picture
 
     How could I resist baking this tart?  It's full of all the things I love... and ingredients that I usually have on hand, making it very easy to assemble for last night's dinner.  This recipe is from the book, Pie by Angela Boggiano.  I found the book at a local discount/used bookstore and purchased it originally for the "noble" or "raised" pie recipes that are baked in tall, decorative pans or molds.  They are works of art, and although I can't see myself searching for pigeon breasts or pigs feet, that are called for in some of the fillings, I'm instead envisioning layers of roasted vegetables and hard-boiled eggs encased in walls of golden pastry... more to my liking.

Picture
Picture

     But, back to the ricotta tart...  If you follow LivingTastefully, you already know that I love using my homemade fresh ricotta (recipe HERE) in just about everything.  And, although it's easy to make, don't feel like you must do that.  Purchased fresh ricotta is absolutely fine.  I also have candied orange rind (recipe HERE) on hand most of the time... for my favorite cookies and alongside an afternoon espresso!
     The author compares this filling to Sicilian cannoli pastry desserts and that is exactly the memory I have when eating this ricotta tart.  Plus, Boggiano recommends always preheating a baking sheet to place your pies and tarts on; a little trick than ensures a well-baked bottom crust.


Picture

     I did several things differently than in the original recipe.  • I used a favorite tart pastry.  It was enough dough to line the deep tart pan, but wasn't enough for a lattice topping.  If you would like lattice on the top of your pie, increase the pastry recipe, below, by half.  The white looking dots on the top of the filling are from a piece of the pastry dough that remained and I cut into small circles... wouldn't do that again. • The recipe called for 3 extra-large eggs, which I did not have.  I substituted 4 of the smallest large eggs I could find.  • And, the last thing, I increased the oven temperature by 25 degrees which was perfect. 
 

Picture
Picture

PASTRY DOUGH

• 1 1/2 cups unbleached, all-purpose flour
• 1/2 teaspoon kosher salt
• 4 teaspoons sugar
• 8 tablespoons cold, unsalted butter, cut into 1/2-inch cubes
• 4 tablespoons ice water
• extra flour for rolling pastry

FILLING
• 1 pound fresh ricotta (recipe HERE)
• 1/3 cup superfine sugar
• 1 teaspoon vanilla extract

• 3 extra-large or 4 large eggs (see • above in text)
• 1/2 cup candied orange rind (recipe HERE)
• 1/4 cup semi-sweet chocolate chips
• 1/3 cup currants
• Grated zest of 1 lemon
• Confectioner's sugar for dusting
TO MAKE THE PASTRY
1.  Pulse 1  1/2 cups unbleached, all-purpose flour, the salt and sugar in a food processor.  Add butter; pulse until pea-size lumps form.  Drizzle 3 tablespoons ice water over the mixture.  Pulse until moist clumps form, adding more ice water by drips if dry.  Gather dough into a ball and flatten into a disk.  Wrap in plastic; chill 2 hours. 
2.  Roll out dough on a lightly floured surface.  Transfer to a 9-inch x 1 3/4-inch fluted tart pan with a removable bottom.  Gently press onto bottom and up sides of the tart pan. Trim.  Refrigerate until needed.
TO MAKE THE FILLING
1.  Preheat oven to 375˚F.  Place a baking sheet on bottom shelf of oven to preheat.
2.  Place the ricotta in a large bowl and whip with a wire whisk until smooth.  Beat in the sugar, vanilla extract and eggs, one at a time, until combined.
3.  Stir in the candied orange rind, chocolate chips, currants and lemon zest.  Pour into the pastry shell. 
4.  Place tart pan on the preheated baking sheet on the lowest oven shelf and bake for 55 minutes until golden.  Set aside for 15 minutes to cool in the pan before transferring to a wire rack to cool completely.  Dust with confectioner's sugar before serving. 


TAKE a LOOK:


6 Comments

Kale, Potato, and Fresh Ricotta Frittata

7/7/2016

0 Comments

 
Picture

     This Kale, Potato, and Fresh Ricotta Frittata has been on the menu often at my house over the past few weeks... And no apologies to all who have had to eat it so many times (mainly my husband).  I always start baking this frittata when the lacinato kale is ready in my garden.  I rarely purchase kale, beets and radishes during the winter months.  They are savored more when eaten only during my kitchen garden's growing season.  This means we consume a huge amount of these vegetables during June, July, and August.

Picture

     We are big egg eaters at my house and frittatas are such a great way to make eggs a meal any time of the day.  And, to clean out the refrigerator!  If I've made roasted potatoes or a french potato salad the day before, they will most likely end up in a frittata the next morning; the same with any other leftover vegetables.  I also try to have fresh ricotta (recipe HERE) available at all times.  I am so in love with it and drop dollops of the ricotta all over the top of a frittata before baking.
     Add what you love to your frittata; the only constant is eight gently whisked eggs.  A 10-inch cast iron skillet I inherited is what I always use; probably my favorite and the most-used kitchen implement I have.   

Picture


Picture

• 4 small Yukon Gold potatoes, thinly sliced
• 5 lacinato kale leaves, ribs removed and thinly sliced
• Extra-virgin olive oil
• Kosher salt and freshly ground black pepper
• 1-1 1/2 cups grated Gruyère cheese
• 8 organic, large eggs, whisked
• Fresh ricotta (recipe HERE)
1.  Preheat oven to 375˚F.
2.  In a 10-inch, non-stick oven-proof skillet, pour a generous drizzle of olive oil over medium heat.  Add the sliced potatoes.  Use a thin spatula to turn the potatoes until light golden in color.  Add the kale and add a bit more olive oil if needed.  Season with salt and pepper and continue to turn the potatoes and kale until the potatoes are a golden brown and the kale has wilted.  Reduce the burner to low and sprinkle the grated cheese evenly over the top of the potatoes and kale.  Slowly pour the whisked eggs over the mixture and sprinkle with additional salt and pepper.  Take off heat.  Top with big dollops of fresh ricotta. (I probably used close to half a pound.)
3.  Place the skillet on the middle rack of oven and bake for 25 to 30 minutes, or until the the eggs are set.  Eat the frittata straight from the oven or at room temperature.  Enjoy!


TAKE a LOOK:


0 Comments

Sunday Mornings at My House...

1/24/2016

1 Comment

 
Picture
Picture


   My daughter stopped by yesterday; possibly to see me, but more likely to see the new puppy, Bisous.  She opened the refrigerator door and said, "You need to go to the grocery store.  There's nothing to eat".  I haven't been baking or cooking much this week.  My husband is visiting his father (and I've been busy with Bisous), but that gives me the opportunity to eat the kind of simple meals I love.  My daughter may have thought there was nothing to eat in the house, but I have eggs, vegetables, and fruit.  Perfect...


Picture

     I eat a LOT of eggs, each and every day.  During that horrible stretch of time when we were told to eat eggs sparingly because of cholesterol, I would continue to consume several a day.  It didn't stop me.  Lately, my morning breakfasts are two fried eggs with toast and smashed avocados.  Dinners recently start with salads topped by poached eggs. Sometimes, the salad is followed by a savory tart of vegetables baked in an egg custard.  Like I've always said... If something is topped with an egg, that something is better because of it. 

Picture

     I wish the frittata I made this morning for one person, would have been larger (for 4 possibly?).  I devoured it quickly and right now I would really like some more.  If I had bacon on hand, I probably would have tossed some of that to the mix, also.
Picture

Serves 1 person and can be easily increased

• 1 yam, cut into small cubes
• extra-virgin olive oil
• sea salt and freshly ground pepper
• 1/2 pear, cut into slices
• 1 handful arugula
• fresh ricotta (recipe HERE, or purchased)
• 3 large eggs, lightly whisked


1.  Preheat oven to 375˚F.  Toss the cubed yam in a bowl with a drizzle of olive oil and a sprinkling of sea salt.  Spread onto a sheet pan and roast in the oven until softened and starting to caramelize.  Remove from oven and reserve.
2.  Drizzle some olive oil onto a medium skillet over medium heat.  Add the pear slices and cook, until they begin to soften and caramelize slightly. 
3.  Using an 8-inch skillet (for 1 serving), place over medium heat and drizzle with olive oil.  Add about 3/4 cup of the cubed yams.  Stir briefly, then add the arugula.  Toss over the heat until the arugula just starts to wilt.  Turn the burner to low and pour the beaten eggs evenly over the top.  Spoon generous dollops of the fresh ricotta over the eggs. Season with salt and pepper.  Place the pear slices on top and sprinkle with some more of the cubed yams.
4.  Place the skillet on the middle rack of the 375˚ oven and bake until the eggs are just set,  approximately 10 minutes.  NOTE:  If increasing the size of the frittata, additional baking time will be necessary.  Remove from oven and serve hot or at room temperature.


TAKE a LOOK:


1 Comment

My Dessert at Restaurant Verjus

11/9/2015

4 Comments

 
Picture
 
     What I love most about visiting France is the inspiration I find in just about everything == it's endless.  I believe it is impossible to be there and not be influenced in some small way, visually or gastronomically.  Most likely, it will be both of those.  In the weeks before I travel to Paris, or anywhere else in France, I note historical and cultural centers I should see in addition to pâtisseries I've been longing to visit and restaurants where I want to eat.  But I'm also a big believer in just heading out in a different direction each morning to see where the streets take me.  I am never disappointed.  I'm always guaranteed unique discoveries that will inspire the way I approach something once I return home to St. Paul.   

Picture

     This recent trip was no exception.  In addition to the 1200 plus photos I returned with, which remind me daily of the beauty that abounds, I ate foods that I knew I would attempt to recreate once at home.  For me, that is the most meaningful thing I can do to remember a trip.  There's nothing like being around the table on our patio with friends and family and eating a meal filled with delicious memories (A French Inspired Meal, French Cauliflower Soup with Truffle Oil).
Picture

     One of the culinary highlights during my time in Paris was dinner at Restaurant Verjus.  I had read about it in food magazines and was reminded by friend and food blogger Stacey that the American owners, Braden Perkins and Laura Adrian (a St. Paul native ?!), started their French culinary career by running the highly successful underground restaurant, Hidden Kitchen, out of their Paris apartment.  While googling info on Verjus, I came upon a restaurant review by Alexander Lobrano for Saveur magazine.  He summed up beautifully   my experience there.  (If interested, read the 2012 article HERE.)  There is no ordering à la carte at Verjus.  The meal is a tasting menu of approximately 8 courses.  The only thing we were asked before the service began, was if either my husband or I had any food allergies and if we wanted the staff to pair each course with the recommended wine.  We ended up talking with diners on both sides of our table throughout our meal, and if I had to describe the atmosphere, it could only be "festive".  Everyone dining at Verjus that night was very happy to be there.
    My little home kitchen project became the dessert I ate at Verjus that night.  There are several components to this dish, but the ice cream, candied pine nuts and fresh ricotta can all be made ahead.  I suggest making the cake the day of, only because I like how it slices; the cake's texture becomes more crumbly over time but the flavor is definitely as good.


Picture
Picture
Picture


PINE NUT ICE CREAM
+ found on Chowhound

MAKE ICE CREAM THE DAY BEFORE

• 3/4 cup pine nuts
• 3/4 cup sugar, divided
•2. 1/2 cups whole milk
• 1 teaspoon almond extract
• 5 egg yolks
1.  Put 3/4 cup of pine nuts in a pie pan and roast them at 350 until fragrant.
Put roasted pine nuts and 1/4 cup sugar in a food processor. Process until you get a peanut butter-like consistency, Combine this with 2 1/2 cups whole milk in a saucepan. Add 1 teaspoon almond extract. Bring to a boil and then immediately remove from the heat.
2.  While the milk is heating. whisk together the 5 egg yolks with the remaining 1/2 cup sugar. Once milk mixture boils, slowly pour it into the egg mixture.
Pour back into saucepan and heat over low heat - DO NOT BOIL - stir constantly. Remove from heat once custard is thick enough to coat a spoon, about 10 minutes.  Cool in the fridge for at least 3 hours or overnight.
3.  Put into your ice cream maker and churn as directed.   Freeze overnight.


CANDIED PINE NUTS
+ found on about.com

* 1/2 cup pine nuts
• 1 1/2 teaspoons honey
• 1 1/2 teaspoons water
• 1 tablespoon granulated sugar
• Pinch of salt
• 1/8 cup Demerara sugar
1.  PREHEAT oven to 350˚F.  In a small bowl, whisk together the honey, water, salt, and granulated sugar until smooth.  Toss the pine nuts and Demerara sugar in the honey mixture stirring well to coat.
2.  Spread the nut mixture onto a parchment lined baking pan in a single layer and bake until the nuts are golden brown.  Watch closely so nuts do not burn.  Allow the nuts to cool to room temperature; chop coarsely.  Keep candied pine nuts in an air-tight container.


FRESH RICOTTA
+ Use either purchased Fresh Ricotta or make your own.  Recipe HERE.

OLIVE OIL CAKE with RED GRAPES
+ recipe, adapted,  found at marthastewart.com

• 1/2 cup extra-virgin olive oil, plus more for pan
• 1 cup unbleached all-purpose flour, plus more for pan
• 1/2 cup almond meal
• 1/4 cup coarsely ground yellow cornmeal
• 1 1/2 teaspoons baking powder
• 1/2 teaspoon salt
• 2 large eggs
• 2/3 cup sugar
• 2 teaspoons finely grated lemon zest
• 1/3 cup whole milk
• 2 cups red seedless grapes
1.  PREHEAT oven to 350˚F.  Brush a 9-inch square pan with oil; dust with flour, tapping out excess.  Whisk together flour, almond meal, cornmeal, baking powder, and 1/2 teaspoon salt.  Beat eggs, sugar, and zest with a mixer on high speed until pale and fluffy.  Reduce speed to low; slowly add the oil.  Beat in flour mixture in 3 additions, alternating with milk, and beginning and ending with flour.
2.  Spoon the batter into pan.  Scatter 1 cup of grapes over the top.  Bake for 15 minutes.  Scatter the remaining 1 cup grapes over cake.  Bake until cake is golden and a toothpick inserted into the center comes out clean; another 25 to 27 minutes.  Let cool in pan on a wire rack, then turn out and slice into thin rectangles.


Picture
ASSEMBLY:
• Fresh Ricotta
• Good quality, runny Honey
• Olive Oil Cake with Red Grapes
• Pine Nut Ice Cream
• Candied Pine Nuts
1.  On a small plate, smear a large spoonful of Fresh Ricotta; drizzle ricotta with honey.
Place a slice of the Olive Oil Cake on top of ricotta.  Add a scoop of the Pine Nut Ice Cream to the plate and sprinkle with the Candied Pine Nuts.  Serve and Enjoy!


TAKE a LOOK:


4 Comments

Clafoutis aux Cerises

7/15/2015

0 Comments

 
Picture
    
     I made this Cherry Clafoutis on Bastille Day.  I guess I felt the need to do something French on July 14, since I wasn't in France for the festivities. 
    
Picture

     We ate half of this yesterday but I think it was best this morning when we downed the remainder for breakfast!

Picture


• Sweet Cherry Clafoutis via Paula Wolfert | Food & Wine Magazine

• 1 pound sweet cherries, pitted and patted dry with paper towels
• 1/4 cup granulated sugar
• 1/2 teaspoon finely grated lemon zest
• 1/2 cup flour, plus additional for dusting
• Pinch of salt
• 3 large eggs, lightly beaten
• 2 cups whole milk
• 4 tablespoons unsalted butter, softened, plus more for the dish
•  2 tablespoons Cognac or brandy
• 1/2 teaspoon pure vanilla extract
• Confectioners' sugar for dusting

1.  In a bowl, toss the cherries with 3 tablespoons of the granulated sugar and the lemon zest.  Spread the cherries in a single layer on a baking sheet.  Transfer to a freezer for 1 1/2 hours.
2.  Meanwhile, in another bowl, whisk the 1/2 cup flour and salt. Whisk in the eggs. In a small saucepan, heat 1/2 cup of the milk with 3 tablespoons of the butter until the butter melts. Whisk the warm milk into the flour mixture just until smooth. Whisk in the remaining 1 1/2 cups of milk. Add the Cognac and vanilla, cover and let rest at room temperature for at least 1 hour.
3.  Preheat the oven to 425°. Butter a 9 1/2-inch deep-dish pie plate and dust with flour. Spread the cherries in a single layer in the pie plate, adding any sugar from the baking sheet to the cherries. Whisk the batter again and pour it over the cherries.
4.  Bake the clafoutis just above the center of the oven for 20 minutes, or until the top is just set and golden. Top with the remaining 1 tablespoon of granulated sugar and 1 tablespoon of butter. Bake for 10 to 15 minutes longer, or until a knife inserted in the center comes out clean. Transfer to a rack to cool. Dust with confectioners' sugar, cut into wedges and serve.


TAKE a LOOK:


0 Comments

I've got beans!

7/13/2015

1 Comment


Picture
Picture

     I cannot let a summer pass without making a big Salade Nicoise at least once.  The timing of a Salade Nicoise depends on just one thing... whether or not my green beans are ready.  WELL... they're ready!
     I plant two beans each spring.  One is a bush, French Haricot Verts -- the thinnest of green beans -- and the bean that I use in my Salade Nicoise.  I always plant two beds from seed with their rectangular plots surrounded by 20-inch-tall bamboo fencing to keep hungry rabbits out.


Picture

     This year I planted one bed of the Haricot Verts in mid-April, followed by a second planting three weeks later.  But I've come to realize I should have waited even longer.  Both beds are going gangbusters right now.  And in addition to the Haricot Verts, the heirloom purple pole beans I planted this spring are coming on with a vengeance as well.  Needless to say... we will be eating a lot of beans this week at my house!

Picture

     Too bad these beautiful purple beans turn green once thrown into a pan of boiling water.

Picture

     This is a fantastic recipe for Salad Nicoise.  Get some really good bread and salted butter, pour yourself a glass of Provencal Rosé and enjoy a long, leisurely al fresco meal this summer!

•  Salade Nicoise
      adapted from a recipe in The New Basics Cookbook
                                         by Julee Rosso & Sheila Lukins
                                    Recipe adjusted to feed 6 to 8 people


• 16 new potatoes
• 1 pound haricot verts, trimmed, or if using regular green beans trimmed and halved lengthwise
• 6 cans (4 1/2 ounces) tuna (packed in olive oil), drained
• 8 tablespoons finely chopped red onion
• 4 tablespoons tiny capers, drained
• 7 tablespoons, plus 1 1/2 teaspoons fresh lemon juice
• 7 tablespoons, plus 1 teaspoon mild extra-virgin olive oil
• Freshly ground black pepper, to taste
• 2 generous tablespoons fresh rosemary, chopped
• 1 cloves minced garlic
• Coarse (kosher) salt, to taste
• 4 cups grape tomatoes, halved
• 4 tablespoons parsley, chopped
• 8 hard-boiled eggs, peeled and halved
• 1/2 cup Nicoise olives

1.  Preheat oven to 350˚ F.
2.  Prick the potatoes with the tines of a fork, and place them in a baking dish.  Bake for 1 hour, or until tender.  Set aside to cool.
3.  Bring a saucepan of water to a boil and add the beans.  Simmer until just tender, 4 to 5 minutes.  Drain.  Wrap in a dish towel and set aside.
4.  Place the tuna in a mixing bowl, and break it into large chunks.  Add the red onion, capers, 4 tablespoons of the lemon juice, 1 tablespoon, plus 1 teaspoon of the olive oil, and pepper.  Toss gently until well-combined and set aside.
5.  Cut the cooked potatoes into 1/4-inch-thick slices, and place them in a mixing bowl.  Add 4 tablespoons of the olive oil, 1 tablespoon plus 1 1/2 teaspoon lemon juice, rosemary, garlic, pepper, and coarse salt.  Toss to combine, and set aside.
6.  Place the halved grape tomatoes in a bowl.  Sprinkle with pepper, coarse salt, and the parsley.
7.  Just before you are ready to serve, toss the beans with the remaining 2 tablespoons lemon juice and 2 teaspoons olive oil.  Season with coarse salt.
8.  Arrange tomatoes, tuna, potatoes, and green beans on a large platter.  Place hard boiled eggs throughout and toss Nicoise olives over the top. 


TAKE a LOOK:


1 Comment

The Coveted Morel

5/19/2015

2 Comments

 
Picture

     (I think) I know what it's like for diehard morel mushroom hunters.  Filled with extreme eagerness to pounce when the moment seems right, the hunter becomes overly aware of the time of year and the weather patterns.  Have the temperatures, rain, filtered sunlight been optimal?  And once it's determined that mushrooms could possibly appear, abandoned cars are seen parked along woodsy landscapes.  Hunters, racing to find the mother lode during that brief window of time... I'm not trying to make anyone jealous here, but this past weekend, that mother lode was found. 
     I won't be bragging proudly to all of you as if this was my discovery, because I did not join in the search.  I stayed behind at the cabin (just relaxing). I had nothing to do with any of it. Occasionally, during the two hour hunt by my husband and several others, I heard screams of delight in the far-off distance from my friend Debbie.  If anyone was meant to find this haul, it was Debbie.  Having never before searched for them herself, Debbie is often the fortunate recipient of morels from all of those who are aware of her intense love for this mushroom.  By the way... eating a meal prepared by Debbie with morels is heaven.


Picture


   During this search, the small group happened upon a carpet of morel mushrooms so dense, it was hard not to step on them.  Our host, who has seriously hunted morels for much of his life, had never seen  anything like it.
This bag of morels was just one of several.


Picture
                  Morel mushrooms sliced in half and awaiting dehydration.
Picture

     The following day, I went out to comb the forest floor myself.  I found one.  ONE!   And that was only because Debbie called me over to the area she was searching.  I stood there; my eyes slowly scanning the ground.  After a short time, Debbie pointed me in which direction to face.  Then she told me how far away the mushroom was.  Time passed... nothing... more time passed... finally... Eureka!  I found a morel.  A single morel.  I wonder how many I actually walked past and never noticed.
     I was not, however, shy about taking several of the fresh morel mushrooms home with me.  Debbie told me how she would prepare her morels that night and I did the same --  Scrambled Eggs with Morels and Chives.  Since I  barely had anything other than eggs in my refrigerator when we returned from the cabin, it was the perfect dish.  It is amazing how a morel mushroom can elevate a simple dish of scrambled eggs into something so extraordinarily delicious. Just as a truffle does.   Better than a truffle?  Possibly.
    

     I hope we're invited back to the cabin next spring... please?

Picture

Picture
Serves 2
• 4 large morel mushrooms
• 6 large eggs
• Butter
• 2-3 tablespoons sour cream
• Salt and freshly ground pepper
• Fresh chives, minced

1.  Gently brush the morels to clean, then dice.  In a small skillet, melt 1 tablespoon butter.  Sauté the mushrooms over medium heat until juices are released and mushrooms are reduced.
2.  In the meantime, crack the eggs into a bowl and whisk briefly to blend. Season with salt and pepper.   Melt 1 to 2 tablespoons of butter in a medium non-stick or cast iron skillet over medium-low heat.  Add the eggs and gently cook, stirring almost constantly.  I like using a thin metal spatula to turn the eggs over as they scramble.  When almost done, add the sour cream and stir into the eggs.
3.  Divide scrambled eggs between two plates.  Top with the sautéed morels and sprinkle with chives; adjust seasonings.


TAKE a LOOK:


2 Comments

Salmon and Potato Hash with Poached Eggs

1/13/2015

0 Comments

 
Picture

     Plan a lazy weekend brunch and make this Salmon and Potato Hash with Poached Eggs!  Whenever I have some leftover salmon, I tend to use it in risotto, but this hash is now the new contender for that piece of fish.  Every ingredient can be prepared ahead, making assembly, the morning of, very easy.


Picture

... an adapted Food & Wine recipe


• 1 pound small Yukon Gold potatoes
• 4 slices of bacon
• 2 tablespoons unsalted butter
• 1 small red onion, finely chopped
• 3/4 pound cooked, skinless salmon fillet, flaked
• 2 tablespoons snipped chives
• Salt and freshly ground pepper
• 4 eggs


1.  Place potatoes in a pot of water and bring to a boil.  Cook until tender.  Drain and let cool briefly.  Peel the potatoes, then cut them into 1/2-inch cubes.
2.  Dice the bacon.  In a large cast iron or nonstick skillet, cook the bacon until browned.  Transfer the bacon to paper towels to drain.
3.  Add the butter to the bacon fat in the skillet. (If not making hash immediately, save bacon fat or substitute olive oil when proceeding with recipe.)  Over moderate heat add the onion and potatoes. Cook, stirring and gently mashing the potatoes occasionally, until the potatoes are beginning to brown in spots.  Add the bacon, salmon, and chives and cook gently until the salmon is heated.  Season with salt and pepper.  Remove from heat and cover to keep hash warm.
4.  Meanwhile, bring a skillet or sauté pan full of water to a vigorous simmer (start heating the water while potatoes are browning).  Crack eggs into individual bowls and add them to the simmering water.  Poach the eggs until the whites are set, but the yolks are still runny, about 5 minutes. (Read how to make poached eggs ahead HERE.)
5.  Divide salmon hash between 4 plates or bowls.  With a slotted spoon, lift eggs from water, drain, and place on top of hash.  Serve immediately.


TAKE a LOOK:


0 Comments
<<Previous
    Picture


    Picture
    Picture
    Enter your Email

    Preview | Powered by FeedBlitz


    Categories

    All
    Amana
    Appetizers
    Beef
    Breads
    Breakfast
    Cakes
    Chocolate
    Condiments
    Cookies
    Daring Bakers Challenge
    Desserts And Sweets
    Drinks
    Eggs
    Espresso
    Etcetera
    Fish
    French Bulldogs
    Friday Night Dinner
    Fruit
    Germany
    Gratins
    Great Kitchens
    Grilling
    Ice Cream
    Lamb
    Main Dishes
    Muffins
    My Garden
    My Kitchen Renovation
    New Years Day Brunch
    Paris
    Pasta
    Pork
    Poultry
    Provence
    Restaurants
    Rhubarb
    Rice
    Salads
    Scones
    Seafood
    Side Dish
    Soup
    Sunday Mornings
    Sweet And Savory Tarts
    Thanksgiving
    Tomatoes
    Vegetables
    Vegetarian

  • Home
  • PAINTINGS
  • About
  • Passions-to-Pastry Blog
  • Contact
  • Recipes