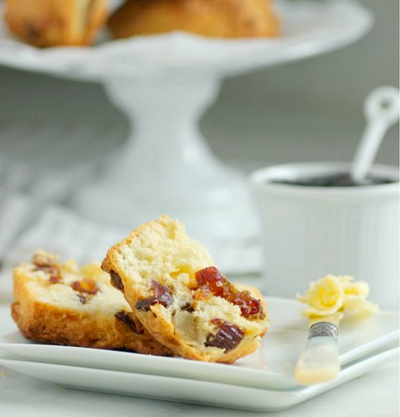
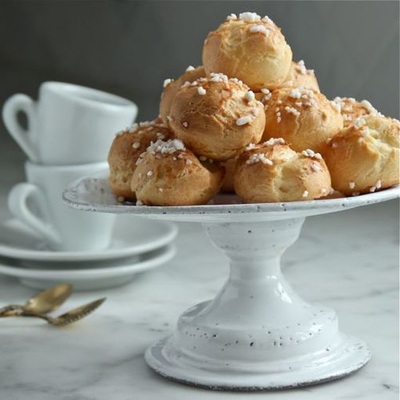
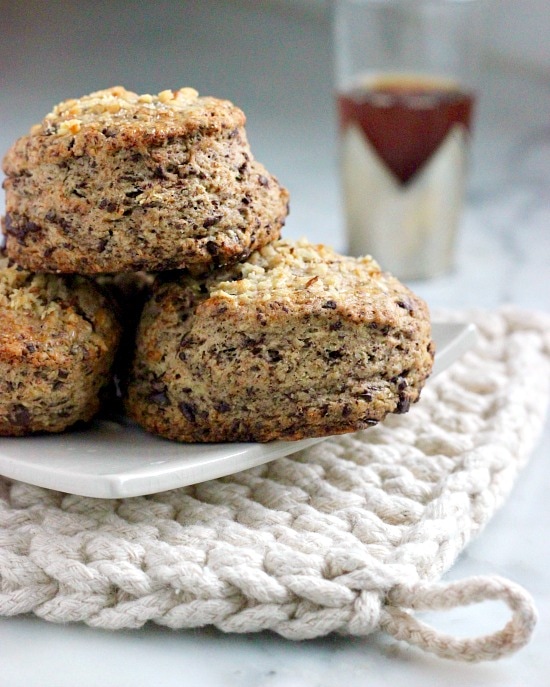
 I'm back in my kitchen after a 2600 mile road trip to Texas. Anymore, I'd prefer to step on a plane and fly to my destination instead of sitting for 9 hour stretches in a car... especially when the destination is 1200 miles south of the Twin Cities. But we have a Bisous, and I am not ready to leave him behind just yet. Our first stop was in Dallas where we stayed with a good friend , Lynn (from my days at the Kansas City Art Institute), and her husband, John. We think it has been 15+ years since we last saw each other... how can that be?? Our time together was brief, but filled with what I enjoy most -- food. I have to agree with Lynn that Dallas has the best grocery store anywhere -- HEB's Central Market. It's at least unlike anything in Minnesota. It was our first stop. The variety of oranges, apples and tomatoes is endless. The kind of place I could be left alone to explore for hours... just drop me off in the morning and pick me up at night.   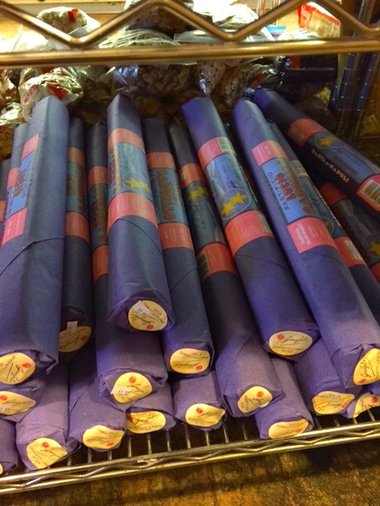 JIMMY'S, a small Italian grocery, was another stop while in Dallas. Small, but packed full of the most wonderful Italian foods! I had never seen 2-foot-long spaghetti before, or, I suppose, wild boar sausage. (I know... I need to go to Italy; a trip I'm hoping isn't too far off.) 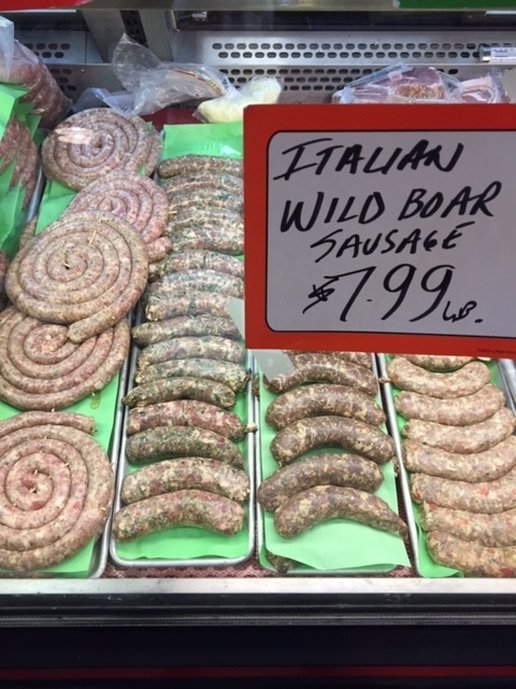 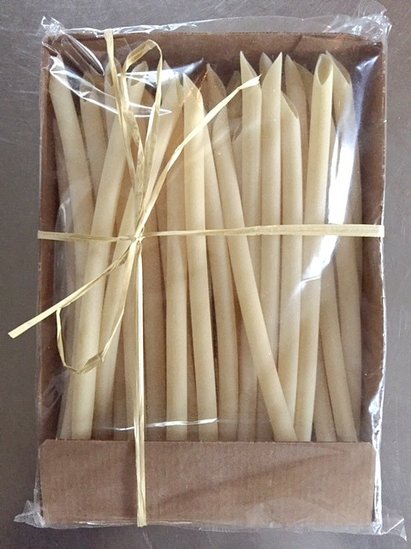 I brought home a shopping bag full of different pastas. I am still amazed that these foot long macaroni didn't break beneath piles of luggage. My husband and I were joined in Dallas by our daughter and her boyfriend, who continued with us on our drive through Texas. A night was spent in Waco with relatives before our final destination of Austin. And, I've got to say, we all loved Austin! My husband had an office in Austin many years ago, but I never accompanied him there. In fact, for a while we thought we'd be making a move there for his work. I'm now thinking it might not have been a bad thing. It's a great city and food truck heaven. 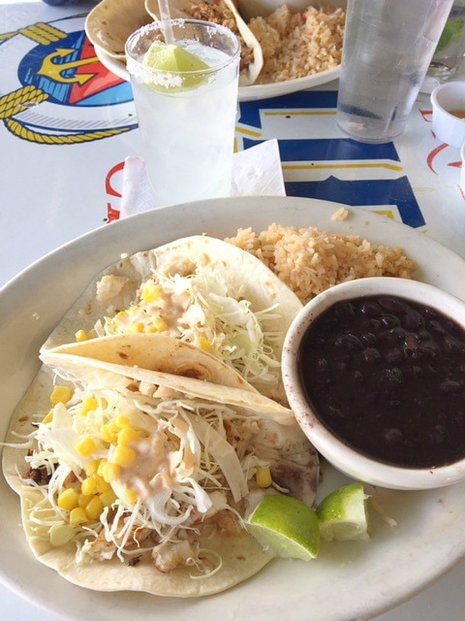  One of the few actual restaurants we ate at while in Austin was Guero's Taco Bar on South Congress. It was warm enough in Austin to sit outdoors for meals and these fish tacos were possibly the best I've ever eaten. Yes, you heard me... the best.  Bisous far succeeded my expectations as a travel companion. He was so good!   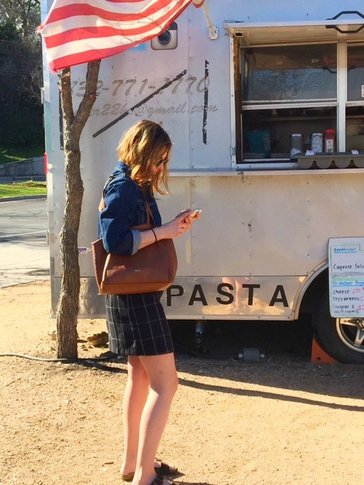 Our second day in Austin, we stopped on Barton Springs Road where there was a large group of food trucks (area called The Picnic). When I saw my daughter ordering from an Italian food truck, I asked her why would she do that when there were taco trucks just steps away! My mistake... she offered me a taste, and it was the best pasta I have ever eaten... ever! I went to the truck's window and told Salvatore, the owner and chef, exactly how I felt. He said he makes all of the fresh pasta himself, daily. When we returned again the next day, just to eat more pasta, I realized I was not the only one heaping praise onto Salvatore. I heard others telling him it was the best pasta they had ever eaten. So, there you are... it's true. If you visit Austin, you must go to Cannone Cucina Italiana. You will thank me.  The road trip is over, and I am (slowly easing) back in my kitchen. For several mornings after our return, I had nothing to eat alongside my cappuccino, and I really need that. But, I finally got baking and made Nancy Silverton's chocolate-walnut scones. I never question a recipe if Nancy Silverton's name is on it. Years ago whenever my husband was in the Los Angeles area on business, he'd always make the drive to LaBrea Bakery, early in the morning, before his flight home. He'd return with a bag of Nancy's bread for me. I even flew out to L.A. once (back in the days of endless airline miles), for 24 hours, just to eat at Nancy Silverton and Mark Peel's restaurant Campanile. And many years later, I went back to L.A. to eat at Osteria Mozza where she creates small plates at her mozzarella bar in the center of the restaurant (and Pizzeria Mozza next door, the following day). I just find Nancy Silverton fascinating beyond her culinary accomplishments, and have recently streamed her on Amazon Prime, with Emeril Lagasse on Emeril's EAT THE WORLD and on Netflix's, Chef's Table (season 3). Now, back to these scones. I think they are my favorite... ever. Tender, with a lovely, flaky crumb, and not very sweet. My plan is to always have a bag full of these scones, unbaked, in my freezer, ready to pop in my oven whenever I need one. NOTE: The original recipe calls for a 1 1/2-inch round cutter for stamping out the disks, and grouping 3 together in a clover shape before baking. I chose to use a 2-inch cutter and baked individual scones.  • 1 1/4 cups walnuts, divided • 7 tablespoons granulated sugar, divided • 2 3/4 cups unbleached all-purpose flour • 1 tablespoon plus 1 teaspoon baking powder • Pinch of salt • 1/2 cup (1 stick) plus 2 tablespoons unsalted butter, cut into 1-inch cubes and frozen • 1 cup (6 ounces) finely chopped bittersweet chocolate • 1 cup plus 2 tablespoons whipping cream, divided • 1/4 cup crème fraîche or sour cream • 1 tablespoon vanilla extract 1. Place oven rack on middle shelf of oven and preheat to 325˚F. Spread the walnuts on a baking sheet and toast in oven until lightly browned, about 8 minutes. Shake pan halfway through so nuts toast evenly. Remove from oven and cool completely. Increase oven temperature to 350˚F. 2. In a food processor fitted with the steel blade, combine 1 cup of the nuts with 3 tablespoons sugar and process until the mixture is the consistency of fine meal. Add 3 more tablespoons sugar with the flour, baking powder and salt and pulse to incorporate. Add the butter and pulse on and off until the mixture is the consistency of fine meal. 3. Transfer the mixture to a large bowl and stir in the chocolate pieces. Make a large well in the center and pour in 1 cup whipping cream, the crème fraîche (or sour cream), and the vanilla. Whisk the liquids together. Using one hand, draw in the dry ingredients and mix until just combined. The mixture will be crumbly. 4. Turn the dough out onto a lightly floured work surface and knead gently a few times, then gather it into a ball. Roll or pat the dough into a circle 1 1/2 inches thick. Spray the inside of a 2-inch round cutter with nonstick spray and cut out circles, cutting them as close together as possible and keeping the trimmings intact. 5. Gather the scraps, press them back together, and cut out additional circles. (If the dough gets too soft to cut, refrigerate it for 15 minutes.) Place the circles parchment-lined baking sheet, spacing 2 inches apart. Freeze until firm, about 1 hour. 6. Brush the tops with the remaining 2 tablespoons cream and sprinkle with the remaining 1 tablespoon sugar. Using the large hole of a box grater, grate some of the remaining one-fourth cup nuts over the top of each scone. Bake for 30 to 34 minutes, until slightly firm to the touch and lightly browned. + If you do not want to bake all of the scones at this time, keep in freezer for later use. TAKE a LOOK:
4 Comments
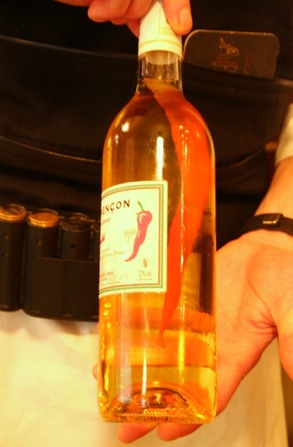
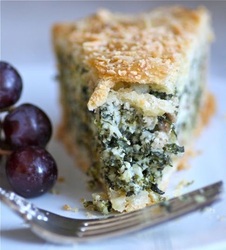
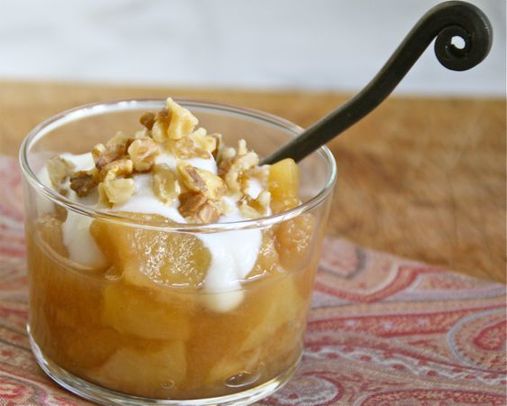
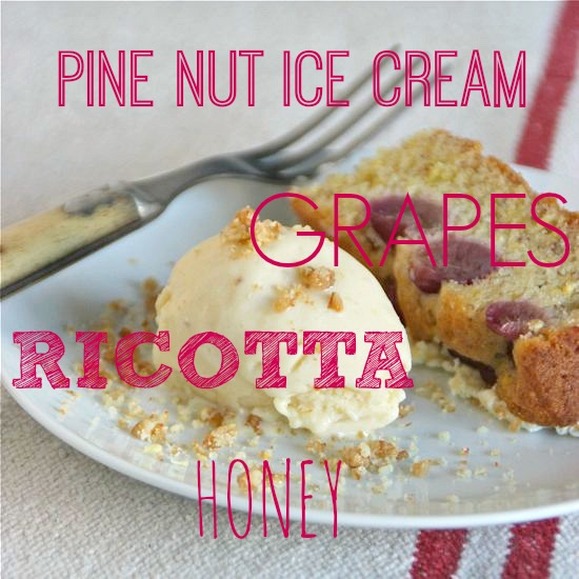 What I love most about visiting France is the inspiration I find in just about everything == it's endless. I believe it is impossible to be there and not be influenced in some small way, visually or gastronomically. Most likely, it will be both of those. In the weeks before I travel to Paris, or anywhere else in France, I note historical and cultural centers I should see in addition to pâtisseries I've been longing to visit and restaurants where I want to eat. But I'm also a big believer in just heading out in a different direction each morning to see where the streets take me. I am never disappointed. I'm always guaranteed unique discoveries that will inspire the way I approach something once I return home to St. Paul. 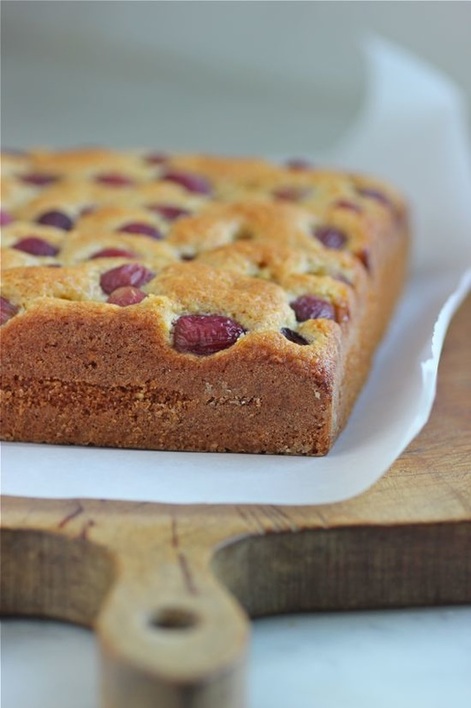 This recent trip was no exception. In addition to the 1200 plus photos I returned with, which remind me daily of the beauty that abounds, I ate foods that I knew I would attempt to recreate once at home. For me, that is the most meaningful thing I can do to remember a trip. There's nothing like being around the table on our patio with friends and family and eating a meal filled with delicious memories (A French Inspired Meal, French Cauliflower Soup with Truffle Oil). 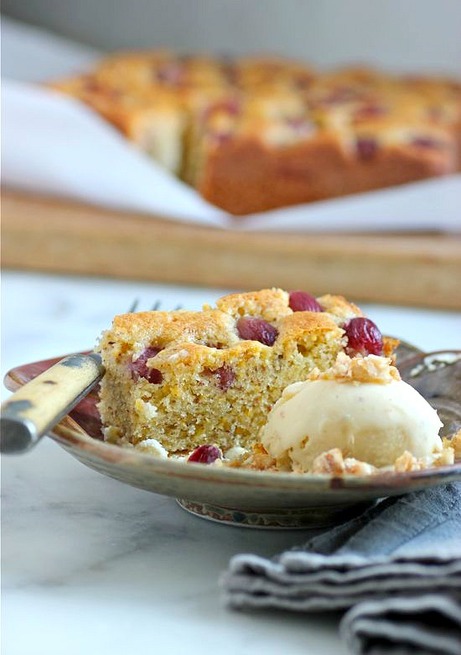 One of the culinary highlights during my time in Paris was dinner at Restaurant Verjus. I had read about it in food magazines and was reminded by friend and food blogger Stacey that the American owners, Braden Perkins and Laura Adrian (a St. Paul native ?!), started their French culinary career by running the highly successful underground restaurant, Hidden Kitchen, out of their Paris apartment. While googling info on Verjus, I came upon a restaurant review by Alexander Lobrano for Saveur magazine. He summed up beautifully my experience there. (If interested, read the 2012 article HERE.) There is no ordering à la carte at Verjus. The meal is a tasting menu of approximately 8 courses. The only thing we were asked before the service began, was if either my husband or I had any food allergies and if we wanted the staff to pair each course with the recommended wine. We ended up talking with diners on both sides of our table throughout our meal, and if I had to describe the atmosphere, it could only be "festive". Everyone dining at Verjus that night was very happy to be there. My little home kitchen project became the dessert I ate at Verjus that night. There are several components to this dish, but the ice cream, candied pine nuts and fresh ricotta can all be made ahead. I suggest making the cake the day of, only because I like how it slices; the cake's texture becomes more crumbly over time but the flavor is definitely as good. 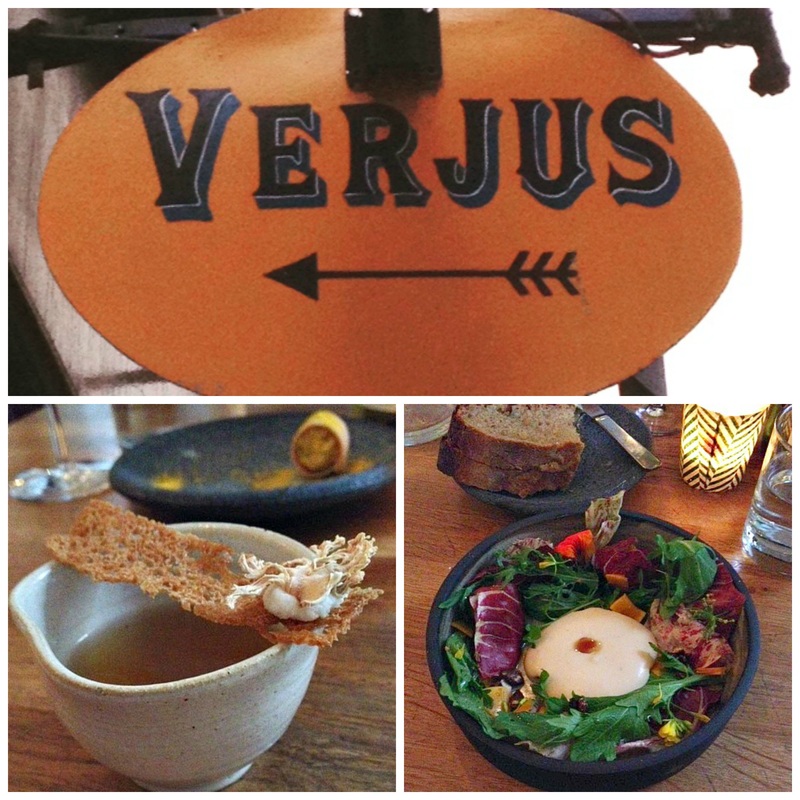 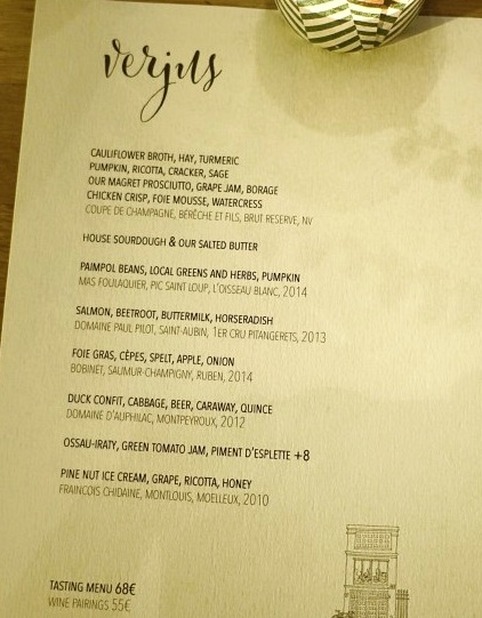 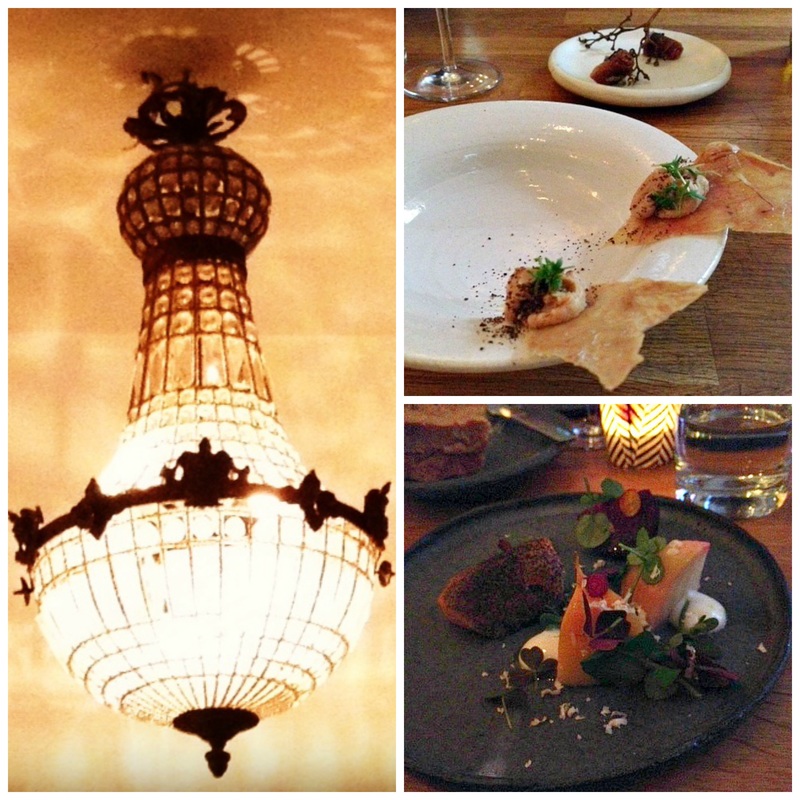 PINE NUT ICE CREAM + found on Chowhound MAKE ICE CREAM THE DAY BEFORE • 3/4 cup pine nuts • 3/4 cup sugar, divided •2. 1/2 cups whole milk • 1 teaspoon almond extract • 5 egg yolks 1. Put 3/4 cup of pine nuts in a pie pan and roast them at 350 until fragrant. Put roasted pine nuts and 1/4 cup sugar in a food processor. Process until you get a peanut butter-like consistency, Combine this with 2 1/2 cups whole milk in a saucepan. Add 1 teaspoon almond extract. Bring to a boil and then immediately remove from the heat. 2. While the milk is heating. whisk together the 5 egg yolks with the remaining 1/2 cup sugar. Once milk mixture boils, slowly pour it into the egg mixture. Pour back into saucepan and heat over low heat - DO NOT BOIL - stir constantly. Remove from heat once custard is thick enough to coat a spoon, about 10 minutes. Cool in the fridge for at least 3 hours or overnight. 3. Put into your ice cream maker and churn as directed. Freeze overnight. CANDIED PINE NUTS + found on about.com * 1/2 cup pine nuts • 1 1/2 teaspoons honey • 1 1/2 teaspoons water • 1 tablespoon granulated sugar • Pinch of salt • 1/8 cup Demerara sugar 1. PREHEAT oven to 350˚F. In a small bowl, whisk together the honey, water, salt, and granulated sugar until smooth. Toss the pine nuts and Demerara sugar in the honey mixture stirring well to coat. 2. Spread the nut mixture onto a parchment lined baking pan in a single layer and bake until the nuts are golden brown. Watch closely so nuts do not burn. Allow the nuts to cool to room temperature; chop coarsely. Keep candied pine nuts in an air-tight container. OLIVE OIL CAKE with RED GRAPES + recipe, adapted, found at marthastewart.com • 1/2 cup extra-virgin olive oil, plus more for pan • 1 cup unbleached all-purpose flour, plus more for pan • 1/2 cup almond meal • 1/4 cup coarsely ground yellow cornmeal • 1 1/2 teaspoons baking powder • 1/2 teaspoon salt • 2 large eggs • 2/3 cup sugar • 2 teaspoons finely grated lemon zest • 1/3 cup whole milk • 2 cups red seedless grapes 1. PREHEAT oven to 350˚F. Brush a 9-inch square pan with oil; dust with flour, tapping out excess. Whisk together flour, almond meal, cornmeal, baking powder, and 1/2 teaspoon salt. Beat eggs, sugar, and zest with a mixer on high speed until pale and fluffy. Reduce speed to low; slowly add the oil. Beat in flour mixture in 3 additions, alternating with milk, and beginning and ending with flour. 2. Spoon the batter into pan. Scatter 1 cup of grapes over the top. Bake for 15 minutes. Scatter the remaining 1 cup grapes over cake. Bake until cake is golden and a toothpick inserted into the center comes out clean; another 25 to 27 minutes. Let cool in pan on a wire rack, then turn out and slice into thin rectangles. 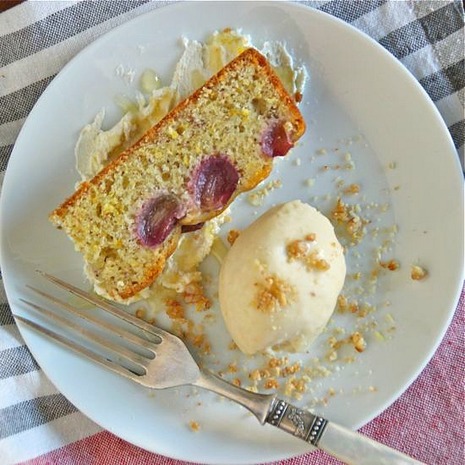 ASSEMBLY: • Fresh Ricotta • Good quality, runny Honey • Olive Oil Cake with Red Grapes • Pine Nut Ice Cream • Candied Pine Nuts 1. On a small plate, smear a large spoonful of Fresh Ricotta; drizzle ricotta with honey. Place a slice of the Olive Oil Cake on top of ricotta. Add a scoop of the Pine Nut Ice Cream to the plate and sprinkle with the Candied Pine Nuts. Serve and Enjoy! TAKE a LOOK:  On my recent trip to Paris, it was truly all about the food, and my husband was game for whatever I suggested. 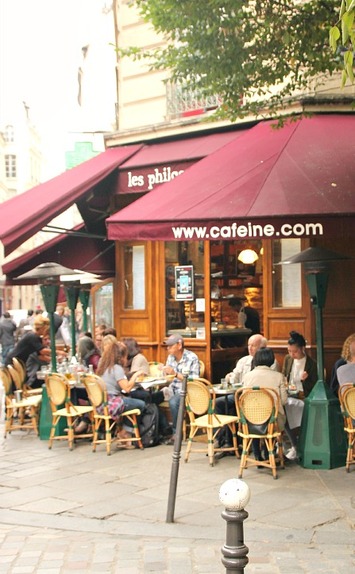 We were at a small hotel in Le Marais during part of our stay in Paris. The first evening there, out of convenience, we strolled half a block down the street for dinner at Le Café Les Philosophes. A restaurant at 28 Rue Vieille du Temple, I have walked past it often on previous visits, but had never stopped to eat. It was a perfect first meal. I ordered the wine that night, choosing Le Pimencon D'Alain Darroze. Very interesting... a white wine with a hot red pepper floating inside the bottle. At first sip, you taste a slightly sweet wine, followed by heat slowly making its way down your throat. Did I say, interesting? After my bowl of onion soup (delicious, I might add) I ordered the dessert of the day -- a slice of prune tart. Unfortunately is was sold out and erased from the tableau du jour; popular, it seems.
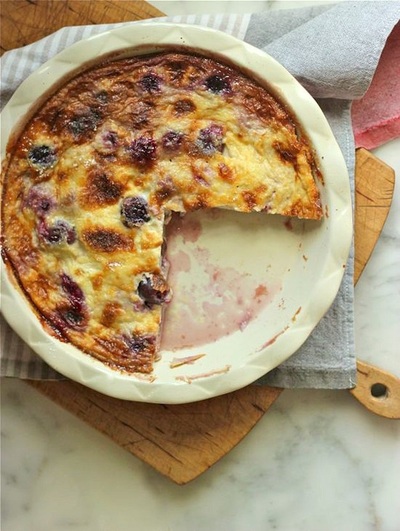
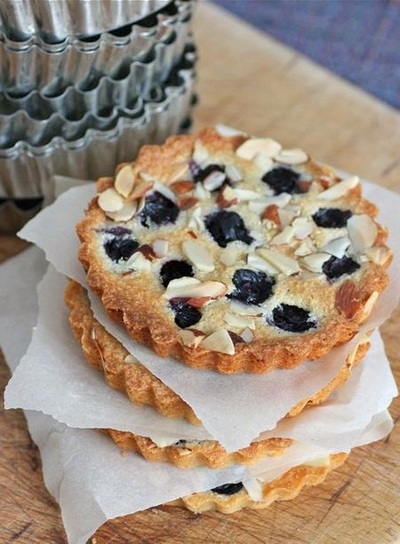
After dinner, we spent the night walking along the right and left banks of the Seine where we saw... a prune festival! I'm thinking... the French take prunes seriously. One of several amazing meals we ate in Paris was the next night at SPRING PARIS. It was also one of two restaurants we visited where the chef was an American. Dinner at Spring Paris is a "prix fixe" menu of 4 courses that aren't revealed to the diner until delivered to the table. When we arrived we were asked if we had any allergies. After that, what we were served was a delicious surprise. 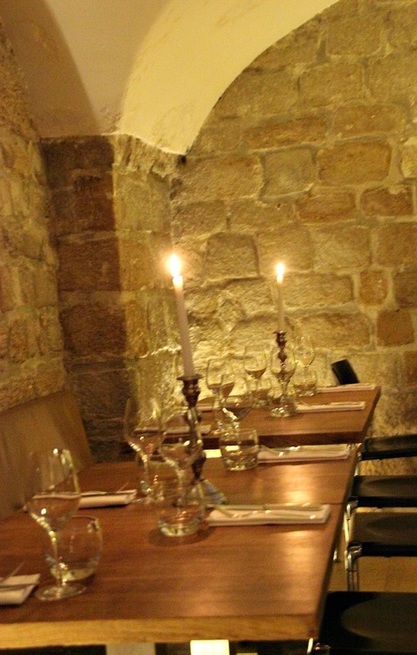 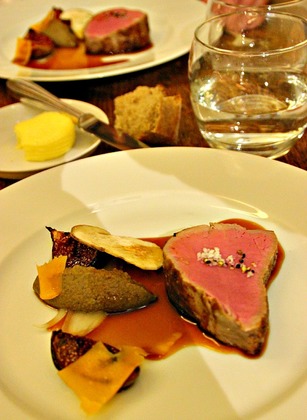 My husband is still raving about the veal filet we ate that night.  The first part of our fourth course, the dessert, was a chocolate wafer with mint gelato. The second was a prune tart  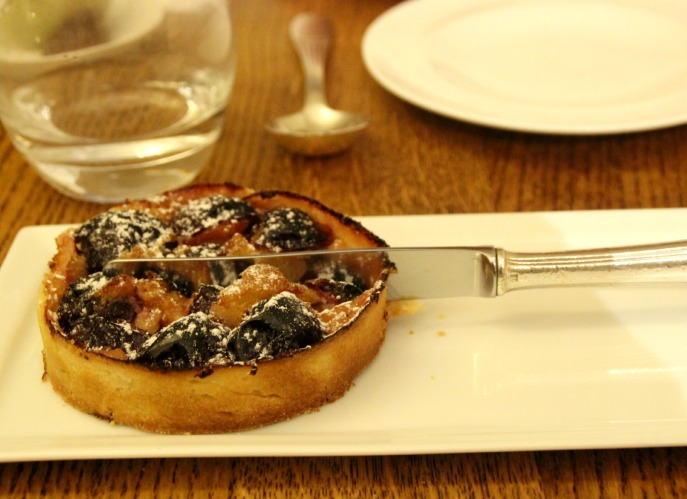 So how could I return home and not make a prune tart? The recipe I used was a Provencal Prune and Almond Tart from Patricia Wells. The dried prunes are plumped in hot black tea before being added to a pastry shell filled with almond cream. It was delicious and I'd have to say, just like the prune tart I ate at Spring Paris. The other restaurant we both loved and with an American at its helm, was VERJUS. That's for another day and another post...  • 1 partially prebaked and cooled flaky sweet pastry shell (I used an 8-inch ring, but suggest a 9-inch tart pan with removable bottom to use all of the almond cream) • 2 cups strong black tea • 1 pound prunes, pitted • 1/4 cup whole unblanched almonds • 1 large egg, slightly beaten • 5 tablespoons granulated sugar • 2 tablespoons plum eau-de-vie or brandy • 3/4 cup heavy cream • Confectioners' sugar, for garnish 1. At least one hour before preparing the tart, pour the hot tea over the prunes and set aside to marinate. 2. PREHEAT OVEN to 375 degrees. 3. Prepare the cream filling: In the bowl of a food processor, grind the almonds to a fine powder. Thoroughly blend the almonds with the egg, sugar, brandy and cream. The mixture should be very smooth. 4. Thoroughly drain the prunes, discarding the soaking liquid. Carefully arrange the prunes in the cooled, prebaked tart shell. This will seem like a lot of prunes, and you may have to arrange them in two layers. Pour the cream filling over the prunes and place the tart in the center of the oven. 5. Bake until the cream filling has set and the tart shell is nicely browned, about 45 minutes. Remove from the oven and sprinkle with confectioners' sugar. 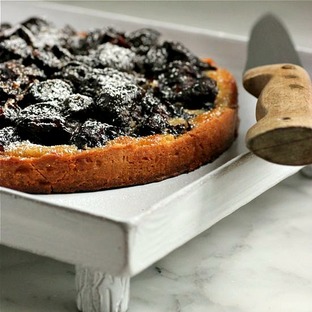 TAKE a LOOK: 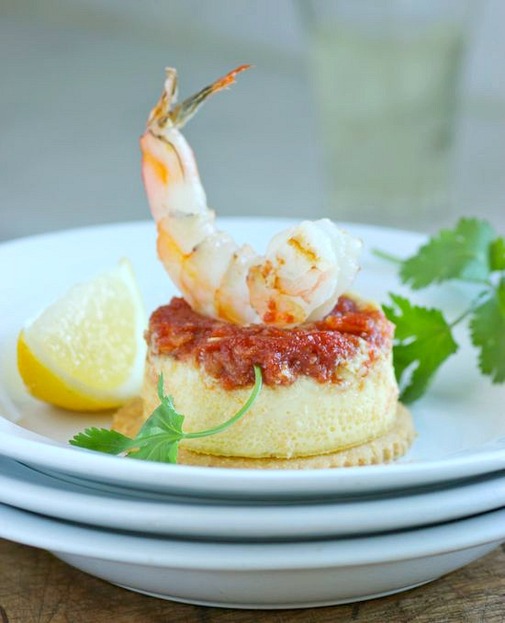
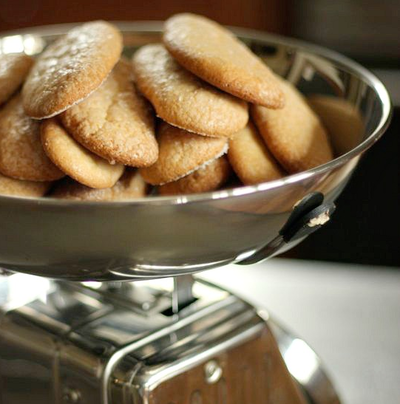
Whenever I visit France, I'm there in search of inspiration. And France never disappoints. Last summer in the south of France, it seems as though every amazing meal I ate incorporated a savory shortbread into the dish. 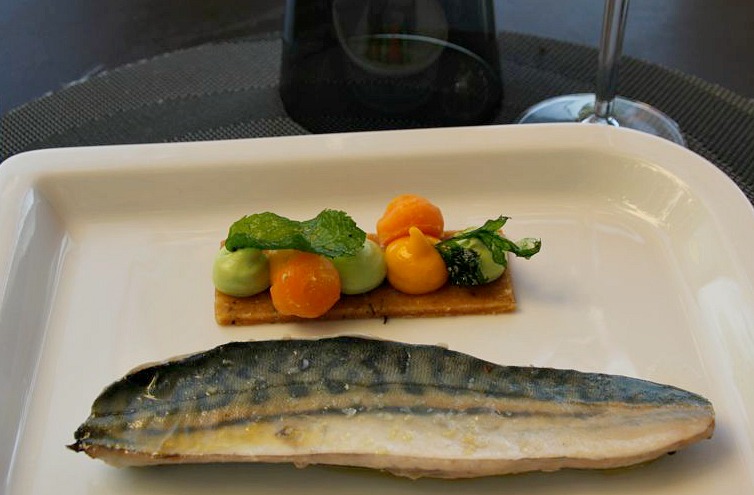
At Le Château de Mazan (check out the beautiful hotel and restaurant HERE) assorted chilled vegetable purées were piped atop a thin savory cookie. 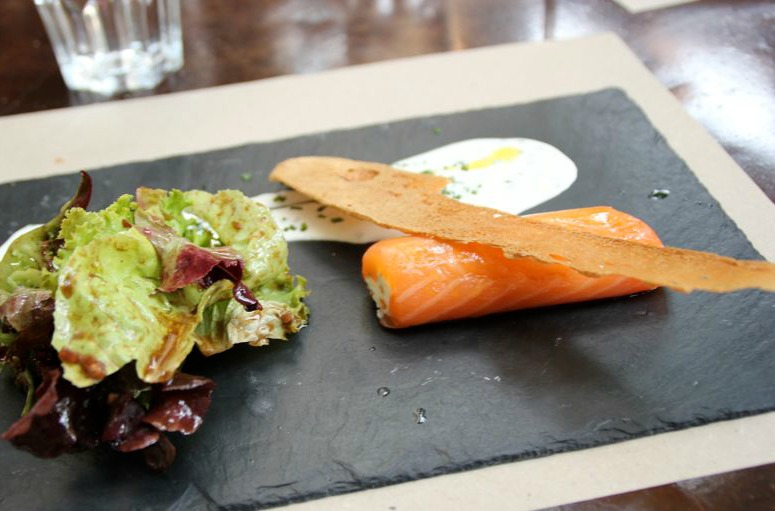
At Chez Serge in Carpentras, my first course balanced a savory cookie over my smoked salmon. 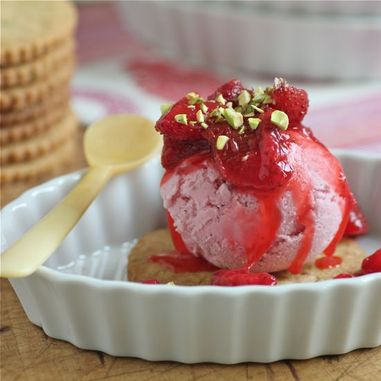
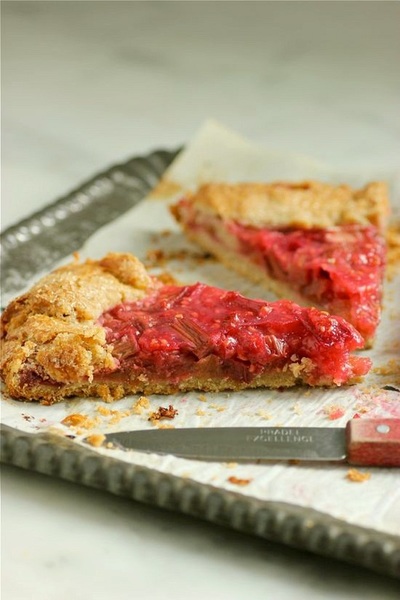
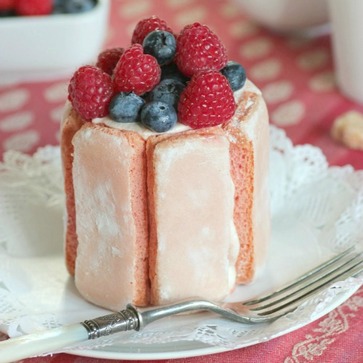
When I returned home with thoughts of cookies, savory and sweet, I made this dessert of fresh strawberry ice cream topped with strawberry rhubarb compote, and placed it on a pistachio cookie. ... and I continue to dream of ways to include savory pastries (and cookies) in the meals I create. 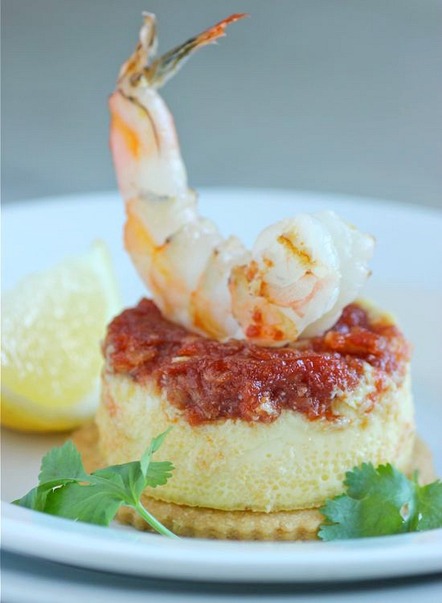
For this appetizer or first course, I rested a savory jalapeño Havarti custard with honeyed cocktail sauce on top of a delicate cornmeal cookie, then crowned it all with a giant grilled, lemon shrimp. I can't wait to make this part of an al fresco meal on the patio this summer! I fortunately had some leftover cocktail sauce that a friend made, and which I used in this recipe. * Ina Garten's cocktail sauce (recipe HERE) would be a good substitute. An excellent commercial brand of cocktail sauce would also work as a coating for the custard. 
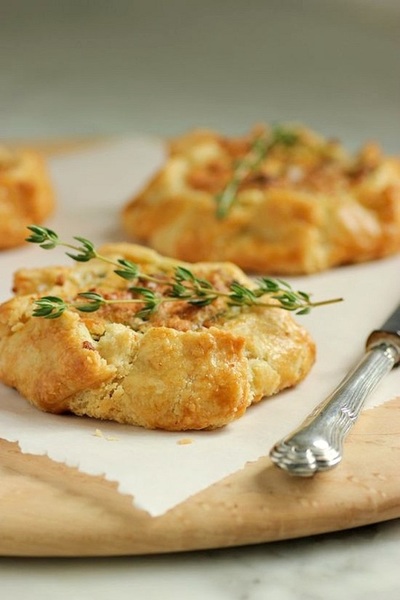
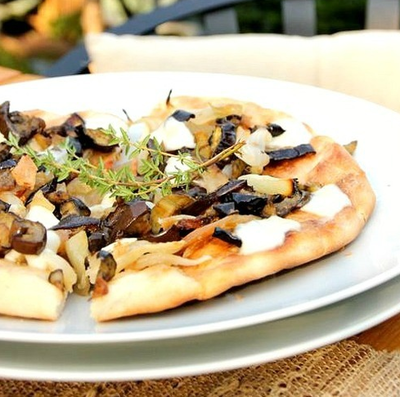
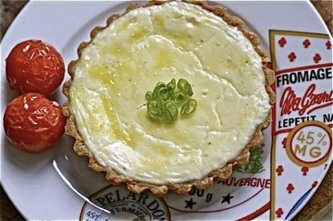
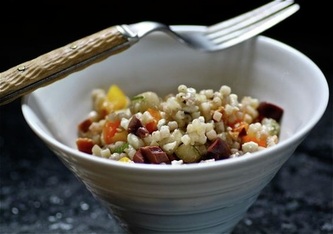
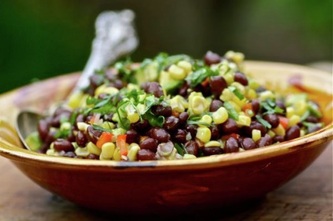
SAVORY CORNMEAL COOKIES makes 8 cookies • 1 cup unbleached, all-purpose flour • 1/8 cup cornmeal • 1/2 teaspoon Maldon salt or fleur de sel • 6 tablespoons cold unsalted butter, cubed • 1 large egg yolk 1. Preheat oven to 350˚F. Line a baking sheet with a piece of parchment paper and set aside. 2. Combine the flour, cornmeal and salt in the bowl of a food processor; pulse once or twice. Add the cubed butter and pulse until small pieces form. Add the egg yolk and pulse briefly until the mixture just starts to come together. Do not over mix. 3. Transfer the mixture to a lightly floured work surface. Roll dough to approximately 3/8-inch thickness and cut out 3 1/2-inch to 4-inch rounds. Place cookies on prepared baking sheet. 4. Bake the cookies on the middle rack of the preheated oven for 25 minutes, or until golden. Remove and allow to cool. JALAPENO HAVARTI CUSTARDS makes 4 servings • 3 large eggs • 3/4 cup whole milk • 1/2 teaspoon kosher salt • 1/3 cup finely diced Jalapeño Havarti • 2 tablespoons honey • 4 tablespoons cocktail sauce (see * above) 1. Preheat oven to 375˚F 2. Prepare four 1/2 cup ramekins by drizzling 1/2 tablespoon honey into each. Gently spread 1 tablespoon cocktail sauce over the honey, evenly coating the bottom of the ramekin. 3. In a medium bowl, whisk together the eggs, milk, salt, and Jalapeño Havarti. Divide the custard evenly between the ramekins. Place the ramekins in a baking pan and make a bain-marie (water bath) by pouring hot water in the pan to reach halfway up the sides of the ramekins. 4. Gently slide the baking pan onto the middle rack of the oven and bake the custards for 30 minutes, or until set. When finished baking, remove from the oven and then remove the ramekins from the bain-marie. Cool for 10 minutes. 5. Prepare and grill shrimp while custards are resting. GRILLED LEMON SHRIMP • 1 to 2 large shrimp for each serving of savory custard • Olive oil • grated lemon zest • kosher salt • cilantro, for serving 1. Peel and devein shrimp. In a bowl, toss the shrimp with a good drizzle of olive oil. Add lemon zest and sprinkling of salt. 2. Grill shrimp either on a preheated grill pan indoors or on an outdoor charcoal or gas grill until pink and cooked through. TO ASSEMBLE: 1. Using a small paring knife, run the tip around the outside of the custards. Top custard with a small plate and invert. Shake to release custard. Place a cookie on a serving plate and using a thin metal spatula center a custard on the cookie. Crown the custard with a grilled shrimp and sprinkle with chopped cilantro. Repeat with remaining cookies, custards, and shrimp. Serve immediately. TAKE a LOOK: 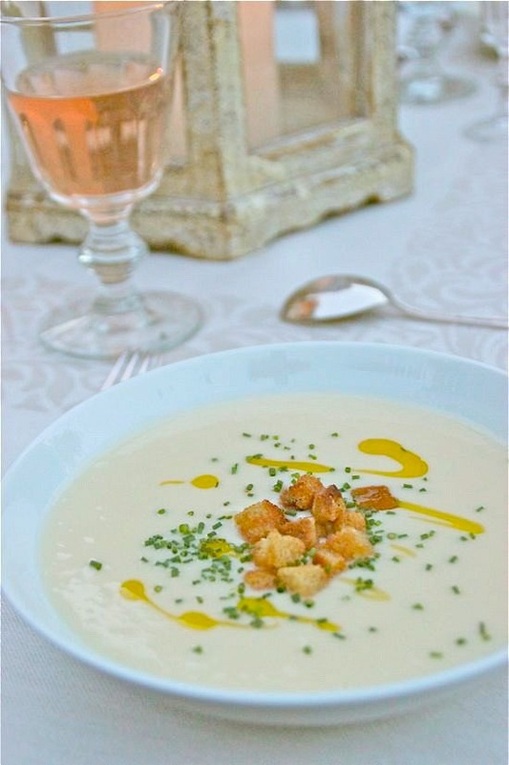 Usually, when I travel, I have good food and not such good food. On my recent trip to Provence, I'd have to say that sister Susan, friend Renate, and I ate quite well at each meal. No complaints. No negative critiquing by me or the others. And three of our meals were exceptional. At the beginning of our trip, we stayed in the town of Carpentras and ate at restaurant Chez Serge. Before a previous trip to France, I had read about Chez Serge in the New York Times and then ate lunch there. On this trip, we booked a reservation for dinner. 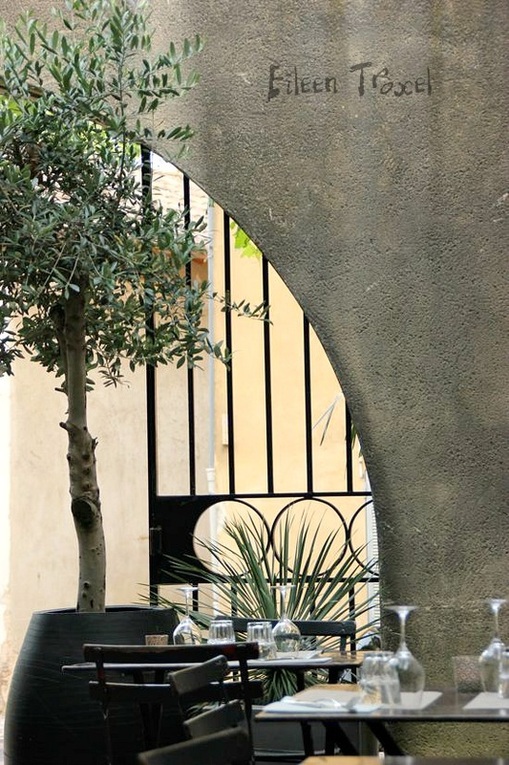 The night we ate at Chez Serge, there was an abundance of black truffles... 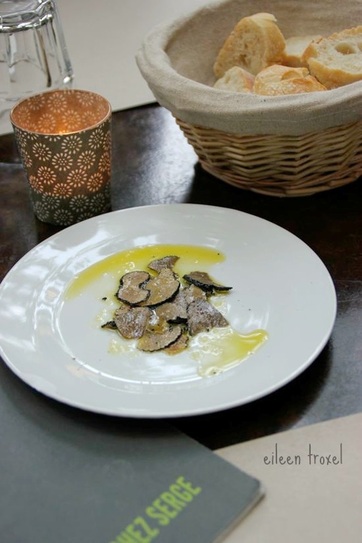 We were served an Amuse Bouche of sliced black truffles and olive oil along with a basket of French bread. 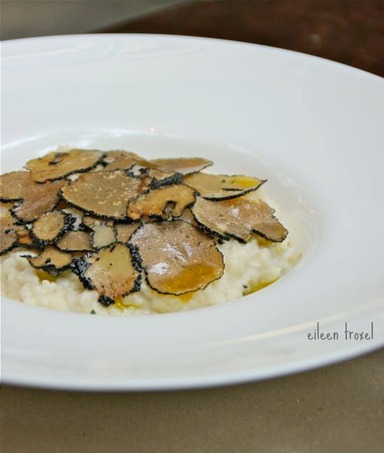 Susan and Renate ordered the black truffle risotto as their main course. Our next exceptional meal was at Chateau de Mazan's Restaurant l'Ingénue. (more on that in a future post). It turned out to be our favorite -- partly due to the magical setting, but mostly because of the incredible meal. There we again had truffles in our amuse bouche; a small bowl of chilled, puréed Cavaillon melon with several thinly-shaved slices of black truffle on top. At one of the Provençal weekly markets we visited, there was a young man selling black truffles. He had a small table set up with just a handful of truffles for sale. He could tell I was interested and held his largest truffle under my nose. I knew I couldn't risk having it confiscated at the airport so I reluctantly thanked him and walked away. I think of that truffle often... 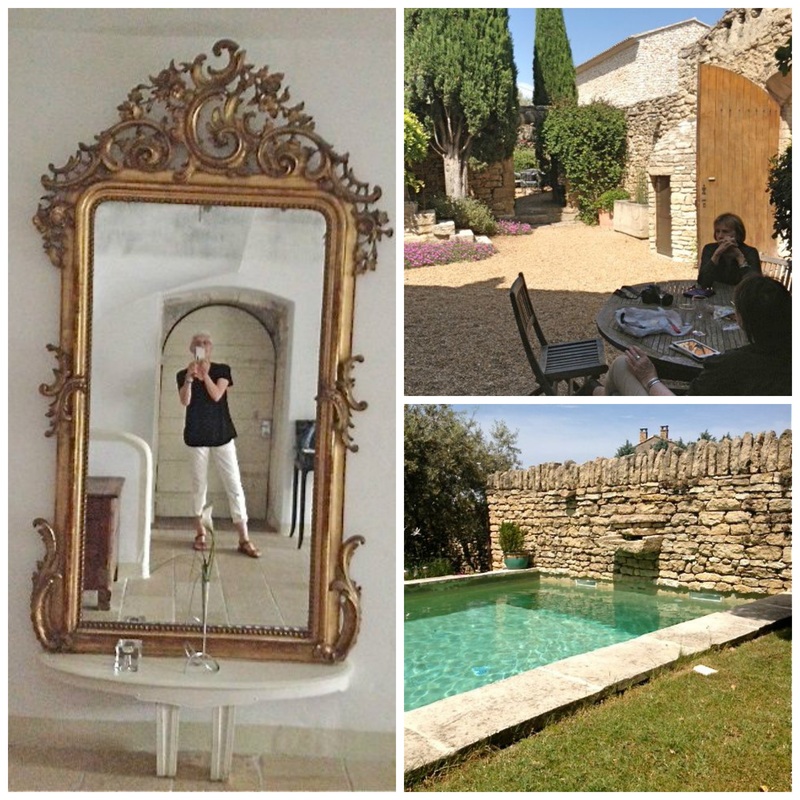 The second half of our trip we moved to Le Moulin des Sources in Les Gros, Gordes. Anyone planning a trip to Provence should check out this Bed & Breakfast's website. It is charming beyond belief and a good location for the places we like to visit when there. Before this trip we had never been to Ménerbes, but this time drove to the village 15 minutes from our B&B to dine at La Verandah. And this is where I had the Cream of Cauliflower Soup with Truffle Oil, Croutons, and Chives for the first time. The three of us had this soup for our first course and I think we agree that we would have been happy with nothing but that soup as our dinner. It was amazing. Amazing enough for me to come back home and immediately make it for a dinner party I was hosting the following week. On my last visit to Paris in 2011, I also had a cream of cauliflower soup that was so good I needed to recreate it when I returned home (recipe HERE). I use the same recipe for both soups. The differences between the two (besides the temperature) are the oils and the toppings that are used to finish off the soup.  • 2 heads cauliflower • 6 tablespoons unsalted butter • 2 leeks, white part only, finely sliced and well-washed (about 5 ounces) • 3 ounces unbleached, all-purpose flour • 2 quarts plus 2 1/2 cups chicken stock • 3/4 cup plus 2 tablespoon heavy cream • 2 large egg yolks • Coarse salt and freshly ground pepper to taste • Truffle oil • Croutons (recipe follows) • Fresh chives, finely chopped 1. Wash, core, and chop the cauliflower. Set aside. 2. Melt the butter in a stockpot over medium heat. When hot, add the leek and cook, stirring occasionally with a wooden spoon for several minutes, or until the leek has sweated its liquid but has not taken on color. 3. While stirring, sift the flour into the leek-butter mixture, and fully incorporate. Remove from the heat and set aside about 10 minutes, or until cooled slightly. 4. Place the stock in a saucepan over medium-high heat. Bring to a simmer, skimming off any foam or particles with a metal spoon. Remove from the heat and, whisking constantly, add the hot liquid to the leek mixture. 5. When well blended, return the stockpot to medium heat and bring to a simmer. Immediately add the reserved cauliflower and return to a bare simmer. Simmer, stirring occasionally with a wooden spatula to ensure that the bottom does not stick or burn, for about 20 minutes or until the cauliflower is tender. If at any point the cauliflower sticks or scalds, remove the cauliflower from the heat, transfer the soup to a clean pot without scraping the burned portion into the new pot, and return it to the stove. Do not allow the soup to continue cooking once it sticks or burns. 6. Remove the pot from the heat and either pass the soup through a food mill or purée it in a blender. You want this soup to be silky-smooth. If necessary, after blending the soup, press through a fine mesh colander. (I purchased a Vitamix blender just for this soup!). 7. Place a saucepan with the cauliflower soup over medium heat. Add 1/2 cup plus 2 tablespoons of the heavy cream and bring to a simmer. 8. In a small bowl, whisk together the remaining 3 tablespoons cream and the 2 egg yolks. Whisk in some of the hot soup to temper the mixture before whisking it into the simmering soup. Taste, and if necessary, season with salt and pepper. 9. Ladle soup into bowls. Drizzle with truffle oil. Garnish with croutons and chopped chives. + CROUTONS No cutting corners on these croutons. The amount of butter and oil seem excessive, but don't cut back on those ingredients! • 3 tablespoons butter • Extra-virgin olive oil • 6 slices of a good, white loaf bread (I use a sourdough loaf from Whole Foods), crusts trimmed and bread cut into 1/2-inch cubes. 1. Melt butter in a large skillet. Add enough olive oil to cover the bottom of the skillet. 2. Add the bread cubes and over medium-low heat use a thin metal spatula to turn the bread cubes. You want all of the croutons to be evenly covered in butter-oil. Add a little more oil if necessary. Keep turning the bread cubes, almost constantly. Your goal is to have them perfectly golden on all sides, but not burnt! When golden, remove from the pan to a small plate or bowl and set aside. TAKE a LOOK: 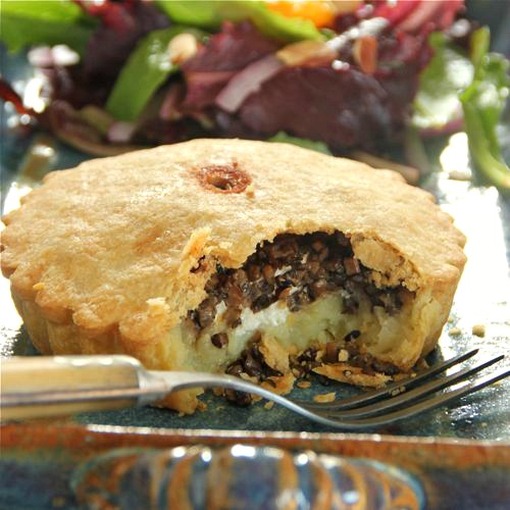 My Individual Potato and Mushroom Tortes were inspired by a recent lunch I had at The Lynn on Bryant in Minneapolis. I have visited this new, little restaurant twice in the past week (Oh-so-good!) If you live in the Twin Cities, or if you are visiting, you must go. First time there, I had a breakfast of soft boiled eggs and toast batons. And most recently for lunch, I ordered The Lynn's Potato and Mushroom Torte. I'm a stickler when it comes to pastry crust -- there are so many bad crusts out there! But everything about this "torte", from the crust to the filling, was perfect. Perfect enough for me to come back home to my own kitchen and start recreating the lunch I had just eaten. 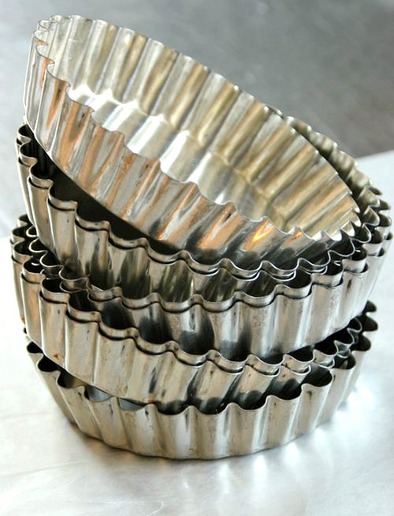 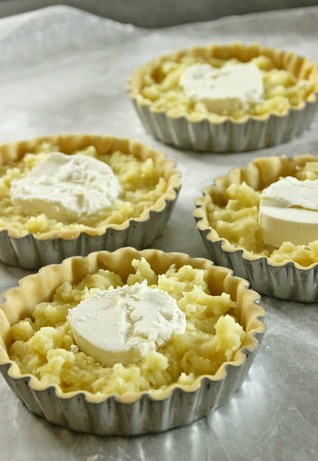 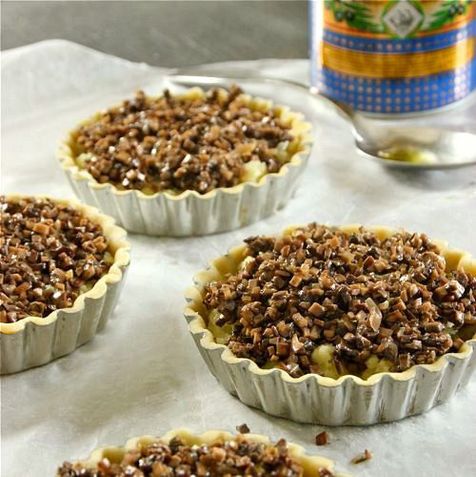 I baked four individual tortes in 3 3/4-inch tart pans, but a single 9- to 10-inch tart pan can be substituted. NOTE: The only change, if using a larger tart pan, would be to increase the mushroom filling by 1 1/2 times the amount -- 12-ounces of cremini mushrooms instead of the 8-ounces I used to fill the four individual tortes. Adjust amount of other ingredients in the filling accordingly. Each torte has a rich, buttery double crust with a layer of mashed Yukon Gold potatoes -- made with a healthy combination of olive oil and buttermilk -- and a disk of goat cheese pressed into the center. The final layer of finely-minced, sherry mushrooms is topped off by another round of flaky pastry. 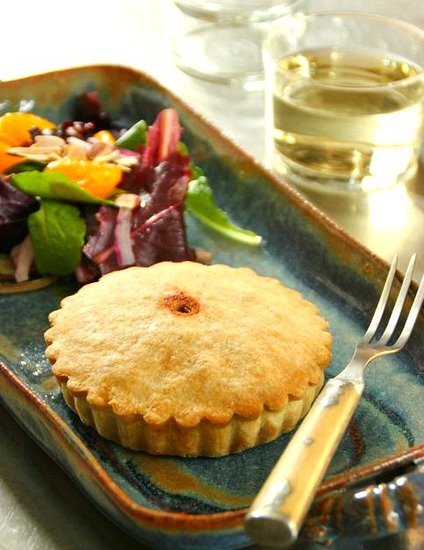 And there is nothing I would change in my version of this delicious vegetarian torte. The little, individual servings would be spectacular on a spring luncheon or brunch menu. I made all of the components the day before baking, making assembly the day of much less time-consuming. 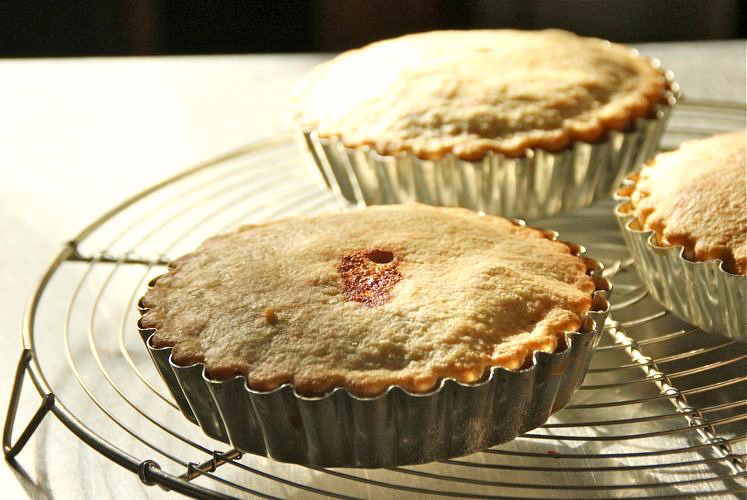 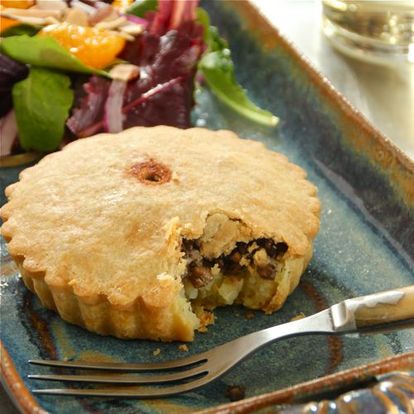  INGREDIENTS For Crust: • 2 cups unbleached, all-purpose flour • 1/2 teaspoon salt • 10 tablespoons cold, unsalted butter, cubed • 1 large egg, beaten to break-up yolk • Ice water, if needed For the Mushroom Filling: • Extra-virgin olive oil • 1 large shallot, finely chopped • 8-ounces cremini mushrooms, finely diced ( see NOTE above) • 1/4 teaspoon dried thyme • Dry sherry • Kosher salt and freshly ground pepper, to taste For the Potato Filling: • 1 pound Yukon Gold potatoes • Extra-virgin olive oil • Buttermilk • Kosher Salt For Assembly: • 4 disks of goat cheese, sliced 1/2-inch-thick (6 disks if making one large torte) • Extra virgin olive oil (I used Nicholas Alziari Nicoise Olive Oil. Any olive oil with a mild, buttery flavor would work well here) • Kosher salt • 1 egg, lightly beaten TO MAKE the CRUST: 1. In the bowl of a food processor, pulse the flour and salt briefly. Add the cubed butter and pulse, in short bursts, until the size of small peas. Add the egg and pulse. If the dough does not start to come together, add ice water while pulsing. (I added 3 tablespoons of ice water to my dough before the dough started to come together.) Do not over-process. 2. Transfer the dough to a large sheet of plastic wrap, flatten into a large disc, wrap completely in plastic and place in refrigerator to chill at least 2 hours. TO MAKE the MUSHROOM FILLING: 1. Drizzle olive oil onto a skillet and warm over medium heat. Add the shallots and mushrooms; cook, while stirring occasionally, until the shallots are translucent and the mushrooms begin to soften. 2. Stir the dried thyme into the mixture, then add a generous splash (to your liking) of the dry sherry. Continue to cook and stir over medium-low heat until most of the moisture has evaporated. Season with salt and freshly ground pepper and remove from the heat. Transfer to a container, and when it has cooled, place container in refrigerator until assembly. TO MAKE the POTATO FILLING: 1. Place the potatoes in a pot of cold water and bring to a boil over high heat; reduce heat to medium and simmer until tender. Drain. When cool enough to handle, peel the potatoes and return to the pot. 2. Over low heat, gently mash the potatoes and add a good drizzle of olive oil, then buttermilk to achieve a somewhat creamy consistency. Add salt to taste. 3. Transfer the mashed potatoes to a container and cool to room temperature; store in refrigerator until assembly. ASSEMBLY: PREHEAT OVEN to 425˚F 1. Divide the dough into eight wedges (If making one large torte, divide dough into two pieces). Roll one wedge in-between two pieces of plastic wrap or waxed paper, lightly dusting the dough on both sides with flour. Roll dough into a disk 1/8-inch thick. Transfer dough to a tart pan and gently press into the pan. Do not stretch the dough. Using the rolling pin, trim the dough along the top edge of the tart tin. Place tin in refrigerator to keep cold and continue to line the remaining tart tins with dough. 2. In a small bowl, gently whisk an egg. Set aside. 3. Take the chilled mashed potatoes and fill each tart shell half full (see photo). You will not need all of the mashed potatoes. Press a disk of goat cheese into the center of each mashed potato filling. Divide the reserved mushroom mixture evenly between the tart tins and gently spread to cover the mashed potatoes. Sprinkle each torte with a little kosher salt, then drizzle each with about 1 tablespoon extra-virgin olive oil. 4. Roll the remaining wedges of pastry dough to top the tortes. Using a drinking straw, stamp a little hole in the center of the rolled dough (or use a sharp knife to make a couple of small slits once the top dough has been placed over the filling). This will allow steam to escape while baking. Brush the top edge of the dough in the tart pans using the reserved beaten egg. Place the rolled dough on top, centering the small stamped hole. Gently press the dough against the egg-brushed edge of pastry in the tart pan and using the rolling pin, trim the torte of the excess pastry dough. 5. Place the tortes on a jelly-roll pan and slide onto the middle shelf of the pre-heated oven. Bake for approximately 35 minutes or until the dough is golden. Remove from oven and transfer tortes to a rack. Allow to cool briefly, then unmold and serve with a green salad. * I ate a left-over, refrigerated Potato and Mushroom Torte, out-of-hand this morning for breakfast... and it was still delicious! TAKE a LOOK:  Paris, and all that I experienced in that amazing city, is still heavy on my mind. It is able to inspire me like nothing else... and, with Paris as my focus, I just hosted a dinner for six which included our friends next door. I was joined on this last trip to Paris by my neighbor Debbie, and this dinner resulted in a French collaboration between the two of us. Never one to return from Paris empty-handed, I did some shopping while in France; how could I not? I brought back the Francoise Paviot paper napkins in the photo below, knowing they would be perfect for a dinner such as this. I also had an apron on my shopping list, but when I saw a "Blouse Laborant" (a stylish lab coat hanging next to the doctors' scrubs, of course) at MONOPRIX, a French store that I refer to as France's TARGET, I thought -- This is it! (Sorry, no photos of me in the lab coat...). But the best things I always bring back from a trip to Paris and France are the experiences I had, and the photos (this time numbering 1000). The best memories from this trip -- the food! I hope you enjoy the party...   • Piscine Bocca • French Cheese Platter • Roquefort Soufflé • Risotto with Sea Bass and Orange Oil • Hazelnut and Mandarin Salad • Cream of Cauliflower Soup with Parsley Oil, Almonds, and Carrot-Ginger Sorbet • Almond Cream Apple Tart Of the six courses that were served at my dinner, only two of them were not directly influenced by meals I had eaten in Paris -- the Hazelnut and Mandarin Salad and the Almond Cream Apple Tart. With music by Jazz de Paris playing in the background (CD purchased while they were performing at the Sunday morning Rue Moufftard street market), we began the evening with a French Cheese Platter, consisting of a Comté and a triple crème that Debbie purchased at Fromagerie Barthélémy, 51 rue de Grenelle on the Left Bank. We served the cheese with Piscine Bocca, a Prosecco and strawberry drink we had (several times) at La Bocca Della Verita on rue du Sabot. (I made ours with Monin Strawberry Sirop added to the Prosecco, altho' the drinks in Paris were likely made with sweetened, puréed strawberries). 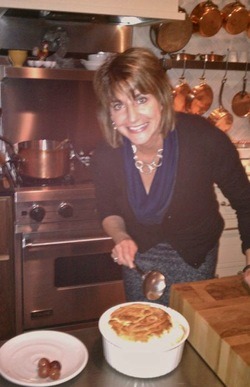 Debbie took a cooking class with Olivier Berte in his home kitchen (which Debbie would highly recommend to anyone wanting to take a cooking class while in Paris), and for our dinner's second course, made the Roquefort Soufflé that they made together there. It was perfect -- a light, moist and creamy interior with a nicely browned top. < Debbie with her beautiful Roquefort Soufflé. (photo taken on my husband's phone) Following the soufflé, I prepared a risotto similar to the one I had eaten at l'Epi Dupin. I did not photograph the risotto with orange oil and red snapper my last night in Paris (didn't have my camera), nor did I photograph the risotto with orange oil and sea bass that I made for my French dinner (imperfect conditions: too dark and too busy). The sea bass was fresher and considered the best buy of the day at Coastal Seafood, so it became a substitute for the snapper. The risotto at l'Epi Dupin was the creamiest I have ever eaten, and I actually used heavy cream in the preparation of mine. The risotto was followed by a green salad with hazelnuts and mandarins from the Zuni Café Cookbook; refreshing after the rich risotto dish. 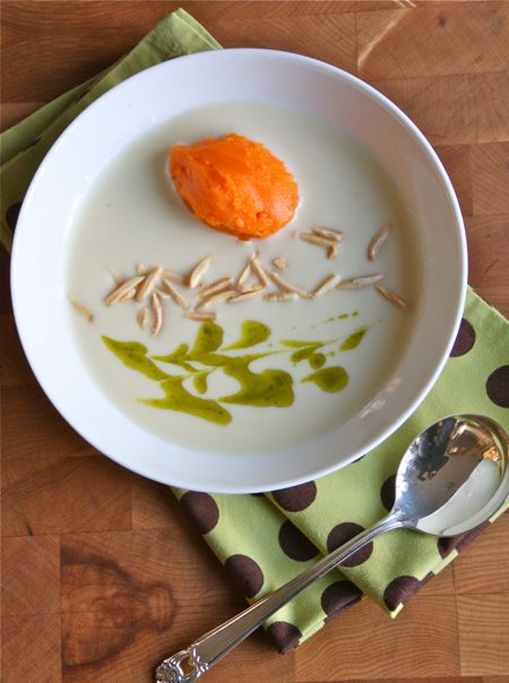 The Pièce de Résistance for me was the Chilled Cauliflower Soup with Parsley Oil, Almonds, and Carrot-Ginger Sorbet. I had this as my first course at l'Epi Dupin. Perfect, first of all, for the warm September, 80+ degree day -- it was a chilled soup! But it was the combination of tastes and textures that made this so appealing and so GOOD! You can't even imagine... There are several steps involved in creating all the parts to this soup, but you can start several days ahead, as I did, so when you finally are ready to serve it, it goes together in a flash. I made the soup (without the addition of the cream and the egg yolks) a week prior to the dinner and froze it. Three days before my dinner, I transferred it from freezer to refrigerator. The morning of the dinner I heated the soup, added the cream and egg yolks as the recipe called for, then chilled the soup until it was served that night. The parsley oil was made 3 weeks in advance and kept in a jar and refrigerated (Just be sure to pull it from the refrigerator at least an hour ahead of when you'll need it so the oil can come to room temperature). The Carrot-Ginger Sorbet was made 4 days before the dinner and stored in a container in my freezer. Toast some slivered almonds in a pan on top of your stove the day before you plan to serve the soup. Keep them in a small, air-tight container. 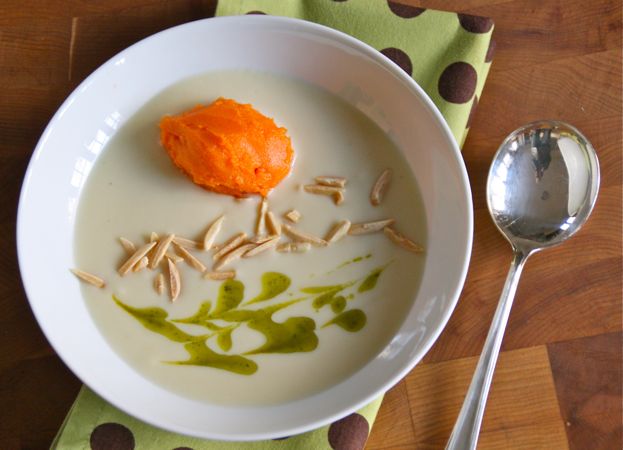  PARSLEY OIL | adapted from a recipe by Patrick Ponsaty • 1/2 cup olive oil • 1 cup fresh parsley, chopped 1. Heat the olive oil in a skillet. Add the parsley and lightly fry for about a minute, infusing the oil with the parsley. Let rest until cooled somewhat and purée in a blender. Strain the parsley oil into a glass jar. Cover and refrigerate for up to 3 weeks. Bring back to room temperature before using. CREAM of CAULIFLOWER SOUP | adapted from The Fundamental of Classic Cuisine by The French Culinary Institute with Judith Choate • 2 heads cauliflower • 6 tablespoons unsalted butter • 2 leeks, white part only, finely sliced and well-washed (about 5 ounces) • 3 ounces unbleached, all-purpose flour • 2 quarts plus 2 1/2 cups chicken stock • 3/4 cup plus 2 tablespoon heavy cream • 2 large egg yolks • Coarse salt and freshly ground pepper to taste 1. Wash, core, and chop the cauliflower. Set aside. 2. Melt the butter in a stockpot over medium heat. When hot, add the leek and cook, stirring occasionally with a wooden spoon for several minutes, or until the leek has sweated its liquid but has not taken on color. 3. While stirring, sift the flour into the leek-butter mixture, and fully incorporate. Remove from the heat and set aside about 10 minutes, or until cooled slightly. 4. Place the stock in a saucepan over medium-high heat. Bring to a simmer, skimming off any foam or particles with a metal spoon. Remove from the heat and, whisking constantly, add the hot liquid to the leek mixture. 5. When well blended, return the stockpot to medium heat and bring to a simmer. Immediately add the reserved cauliflower and return to a bare simmer. Simmer, stirring occasionally with a wooden spatula to ensure that the bottom does not stick or burn, for about 20 minutes or until the cauliflower is tender. If at any point the cauliflower sticks or scalds, remove the cauliflower from the heat, transfer the soup to a clean pot without scraping the burned portion into the new pot, and return it to the stove. Do not allow the soup to continue cooking once it sticks or burns. 6. Remove the pot from the heat and either pass the soup through a food mill or purée it in a blender. Once processed, pass through a chinois into a clean saucepan. (I do not own a chinois, but used a very fine strainer instead and slowly pressed through all of the puréed soup into a bowl. It is a slow process, but the results are a silky-smooth liquid). This is the point I poured the soup into a container and froze it for several days. Once defrosted, I proceeded with the last steps. 7. Place a saucepan with the cauliflower soup over medium heat. Add 1/2 cup plus 2 tablespoons of the heavy cream and bring to a simmer. 8. In a small bowl, whisk together the remaining 3 tablespoons cream and the 2 egg yolks. Whisk in some of the hot soup to temper the mixture before whisking it into the simmering soup. Taste, and if necessary, season with salt and pepper. Chill until ready to serve. CARROT-GINGER SORBET | recipe from Peggy Lampman • AnnArbor.com • 1 tablespoon finely chopped orange zest, plus fresh squeezed orange juice to equal 1/2 cup • 3/4 cup sugar • 3 cups carrot juice (available at Whole Foods) • 1 tablespoon grated fresh ginger 1. Mash orange zest with 1 teaspoon of the sugar to release the orange oils. 2. Combine orange and carrot juices. Stir in ginger, orange zest and remaining sugar and let stand until sugar dissolves, about 10 minutes. Stir well and refrigerate until well-chilled, about 2 to 4 hours. 3. Pour into an ice cream maker and prepare according to manufacturer's directions. 4. Store in a container in the freezer. 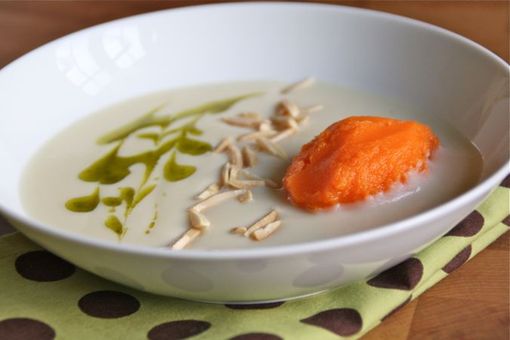 TO ASSEMBLE • Ladle the chilled Cauliflower Soup into bowls. Drizzle with Parsley Oil, sprinkle with some Toasted Almonds, then add a scoop of the Carrot-Ginger Sorbet. Now, watch everyone's eyes light up when they taste this incredible soup! 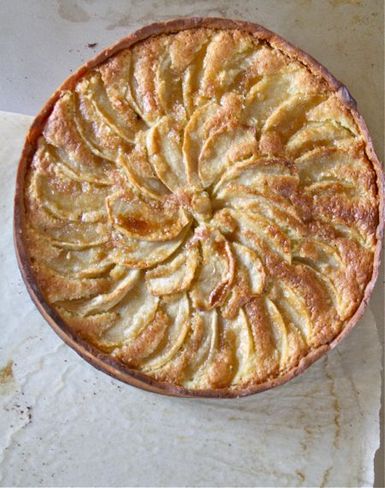 DESSERT -- Almond Cream Apple Tart • la fin • TAKE a LOOK: 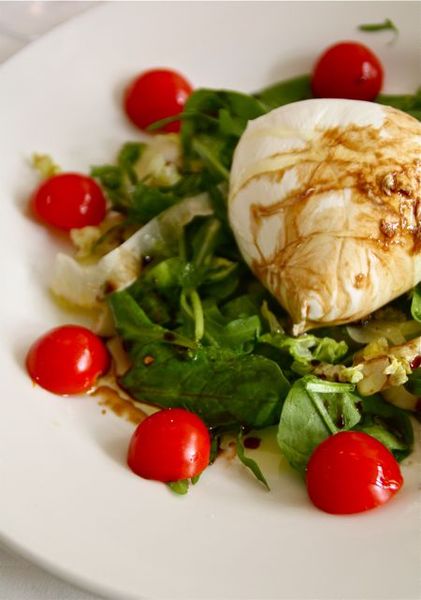 I have been asked many times if I enjoyed any good meals on my recent trip to Paris; my answer has been yes. Our first night and our last night in Paris we ate at a small, extremely popular restaurant called l'Epi Dupin on rue Dupin. I was first told of this restaurant on a trip in 2004, when I asked a Parisian woman I was speaking with if she could recommend a good place to eat. She told me we must to go to l'Epi Dupin -- it was where the "locals" ate. I had two marvelous meals there on this last trip, and I'm going to attempt recreating one of them for a dinner I'll be hosting next month. Preparing the meal shouldn't be that hard, but the Parisian ambiance... well, there are no cobbled streets outside of my dining room windows in St. Paul, Minnesota. I believe that part of the reason a meal tastes so good in Paris is... well... you're in Paris!  Another little restaurant my sister and I fell in love with and visited three times was La Bocca Della Verita at 2 rue du Sabot, in the St. Germain des Près neighborhood of Paris.  We walked by the restaurant one morning and vowed we'd return for lunch. My sister ordered Dolce Vita on our first visit -- ravioli with goat cheese, honey, and thyme. It was luscious. I had the Bufala salad -- Mozzarella di Bufala with Cherry Tomatoes and Mixed Greens. Every dish so simple, and yet incredibly good, the result of the chef using the best ingredients. 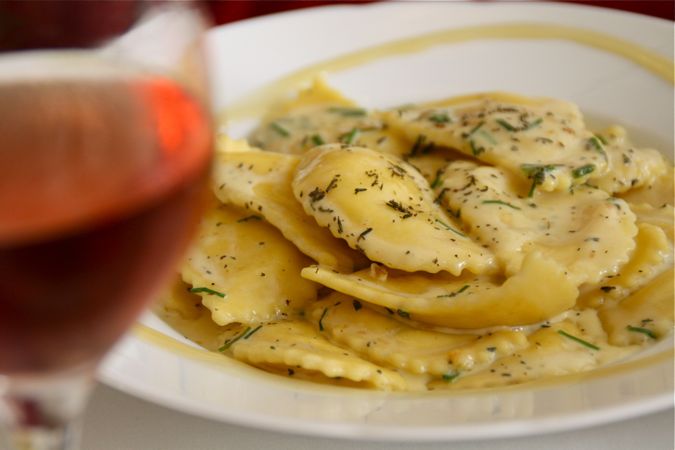 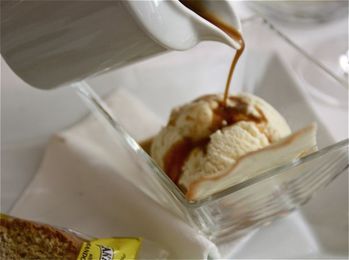 Dessert for me was Affogato -- vanilla ice cream drizzled with hot espresso. On our second visit we had an early dinner in French terms -- 7 o'clock. My sister's meal was a dish of mixed grilled vegetables with a vegetable purée, artichokes, mozzarella di Bufala and cherry tomatoes, mixed salad and Proscuitto. I seriously considered eating the Bufala salad again, but fortunately, at the last minute I decided to try the Piccata, a veal cutlet with a light cream of Sorrento lemon -- an excellent choice. Dessert that night was two different Tiramisu that we shared, of course. One, the traditional, and the second, Red Fruit Tiramisu. All I can say is... man, were they good! We started this meal with a glass of the restaurant's Strawberry Prosecco on ice. It's difficult to get my sister to join me in a glass of wine with our meals; she just doesn't care for it. But when she saw someone else drinking the red Prosecco, she was totally on board. We each had one that night...  and then returned the following night for another glass of the Strawberry Prosecco which we enjoyed in front of the restaurant on two little stools by the window. That's where we met these four chefs and a wizard on the narrow cobbled street. 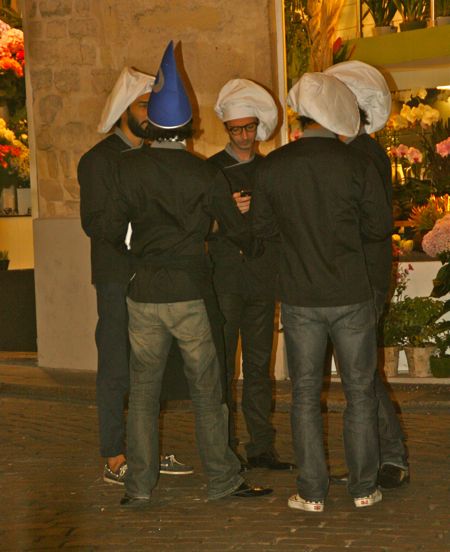 only in Paris, right?  :: Mozzarella di Bufala with Cherry Tomatoes and Mixed Greens • Mixed salad greens • Cherry tomatoes, organic and heirloom if possible • 8-ounce ball of fresh Mozzarella di Bufala (buffalo mozzarella) • Balsamic vinegar • Extra-virgin olive oil • Sea salt and freshly ground black pepper to taste This salad is all about using the absolute best ingredients you can. Place the salad greens on a large plate; surround the greens with a ring of halved cherry tomatoes. Position the Mozzarella di Bufala in the center of the greens. There is no substitution for this. A regular "fresh mozzarella" won't have the flavor the Bufala does. It is worth every cent! Drizzle the salad with the balsamic and the olive oil. Serve with a tasty baguette, a glass of wine, and enjoy! TAKE a LOOK:  A rainy night wasn't enough to dampen our enthusiasm for Pizza on the Farm.  Tuesday nights, the Pizza Farm in Stockholm, Wisconsin, bakes up "killer" pizzas from ingredients grown on the farm. (Yes, even the grain to make the flour for the crusts.)  I suggest arriving as early as possible; it's a popular destination on Tuesday nights. The lines will become long. 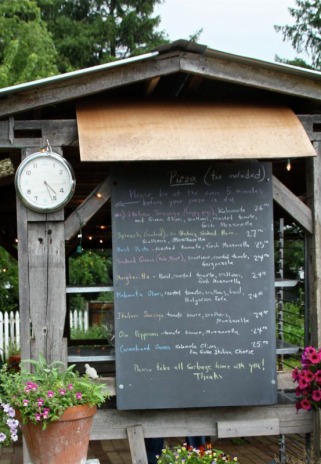 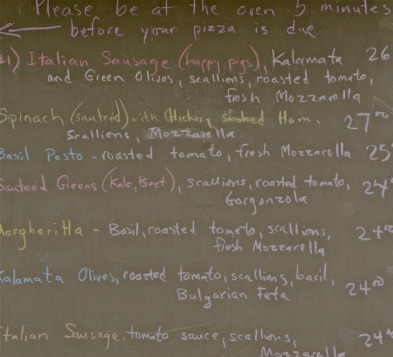 One size of pizza -- BIG 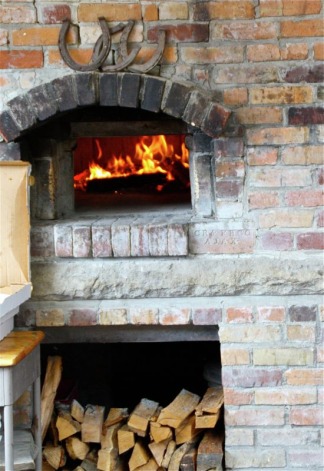 The wood-burning pizza ovens are fired up already on Monday mornings for the Tuesday night baking. 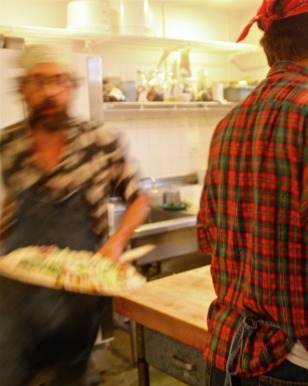 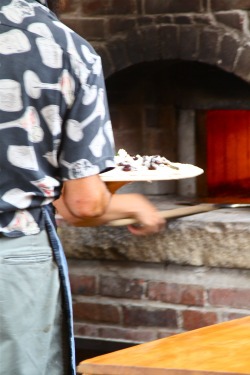 The pizzas are prepared in a small, enclosed prep kitchen opposite the two pizza ovens. When completed, a mad dash is made with the pizza peel to the oven. 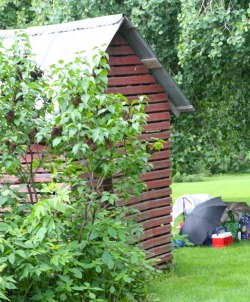 Under better circumstances, the pizzas are eaten outdoors on the lawn, or picked up and taken home.  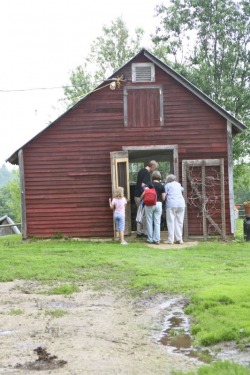 Fortunately, we were early enough to score a table inside one of the out-buildings; away from the rain.  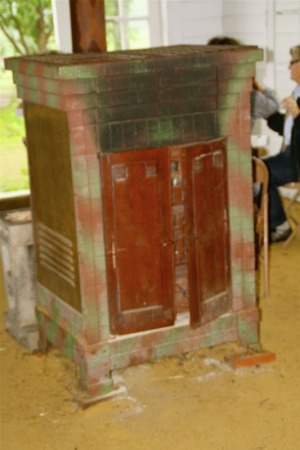 A beautiful, old wood-burning heater keeps diners warm on chilly fall nights.    You bring your own drinks, silverware and napkins. 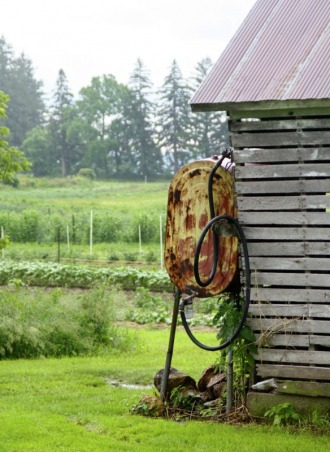    I can't even imagine how big the pizza crowds must be on a warm, sunny evening. What you can't see in this photo are the many cars that were lining the road as we drove away. 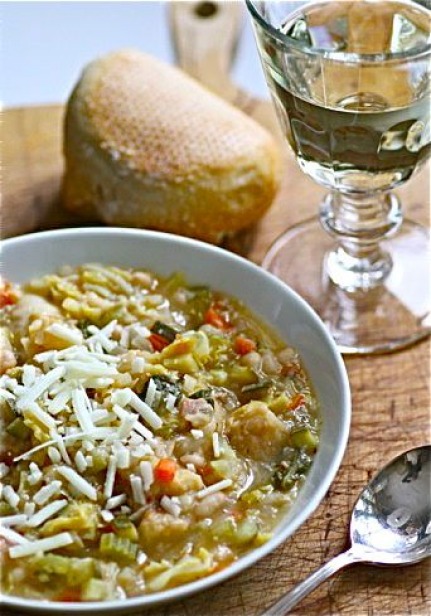 How could a Tuscan "re-boiled" soup have anything to do with a life I used to have making one-of-a-kind, tapestry-crocheted bags out of hand-dyed linen? Are you sitting down? This could take a while. Way, way back in the '70s I attended the Kansas City Art Institute, majoring in Fiber. After several years of tapestry weaving I picked up a crochet hook and some Irish rug linen. I needed a bag for myself and was inspired by Ecuadorian Shigras, a vessel-shaped, twined bag made out of agave fibers. When women tried to purchase bags I had made off of my shoulder, I left my loom and weaving behind and started crocheting full-time. My pieces ranged from "every day bags" approximately 6-inches in diameter by 9-inches tall to large vessels used in interiors. My favorite pieces were small, finely-crocheted "evening bags". The majority of these were made out of linen and silk and had drawstring closures out of the most beautiful, one-of-a-kind Japanese kimono silks. I was extremely lucky to know Fifi White and Elizabeth Wilson of Asiatica Ltd. in Kansas City, Missouri. Through them I had access to exquisite fabrics aquired on their regular buying trips to Japan that I never would have been able to purchase anywhere else. I heard Fifi sold her collection of kimonos to the Japanese government years ago, having a better private collection than Japan itself.  Above, a large vessel I made that was the ad for the Baltimore American Craft Show. I crocheted tapestry linen bags for 20 years, working with galleries throughout the country. My bags are in some pretty-impressive private collections. At times I am sorry I didn't pursue a degree in painting, the area of study I initially intended. But I remind myself that had I done that, I would not know many of the interesting people I consider friends today; which brings me back to the Ribollita. 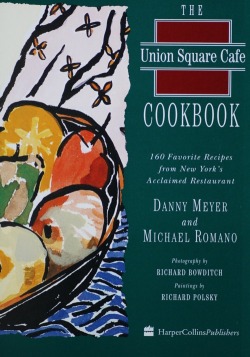 Back when The Union Square Cafe Cookbook came out in 1994, I purchased it immediately. Everything in that book sounded good, and I have used it many times over the years. I don't know how long I had the book when I realized that all of the watercolors in there were painted by Richard Polsky. Dick had called me right after my second daughter was born, when he had seen an article on my crocheted pieces in American Craft Magazine. In addition to being a painter himself, he is also a collector, and we corresponded on a regular basis after that. When I happened to notice one day Richard Polsky's name on my favorite cookbook, I was stunned. I had no idea. Turns out, he's Danny Meyer's uncle. It's been several years now since I've heard from him. I should drop him a note. I hope all is well. One piece of correspondence that I treasure is a post-card he sent with small frames of original black ink drawings on the front. The card has been displayed on an etagére in my living room since the day I received it. I picked up The Union Square Cafe Cookbook the other day, deciding on the Ribollita Soup, and then spent some time turning the pages, looking again at the beautiful watercolors of fruits and vegetables that first attracted me to this book. By the way, I love this soup. It's hearty, healthy and delicious.  Ribollita from The Union Square Cafe Cookbook by Danny Meyer & Michael Romano Watercolors by Richard Polsky • 1 cup dried cannellini or Great Northern beans • 2 teaspoons Kosher salt • 4 tablespoons olive oil • 2 cups diced zucchini • 1 1/2 cups diced onions • 2/3 cup diced celery • 1/2 cup scrubbed and diced carrots • 1/4 pound pancetta, diced • 2 tablespoons minced garlic • 1/2 head savoy cabbage, washed and cut into 1-inch pieces • 2 tomatoes, peeled, seeded, and chopped • 1/2 cup chopped basil • 2 cups cleaned spinach leaves • 1/4 teaspoon freshly ground black pepper • 4 cups day-old sourdough bread • 1/2 cup grated Pecorino Romano • 4 tablespoons olive oil 1. Rinse and cover the beans with cold water and soak overnight. 2. Drain the beans and place them in a saucepan with 8 cups cold water. Cook, covered, for 1 hour. Add 1 teaspoon of the salt and continue cooking for an additional 30 minutes, or until the beans are tender. Set the beans aside with their liquid. 3. Over a medium flame, heat the olive oil in a large soup pot. Over medium heat, sauté the zucchini, onions, celery, carrots, pancetta, and garlic until softened, about 10 minutes. Add the cabbage, tomatoes, basil, and spinach. Season with the remaining 1 teaspoon salt and pepper. Continue to cook, stirring occasionally, for another 10 minutes. 4. Strain the beans, reserving their cooking liquid. Purée half the beans in a food processor. Add the puréed beans, the whole beans, and their cooking liquid (8 cups) to the soup pot and simmer over low heat for 20 minutes. If there is not enough cooking liquid, add water to make up the difference. 5. Add the diced sourdough bread to the soup and cook for 10 more minutes. Adjust the seasoning. Serve with the Pecorino Romano and a drizzle of extra-virgin olive oil. |


Categories
All
|