Living Tastefully
  • Home
  • PAINTINGS
  • About
  • Passions-to-Pastry Blog
  • Contact
  • Recipes

Farro with Orange, Avocado, and Arugula

2/28/2018

0 Comments

 
Picture

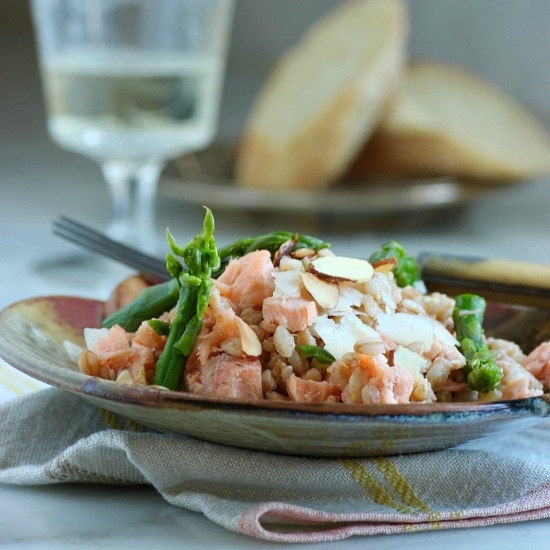
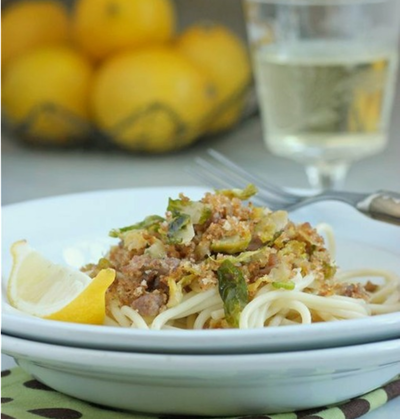
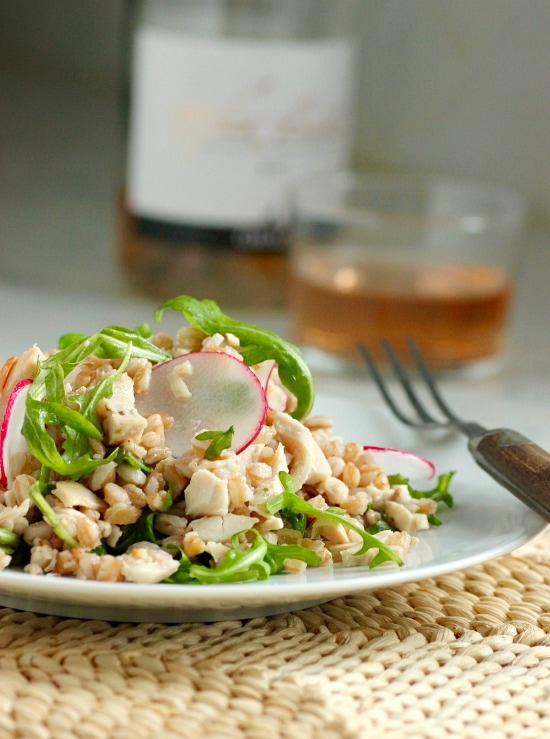
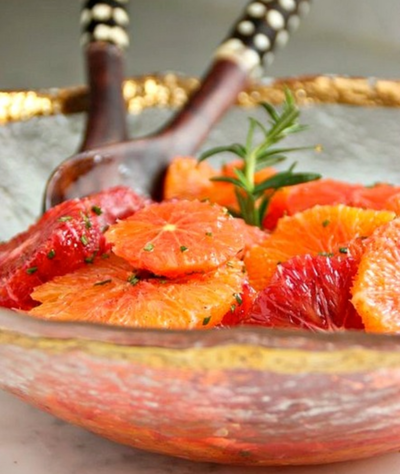
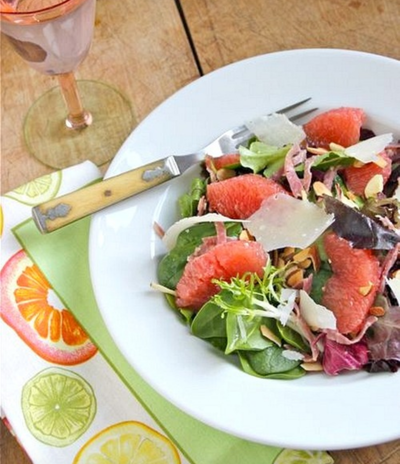
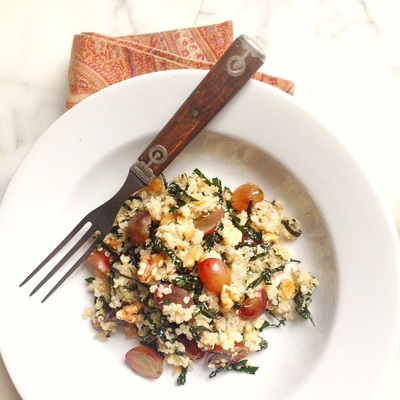
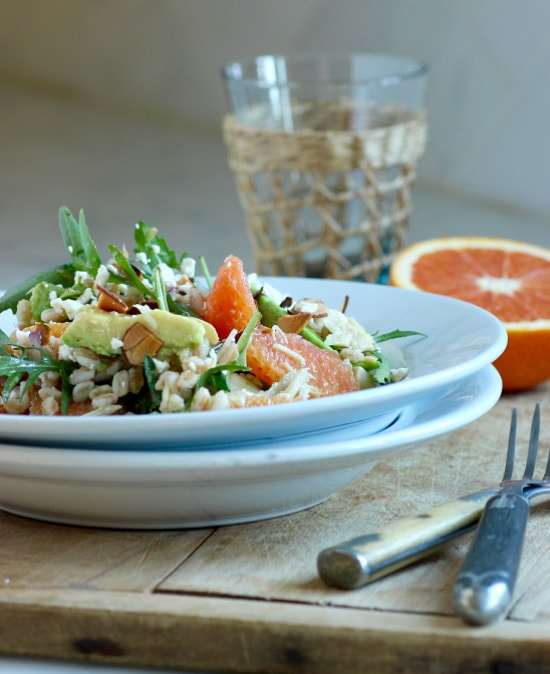
     I've become a farro fanatic.  I have been making salads lately with farro and whatever  fruits, vegetables, and nuts are available in my kitchen.  Last night's dinner consisted of farro with Cara Cara oranges, avocados, arugula... etc.  I will show -- with approximate amounts used -- my recipe below.  It's hard to go wrong creating your own signature salad.  Just fill it full of combinations you love.  From January until spring, my diet contains large amounts of citrus.  I just crave it this time of year.  If I'm eating a green salad, it most likely contains oranges (blood orange + CaraCara being my favorites), very thinly sliced red onion, and almonds... and a vinegrette using the juice of the oranges and a peppery olive oil; basically how I made my farro salad. Tonight, possibly a farro risotto!

Picture


Feel free to change the amounts of the ingredients to your liking...
• 1 cup farro
• 3 cups water
• Salt & pepper
• 2 cups shredded rotisserie chicken
• 3 large oranges, supremed, and any juices (from the cutting and squeezing of supremed oranges) reserved
• 2 avocados, sliced
• 1/2 cup (more or less) thinly-sliced red onion
• 2 handfuls arugula
• Good quality extra-virgin olive oil
• 1/2 cup toasted, slivered almonds
• 3/4 cup Feta cheese, crumbled

1.  Toast the farro in a dry saucepan over medium-high heat, stirring frequently, until it smells nutty, about 3 minutes. Add the water and 1 teaspoon salt and bring to a boil. Reduce heat to medium-low, cover partially, and cook until the farro is tender but still chewy, about 40 minutes.  Drain farro in a colander.
2.  In a large serving bowl, combine the farro, chicken, orange segments (see above to learn how to supreme an orange), avocados, red onion, and arugula.
3.  Using the reserved orange juices, make a vinegrette with equal amounts of juice and olive oil whisked together.  Add salt and pepper to taste.  Add vinegrette to the farro mixture and toss gently.
4.  Top the salad with the crumbled Feta and toasted almonds.


TAKE a LOOK:


0 Comments

Savory Zucchini & Gruyére Scones

9/24/2017

1 Comment

 
Picture

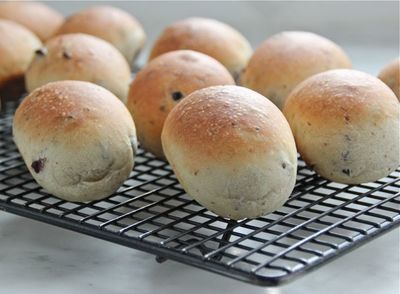
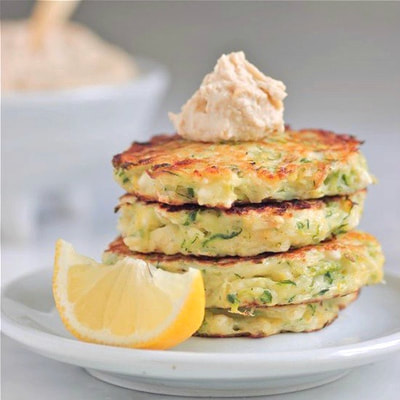
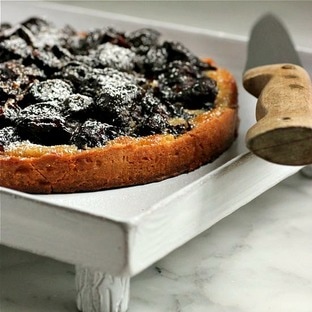
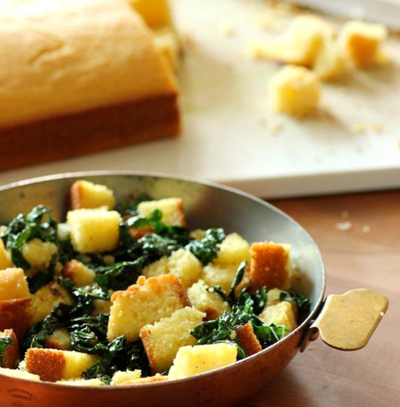
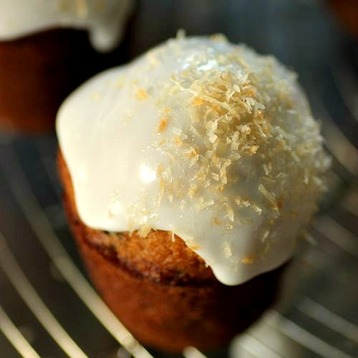
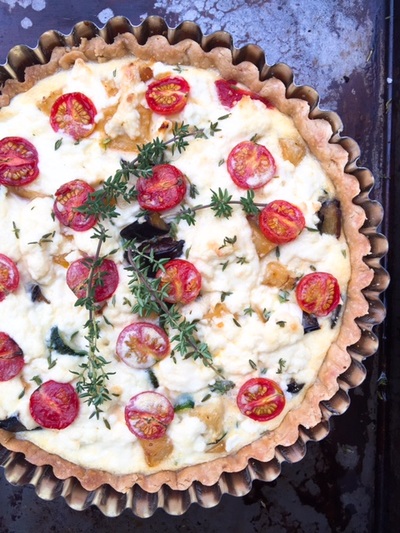
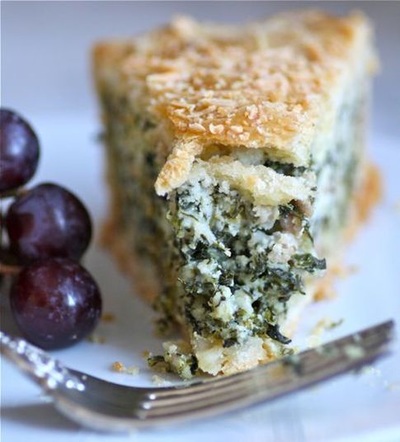
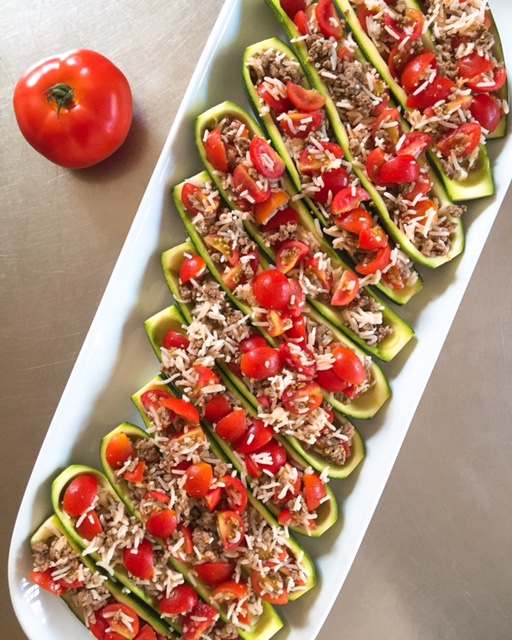
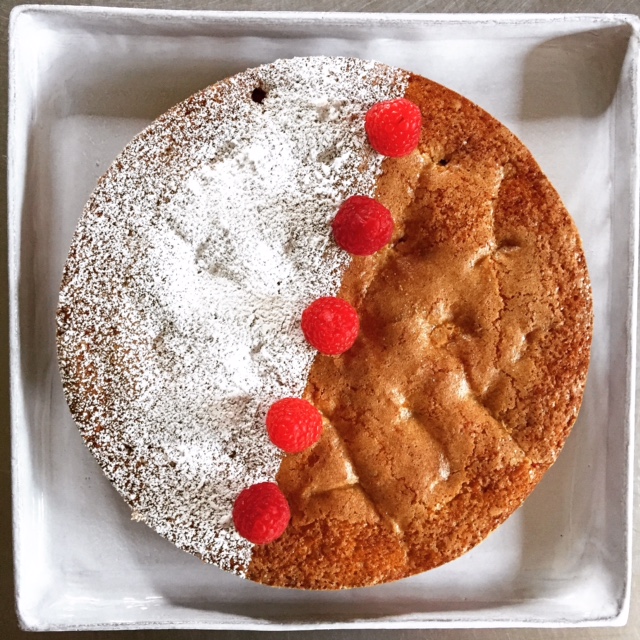
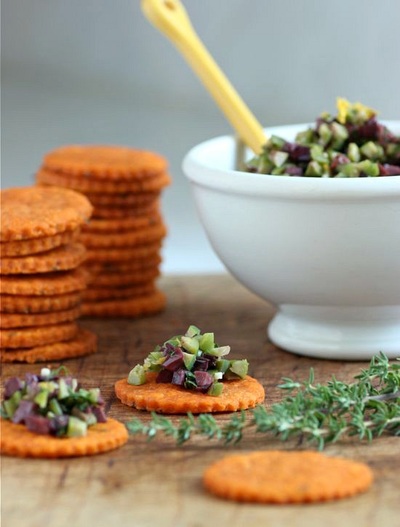
     Judging by its continued abundance, my zucchini never received the memo that summer is over; I won't complain.  There's nothing better than walking into the backyard and harvesting our dinner.  Or in this case... the makings of a savory scone. 

Picture

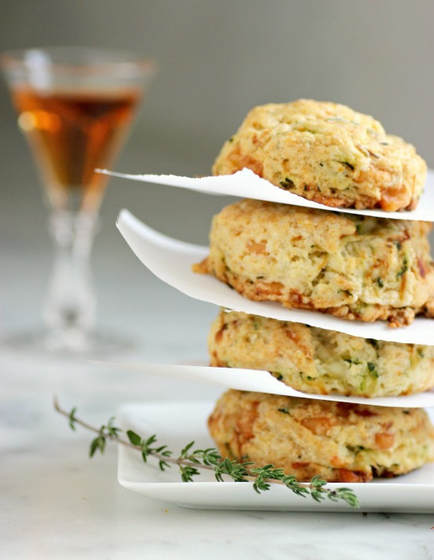
     My plan is to mix up these Zucchini and Gruyère Scones again, freeze the unbaked disks on a sheet pan, then drop into bags to freeze.  I'll pull them out to bake when I have a pot of soup on the stove this winter.  I'm thinking they'd be perfect alongside a tomato cream soup (RECIPE).

Picture

     Or, with an antipasto platter and a glass of wine...

Picture


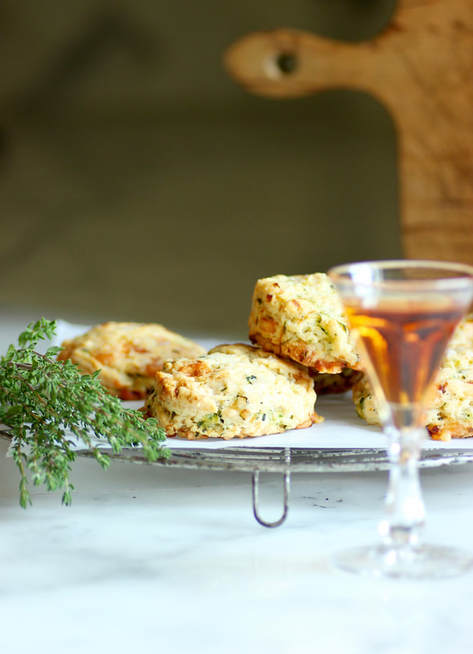
•Savory Zucchini and Gruyère Scones•

    from the September 2017 issue of Bon Appétit (adapted)
• Makes about 12 scones using a 3-inch biscuit cutter.  I used a 2-inch cutter which made almost double that amount. 
• 3 tablespoons baking powder
• 3 tablespoons sugar
• 1  1/2 teaspoons kosher salt
• 1 teaspoon freshly ground black pepper
• 1 teaspoon fresh thyme leaves
• 3  1/4 cups unbleached all-purpose flour, plus more for surface
• 3/4 cup (1  1/2 sticks) unsalted butter, cut into 1/2-inch cubes and chilled
• 1 cup heavy cream, plus more for brushing
• 2 medium zucchini, coarsely grated, excess liquid squeezed out with a kitchen towel
• 6 ounces Gruyère, cut into 1/4-inch pieces
• Flaky sea salt for sprinkling
1.  Preheat oven to 350˚F.  Combine baking powder, sugar, kosher salt, pepper, thyme, and 3  1/4 cups flour in the bowl of a food processor.  Pulse several times.  Add the chilled butter and pulse until the size of small peas.  Transfer the mixture to a large bowl.  Pour in the cream and mix gently with a wooden spoon to distribute evenly.  Add the zucchini and Gruyère and mix into the dough just to distribute.  Using your hands, gently knead the mixture until the dough comes together.  The less you work the dough, the more tender the scones will be.  This dough will be somewhat drier than most scone recipes, but the zucchini will release additional moisture during baking.
2.  Turn the dough out onto a lightly floured surface and pat into a 2-inch thick disk.  Place a sheet of plastic wrap on top of the dough and roll out to a 1-inch thick disk.  Punch out scones with the biscuit cutter (it helps to brush the inside of the cutter with oil to help  release the scones); place on a parchment-lined baking sheet, spacing about 2-inches apart.  Brush tops with cream and sprinkle with flaky sea salt (if storing unbaked scones in freezer, wait to finish with the cream and salt until baking).
3.  Bake scones, rotating baking sheet halfway through, until golden brown, 30-40 minutes.  Transfer to a wire rack to cool.


TAKE a LOOK:


1 Comment

Spinach and Mushroom Tart with Ricotta Cheese

4/5/2017

12 Comments

 
Picture

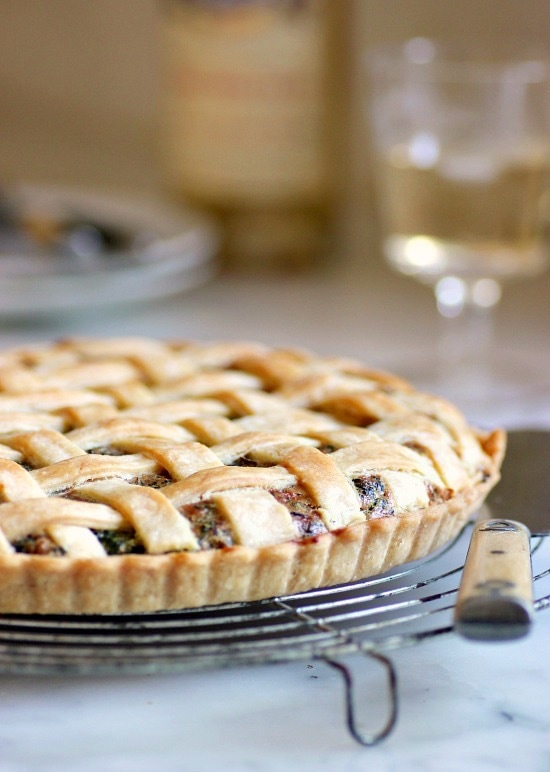
     Yes... I'm still here.  And to prove it, I've made the most delicious savory tart. 

Picture

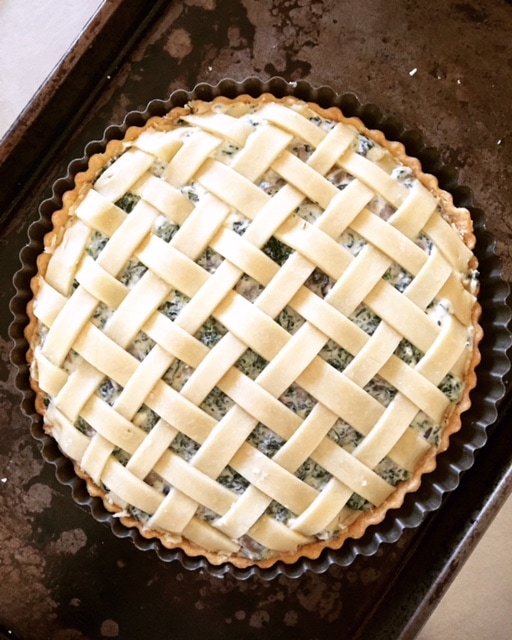
     The recipe is from an old (and favorite) cookbook, Once Upon a Tart.  Family members have been out of town this week and when that happens, I usually don't spend time in the kitchen.  But I've been asked recently why I haven't posted any recipes lately, and thought it was time I made an appearance.  This savory tart seemed perfect for my reentry ... a 9-inch tart pan (on the smallish side), and as good this morning (at room temperature) for breakfast, as it was last night right out of the oven.  If you bake this tart, make it easy on yourself (like I did) and defrost your spinach.  But if you want to use fresh, take a pound of spinach and wilt, using a large pan, with a little butter and olive oil.

Picture
    
     This painting (of an actual woman with her dog on the upper eastside of NYC) is one of the reasons I've disappeared.  I put my paints & brushes away 40-some years ago in art school.  I was obsessed and did nothing else.  I didn't think I could continue that way, so I entered the fiber department instead of painting/printmaking.  I often wonder what my life would be like now if I had continued in painting... and I've been missing it.  So, now I will be dividing time between painting and LivingTastefully... oh... and the garden that I need to start planting.  I'm busy, but I'll still be around.  Maybe just not as frequently.


Spinach and Mushroom Tart with Fresh Ricotta

• recipe by Frank Mentesana and Jerome Audureau, adapted
•  Tart Crust Dough (recipe HERE)
• 1 tablespoon olive oil
• 10 ounces defrosted frozen spinach, drained in a colander, excess water squeezed out
• 1 tablespoon unsalted butter
• 1 tablespoon olive oil
• 3 garlic cloves, peeled and finely chopped
• 1/2 pound white mushrooms, cleaned, trimmed, and thinly sliced
• 2 large eggs
• 1/4 cup light cream plus extra to brush on the lattice pastry
• 1 cup ricotta cheese, preferrably fresh (recipe HERE)

• 1/2 cup grated Parmesan cheese
• 1/2 teaspoon freshly grated nutmeg
• 1/8 teaspoon crushed red-pepper flakes
• 1 teaspoon salt
• A few turns of freshly ground black pepper


1. Using 2/3 of the pastry dough from recipe above, roll dough to fit into a 9-inch tart pan.  Trim any overhang and reserve with the 1/3 of the unused dough; wrap in plastic and keep chilled in refrigerator.  Place the dough-lined tart pan in the freezer and preheat oven to 400˚F.  When the oven is preheated, gently press a square of aluminum foil onto the base and up the sides of the tart pan; fill with dried rice or beans.  Place the pan on a rack in the center of oven and bake for 17 minutes.  Remove tart pan from oven and carefully lift out the foil + dried rice/beans.  Return the tart pan to the oven and continue to bake until golden.  Remove.  Reduce oven temperature to 375˚F. 
2.  Heat the butter and olive oil in a medium sauté pan over medium-low heat.  Add the garlic and stir just briefly; add the mushrooms and sauté until glossy and dark.  Remove from heat and scrape into a large bowl.  Add the spinach.
3.  Whisk the eggs in a bowl to break up the yolks.  Whisk in the cream, cheeses, nutmeg, red-pepper flakes. salt and pepper.  Add this mixture to the bowl with the mushrooms and spinach and stir until evenly distributed.  Spoon the mixture into the tart shell, and using a spatula, spread to level the filling. 
4.  Make the lattice top by thinly rolling the remaining dough.  I used a pizza cutter to cut 1/2-inch strips of dough.  Weave a lattice crust over the top of the filling (instructions HERE).  Trim any excess and gently tuck ends in around edge of pan.  Using a pastry brush, brush the lattice with light cream.
5.  Place the tart onto a rimmed baking sheet and place baking sheet on middle rack of oven.  Bake for 1 hour, until the filling is firm to the touch, and the lattice is golden brown.
6.  Remove tart from oven and let cool slightly before removing the outside ring.  Serve warm or at room temperature. 


TAKE a LOOK:


12 Comments

Farro + Salmon + Asparagus

3/19/2017

2 Comments

 
Picture

     Yes... it's another farro "dish".  That's what happens when I go out and buy farro in bulk.  And having no idea what dinner was going to be the other night, it eventually ended up as a Farro + Salmon + Asparagus Salad, since that is what I had in my pantry and fridge.
     This is a fly-by-the-seat-of-your-pants recipe.  Make changes or additions as you see fit.  I gently boiled the asparagus, and I'm not sure quite why I did that... It's my least favorite way to make and eat asparagus.  I won't do it again.  My favorite asparagus preparation is either roasted with olive oil in a 375˚- 400˚F oven, or sautéed in an olive oil-butter mix.  So much more flavor than steamed or boiled. 
     RECIPE:  1.  Measure 1 cup of farro (see NOTE below) and place into a fine-mesh strainer. Rinse thoroughly with cool water for about 1 minute.  Drain.  Place a two quart saucepan over low heat and add the farro.  Toast the farro, stirring, for about 3 minutes.  This adds wonderful flavor to the grain.  Add 3 cups of cold water plus a generous pinch of salt.  Bring to a boil, then reduce heat to low.  Simmer for about 15 minutes or until farro becomes tender.  Turn off heat and allow farro to rest for 5 minutes.  Turn the farro into a mesh strainer and drain off any remaining water.  2. While the farro is cooking squeeze the juice from half a fresh lemon into a small dish.  Whisk in some good extra virgin olive oil (the same amount as the lemon juice or slightly more... your preference) and kosher salt and freshly ground pepper to taste.  Combine with the drained farro in a large bowl.           3.  Preheat oven to 400˚F.  Place 2  5-ounce pieces of salmon in a baking dish.  Sprinkle with salt and freshly ground pepper.  Chop some fresh dill and generously scatter over the salmon pieces.  Lightly drizzle with extra-virgin olive oil, then place the baking dish on the middle rack of the oven.  Roast the salmon until it flakes easily with a fork.  Remove from oven.  4.  Slice the tough ends from a bunch of asparagus and rinse the stems under cold water.  Cut the stems into pieces about 2-inches in length.  Either roast or pan fry the asparagus (see second paragraph on preparing asparagus).  Sprinkle with kosher salt.       5.  Remove the roasted salmon from its skin and break into chunks.  Add the salmon to the farro along with the cooked asparagus pieces.  Gently fold into the farro. Adjust seasoning.  Using a block of Parmigiano-Reggiano, take a vegetable peeler and slice large chards of the Parmesan.  Sprinkle chards generously over the top of the salad.  Top the salad with toasted sliced almonds or pine nuts.  

NOTE:  Farro is an ancient grain.  Look for the semipearled variety of farro for this recipe.  It has had some of the bran removed for quicker cooking.  The whole grain variety will need overnight soaking before you can proceed. 


TAKE a LOOK:


2 Comments

Farro Salad with Chicken

3/5/2017

2 Comments

 
Picture
    
     I've been on a farro kick lately.  In addition to this farro salad with chicken, green beans and radishes, that I've made twice in the past week, I've also made a farro, orange and avocado salad two times.  Just feels like the perfect thing to eat right now...

    
Picture
• recipe by Russ Parsons | featured in the L.A. Times
• 1 cup farro
• 3 cups water
• Salt
• 1/2 pound green beans, trimmed
• 5 tablespoons olive oil
• 3 tablespoons red wine vinegar
• 3/4 pound rotisserie chicken, cut into bite-sized piece
• 3 cups lightly packed arugula, torn into bit-sized pieces
• 1 cup thinly sliced radishes
• 1/3 cup toasted slivered almonds
1.  Toast the farro in a dry saucepan over medium-high heat, stirring frequently, until it smells nutty, about 3 minutes. Add the water and 1 teaspoon salt and bring to a boil. Reduce heat to medium-low, cover partially, and cook until the farro is tender but still chewy, about 40 minutes. Remove from the heat and let stand covered 10 minutes to allow the grain to remove any excess moisture.
2.  While the farro is cooking, add the green beans to a medium saucepan of rapidly boiling, liberally salted water and cook just until the color brightens, about 3 minutes. They should still be crisp. Drain and plunge immediately into ice water to stop the cooking. Pat dry, cut into bite-sized pieces and set aside.
3.  When the farro is done and while it is still warm, Add the olive oil and vinegar and stir to mix well. Add the chicken and black pepper to taste.
4.  When ready to serve, fold in the green beans, arugula, radishes and almonds.  Taste, and adjust seasonings if necessary.


TAKE a LOOK:


2 Comments

Baked Pasta Shells and Cauliflower

1/18/2017

1 Comment

 
Picture

    
Blame it on January...

     I find motivation difficult this time of year and feel like I accomplish very little.  January is the perfect time for projects; paint a room, organize, clean or plan the summer garden, right?  But I don't.  That may be because I tend to go full throttle during the holidays and I need an effortless January to even me out.  I take a break from everything... even cooking and my beloved baking.  But with time, that changes.  This week I prepared several old favorites, but I also made, for the first time, this recipe for Baked Crusty Pasta Shells and Cauliflower that came across in an email from Food & Wine recently.  It's fabulous on a cold, dark January night in Minnesota, and for those in my family that are eating less meat or none whatsoever.  Anything made with salty capers, lemon zest and fresh ricotta is a winner, as far as I'm concerned.  Yes... I'll be making Pasta Shells with Cauliflower again.
    (NOTE) When purchasing the ingredients for this recipe, my cheesemonger suggested I cut back on the Fontina Val d'Aosta, which is pricey.  I used half the amount that is shown in the original recipe below, and replaced the remaining 5 ounces with a container of pre-grated cheeses that included fontina in the mix.  I had no complaint with doing that nor with the results.  I loved this pasta.  


Picture
Ina Garten | Food & Wine, November 2016, slightly adapted
• Kosher salt
• Freshly ground black pepper
• 3/4 pound medium pasta shells
• Extra-virgin olive oil
• 2 1/2 pounds cauliflower, cut into small florets (1 large head)
• 3 tablespoons roughly chopped fresh sage leaves (I substituted 2 tablespoons rubbed sage)
• 2 tablespoons capers, drained
• 1 tablespoon minced garlic
• 1/2 teaspoon grated lemon zest
• 1/4 teaspoon crushed red pepper flakes
• 2 cups freshly grated Italian Fontina Val d'Aosta cheese (10 ounces with rind)... see NOTE above
• 1 cup (8 ounces) fresh ricotta
• 1/2 cup panko (Japanese bread flakes)
• 6 tablespoons freshly grated Italian Pecorino cheese
• 2 tablespoons minced fresh parsley leaves


1.  Preheat oven to 400˚F.
2.  Fill a large pot with water, add 1 tablespoon of salt and bring to a boil.  Add the pasta and cook until al dente, according to the instructions on package.  Drain and pour into a very large bowl.
3.  Meanwhile, heat 3 tablespoons of olive oil in a large (12-inch sauté pan over medium-high heat, add half of the cauliflower in one layer and sauté for 5 to 6 minutes, tossing occasionally, until the florets are lightly browned and tender.  Pour the cauliflower into the bowl with the pasta.  Add 3 additional tablespoons of olive oil to the pan and add the remaining cauliflower.  Cook until browned and tender; add to the bowl.
4.  Add the sage, capers, garlic, lemon zest, red pepper flakes, 2 teaspoons salt and 1 teaspoon black pepper to the bowl; stir gently to combine.  Stir in the Fontina.  Transfer half of the mixture to a 10 x 13 x 2-inch baking dish.  Spoon rounded tablespoons of ricotta on the pasta and spoon the remaining pasta mixture on top.  Combine the panko, Pecorino, parsley and 1 tablespoon of olive oil in a small bowl and sprinkle it evenly on top.  Bake for 25 to 30 minutes, until browned and crusty on top.  Serve hot.


TAKE a LOOK:


1 Comment

Christmas Dinner... 2016

12/27/2016

6 Comments

 
Picture

     This was an unusual Christmas for my husband and me.  It's the first year neither one of our daughters was here to celebrate -- with one visiting in-laws in Milwaukee and the other with her boyfriend's family in Chicago.   Christmas Eve for us was spent at our neighbor's; a tradition, now that we are no longer  traveling over the holidays.  We have amazing neighbors and I've made it clear to all of them that they can never move away from me...

Picture

     When we finally gathered yesterday with family, our Christmas dinner was French Onion Soup and a Salad of Arugula, Roasted Peppers, and Steak.  Dessert... a Lemon Meringue Tart.

Picture


Picture

     To start off our midday meal, we drank small glasses of spiked eggnog.  Fortunately, the rich aperitif didn't seem to kill anyone's appetite...  I stirred a good sprinkling of Chinese 5 Spice into organic eggnog, then added golden rum... to taste.  The top was covered in a thick coating of whipped, heavy cream, along with a generous grating of nutmeg.

Picture
Picture
                                        
  Whitney with her Frenchie, Midge

Picture

     As usual, Bisous waiting for anything edible to drop from above.

Picture

     This will now be my go-to French Onion Soup.  The best I've ever made.  I made some slight changes to a recipe by Ina Garten.
                                                                   (recipe below)


Picture

     When finishing the soup, you will want to top it with the best Gruyére cheese you can fiind.  It really makes a difference.  I could eat this soup every day...

Picture

     This is one of my favorite "hearty" salads, and I make it often during the summer for our alfresco meals.                                                       
  (recipe HERE)

Picture

     La Fin... Lemon Meringue Tart.  Perfect any time of the year...
(recipe below)


   French  Onion Soup


Serves 8
• 3 3/4 pounds yellow onions, halved, and sliced 1/4-inch thick
• 12 tablespoons (1 1/2 sticks) unsalted butter
• 2 bay leaves
• 3/4 cup medium-dry sherry
• 3/4 cup Cognac
• 2 1/4 cups good quality dry white wine
• 3 quarts  organic beef stock
• 1 1/2 tablespoon kosher salt
• 3/4 teaspoon freshly ground white or black pepper
• 2 teaspoons concentrated beef base (such as Better Than Bouillon brand)
• 1-2 French baguettes, sliced 1/2-inch thick
• 4 tablespoons unsalted butter, melted
• 4-5 cups grated Gruyére cheese
1.  In a large stockpot, over medium heat, sauté the onions with the butter and bay leaves until the onions turn a rich golden brown color.  Take your time with this -- approximately 45+ minutes.  You want to slowly caramelize the onions and not burn them.
2.  Deglaze the pan with the sherry and brandy and simmer uncovered for 5 minutes.  Add the white wine and simmer uncovered for an addition 15 minutes.  Preheat the oven to 375˚F. 
3.  Add the beef stock, salt and pepper.  Bring to a boil, then simmer over low heat for 45 minutes. Stir in the concentrated beef base, starting with 1 teaspoon.  Taste, and add additional base if needed.  Adjust salt and pepper; remove the bay leaves.
4.  Brush the baguette slices with the melted butter and place on a baking sheet.  Transfer to the middle rack of the preheated oven and bake until the bread slices begin to lightly toast and turn golden.  Remove from oven.  Ladle soup into oven-proof bowls.  Place several slices of baguette onto each bowl of soup, then generously cover with grated Gruyére.  Place several bowls on a baking sheet with 1-inch sides and slide onto middle rack of oven.  Broil until cheese is melted and gooey.  Repeat with remaining bowls.  Serve.


Lemon Meringue Tart

TART PASTRY:
• 2 T. sliced almonds
• 1 cup unbleached flour
• 1/4 tsp. salt
• 5 1/3 T. very cold butter, 1/2" dice
• 3 T. ice water
FILLING:
• 3/4 cup sugar
• 1/4 tsp. salt
ˆ 1 cup water
• 3 T. cornstarch
• 2 egg yolks
• 1/4 cup lemon juice
• 2 T. butter
• 2 tsp. grated lemon rind
MERINGUE:
• 5 egg whites
• 1/4 teaspoon salt
• 1/2 cup sugar
• 1/2 teaspoon cream of tartar

1.  Make pastry dough and chill for 2 hours.  Line a 9-inch tart pan and bake blind at 400˚F  until golden brown. 
2.  Dissolve sugar with salt in 3/4 cup of the water in a saucepan and bring to a boil.  Mix the cornstarch with the remaining 1/4 cup water and stir into the sugar-water mixture.  Stir constantly until thick and clear.  Remove from heat.  Beat egg yolks with lemon juice until slightly thickened and stir into cornstarch mixture.  Return to heat and bring back just to a boil.  Take from heat and stir in the butter and grated lemon rind.  Cool slightly and fill the baked tart shell.
3. To make meringue:  Place egg whites, at room temperature, in the bowl of an electric mixer.  Add salt and start beating with a whisk attachment.  Once frothiness has been achieved, slowly start adding the granulated sugar and the cream of tartar.  Continue to beat at high speed until the egg whites just begin to hold stiff peaks.  Do not overbeat or the whites will become dry and start to separate.  Mound the billowy, cloud-like meringue onto the tart and bake in a preheated 375˚F oven until golden.


TAKE a LOOK:


6 Comments

Red cabbage from my garden

9/22/2016

0 Comments

 
Picture

     I usually grow 15-20 red cabbages (I admit, primarily for the beautiful color) every summer in my vegetable garden, with most of them gifted to friends before I even think about using one of the cabbages myself.  So, with the Autumnal Equinox occurring this week, I thought it made sense to finally have a cabbage dinner, on the last night of summer. 
     This was the second time I've made this Suzanne Goin recipe for Sausage with Mustardy Fried Potatoes and Braised Cabbage. This time, however, I substituted Chicken-Apple Sausage for the Bratwurst used the original recipe.  It's your call on what type of sausage to use, but I do believe the Bratwurst wins...
     I suggest making the Citrus-Spiced Red Cabbage a day or two ahead if possible; just to reduce time spent in the kitchen the day of finishing and serving.  A hearty meal for 4 persons.


Sausage with Mustardy Fried Potatoes and Citrus-Spiced Cabbage

• recipe by Suzanne Goin via Food & Wine Magazine, recipe adapted
• 1/8 cup diced shallots
• 1/8 cup red wine vinegar
• 1/8 cup whole-grain mustard
• 1/8 cup Dijon mustard
• 3-ounces (3/8 cup) plus 2 tablespoon extra-virgin olive oil
• Kosher salt
• Freshly ground pepper
• 1 1/2 pounds Yukon Gold potatoes
• 6 bratwursts
• 1 teaspoon fresh thyme leaves
• 2 tablespoons chopped parsley
• Citrus-Spiced Red Cabbage (recipe follows)
• 1 bunch of watercress, thick stems discarded (or a handful of arugula)

1.  In a small bowl, combine the shallots and vinegar and let stand for 5 minutes; stir in both mustards. Whisk in 3-ounces (3/8 cup) of the oil and season the vinaigrette with salt and pepper.  Reserve.
2.  In a pot of salted, boiling water, cook the potatoes until tender, about 30 minutes.  Drain and let cool slightly, then remove the skins.  Break potatoes into chunks.
3.  Light a grill or preheat a grill pan.  Grill the bratwursts over moderate heat, turning until heated through and cooked, 10 to 15 minutes.
4.  In a large nonstick skillet, heat the remaining 2 tablespoons of oil.  Add the potatoes and thyme and season with salt and pepper.  Cook over moderately high heat, turning with a thin metal spatula until golden and crisp.  Remove the pan from the heat and add 1/2 cup of the vinaigrette plus the parsley.  Season with salt and pepper and toss to evenly coat.
5.  Arrange half of the Citrus-Spiced Red Cabbage on a serving platter.  Scatter the potatoes and three-fourths of the watercress (or arugula) over the cabbage.  Top with half of the Bratwursts.  Repeat with the remaining cabbage, watercress/arugula and bratwursts. 


Citrus-Spiced Red Cabbage

• One 1-pound red cabbage-halved, cored and sliced 1/8-inch thick
• 1/2 cup fresh lemon juice
• 1/2 cup fresh orange juice
• 1/3 cup sugar
• 1/4 cup unsalted butter
• 1 large onion, thinly sliced
• 2 teaspoons fresh thyme leaves
• 1 árbol chile with seeds, crumbled (I used a big pinch of red pepper flakes)
• 1/2 teaspoon ground allspice
• Kosher salt
• Freshly ground pepper
• 1 1/2 cups dry red wine
• 1/2 cup port

1. In a large bowl, combine the cabbage, lemon juice and orange juice.  Let cabbage stand at room temperature for 1 hour, tossing occasionally.
2.  Set a large enameled, cast-iron casserole over moderate heat for 1 minute.  Add the sugar in an even layer and cook, without stirring, until melted and starting to caramelize.  Stir in the butter.  Add the onion, thyme, chile, allspice, 1 teaspoon salt and 1/4 teaspoon pepper.  Cook over moderate heat, stirring often, until the onion is lightly caramelized.  Stir in the wine and port and cook over moderately high heat until the liquid is reduced to 2/3 up.  Add the cabbage and any accumulated juices and 1 teaspoon of salt.  Cook over moderate heat, stirring often, until the cabbage is tender and glazed, about 20 minutes.  Season with salt and pepper. 


TAKE a LOOK:


0 Comments

Mexican Tortilla Casserole

9/7/2016

2 Comments

 
Picture

     There's an obvious shift this week to how and what I'm making for our dinner.  Over the past couple of months, every meal consisted largely of produce from the vegetable garden.  With this Mexican Tortilla Casserole, the only home-grown ingredient was the lone cherry tomato on the top.  My garden still boasts kale, some beans, and an occasional cucumber... and, don't let me forget red cabbage!  My husband also planted watermelon radishes and a second crop of lettuces;  but for the most part, it's coming to an end. 

Picture

     As much as I miss my garden vegetables when I no longer have them, I am always ready for cool weather meals that simmer on my stove throughout the day.  Desserts that consist of stone fruit and berries (most likely tarts and galettes) are replaced by apples, pears, and a good amount of chocolate... I love fall!
     This Mexican Tortilla Casserole is simple and quick to assemble.  And, feel free to swap out ingredients to your liking. 


Picture


 • Mexican Tortilla Casserole •

• recipe via The Splendid Table | from the cookbook, The Mom 100 Cookbook:  100 Recipes Every Mom Needs in Her Back Pocket
• Nonstick cooking spray
• 1 tablespoon olive oil
• 1 onion, chopped
• 1 teaspoon ground cumin
• 1  1/2 teaspoon chili powder
• 1 teaspoon minced garlic
• 1 can (14 ounces) chopped tomatoes, drained, with 1/3 cup juice reserved
• 1/4 cup tomato paste
• 2 cans (15.5 ounces each) white, black, or kidney beans (or a mixture of any two), rinsed and drained
• Kosher or coarse salt and freshly ground black pepper
• 1  1/2 cups frozen corn thawed
• 3 cups coarsely chopped spinach
• 4 medium-size (8-inch) flour tortillas
• 2 cups (8 ounces) shredded Monterey Jack or Cheddar Cheese, or a mixture of the two
• Sliced avocados, fresh cilantro, cherry tomatoes, etc., for garnish
• Sour cream, for serving (optional)
• Salsa, for serving (optional)
1. Preheat the oven to 400°F. Spray an 8 1/2 to 9-inch springform pan with nonstick cooking spray.
2. Heat the oil in a large skillet over medium heat. Add the onion, cumin, chili powder, and garlic and cook until the onion is softened, about 3 minutes. Stir in the tomatoes with the 1/3 cup of reserved juice and the tomato paste, then stir in the beans. Season with salt and pepper to taste. Let the bean mixture simmer until everything is hot, about 3 minutes. Add the corn and spinach and stir until the spinach has wilted and everything is well blended and hot, about 3 minutes. Taste for seasoning, adding more salt and/or pepper as necessary.
3. Place 1 tortilla in the prepared pan. Spread one fourth of the bean and vegetable mixture evenly over the tortilla, then sprinkle 1/2 cup of the shredded cheese evenly over the top. Repeat with 3 more layers, ending with the last quarter of the bean mixture and then the last 1/2 cup of shredded cheese.
4. Bake the tortilla casserole until it is hot throughout and the top is lightly browned, about 20 minutes. Let the casserole sit for about 5 minutes. Top with sliced avocados and cherry tomatoes, if desired.  Cut it into wedges and serve.  Serve with sour cream and/or salsa on the side, if you like.
Cooking Tip: You can make the tortilla casserole a day ahead of time, cover it with plastic wrap or aluminum foil, and put it in the fridge overnight; just take it out and let it sit at room temperature for about 20 minutes while the oven preheats to 400°F. Bake the casserole uncovered. You can also reheat the cooked casserole at 350°F for 15 to 20 minutes, until warm.


TAKE a LOOK:


2 Comments

What have I been up to...?

8/28/2016

4 Comments

 
Picture

I'm not here :(

Picture

nor here :(

Picture

or even here :(

     It probably seems like I've been gone for awhile...  So, what have I been doing?  Not traveling.  I wish I could say I spent the summer in the south of France, but that didn't happen.  No surprise to most of you, I've been spending a LOT of time with my Frenchie puppy, Bisous.  Right before I lost my Frenchie, Pipi, just a year ago, my vet tried to help me put her life into perspective.  She told me, "Pipi is like 110 in people years and has had a better life than most children".  I'm embarrassed to say, the vet was probably 100% right.  I'm very devoted to my dogs and that's one reason I've been staying close to home with "B".  No major trips.  If any traveling is done anytime soon, it will be by car so Bisous can accompany us.  So right now, there's no France in my future.  Life is currently all about Bisous...
     And lately, most of my days are spent in my kitchen, trying to make sense of the ridiculous amount of produce from my vegetable garden.  I'm thankful our backyard isn't any larger.  If it were, my gardens would certainly be larger also, and there would be even more vegetables!  Right after I finish this post, I will begin chopping tomatoes for a fresh pasta sauce we will eat for dinner tonight.  We've had some wonderful dinners on the patio this summer, and I'm hoping warm weather will continue into October.  I'm not ready to give up alfresco dining with friends and family quite yet...
     There have also been out-of-town visitors recently.  This has all kept me busy. Plus, you would probably find my meal rotations rather boring.  Not much experimenting this summer for me.  I tend to make many of the foods we eat over and over during the growing season... because I love them.  I wait months in Minnesota for the tomatoes, beans, zucchini, beets, etc., from my garden,  and I'm perfectly happy eating them, much of the time, the same way.  I will never tire of fresh tomato pasta sauce, Caprese salads, seared beans, zucchini-walnut bread... experimenting can wait! 
     If you follow my posts on Instagram, you will most likely know what I've been cooking and baking in my kitchen.  Below are a few iPhone photos of things I've made recently, along with links to the recipes.  Photo shoots with my SLR camera seem like a luxury this time of year.  It's all about sitting down and eating (immediately!) when the food is ready.  No one wants to wait while I photograph.

Picture


Stuffed Zucchini... recipe HERE

     (almost ready for the oven)  The only thing I did differently was to fill the zucchini shells with tiny cubes of fresh mozzarella before I finished filling with the rice, ground beef and tomatoes.  I highly recommend the addition of the mozzarella!


Picture


Yotam Ottolenghi's "Very Full Tart"... recipe HERE


     This savory tart recipe is from Ottolenghi's cookbook PLENTY, and a great way to use up some of that vegetable garden produce!  Loved that sweet potato added to the mix.  The one thing I'll do the next time I make this tart is add one more egg, for a total of three.  It will help that one cup of heavy cream set up better.  Also, I recommend using a 9-inch deep-sided tart pan with a removable bottom.


Picture


Raspberry Buttermilk Cake... recipe HERE


     I posted the recipe for this Raspberry Buttermilk Cake several years ago.  Every time I make this cake I ask myself... Why don't I make it more often?  It is extremely easy and delicious!


TAKE a LOOK:


4 Comments
<<Previous
    Picture


    Picture
    Picture
    Enter your Email

    Preview | Powered by FeedBlitz


    Categories

    All
    Amana
    Appetizers
    Beef
    Breads
    Breakfast
    Cakes
    Chocolate
    Condiments
    Cookies
    Daring Bakers Challenge
    Desserts And Sweets
    Drinks
    Eggs
    Espresso
    Etcetera
    Fish
    French Bulldogs
    Friday Night Dinner
    Fruit
    Germany
    Gratins
    Great Kitchens
    Grilling
    Ice Cream
    Lamb
    Main Dishes
    Muffins
    My Garden
    My Kitchen Renovation
    New Years Day Brunch
    Paris
    Pasta
    Pork
    Poultry
    Provence
    Restaurants
    Rhubarb
    Rice
    Salads
    Scones
    Seafood
    Side Dish
    Soup
    Sunday Mornings
    Sweet And Savory Tarts
    Thanksgiving
    Tomatoes
    Vegetables
    Vegetarian

  • Home
  • PAINTINGS
  • About
  • Passions-to-Pastry Blog
  • Contact
  • Recipes