Living Tastefully
  • Home
  • PAINTINGS
  • About
  • Passions-to-Pastry Blog
  • Contact
  • Recipes

Lemon Layer Cake with Lemon Cream Cheese Buttercream

6/3/2018

7 Comments

 
Picture

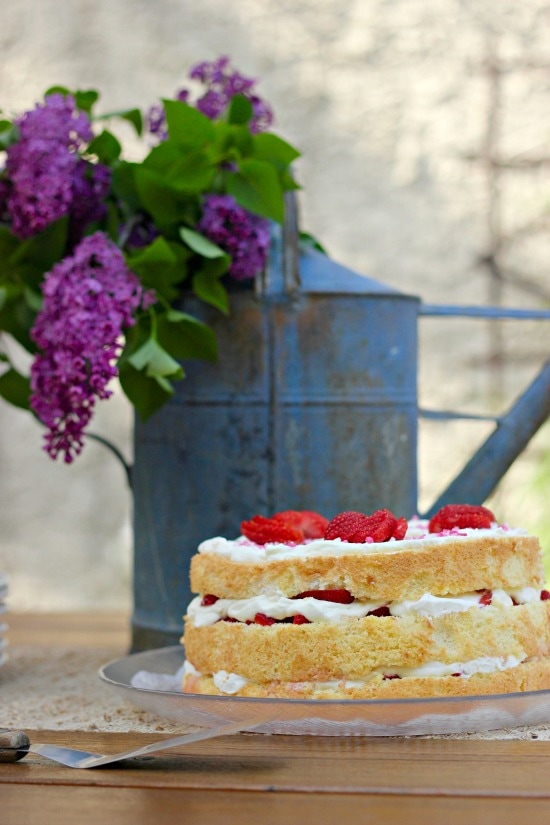
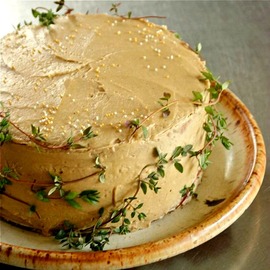
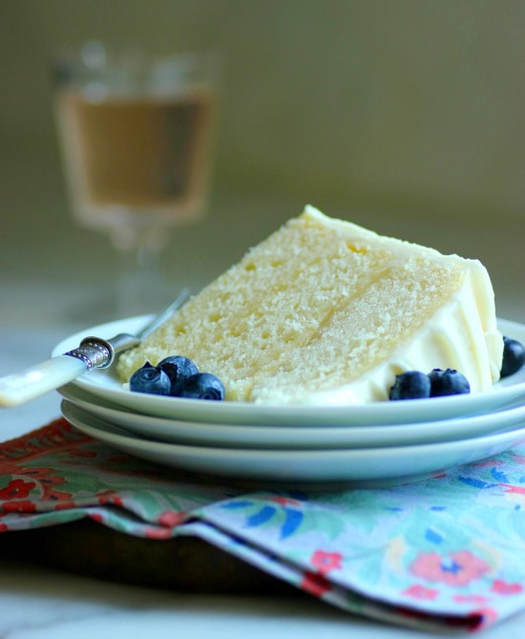
     There are three birthdays in our family during the months of April and May.  When my girls were little, their birthday cakes were almost always chocolate, filled with sweet cherries, and frosted with whipped heavy cream.  But lately, I ask what I should bake them for their birthdays.  They never reply with a flavor or a type of cake.  They do research for days, if not weeks, for a recipe they like, never taking into consideration the complexity or the availability of certain ingredients.  I guess I should be flattered that my daughters have faith in my ability to pull off whatever it is they choose.

Picture

     The recipe for this lemon layer cake appeared in my inbox, sent to me by my lemon-loving daughter about a week before her birthday.  I made the lemon curd filling and the lemon cream cheese buttercream three days ahead and the cake layers the day before I planned to assemble it, making it seem less labor intensive.  If you love lemon, this cake's for you.  It really was fabulous and I liked it even more after a couple of days when the flavors merged and became more intense. 

Picture

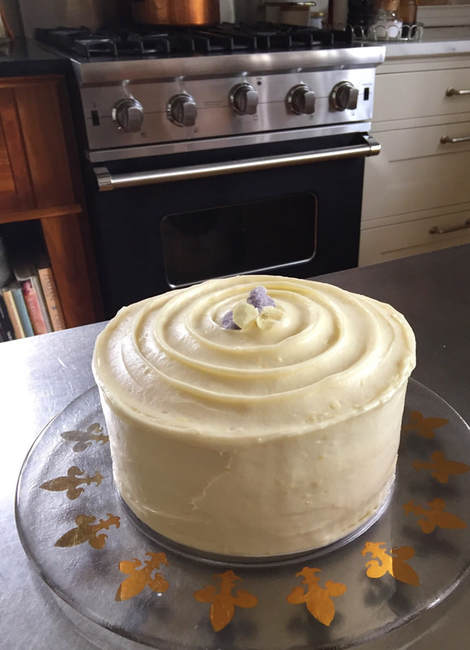
     I received an Ateco 612 Revolving Cake Stand this year and it makes all the difference in frosting a cake.  If you bake a lot of cakes and don't have one of these... get one!

Picture

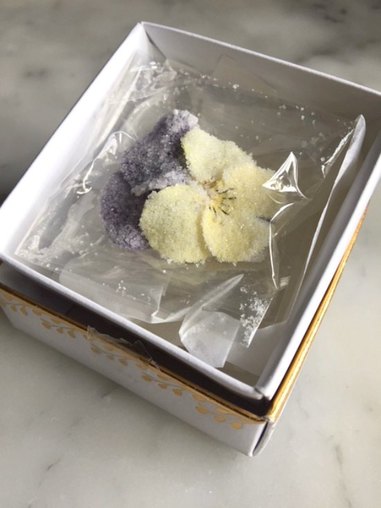
     The big candied violet on top was purchased by my sister on a recent trip to Germany.  Loved it!  I suppose I need to start growing organic violets, too...     


Lemon Layer Cake

Recipe, slightly adapted, from the website, MyCakeSchool.com

Lemon Curd
• 3/4 cup granulated sugar
• 1/4 cup cornstarch
• 1 cup water
• 2 large egg yolks, lightly beaten
• 2 tablespoons butter
• 1 tablespoon grated lemon zest (preferably organic)
• 4 tablespoons fresh lemon juice
1.  Combine sugar, cornstarch and water in a saucepan over medium heat. Stir constantly, until mixture thickens and comes to a boil. Boil, stirring, for 1 minute more.. Remove the pan from the heat. Spoon about 1/2 cup of the hot mixture into a small bowl with egg yolks and stir quickly until combined. Continue stirring, while pouring the egg mixture back into the saucepan. Return pan to medium heat and cook, stirring, until the curd is thickened (1-2 minutes). Remove from heat and stir in the butter, lemon juice, and lemon zest.  Let the lemon curd cool, then press plastic wrap onto the surface, this will prevent a skin from forming on the top. Refrigerate.


Lemon Cream Cheese Buttercream
• 2 sticks (16 tablespoons) unsalted butter, slightly softened but still cool to touch
• 2  8oz packages full fat cream cheese, slightly softened
• 2 teaspoons lemon juice
• 1  1/2 teaspoon lemon zest
• 1  teaspoons lemon extract
• 6 to 6 1/2 cups powdered (confectioner's) sugar, adding more if necessary
1.  Cut butter into 1/2 inch slices and place in the bowl of your mixer.  Beat until smooth.

2.  Cut the cream cheese into pieces and add to the butter.  Beat until blended.
3.  Add the lemon juice, lemon zest, and lemon extract.
4.  Gradually add the powdered sugar and beat until well blended.
5.  Refrigerate frosting until needed.  Allow frosting to soften slightly and remix before using.  Do not microwave to soften.  There will be enough frosting for a 3 layer, 8 or 9-inch cake.


Lemon Cake Layers
• 1 1/2 sticks (12 tablespoons) unsalted butter, softened, plus additional butter for greasing pans
• 1 1/2 cups granulated sugar
• 4 large eggs, room temperature
• 3 cups cake flour
• 1/2 teaspoon salt
• 1 1/2 teaspoons baking powder
• 1/2 teaspoon baking soda
• 1 cup milk
• 1/4 cup lemon juice
• 1/4 cup canola oil or vegetable oil (preferably expeller pressed)
• zest of 2 lemons
• 1 tablespoon lemon extract

1.  PREHEAT OVEN to 350 degrees.
2.  Grease three 8-inch cake pans.  Line the base of each pan with a round of waxed paper; grease the paper and dust the interior of the pans with flour, tapping out any excess flour.
3.  In a medium bowl add the flour, baking powder, baking soda, salt and zest of 2 lemons.  Whisk to blend and set aside.
4.  In another bowl, add the milk, canola or vegetable oil, lemon juice, and lemon extract.  Whisk to blend and set aside.
5.  In the bowl of a mixer, beat the softened butter until smooth.  Gradually add the sugar and mix on medium speed 3 to 5 minutes until it is light in color and fluffy.
6.  Add the eggs, one at a time, mixing until the yellow of the yolk disappears.
7.  Add the flour mixture and the milk mixture alternately, beginning and ending with the flour (3 additions of flour and 2 of milk).  Mix on medium speed until combined and smooth.  Do not overmix.

8.  Pour the batter into the prepared pans, smoothing the tops.  Bake at 350 degrees for 20-25 minutes, or until a toothpick inserted in the center comes out clean.  Let the cakes cool in the pans for 10 minutes before turning out.

ASSEMBLY
1.  Pipe a dam of lemon cream cheese buttercream about 1/4-inch inside the edge of the first layer.  Spread a thin layer of lemon curd inside the buttercream, then pipe and spread a layer of buttercream on top of it.  Repeat with the second layer.  Top with the third layer cake.
2.  Crumb coat the entire cake with a thin layer of the buttercream frosting.  Refrigerate the cake for about 30 minutes, remove from refrigerator and finish frosting the cake with the lemon cream cheese buttercream.  Refrigerate the cake if not eating immediately.  Pull the cake from the refrigerator about 20 minutes before serving.  And as I said earlier, I really think it tastes even better the next day.


TAKE a LOOK


7 Comments

Baby Shower Luncheon

6/14/2017

7 Comments

 
Picture

     This past weekend my daughter Claire hosted a baby shower for her sister, Whitney, along with Whitney's close friend, Allison.  Yes... I'm going to be an Oma.  The event took place in my home, and my contribution for this gathering was lunch.  The plan (for months) had been a luncheon outdoors on the patio and in the garden, of course!  But the weather turned against us with 90+ degree heat and unbearable dew points that forced everyone attending inside; not ideal in our minds, but we made it work...

Picture

     Appetizers were placed in the living room. 

Picture
Picture

 Tomato tarts (recipe HERE) and main course salad were served in the kitchen.

Picture

     I have been making my version of this chicken, corn and avocado salad (recipe below) since eating it at a local restaurant this spring.

Picture
Picture

    Dessert was 3 Rhubarb and Almond Cakes and Chocolate Bouchons (recipe HERE)  Yes... I always prepare more than we need.
    Drinks consisted of Mimosas made with Prosecco, Rosé, and non-alcoholic Watermelon-Ginger Spritzers (recipe HERE), which were just the thing on a hot, sultry day.
     The baby girl is due in September... a sister for Midge the French Bulldog.


Picture

CHICKEN, CORN, and AVOCADO SALAD
The ingredients of the salad below are approximate
Serves 4
• 1 Rotisserie chicken, skin removed and meat from the bones cut into bite-size pieces
• 16-ounce can organic corn, drained
• a handful of Medjool dates, pitted and diced
• 1-2 avocados, cut into 1/2-inch dice
• 5-ounce bag of Italian greens (or combine romaine, butter lettuce, and radicchio)
• 1/4 cup sliced or slivered almonds, toasted
• goat cheese, as much as you like for tossing on top of salad
• apple cider vinegar
• extra-virgin olive oil
• salt and freshly ground pepper

1.  In a large bowl, gently combine the chicken, corn, dates, avocado and greens. 
2.  In a small bowl, whisk together equal amounts of apple cider vinegar and olive oil.  Add salt and pepper to taste.  Poor dressing over salad and gently toss.  Add additional salt and pepper if needed.
3.  Sprinkle almonds and goat cheese over the top of the salad and serve.


RHUBARB and ALMOND CAKE
adapted recipe from The Floating Kitchen
10 servings

• 1 cup sugar
• 1/2 cup unsalted butter, at room temperature
• 2 large eggs
• 1 cup plain Greek yogurt
• 1 tablespoon grated orange zest
• 3/4 teaspoon vanilla extract
• 1/4 teaspoon almond extract
• 1 1/2 cups unbleached all-purpose flour
• 1/2 cup almond meal
• 1 teaspoon baking powder
• 1/2 teaspoon baking soda
• 1/2 teaspoon ground cardamom
• 1/4 teaspoon salt
• 3/4 pound rhubarb
• 1 tablespoon turbinado sugar
• 1/3 cup sliced almonds
• Confectioners' sugar for serving

1.  Preheat oven to 350˚F.  Line the bottom of a 9-inch springform pan with a round of parchment paper.  Generously coat the parchment paper and the sides of the pan with non-stick cooking spray.  Set aside.
2.  In the bowl of a stand mixer and using the paddle attachment, beat 1 cup of the sugar and the butter together on medium speed until light and fluffy.  Add the eggs, one at a time, mixing after each addition.  Add the yogurt, orange zest and extracts and beat until just incorporated. 
3.  In a medium bowl, combine the flours, baking powder, baking soda, cardamom and salt.  Add dry ingredients to the cake batter, adding in one-third at a time, mixing on low speed until none of the white streaks remain.  Set aside. 
4.  Trim rhubarb of leaves and if the stalks are wide, slice them in half lengthwise.  Cut the rhubarb stalks into pieces 1 1/2-inches in length.
5.  Spread about half of the cake batter evenly over the bottom of the prepared springform pan.  Layer about half of the rhubarb over the batter in a single layer, leaving a half-inch space uncovered around the edges of the pan.  Spread the remaining cake batter over the rhubarb and arrange rhubarb pieces on top.  You may not need all of the rhubarb.  Sprinkle the sliced almonds and turbinado sugar over the cake.
6.  Place the cake on the middle rack of the preheated oven.  Bake for approximately 50-60 minutes, or until a toothpick inserted into the middle comes out clean.  Remove cake from the oven and set it on a wire rack to cool.  Once cooled, run a knife around the outer edge of the cake and release the sides of the springform pan.  Cut into slices and dust with the Confectioners' sugar.
• The cake can be stored at room temperature in an airtight container for up to 2 days.


TAKE a LOOK:


7 Comments

Sponge Cake with Rhubarb and Strawberries

5/16/2017

2 Comments

 
Picture

     It was a beautiful day...
     I spent it in the kitchen baking and walking my French Bulldog, Bisous.  What could be better than that?  The weather has been fantastic and we dined alfresco on the patio with family and friends.  This sponge cake with rhubarb compote and fresh strawberries tucked between the layers was our dessert... always looking for ways to use my yearly bumper crop of rhubarb.


Picture


Sponge Cake with Rhubarb and Strawberries

• recipe for sponge cake from thejoyofbaking.com

INGREDIENTS:
• 6 large eggs, separated
• 1 cup sifted cake flour (make your own... recipe
HERE)
• 1/4 teaspoon baking powder
• 1/4 teaspoon salt
• 1 cup granulated white sugar, divided
• 1 teaspoon pure vanilla extract
• 2 tablespoons water
• Zest of a lemon
• 3/4 teaspoon cream of tartar
• 1 pound strawberries, 3 reserved and the rest of the berries hulled and sliced
• Rhubarb sauce, recipe below
• 2 cups heavy cream
• 3 tablespoons Confectioners' sugar

EQUIPMENT:
• 1 ungreased, 2 piece, 10-inch tube pan

TO MAKE THE CAKE:
1.  Preheat the oven to 350˚F.  Place a rack in the center of the oven.
2.  Separate the cold eggs, placing yolks in one bowl and whites in another bowl.  Cover bowls with plastic wrap and bring to room temperature.  In the meantime, whisk together the sifted flour, baking powder, and salt.  Set aside.
3.  Place the egg yolks and 2/3 cup of the sugar in the bowl of an electric mixer.  Beat

on high speed until thick and light colored.  When you raise the beater, the batter should fall back into the bowl in a slow ribbon.  Beat in the vanilla extract, water, and lemon zest.  Set aside.
4. In a clean bowl with the whisk attachment whip the egg whites until foamy.  Add the cream of tartar and continue beating until soft peaks form.  Gradually add the 1/3 cup of sugar and continue beating until the egg whites are shiny and just form stiff peaks.
5.  Sift 1/3 of the flour mixture over the beaten egg yolks and gently fold into the egg yolk batter with a rubber spatula.  Repeat with the remaining flour, then gently fold a little of the beaten egg whites into the batter to lighten it.  Add the rest of the whites, and fold just until incorporated.  Do not overmix the batter -- it will deflate.  Pour the batter into the tube pan and smooth the top.
6.  Bake in the preheated oven for 30 to 35 minutes, or until a toothpick inserted into the cake comes out clean.  Remove from oven and invert the tube pan and suspend over the neck of a glass wine or water bottle.  Cool the cake completely (about 1 hour).  Run a sharp knife around the inside of the pan and lift up on the tube to removed the center of the pan.  Run the knife along the bottom and around the tube of the pan.  Invert the cake onto a wire rack.

TO ASSEMBLE THE CAKE:
1.  At least 2 hours before serving, pour the heavy cream into a bowl and whip until starting to thicken.  Add the Confectioners' sugar and continue to whip until soft peaks form.  Set aside (or place in refrigerator if a warm day).
2. Using a serrated knife, slice the cake into 3 equal layers.  Take the bottom cake layer and place on a serving plate or cake stand.  Spoon half of the rhubarb sauce evenly over the cake layer, including just enough of the rhubarb's syrup to moisten the cake.  Take half of the sliced strawberries and scatter them evenly over the rhubarb.  Cover the rhubarb and strawberries with about 1/3 of the whipped cream.  Take the middle layer of sponge cake and place on top of the whipped cream, strawberries, and rhubarb; press sponge layer gently onto the whipped cream.  Spoon the remaining rhubarb, and some of the syrup, plus the strawberries onto the second sponge layer and top with another 1/3 of the whipped cream.  Place the last layer of sponge on the top and cover with the remaining whipped cream.  Slice the remaining 3 strawberries into fans and place on top of the cake.  I also sprinkled the top of my cake with strawberry sugar from
Zuk-Zak. 
3.  Refrigerate the cake until you are ready to serve.  The cake is best when eaten the same day it is made.

RHUBARB SAUCE:
• 3 cups rhubarb, sliced into 1/2-inch pieces
• 1 cup sugar
• 1 cup water
1.  Combine all of the ingredients in a saucepan and place over medium-low heat on the stove.  Cook until rhubarb has softened, making sure that the rhubarb has not broken down and you still have whole chunks of rhubarb.  Remove from heat and allow mixture to cool completely before assembling the cake.


TAKE a LOOK:


2 Comments

Lemon Meringue Cake... for a birthday

4/8/2017

3 Comments

 
Picture
Picture

  Today is my youngest daughter's 24th birthday.  Yes... time flies. 

Picture

     The driving force behind choosing this cake recipe, from Liz Pruitt's TARTINE, was the large bag of lemons in my refrigerator.

Picture

     As you can see in this photo, I went a bit overboard with the caramel spread between the cake layers, resulting in a gentle oozing that bothered no one but me.  And with any recipe from TARTINE, you can't go wrong.

Picture
Picture

•
TARTINE'S
recipe calls for using a 10-inch springform pan with 3-inch sides.  I used two 8-inch pans with 2-inch sides, and one 8-inch pan with 1 1/4-inch sides to bake.  I split the two taller cakes in half to use in this recipe.

CAKE:

• 2¼ cups  all-purpose flour
• 2 teaspoons baking powder
• 1½ cups sugar
• 3/4 teaspoon salt
• 1/2 cup vegetable oil
• 6 large egg yolks, at room temperature
• 1/2 cup water
• 1/4 cup lemon juice
• 1 1/2 teaspoon grated lemon zest
• 10 large egg whites, at room temperature
• 1./4 teaspoon cream of tartar
1.  Preheat the oven to 325F. Line the bottom of a 10-inch cake or springform pan with 3-inch sides with parchment paper cut to fit exactly; don’t grease the pan.  (• See above for what pans I used in this recipe.)
2.  Sift together the flour and baking powder into a large mixing bowl. Add 1 1/4 cups of the sugar and the salt and whisk to combine. In a small bowl, whisk together the oil, egg yolks, water, lemon juice, and lemon zest. Make a well in the flour, add the yolk mixture, and then whisk thoroughly and quickly for about 1 minutes until very smooth.
3.  In another large mixing bowl, beat the egg whites until frothy, then add the cream of tartar and beat on medium-high speed until it holds soft peaks. Add the remaining 1/4 cup  sugar slowly while beating on medium-high speed until the whites hold firm, shiny peaks. Add a third of the egg whites and fold into the yolk mixture to lighten, then fold in the rest of the whites until just combined.
4.  Pour the batter into the pan, smoothing the top if necessary. Bake until a toothpick inserted in the center comes out clean, about 45-55 minutes. (About 40 minutes if you use 8-inch cake pans).  Let cool in the pan on a wire rack. Once completely cool, run a thin knife around the sides of the pan to loosen the cake an then release and lift off the pan sides. Invert the cake and peel off the parchment.

CARAMEL:
• 2/3 cup heavy cream
• 1/4 vanilla bean
• 1 1/4 cup sugar
• 1/4 cup water
• 1/4 teaspoon salt
• 2 tablespoons light corn syrup
• 3/4 teaspoon lemon juice
• 4 tablespoons unsalted butter
1.  Pour the cream into a small, heavy saucepan. Split the vanilla bean in half lengthwise and use the tip of a sharp knife to scrape the seeds from the pod halves into the milk. Place over medium-high heat and bring to just under a boil, stirring occasionally. Reduce the heat to low to keep the cream warm.
2.  In a medium, heavy saucepan, combine the sugar, water, salt, and corn syrup. Bring to a boil over medium heat, stirring to dissolve the sugar. Then cook, without stirring, until the mixture is amber colored, 5 to 8 minutes. Remove from the heat.
3.  The mixture will continue to cook off the heat and become darker, so make sure to have your cream close by. Carefully and slowly add the cream to the sugar syrup. The mixture will boil vigorously at first. Let the mixture simmer down, and then whisk until smooth. Add the lemon juice. Let cool for about 10 minutes.
4.  Cut the butter into 1-inch chunks and add to the caramel one at a time, whisking constantly after each addition. Then whisk the caramel periodically as it continues to cool.

LEMON CREAM:
• 1/2 cup, plus 2 tablespoons lemon juice
• 3 large eggs
• 1 egg yolk
• 3/4 cup sugar
• pinch salt
• 16 tablespoons unsalted butter
1. In a heatproof bowl set over a saucepan of simmering water, combine the lemon juice, eggs, yolk, sugar, and salt (make sure the bottom of the bowl doesn’t touch the water). Whisk them together constantly until very thick, or 80°C (180°F) on an instant-read thermometer. Remove from the heat and let it cool down until warm to touch (60°C or 140°F on a thermometer). Place the lemon cream in a blender and with the motor running, add the butter in small pieces. Allow to cool completely. (You may refrigerate it, but allow to come to cool room temperature before using.)

LEMON SYRUP:
• 1/3 cup sugar
• 1/3 cup water
• 1/3 cup lemon juice

1. In a nonreactive saucepan, combine the sugar and water and bring to a boil over medium heat. Transfer to a cool bowl, let cool for a bit, then chill for half an hour. Stir in the lemon juice.
ASSEMBLY:
1.  Split the chiffon cake horizontally into four equal layers. Place one layer on your serving plate (which I lined with wax paper around to cake) and moisten evenly with ¼ of the lemon syrup. Spread 1/3 of the caramel over the cake, then 1/3 of the lemon cream. Repeat with 2 more layers, using up the remaining caramel and lemon cream. Top with the fourth cake layer and moisten with the remaining lemon syrup. Cover the cake completely with plastic wrap and refrigerate for at least four hours or overnight.
NOTE:  If using smaller cake pans than the 10-inch springform pan used in this recipe, reduce the amount of caramel and lemon cream between the layers.

SWISS MERINGUE:
• 7 egg whites
• 1 3/4 cup sugar
• pinch of salt
1.  In a heatproof bowl over a pan of simmering water, combine the egg whites, sugar, and salt and whisk until the whites are hot to the touch, about 120F, about 5 minutes. Beat on high speed until the mixture is very thick and holds stiff, glossy peaks.
2.  Unmold the cake and spread the meringue all over. Use a spatula or a spoon to create dramatic swirls. Using a propane torch if available, scorch the meringue, blackening the tips and swirls.


TAKE a LOOK:


3 Comments

Lime Angel Food Cake with Pistachios

3/21/2017

1 Comment

 
Picture


Picture

     I felt like eating cake today.


Picture


Lime Angel Food Cake with Lime Glaze & Pistachios
Matt Lewis & Renato Poliafito | Bon Appétit, April 2010


CAKE:
• 1 cup cake flour
• 1  1/2 cups superfine sugar, divided
• 1/4 teaspoon salt
• 10 large egg whites, room temperature
• 2 teaspoons finely grated lime peel
• 1 teaspoon vanilla extract
• 1 teaspoon cream of tartar

LIME SYRUP and LIME GLAZE:
• 1/2 cup sugar
• 4 tablespoons fresh lime juice, divided
• 1/2 cup unsalted raw pistachios (about 2 ounces), finely chopped in food processor
• 1/2 cup powdered sugar

SPECIAL EQUIPMENT: 
• 10-inch-diameter angel food cake pan with 4-inch-high sides and removable bottom (do not use a nonstick pan)


FOR CAKE:
1.  Place rack in center of oven and preheat to 350˚F.  Sift flour, 1/2 cup superfine sugar, and salt into medium bowl; repeat sifting 3 times. Using electric mixer, beat egg whites, lime peel, and vanilla on medium speed in large bowl until frothy.  Add cream of tartar; increase speed to high and beat until soft peaks form. Gradually add remaining 1 cup sugar, 2 tablespoons at a time, beating until stiff peaks form. Sprinkle 1/3 of flour mixture over whites and gently fold in until incorporated. Fold in remaining flour mixture in 2 more additions just until incorporated. Transfer to an ungreased 10-inch angel food cake pan with 4-inch-high sides and removable bottom (do not use a nonstick pan); smooth top.

2.  Bake cake until pale golden and tester inserted near center comes out clean, about 38 minutes. Immediately invert cake onto work surface if pan has feet, or invert center tube of pan onto neck of a bottle and cool cake completely.

3.  Using a long thin knife, cut around cake sides and center tube to loosen. Lift out center tube with cake still attached; run knife between cake and bottom of pan to loosen. Invert cake onto rack, then turn cake over, rounded side up. Set rack with cake atop a rimmed baking sheet.

FOR LIME SYRUP & GLAZE:
1.  Combine sugar and 3 tablespoons lime juice in small saucepan; stir over medium heat until sugar dissolves. Brush syrup all over top and sides of cake. Immediately press pistachios onto top and sides of cake, pressing to adhere.
2.  Stir powdered sugar with remaining 1 tablespoon lime juice in small bowl until smooth. Drizzle glaze over top of cake. Let stand until glaze sets, about 10 minutes.
3.  Transfer cake to platter and serve.


TAKE a LOOK:


1 Comment

Flourless Chocolate Cake with Crème Anglaise

3/1/2017

2 Comments

 
Picture

     Whenever I eat a flourless chocolate cake with crème anglaise I'm reminded of a dessert my mother and aunt made often when I was growing up in the Amana Colonies.  A dense, bitter chocolate pudding was poured into a mold, and when set, it was released into a large bowl of sweet vanilla sauce.  I was always so happy when I saw it being prepared.  I loved it.  And many years later, when I was in Paris with my sister and daughter during October, the first time I had ever visited in the fall, I saw Gâteau au Chocolat avec Crème Anglaise on bistro chalkboards, everywhere.  One restaurant had a little table set up by the front window with pitchers full of the vanilla sauce alongside platters of chocolate cake.  You probably know what I had for dessert that night.
     I have baked many flourless chocolate cakes and this one has edged itself to the front of the line.  Double the recipe, below, for the Crème Anglaise if you want a generous dish of the vanilla sauce to accompany all of the chocolate cake slices ;-P


Picture


Flourless Chocolate Cake

+ a Martha Stewart recipe
• 3 tablespoons unsalted butter, plus more for the cake pan
• 6 ounces bittersweet chocolate, chopped
• 6 large eggs, separated, at room temperature
• 1 cup sugar, divided
• 3 tablespoons instant espresso powder, such as Medaglia d'Oro
• 1/4 teaspoon coarse salt
• 1 teaspoon pure vanilla extract
• Cocoa powder for serving, optional
• Vanilla Fleur de Sel for serving, optional

1.  Preheat oven to 350˚F.  Line a 9-inch springform pan with a parchment round; butter parchment and sides of pan.  Melt butter and chocolate, stirring until smooth, in a bowl set over a saucepan of simmering water or in 15 second intervals in a microwave oven.
2.  Beat together egg yolks and 1/2 cup sugar with a mixer on medium-high speed, about 3 minutes; mixture should be thick and pale.  Add espresso powder and salt; beat until combined, about 1 minute. Add vanilla and melted-chocolate mixture; beat 1 minute longer.
3.  In another bowl, beat egg whites on medium-high speed until foamy. Increase speed to high; gradually add remaining 1/2 cup sugar, beating until stiff peaks form, about 5 minutes. Stir about 1/2 cup into the chocolate mixture to lighten, then fold remaining egg whites into chocolate mixture in 3 additions. Transfer batter to pan and bake until set, 40 to 45 minutes. Let cake cool completely in pan on a wire rack. Remove side of pan; transfer cake to a serving plate.  Dust with cocoa and a sprinkle of vanilla fleur de sel, if desired.

Crème Anglaise

+ recipe from French Tarts by Linda Dannenberg
• 5 large egg yolks
• 1/2 cup sugar
• 2 cups whole milk
• 1 teaspoon vanilla extract
1. In a large saucepan, whisk together the yolks and the sugar.  In another saucepan, heat the milk and the vanilla extract over medium heat until hot but not boiling.  Pour the hot milk into the yolk mixture, stirring constantly with a spoon.  Set over medium heat and stir constantly until the sauce thickens and coats the back of the spoon.  Do not let the sauce come to a boil or it will curdle.  Remove from the heat and place plastic wrap directly on the surface to prevent a skin from forming.  Let cool, then refrigerate if not serving immediately. 
2.  Crème Anglaise is best served the day it is made, at room temperature, but if can be refrigerated for a couple of days and served chilled.

TAKE a LOOK:


2 Comments

Chocolate-Orange-Olive Oil Cake

1/27/2017

4 Comments

 
Picture

     I just ate this... right after I finished taking photos, I sat down and devoured it.  And what I found was, this Chocolate-Orange Olive Oil Cake made with almond flour, is even better the second day!  That's because all of the zested orange added to the batter has additional time to infuse the baked cake.  And for me, there has never been a more delicious combination than chocolate and orange.
     I've recently baked several breads and cakes with almond flour exclusively (no wheat flour added) and with some of them, I have run into trouble when using the oven temperatures and baking times that are called for in the recipes.  This cake was no exception.  In the recipe below, I show my adjusted time and temp.  I recommend observing your cake closely towards the last 15 minutes of baking and testing frequently with a skewer for doneness.  Ovens vary and pan size can also change the cooking time.


Picture
Picture
• adapted recipe | Mary Luz Mejia

• 5 tablespoons unsweetened cocoa, sifted
• 1 1/4 ounce bittersweet chocolate, chopped
• 1/4 cup whole milk
• 1 vanilla bean, split lengthwise and seeds scraped
• 1 3/4 cups fine almond meal/flour
• 1/2 teaspoon baking soda
• 1/4 teaspoon sea salt
• 1/2 teaspoon cinnamon
• Pinch of freshly ground nutmeg
• 1 cup cane sugar
• 2/3 cup mild extra-virgin olive oil, plus extra oil for greasing pan
• 2 tablespoons freshly squeezed orange juice
• Zest of 2 large or 3 small organic oranges
• 3 large eggs
• Whipped heavy cream or crème fraîche, for serving
• Candied orange rind, for serving


1.  Preheat oven to 350˚F. 
2.  Grease an 8 1/2-inch to 9-inch springform pan with olive oil and line bottom of pan with parchment paper.
3.  Combine the cocoa and chopped chocolate in a bowl.  Bring the whole milk to a boil and add to the chocolate, whisking until smooth.  Stir in the vanilla bean seeds; set aside.
4.  In a medium bowl, combine the almond meal/flour, baking soda, salt, cinnamon and nutmeg.
5.  Place the sugar, olive oil, orange juice, zest and eggs in the bowl of an electric stand mixer.  Beat until the mixture is smooth and thick.  Scrape the cocoa mixture into the egg mixture and beat until combined.  Slowly add the dry ingredients to the mixing bowl and mix until well combined, scraping down the sides of bowl if necessary.
6.  Pour the batter into the springform pan and bake for 40 minutes.  To test doneness, use a wooden skewer to pierce into the center of the cake.  If there is moist batter or crumbs on the skewer when removed, continue to bake until the skewer tests dry, possibly another 15 minutes.  (I baked my cake for 40 minutes, then turned on the convection for an additional 15 minutes before my cake was done.  Adjust accordingly to your oven and pan size). 
7.  Remove cake and cool for 10 minutes before running a thin knife around the edges and removing the ring.  Serve with whipped heavy cream or crème fraîche and top with a slice of candied orange rind.


TAKE a LOOK:


4 Comments

Apple Kuchen with Honey and Ginger

10/13/2016

7 Comments

 
Picture

     I follow New York Times Food on Instagram.  And when a drool-inducing photo of this kuchen... or cake... appeared on the site, I immediately got to work with the apples I had just purchased at a local farm. 
     I was tempted to cut back a bit on the amount of ginger, fresh and candied, that was called for in the recipe; but I'm glad I didn't.  Everything about this cake, from chef and cookbook author, David Tanis, is pretty perfect.
     The only thing I changed was the oven temperature and baking time.  The original recipe calls for 325˚F.  I baked my cake at 350˚, plus an additional 10 minutes longer.  That may just be my oven, although I've had the Viking repair man tell me it's calibrated perfectly.  May have to bake this kuchen along with my pumpkin pies for Thanksgiving this year -- or at least have it alongside our coffee in the morning.


Picture


Picture
FOR THE CAKE:
• 1/2 cup unsalted butter, softened, plus additional butter for greasing pan
• 1 1/2 cups unbleached all-purpose flour, plus flour for dusting pan
• 1/2 cup sugar, plus 1 tablespoon for sprinkling apples
• 1/4 cup raw honey
• 3 large eggs
• 1 tablespoon grated fresh ginger
• 2 ounces candied ginger, finely diced
• 1/2 teaspoon grated lemon zest
• 1/2 teaspoon salt
• 2 teaspoons baking powder
• 3 medium apples, peeled and quartered
FOR THE GLAZE:
• 1/4 cup sugar
• 1/4 cup honey
• 3 tablespoons honey
1.  Heat the oven to 350˚F and position a rack in the middle of the oven.  Butter and flour a 9-inch springform pan (I used a 10 1/4-inch springform, since it was all I had). 
2.  With an electric mixer, cream the butter and sugar, then add the honey and whip for 1 minute, until fluffy.  Beat in eggs, one at a time, until well incorporated, then whip for 2 minutes.  Stir in grated ginger, candied ginger and lemon zest.
3.  Whisk together flour, salt and baking powder and add to bowl, mixing briefly to make a stiff batter.  Pour batter into prepared pan.
4.  With a paring knife, cut slits in each of the apple quarters on the rounded, outer side of each apple wedge.  Slice partway through at approx. 1/8-inch intervals.  Arrange apple quarters slit-side-up over the batter (I used all but one quarter, which my French Bulldog greatly appreciated).  Sprinkle surface with 1 tablespoon sugar.
5.  Place cake pan on a baking sheet and put on middle rack of oven.  Bake for about 45-55 minutes, or until an inserted skewer emerges dry (I baked my cake for a total of 55 minutes).  If cake browns too rapidly, tent with foil until done.  Cool on a rack, then carefully unmold.
6.  Make the glaze:  Put sugar, honey and lemon juice in a small saucepan over medium heat, stirring until sugar is dissolved and mixture bubbles.  Brush surface of  cake and apples with warm glaze.  Cake will keep for several days, tightly wrapped at room temperature.


TAKE a LOOK:


7 Comments

breakfast at my house... Fig & Almond Cake

9/8/2016

1 Comment

 
Picture

     September and figs.  I wish the season weren't so brief.  I bought my first carton of fresh figs yesterday.  My two "Little Miss Figgy" plants on my patio are still too young to produce fruit.  I decided that baking a breakfast cake with my purchased figs, to eat along with my cappuccino in the morning, was the way to go. 

Picture

  And figs are really good for you!  (read this)... Another reason to go out and buy some figs.!

Picture

    
And, right before I photographed the Fig & Almond Breakfast Cake, a neighbor stopped by with fresh raspberries that he picked from the bushes in his yard.  Perfect timing!

Picture
• recipe from Beyond the Plate
• 2 1/2 ounces blanched almond meal
• 2 1/2 ounces unbleached, all-purpose flour
• Pinch of salt
• 1 teaspoon baking powder
• 8 tablespoons (1 stick) unsalted butter, softened
• 3 ounces sugar
• 1 tablespoon rum
• 2 large eggs
• several (I used about 5-6) ripe figs, quartered
• Confectioners' sugar and fresh figs for finishing, if desired
1.  Preheat oven to 375˚F.
2. Line the base of an 8 1/2 to 9-inch springform pan with parchment paper, then tighten the springform ring to keep the parchment in place; trim excess paper.
3.  In a large bowl, whisk together the almond meal, flour, salt and baking powder; set aside.
4.  In the bowl of a stand mixer, beat the butter and sugar at medium speed, until pale and fluffy.  Turn mixer to low and add the rum, dry ingredients and eggs.  Increase the speed to medium and beat for 3-4 minutes.  The batter should be smooth and all the ingredients are incorporated.
5.  Turn the cake batter into the prepared springform pan using a spatula to spread the thick mixture evenly.  Arrange the fig quarters over the top of the batter.  Place the pan on the middle rack of the oven and bake for approximately 45 minutes, or until the cake is golden brown and a toothpick inserted into the cake comes out clean.
6.  Run a knife around the perimeter of the cake before releasing the ring; allow to cool for about 15 minutes.  Dust with confectioners' sugar and decorate with additional fresh figs if desired.


TAKE a LOOK:


1 Comment

What have I been up to...?

8/28/2016

4 Comments

 
Picture

I'm not here :(

Picture

nor here :(

Picture

or even here :(

     It probably seems like I've been gone for awhile...  So, what have I been doing?  Not traveling.  I wish I could say I spent the summer in the south of France, but that didn't happen.  No surprise to most of you, I've been spending a LOT of time with my Frenchie puppy, Bisous.  Right before I lost my Frenchie, Pipi, just a year ago, my vet tried to help me put her life into perspective.  She told me, "Pipi is like 110 in people years and has had a better life than most children".  I'm embarrassed to say, the vet was probably 100% right.  I'm very devoted to my dogs and that's one reason I've been staying close to home with "B".  No major trips.  If any traveling is done anytime soon, it will be by car so Bisous can accompany us.  So right now, there's no France in my future.  Life is currently all about Bisous...
     And lately, most of my days are spent in my kitchen, trying to make sense of the ridiculous amount of produce from my vegetable garden.  I'm thankful our backyard isn't any larger.  If it were, my gardens would certainly be larger also, and there would be even more vegetables!  Right after I finish this post, I will begin chopping tomatoes for a fresh pasta sauce we will eat for dinner tonight.  We've had some wonderful dinners on the patio this summer, and I'm hoping warm weather will continue into October.  I'm not ready to give up alfresco dining with friends and family quite yet...
     There have also been out-of-town visitors recently.  This has all kept me busy. Plus, you would probably find my meal rotations rather boring.  Not much experimenting this summer for me.  I tend to make many of the foods we eat over and over during the growing season... because I love them.  I wait months in Minnesota for the tomatoes, beans, zucchini, beets, etc., from my garden,  and I'm perfectly happy eating them, much of the time, the same way.  I will never tire of fresh tomato pasta sauce, Caprese salads, seared beans, zucchini-walnut bread... experimenting can wait! 
     If you follow my posts on Instagram, you will most likely know what I've been cooking and baking in my kitchen.  Below are a few iPhone photos of things I've made recently, along with links to the recipes.  Photo shoots with my SLR camera seem like a luxury this time of year.  It's all about sitting down and eating (immediately!) when the food is ready.  No one wants to wait while I photograph.

Picture


Stuffed Zucchini... recipe HERE

     (almost ready for the oven)  The only thing I did differently was to fill the zucchini shells with tiny cubes of fresh mozzarella before I finished filling with the rice, ground beef and tomatoes.  I highly recommend the addition of the mozzarella!


Picture


Yotam Ottolenghi's "Very Full Tart"... recipe HERE


     This savory tart recipe is from Ottolenghi's cookbook PLENTY, and a great way to use up some of that vegetable garden produce!  Loved that sweet potato added to the mix.  The one thing I'll do the next time I make this tart is add one more egg, for a total of three.  It will help that one cup of heavy cream set up better.  Also, I recommend using a 9-inch deep-sided tart pan with a removable bottom.


Picture


Raspberry Buttermilk Cake... recipe HERE


     I posted the recipe for this Raspberry Buttermilk Cake several years ago.  Every time I make this cake I ask myself... Why don't I make it more often?  It is extremely easy and delicious!


TAKE a LOOK:


4 Comments
<<Previous
    Picture


    Picture
    Picture
    Enter your Email

    Preview | Powered by FeedBlitz


    Categories

    All
    Amana
    Appetizers
    Beef
    Breads
    Breakfast
    Cakes
    Chocolate
    Condiments
    Cookies
    Daring Bakers Challenge
    Desserts And Sweets
    Drinks
    Eggs
    Espresso
    Etcetera
    Fish
    French Bulldogs
    Friday Night Dinner
    Fruit
    Germany
    Gratins
    Great Kitchens
    Grilling
    Ice Cream
    Lamb
    Main Dishes
    Muffins
    My Garden
    My Kitchen Renovation
    New Years Day Brunch
    Paris
    Pasta
    Pork
    Poultry
    Provence
    Restaurants
    Rhubarb
    Rice
    Salads
    Scones
    Seafood
    Side Dish
    Soup
    Sunday Mornings
    Sweet And Savory Tarts
    Thanksgiving
    Tomatoes
    Vegetables
    Vegetarian

  • Home
  • PAINTINGS
  • About
  • Passions-to-Pastry Blog
  • Contact
  • Recipes