 One of the best things that has happened for me through LivingTastefully's Passions to Pastry is the people I have come in contact with and the friendships that have developed. One of those I now consider a friend is fellow Francophile Stacey of Stacey Snacks. Can't decide what to make for dinner tonight? Go to Stacey Snacks for inspiration. There's a new recipe posted almost daily, and it's always the kind of food I like to eat!  This Cherry Tomato & Corn Clafoutis is from one of Stacey's recent posts. I made if for dinner last night (I finally have some cherry tomatoes to work with -- no thanks to my French Bulldog Pipi who finds the ripe tomatoes before I do!), and my family loved it! The only change I made to the recipe was to add just a few more tomatoes. I served it alongside a dry-rubbed, grilled salmon and a salad of greens, roasted beets from my garden, toasted walnuts, and fresh goat cheese -- all tossed with a balsamic vinaigrette. 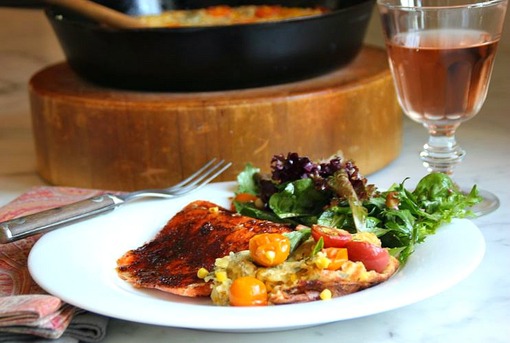 I'll send you to Stacey's post for the recipe. And please, if you haven't been to Stacey Snacks before, take some time to look around. 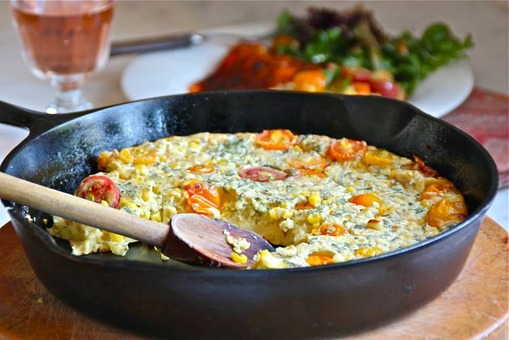 Enjoy! TAKE a LOOK:
4 Comments
 It's the end of October and I have yet to pull my tomato plants from the ground. Occasionally, I will still pick a handful of red cherry tomatoes from the vines -- unheard of at this time of year! What I have an abundance of, however, is green tomatoes -- beautiful, big, green tomatoes. If you are in need of a recipe to use up any green tomatoes you might still have, try this one for Green Tomato and Onion Gratin. I ate this one night as a main course. It would be great served alongside a beef or pork roast.  :: adapted from a recipe by Claire Robinson:: • 1/4 pound bacon, cut into 1/4-inch wide pieces • 1 cup fresh bread crumbs • 2 large Vidalia onions, peeled and sliced into 1/4-inch thick rounds • 4 large green tomatoes, sliced 1/4-inch thick • Kosher salt and freshly ground black pepper • 6 ounces sharp white cheddar, grated (I used Gruyére) 1. Preheat oven to 350˚F. 2. Render bacon in a large skillet over medium heat. Transfer the bacon to a plate lined with paper towels. In a small bowl, combine the bread crumbs with 2 tablespoons of the bacon fat removed from the skillet. 3. Add the onion rounds to the remaining bacon fat in the skillet in batches and cook, without breaking the round slices apart, until there is some golden color, about 5 to 6 minutes per side. 4. To assemble the gratin: Overlap the tomato slices in one row in a large baking dish. Next, make a slightly overlapping layer of the partially cooked onion slices, keeping them intact. Repeat the layers until all of the tomatoes and onions have been used. Season lightly with salt and heavily with black pepper. Sprinkle the cooked bacon over the top of the tomato-onion layers, and follow that with the grated cheese and bread crumbs. 5. Bake on the middle shelf of the preheated oven for 40-45 minutes. If browning too quickly, cover the gratin with foil. TAKE a LOOK: 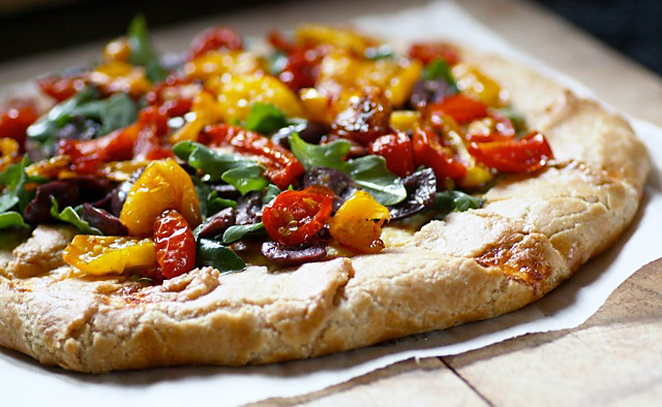 Another great recipe from the Macrina Bakery and Café Cookbook. This book has never let me down! The only change I made was to substitute red cherry and yellow pear tomatoes for the roasted Italian Romas called for in the original recipe. My small, garden tomatoes made an extremely sweet topping. I can see baking this tart in the winter and topping instead with roasted red bell peppers. The cheese-filled galette with tomatoes, arugula, and olives is a meal in itself; just add a glass of white wine and you're set!  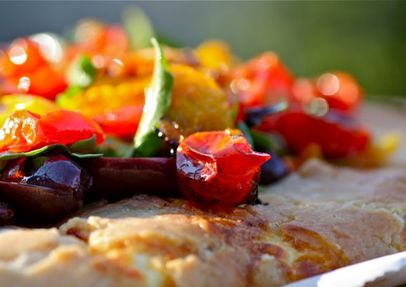 Roasted Tomato & Olive Galette with Fontina | adapted from Macrina Café and Bakery Cookbook • 2 cups grated fontina cheese • 2 cups ricotta cheese • 3 eggs • Kosher salt • 1 teaspoon chopped fresh oregano (I used a sprinkling of dried) • 1 teaspoon chopped fresh thyme • Freshly ground black pepper • Tart dough, chilled (recipe here) • Egg wash made with 1 egg and 1 teaspoon water • 5 Roma tomatoes • 1/3 cup extra virgin olive oil • Handful of fresh arugula • 1 cup kalamata olives, pitted and halved • 1 teaspoon freshly grated lemon zest 1. Line 2 rimmed baking sheets with parchment paper. 2. Combine fontina cheese, ricotta, eggs, 1 teaspoon kosher salt, oregano, thyme, and a little freshly ground black pepper in a large bowl. Mix with a whisk to fully blend ingredients. Set aside. 3. Roll the tart dough into a 14-inch circle, about 1/8-inch thick. Carefully lift it to a prepared baking sheet. Spoon the ricotta mixture onto the center of the rolled circle and spread to cover 10 inches, leaving a 2-inch border. Lift the border over top of the filling and pleat. Lift each fold of the pleat and brush underneath with egg wash to seal the crust (this helps to hold the pleated edges together during baking). Brush all exposed dough with egg wash, then place the galette in the refrigerator and chill for at least 30 minutes. 4. Preheat oven to 375˚F. 5. Wash and core the tomatoes, then cut each into 10 to 12 pieces. Combine chopped tomatoes and 1/4 cup of the olive oil in a bowl and toss together. Pour tomatoes onto a prepared baking sheet and spread into a single layer. Season with salt and pepper. Roast on center rack of the oven for approximately 35 minutes, or until edges are deep brown. Set aside to cool. Leave oven on. 6. Remove tart from refrigerator and bake on center rack of oven for 55 to 60 minutes, or until the crust is golden brown. Let cool on the baking sheet for 20 minutes. 7. Tear the arugula leaves into pieces and place in a bowl with olives, fresh lemon zest, and remaining olive oil. Add salt and pepper to taste and toss together. Spoon arugula mixture onto the galette and scatter roasted tomatoes over the top. Serve at room temperature. TAKE a LOOK: 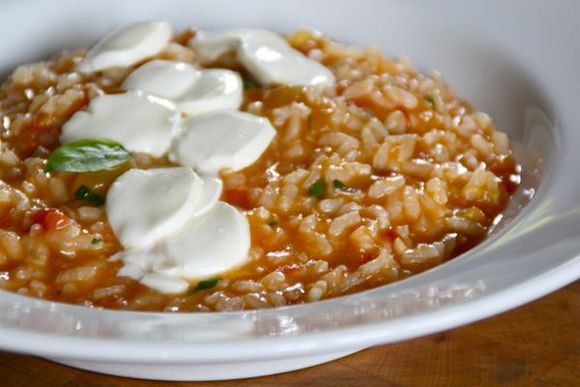 This risotto is one of the highlights of my summer menus. When my heirloom tomatoes finally start giving me an endless supply, this is one of the first dishes I will prepare. Chances are, by mid to late August we start experiencing cooler evenings in Minnesota, and a warm bowl of summer tomatoes with rice and fresh mozzarella melting on top is a delicious joy. If a dinner invitation is extended to friends or family, there is a high probability that they will be eating Tomato Risotto on our patio. 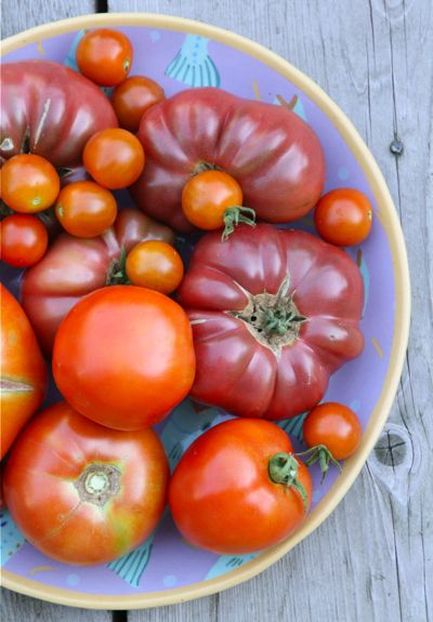 And when I begin to have more tomatoes than I know what to do with, I will double or even triple the recipe, and package up containers of the tomato risotto base for the freezer. There's nothing better than eating this in the winter when it's snowing outdoors. :: Summer Tomato Risotto | adapted from a recipe by Sheila Lukins 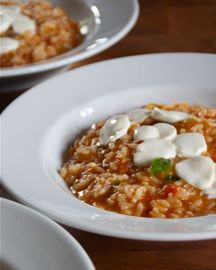 • 2 Tbsp. olive oil • 1 cup coarsely chopped onion • 2 Tbsp. minced garlic • 2 lbs. garden tomatoes, peeled and coarsely chopped • 1-2 Tbsp. honey • 1 1/4 cups Arborio rice • 6 cups organic Chicken Broth • 1/2 cup basil, chopped • salt & freshly-ground black pepper, to taste • sliced fresh mozzarella 1. Heat the oil in a heavy pot over low heat. Add the onion and cook to wilt slightly, 5 minutes, stirring occasionally. Add the garlic and cook 4 minutes longer. 2. Add the tomatoes and honey, increase the heat to medium, and cook, stirring occasionally, until most of the liquid has evaporated and the mixture has thickened, about 20 minutes (At this point, the mixture can be cooled, placed in a container and frozen). 3. When the tomatoes are nearly done (or when the tomatoes have been removed from the freezer and defrosted, and gently reheated in a pot for the risotto) heat the chicken broth to a simmer. 4. Add the rice to the tomatoes and stir well, making sure that all of the grains are coated with the mixture. 5. Add 1/2 cup of the hot broth and cook, stirring frequently, until it has been absorbed into the rice, 3 - 4 minutes. Continue to cook, stir, and add broth 1/2 cup at a time until all has been absorbed. 6. Remove the risotto from the heat and add salt and pepper to taste. Stir in the chopped basil. 7. Portion into bowls and top with sliced fresh mozzarella. TAKE a LOOK:  When I served this tart for dinner, my husband said he felt like he was eating a painting. One thing about summer -- it can sure give you a colorful meal!  This Yellow Tomato Tart is unlike any tart I have made before -- from the crust, to the tomato custard filling. I have wanted to bake this tart for two years (You should only bake this tart with in-season, garden tomatoes!) Last summer during my kitchen renovation, there were no tarts emerging from my oven. I missed an entire season of baking with stone fruit, berries, and tomatoes. This summer I have the ideal workspace, but it's been my tomatoes that have kept me from baking this tart -- up until this week. A cool, damp spring and an intensely hot summer were not kind to Minnesota tomatoes. I have had big, hard, green tomatoes hanging on the vines since early July; such disappointment! Finally today, I was able to harvest enough yellow tomatoes to make the custard for this tart. There is no dairy in this custard; gently cooked and puréed tomatoes blended with eggs make up the rich, velvety filling. If you don't feel like making a tart, fill individual ramekins with the custard and bake in a bain marie. And how about making the tomato purée now and freezing it to enjoy during the dead of winter? Sounds good to me! :: Yellow Tomato Tart recipe from Happy In The Kitchen by Michel Richard  Use either a tart ring with 2-inch sides or cake pan with a removable bottom and 2-inch sides. • Unsalted butter and flour for the ring or pan • Pâte Brisée (recipe follows) • 2 tablespoons extra-virgin olive oil • 2 pounds yellow tomatoes (4 or 5 large), cored and cut into 2-inch chunks • 5 large eggs • Fine sea salt • Tabasco sauce GARNISHES • Assorted small heirloom tomatoes in different colors and shapes • Assorted herbs and herb flowers, such as sliced chives, chive blossoms, and basil blossoms • Fleur de sel • Extra-virgin olive oil 1. If using a ring, line a baking sheet with a piece of parchment paper. Butter a 2-inch-high 7-inch ring and place it on the baking sheet. Or butter a 7- or 8-inch cake pan with a removable bottom (I used a springform pan) and place it on a baking sheet. 2. Lightly flour a work surface. Roll the pastry dough into a 12-to 12-1/2-inch circle about 1/8 inch thick, flouring the dough and work surface as necessary (I always roll my dough between sheets of lightly-floured wax paper and plastic wrap). Brush off any excess flour. Transfer the dough to the tart ring or pan. Gently lift the edges to ease the dough into the corners of the ring or pan, then push down gently to fill the corners. Press the dough gently against the sides of the ring or pan to form an even layer, and trim the excess dough. Prick the dough all over with the tines of a fork, and refrigerate for at least 20 minutes. 3. Position a rack in the center of the oven and preheat the oven to 350˚F. 4. Line the pastry shell with a sheet of buttered aluminum foil and fill with dried rice or beans. Bake for 20 to 25 minutes to set the dough. Remove the foil and weights, and continue to bake for an additional 15 to 20 minutes, or until golden brown and cooked through. Remove the pan from the oven and cool completely on a cooling rack. Reduce the oven temperature to 325˚F. 5. Place the oil in a large skillet over medium-high heat. Add the yellow tomatoes and stir until they begin to release their juices. Lower the heat as necessary to prevent the tomatoes from browning, and cook for about 10 minutes, stirring often, until they have softened and the juices are slightly reduced. 6. Transfer the tomatoes to a blender and purée until smooth. Strain through a fine mesh sieve into a bowl, pressing on the solids to release all of the liquid; discard the solids. There should be about 2 cups of purée. 7. Break the eggs into the blender. Add the puréed tomatoes and blend thoroughly. Season with salt and Tabasco to taste, and pulse to blend in the seasonings. 8. Pour the filling into the shell and bake for about 45 minutes, or until set. To check, jiggle the pan slightly; there should not be any sections that appear liquid. Remove from the oven and place on a rack to cool briefly. When cool enough to handle, remove the ring or remove from the pan. Cool tart completely before serving. 9. To serve, brush the tart lightly with olive oil and garnish with tomatoes, herbs, and flowers. FOR INDIVIDUAL CUSTARDS: Preheat over to 325˚F. Place four 6-ounce ramekins in a high-sided baking pan and divide the custard between them. Fill the pan with very hot water to come halfway up the sides of the ramekins. Bake for about 30 to 40 minutes, until set. Serve at room temperature.  Pâte Brisée • 1 2/3 cups pastry flour • 4 tablespoons unsalted butter, at room temperature • 2 tablespoons water • 1 large egg • 1/2 teaspoon fine sea salt • 1 tablespoon granulated sugar 1. In the bowl of a food processor, combine a generous 1/2 cup of the flour, the butter, water, egg, salt, and sugar. Blend until thoroughly combined and smooth. Add the remaining flour and pulse until the dough just starts to come together. 2. Pour out onto a sheet of plastic wrap and flatten into a disk about 1-inch thick. Wrap in the plastic and refrigerate until firm, at least 1 hour, or up to 3 days. TAKE a LOOK:  This cheese and tomato tart is definitely worth the effort. It is certainly delicious -- but I debated whether or not I should share my results with you. My second attempt at this tart was a bit of a disappointment. I made it for the first time many years ago. Back then, fresh mozzarella wasn't as readily available at the grocery. I sliced a block of low moisture mozzarella instead to layer in between the fresh tomato slices. I ran into trouble with my recent attempt at making this tart when I used fresh mozzarella as the recipe calls for -- it releases a lot of moisture and that much additional wetness will not allow the crust to dry out and brown underneath. A HUGE turn-off for me is a tart with a soggy, uncooked crust. But like I said... this cheese and tomato tart is definitely worth the effort. What I will do the next time is line the tart shell with foil, fill with rice or dried beans, and partially bake the crust on the lowest shelf of the oven. When it achieves the golden color I want, I will quickly spread the mustard over the bottom of the crust and fill the pastry with the remaining ingredients. Pull the finished tart slowly from the oven. The mozzarella will cause it to be soupy for a few minutes. Let the tart rest and cut once the cheese filling has set. Tomato and Cheese Tart adapted from a recipe by LInda Dannenberg HERBED OLIVE OIL: • 1/2 cup extra-virgin olive oil • 1 garlic clove, crushed • 1 bouquet garni (1 branch or teaspoon each of fresh thyme, rosemary, fennel, and 1 bay leaf, tied with thin string or wrapped in cheesecloth) • 1/2 teaspoon salt • 1/2 teaspoon freshly ground pepper TART: • recipe Pâte Brisée (recipe HERE) • 2 tablespoons Dijon mustard • 2 ounces Emmental or Gruyère Cheese, grated (about 3/4 cup) • 5 to 6 medium tomatoes, thinly sliced • 1/2 pound fresh whole-milk mozzarella, thinly sliced • 1 teaspoon fresh thyme 1. Prepare the herbed oil at least a day in advance. To make the herbed oil: In a small glass jar, combine the olive oil with the garlic, bouquet garni, salt and pepper. Cover and let marinate at least overnight. 2. Line a 10 1/2-inch tart pan with the tart pastry. Place in the freezer while you preheat the oven to 400˚F. Remove the tart shell from the freezer and line the shell with foil and fill with rice or beans. Bake the tart shell for 12 minutes; take tart shell from the oven and remove the foil and rice. Let the shell cool briefly. 3. Spread the mustard on the base of the tart shell. Sprinkle the grated cheese over the mustard. Starting at the outside edge of the tart, arrange the tomatoes and mozzarella in alternating, overlapping circles, working into the center. Sprinkle with the thyme then drizzle on 2 tablespoons of the herbed olive oil. Bake on the lower rack of the oven for 35 to 40 minutes, or until the crust is browned and the cheese is melted and bubbly. 4. Carefully remove the tart from the oven (the cheese will be very runny at this point). Place the tart on a wire rack and let it rest until the cheese has set. Cut into slices and serve. TAKE a LOOK: 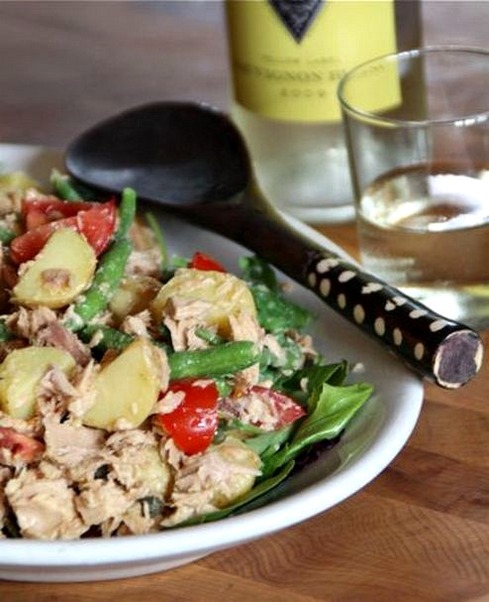 I have just placed a cake on the back burner. A recipe for a Cherry + Almond Loaf Cake, that I'm very anxious to share, will come later this week. With a large portion of our country enduring record heat, this Tuna Dijon Potato Salad seems more timely. If possible, combine the vegetables and tuna with the Dijon dressing early in the day, allowing them to soak up the flavors. Scoop onto the lettuce greens when ready to serve... Keep Cool! + Tuna Dijon Potato Salad + recipe from the Tuna Council of The National Fisheries Institute • 2 cans (5 ounces each) tuna in olive oil, drained • 3/4 pound small Yukon gold potatoes • 1/4 pound fresh green beans, trimmed • 10 cherry tomatoes, halved • 1/8 cup extra-virgin olive oil • 1 tablespoon red wine vinegar • 1 tablespoon Dijon mustard • 1 tablespoon capers, drained • 1 tablespoon fresh oregano, chopped, or 1/4 teaspoon dried • 3 to 4 cups lettuces of your choice Boil potatoes until just tender. Drain and cool immediately under cold water. Steam green beans until just tender. Cool immediately under cold water. Cut potatoes into quarters and place in a large bowl. Add the green beans, tuna, and tomatoes. Pour olive oil into a small bowl. Whisk in vinegar and mustard until thick and creamy. Whisk in capers and oregano. Pour dressing over potato and tuna mixture and toss. Serve over lettuce greens. TAKE a LOOK: 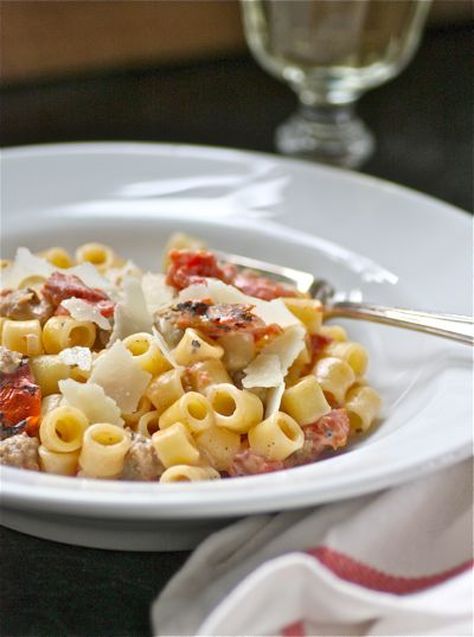 I usually make this pasta when I have fresh sage in my kitchen garden; and since I didn't have much of a kitchen (actually, no kitchen at all) last summer when my fresh sage was available, I missed the growing season and my chance to make this pasta the way I normally do. But don't do as I do, and limit this pasta to just a few select months. It's too good for that. Substituting dried rubbed sage for the fresh is easy enough. I'm taking a break until the end of March; taking a vacation, actually! That's something I haven't done in over 2 years, and it's something I desperately need right now. We're also in the midst of another renovation (our basement and two bathrooms). Yes... time to go. Heading to northern California. Hope to eat well, drink some good wines, and take a lot of beautiful photos. • • • • • • Pasta with Turkey Italian Sausage and Sage • 2 tablespoons olive oil • 1 pound bulk turkey Italian sausage • 1/2 cup diced red onion • 3 garlic cloves, chopped • 1 teaspoon dried rubbed sage • 1 14.5 ounce can Muir Glen Organic Fire Roasted Diced Tomatoes • 1 pound Mezzi Tubetti • 1 cup half-and-half • 1/3 cup heavy cream • 1/2 cup dry white wine • 1/4 cup freshly grated Parmigiano-Reggiano, plus addition to garnish • Fresh sage and diced tomatoes, to garnish, if available • Heat the olive oil in a large sauté pan. Add the turkey Italian sausage, red onion and garlic, stirring to break up the sausage. Cook until the sausage is no longer pink. Add the sage and canned tomatoes. Toss the mixture in the sauté pan with the cooked pasta. In a small saucepan, heat the half-and-half and heavy cream; add the wine and cook over low heat until slightly reduced and smooth. Stir in the Parmigiano-Reggiano. Add to the pasta mixture and toss. Garnish with additional Parmigiano-Reggiano, chopped tomatoes and fresh sage sprigs. TAKE a LOOK: 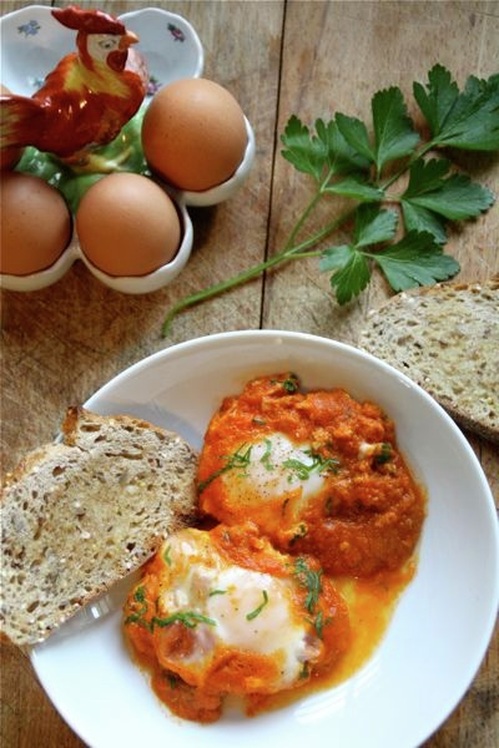 I have gotten to where I crave this meal. It's one of those meals you can truly "throw together" in a matter of minutes, which is essential when you're having those cravings and waiting is not an option. The key to getting the Eggs in Tomato Sauce made quickly is having this deliciously sweet tomato sauce (recipe here) on hand. I always quadruple the recipe when I make it and store the 4 individual containers in the freezer until needed. 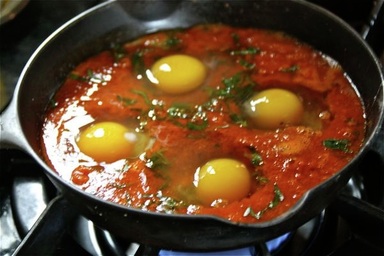 The amount of tomato sauce and eggs used in the assembly of this dish is really up to the cook. Normally, if I'm feeding two people, I will cover an 8-inch skillet with tomato sauce about 3/4-inch deep, sprinkle either fresh parsley or basil over the sauce, and crack 4 organic eggs on top. Cover and cook over medium-low heat until the eggs are done the way you like them. Use a large spoon and transfer the eggs with sauce to shallow bowls. Sprinkle with some more fresh herbs and freshly-grated Parmesan, if you like. 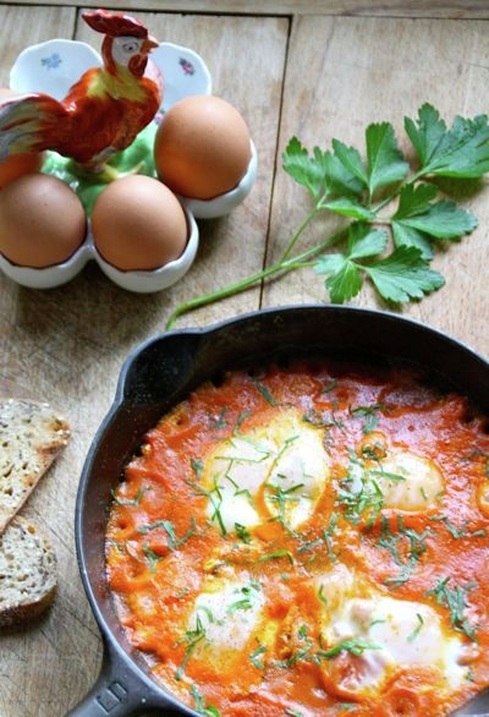 When I am serving 3, I move up to a 10-inch skillet, add a little more tomato sauce, and crack 6 eggs. Simplicity at its best! And, a meal that tastes good any time of the day. TAKE a LOOK: 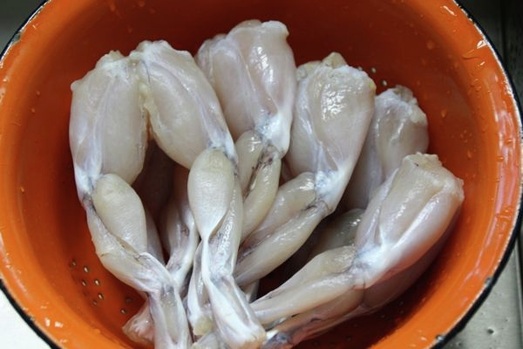 You knew this would be coming; it was inevitable. You may have seen this first course of Sautéed Frog Legs with Tomato Garlic Butter written on my kitchen chalkboard; part of the menu for my recent fall dinner. 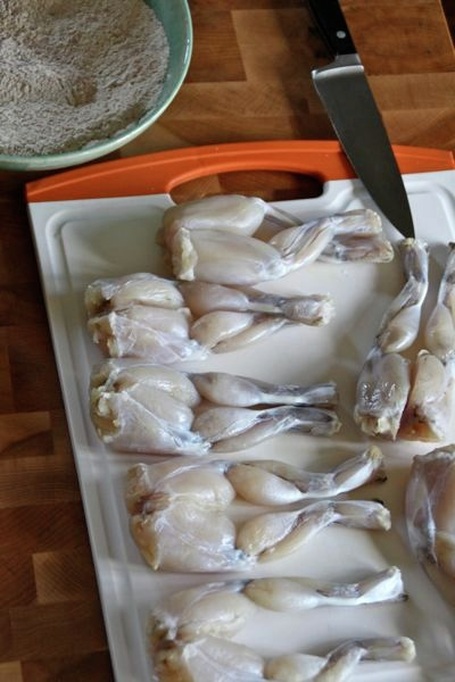  (Pipi will be a frog prince(ess) for Halloween this year. What are the chances of that ?!) The fact that these frog legs reminded me of the hind quarters of my French Bulldog, Pipi, did not deter me. I took a deep breath and forged ahead. Actually... these frog legs were excellent; the result of a great recipe, I'm certain. The fact that every one of the 6 people seated at the dinner table cleaned their plates, strongly confirms this.  And, I was still able to use summer heirloom tomatoes for this dish! ÷ Sautéed Frog Legs with Tomato Garlic Butter÷ adapted from a recipe by Emerille Lagasse • 1 pound of large frog legs • Essence, recipe follows • 1 cup flour • 1/4 cup of Garlic Butter, recipe follows • 1/4 cup minced shallots • 1/2 cup chopped fresh tomatoes, peeled and seeded • Salt • Freshly ground black pepper • 1/2 cup dry white wine • 1 tablespoon finely chopped fresh parsley leaves 1. Cut the frog legs in half. Season the frog legs and flour with Essense (I didn't use quite all of the Essence. It's your call on whether or not you want to use all of the seasoning). Coat the frog legs with the flour, shaking off any excess. In a large saucepan, over medium heat, melt the garlic butter. Add the frog legs and sauté until golden, about 6 to 8 minutes. Add the shallots and sauté for 1 minute. Add the tomatoes and season with salt and pepper. Continue to sauté for 1 minute. Add the wine and continue to simmer for 2 minutes. Stir in the parsley. Remove from the heat and serve. Essence (Also known as Bayou Blast) • 1 1/4 tablespoons paprika • 1 tablespoon kosher salt • 1 tablespoon garlic powder • 1/2 tablespoon black pepper • 1/2 tablespoon onion powder • 1/2 tablespoon cayenne pepper • 1/2 tablespoon dried oregano • 1/2 tablespoon dried thyme 1. Combine all of the ingredients. Garlic Butter • 1 stick (8 tablespoons) unsalted butter, at room temperature • 1/8 cup finely chopped garlic • Salt • Freshly ground pepper 1. In a mixing bowl, combine the butter and garlic until smooth. Season with salt and pepper. Transfer the garlic butter to a ramekin and refrigerate until needed. YOU MIGHT ALSO LIKE: |


Categories
All
|