I love my dog. The French love their dogs. I have never had one person in France tell me "no" when I ask if I can photograph their dog. Isn't this a sweet little guy, hanging out on rue St. Paul in the Marais? 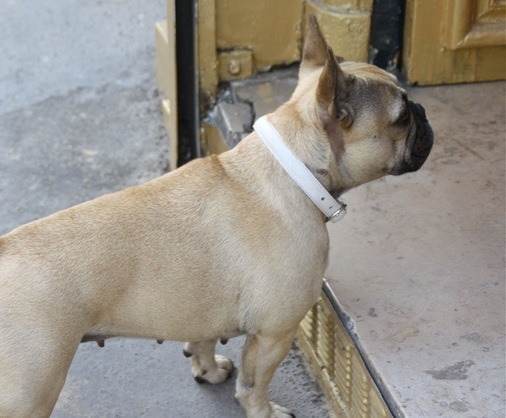 If French dogs are not shopping with their owner...  waiting for their owner...  questioning their owner...  strolling through the market with their owner...  or manning the shop with their owner...  well, then... they are probably relaxing at a café with their owner.  Ahh.... the feel of the wind blowing through your fur while driving down rue St. Dominique on La Rive Gauche.  I have the feeling this dog leads a very nice life in Paris.  I think many dogs lead very nice lives in Paris.  I'd like to request being a Parisian dog in my next life.  He seems happy.  I am certain the French would not subject their dogs to this kind of humiliation. My Pipi won't even smile for the camera. Is it really that painful? Oh Pips... you just have to wear the triceratops costume for a few hours on Halloween! That's it! I'll put it away after that. You never have to strap this to your head again! Promise. TAKE a LOOK:
3 Comments
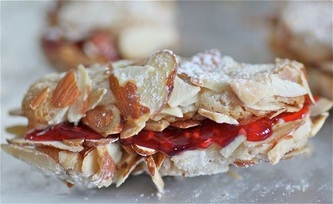
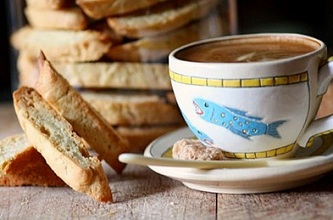
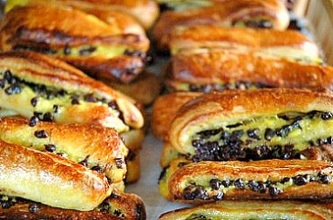
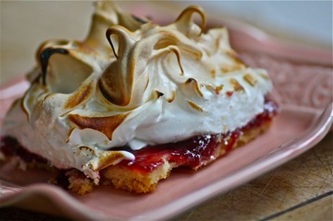
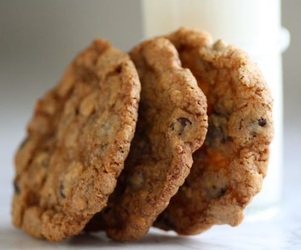
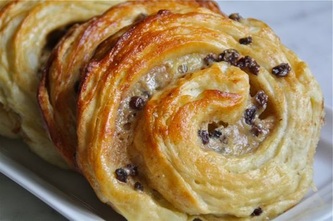
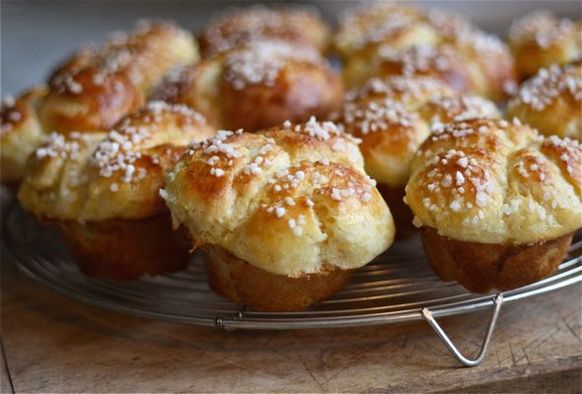
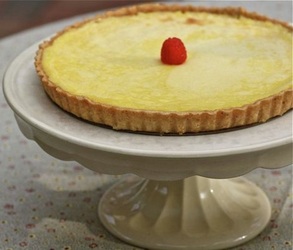
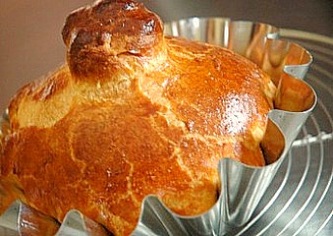
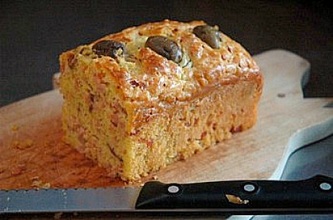
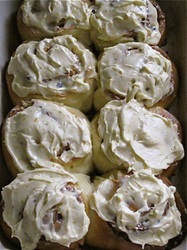
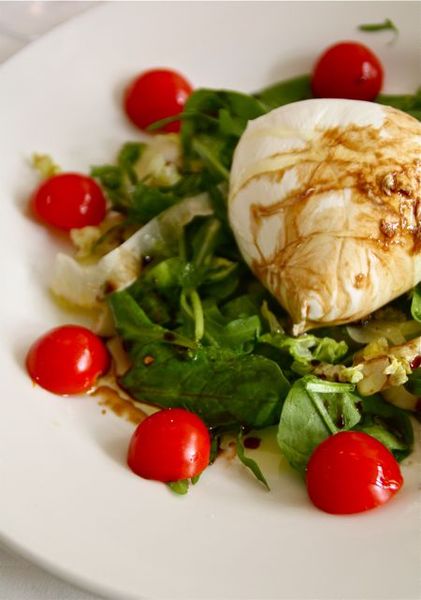 I have been asked many times if I enjoyed any good meals on my recent trip to Paris; my answer has been yes. Our first night and our last night in Paris we ate at a small, extremely popular restaurant called l'Epi Dupin on rue Dupin. I was first told of this restaurant on a trip in 2004, when I asked a Parisian woman I was speaking with if she could recommend a good place to eat. She told me we must to go to l'Epi Dupin -- it was where the "locals" ate. I had two marvelous meals there on this last trip, and I'm going to attempt recreating one of them for a dinner I'll be hosting next month. Preparing the meal shouldn't be that hard, but the Parisian ambiance... well, there are no cobbled streets outside of my dining room windows in St. Paul, Minnesota. I believe that part of the reason a meal tastes so good in Paris is... well... you're in Paris!  Another little restaurant my sister and I fell in love with and visited three times was La Bocca Della Verita at 2 rue du Sabot, in the St. Germain des Près neighborhood of Paris.  We walked by the restaurant one morning and vowed we'd return for lunch. My sister ordered Dolce Vita on our first visit -- ravioli with goat cheese, honey, and thyme. It was luscious. I had the Bufala salad -- Mozzarella di Bufala with Cherry Tomatoes and Mixed Greens. Every dish so simple, and yet incredibly good, the result of the chef using the best ingredients. 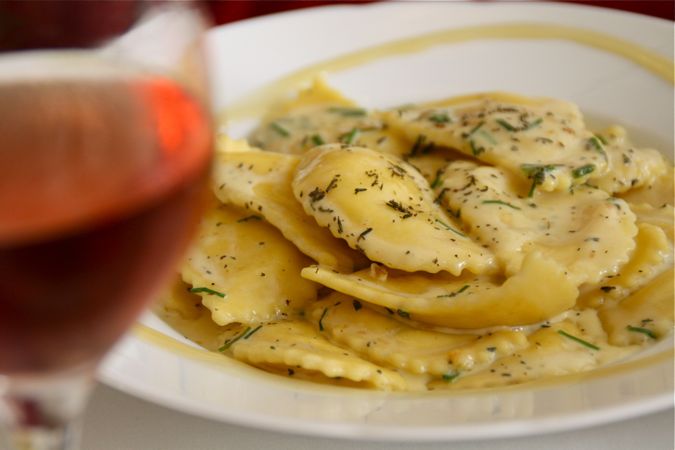 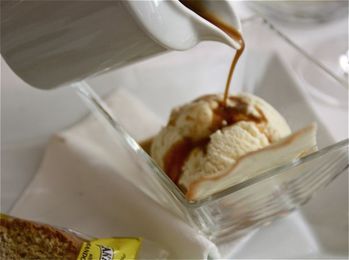 Dessert for me was Affogato -- vanilla ice cream drizzled with hot espresso. On our second visit we had an early dinner in French terms -- 7 o'clock. My sister's meal was a dish of mixed grilled vegetables with a vegetable purée, artichokes, mozzarella di Bufala and cherry tomatoes, mixed salad and Proscuitto. I seriously considered eating the Bufala salad again, but fortunately, at the last minute I decided to try the Piccata, a veal cutlet with a light cream of Sorrento lemon -- an excellent choice. Dessert that night was two different Tiramisu that we shared, of course. One, the traditional, and the second, Red Fruit Tiramisu. All I can say is... man, were they good! We started this meal with a glass of the restaurant's Strawberry Prosecco on ice. It's difficult to get my sister to join me in a glass of wine with our meals; she just doesn't care for it. But when she saw someone else drinking the red Prosecco, she was totally on board. We each had one that night...  and then returned the following night for another glass of the Strawberry Prosecco which we enjoyed in front of the restaurant on two little stools by the window. That's where we met these four chefs and a wizard on the narrow cobbled street. 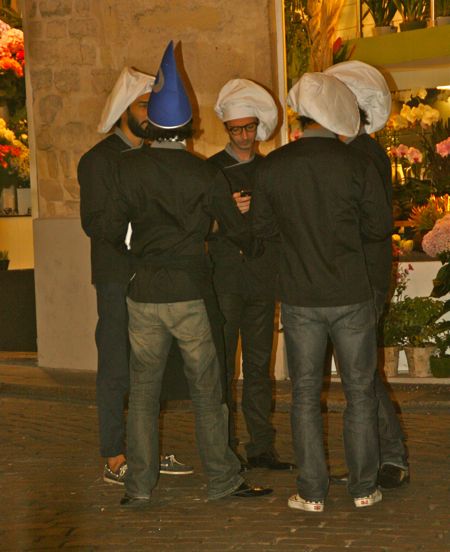 only in Paris, right?  :: Mozzarella di Bufala with Cherry Tomatoes and Mixed Greens • Mixed salad greens • Cherry tomatoes, organic and heirloom if possible • 8-ounce ball of fresh Mozzarella di Bufala (buffalo mozzarella) • Balsamic vinegar • Extra-virgin olive oil • Sea salt and freshly ground black pepper to taste This salad is all about using the absolute best ingredients you can. Place the salad greens on a large plate; surround the greens with a ring of halved cherry tomatoes. Position the Mozzarella di Bufala in the center of the greens. There is no substitution for this. A regular "fresh mozzarella" won't have the flavor the Bufala does. It is worth every cent! Drizzle the salad with the balsamic and the olive oil. Serve with a tasty baguette, a glass of wine, and enjoy! TAKE a LOOK: 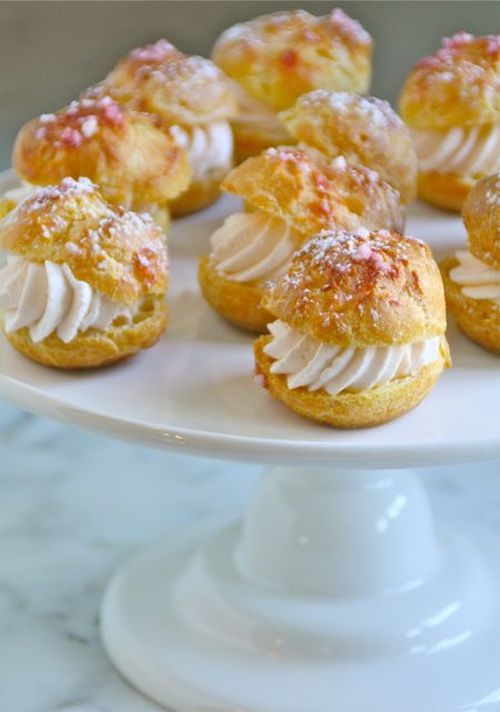 These small strawberry sugar-studded cream puffs are the result of my recent trip to Paris. I can't deny that the majority of my time in France is focused on food -- eating delicious meals and the purchase of food items to bring back home with me. This visit was no different. I bought olive oils, vinegars, salt, and mustard -- the usual. My sister also twisted my arm to purchase a coarse, flavored (chouquette) sugar at food purveyor G. Detou, 58 rue Tiquetonne, Les Halles. I left this incredible little shop with two 700 gram jars of flavored sugar by ZUK ZAK -- an orange and a strawberry. When it finally became time to pack our bags for the trip home I was wishing I hadn't purchased them. They were big, heavy, and... what would I do with all that sugar? But right now I couldn't be happier that I lugged those two jars home from Paris. 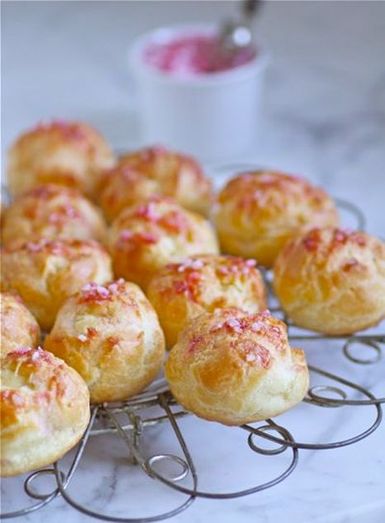 Cooling Choux Pastry Puffs I also happen to have a bottle of Monin Strawberry Syrup. A favorite little Italian restaurant of ours on rue du Sabot in Paris serves a strawberry Prosecco drink before dinner that I am totally hooked on and bought the syrup for that purpose. One thing led to another and yesterday was spent baking cream puffs studded with strawberry sugar and filled with strawberry whipped cream. With my family out-of-town, I've been delivering these to neighbors. The temptation to eat them all myself is too great! 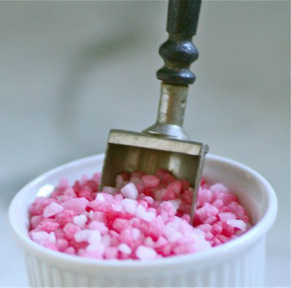 Swedish Pearl Sugar is a good substitute for the coarse ZUK ZAK "chouquette" sugar. The choux pastry puffs would also taste fine without any sugar what-so-ever pressed on top. I just happen to like that little, sweet crunch when I bite into them. Monin and Torani both produce a large range of flavored syrups and are easily found for purchase at grocery stores and coffee shops. Don't limit yourself to just strawberry! :: CREAM PUFFS with STRAWBERRY CREAM | pâte a choux recipe adapted from Paris Boulangerie Pâtisserie by Linda Dannenberg 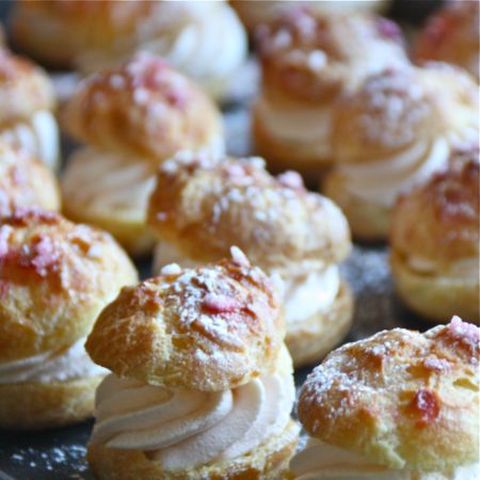 • 1 2/3 cup unbleached, all-purpose flour • 1 cup water • 1 cup milk • 1 teaspoon salt • 1 teaspoon sugar • 7/8 cup ( 1 3/4 sticks ) unsalted butter, cut in pieces • 6 large eggs 1. Preheat oven to 425˚F. 2. Sift the flour onto a sheet of waxed paper. Set aside. 3. In a large heavy saucepan, combine the water, milk, salt, sugar, and butter. Bring to a boil over medium-high heat, stirring until the butter melts and the liquid begins to boil. Take the pan off the heat and add the reserved flour in a thin stream, stirring vigorously with a wooden spoon. Return the saucepan to the burner, and continue to stir quickly over medium heat for an additional minute, until the mixture pulls away from the side of the pan. This process helps dry out the mixture; be careful not to overcook at this point. 4. Transfer the mixture to the bowl of an electric mixer. Let cool for one minute, then at medium speed add the eggs one at a time. Mix until the dough is smooth and shiny. 5. Scoop the dough into a pastry bag with a 1/2-inch plain tip and pipe 1 1/2-inch mounds onto a parchment paper lined baking sheet. If you do not want to use a pastry bag, use a spoon to scoop up dough and make similar-sized choux pastry mounds. Leave about 1-inch in between each mound of dough. Gently smooth the tips out of the mounds with a finger dipped in cold water. Press coarse sugar onto the tops. Brushing the tops of the choux pastry with a beaten egg adheres the sugar even better than the water, but also ends up browning the pastry quite a bit, and I am tempted to pull them from the oven before I actually should. If you go this route, consider covering the choux pastry with foil towards the end of baking. 6. Place the baking sheet on the center rack of the oven. Bake at the preheated 425˚ for 10 minutes, then reduce the temperature to 350˚ and bake an additional 30 minutes. With the oven still at 350˚ and door ajar, leave the pastry mounds in the oven an additional 10 to 15 minutes. You may want to cover them with foil if they have become too brown. You want the cream puffs to be light and dry in the center. Keep an eye on them towards the end of baking since ovens will differ somewhat. I will also take a toothpick and pierce each cream puff when pulled from the oven to help the hot, moist air escape. 7. Transfer the choux puffs to a cooling rack; when cool, use a sharp serrated knife to cut them in half. Fill with whipped cream. Dust with confectioners' sugar. Refrigerate until ready to eat. The cream puffs are best eaten the day they are made. If you are not planning on eating the cream puffs the day you bake them, do not slice them open and do not fill them with the cream. Place the puffs in a covered tin and right before you plan to fill them, reheat in a 300˚ oven until they feel dry, approximately 10 to 15 minutes. Cool, then continue with the final steps. 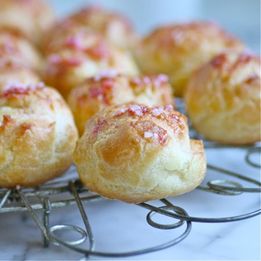 :: FLAVORED WHIPPED CREAM • 1 teaspoon unflavored gelatin • 2 tablespoons Monin Strawberry Syrup • 1 cup heavy cream • 5 tablespoons confectioners' sugar • additional Monin Strawberry Syrup (optional) 1. Place the gelatin in a small dish such as a custard cup, and add the 2 tablespoons Monin Strawberry Syrup to soften. 2. Pour some boiling water into a shallow bowl and set the small dish of gelatin in the hot water. Stir the mixture until the gelatin has dissolved and no lumps remain. 3. In the bowl of a mixer, add the heavy cream, confectioners' sugar, and the gelatin mixture. Beat until the cream has thickened, adding more strawberry syrup if a stronger flavor is desired. TAKE a LOOK: 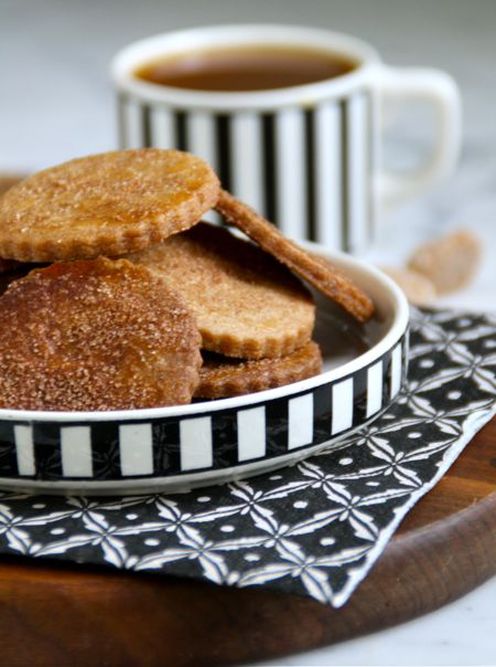 My first week home from Paris and what did I bake in my kitchen? You would think that seeing pâtisserie after pâtisserie, and eating pastry after pastry, I would be inspired to pull out all of my French tinware and get to work on tarts, financiers, or éclairs. 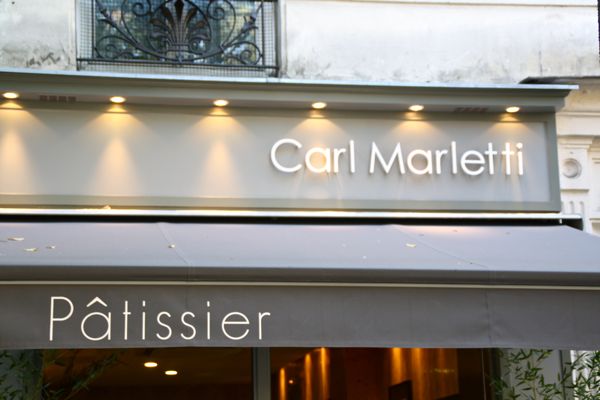 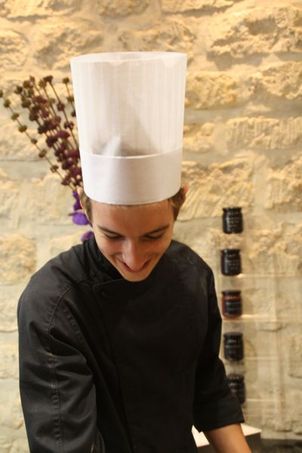 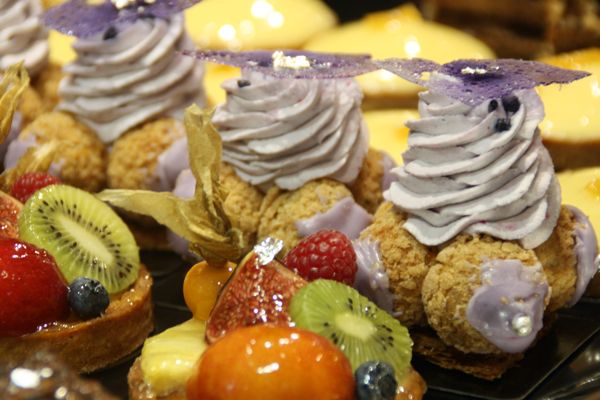 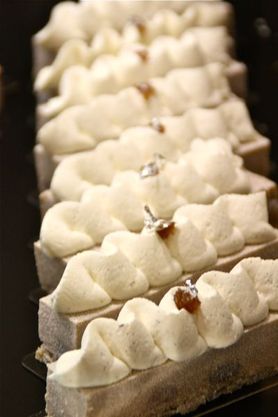 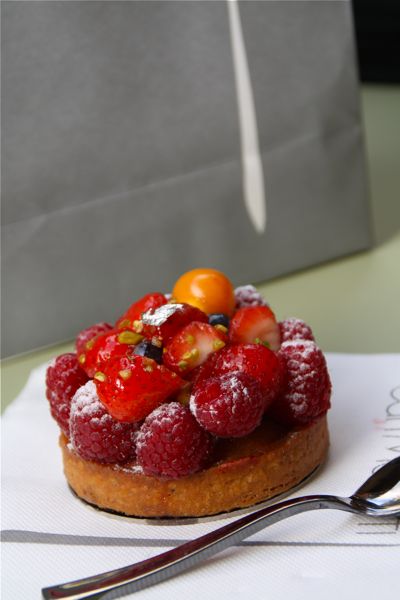 I brought back a couple of tarts to the hotel for my sister and me. One was fresh berries piled atop pastry cream and the other, an orange curd tart with a sliver of silver leaf.  Pastries from Carl Marletti Pâtissier in Paris' Latin Quartier Oddly enough, I started baking cookies when I was home again... three different kinds. Usually, if I'm mixing up and baking this amount of cookies, it means the holiday season is approaching; but in this case, it was all about the empty, clear glass jars on my kitchen counter begging to be filled. The first morning home from my trip, I made Chocolate Chip-Dried Cherry-Pecan Cookies. Most of those headed back to college with my youngest daughter who was home from school for the first time -- a BIG surprise last weekend when I returned! I followed those with Pecan & Butter Log Cookies, a favorite of mine. The third cookie has been bookmarked on my computer for almost 2 years now -- Swiss Cinnamon Crisps. This cookie was posted on Serious Eats by Gina DePalma (pastry chef at Mario Batali's Babbo in Manhattan) back in December of 2010. It's a great cookie for fall and cooler temperatures served with mugs of hot chocolate, fresh apple cider, or a big glass of cold milk. 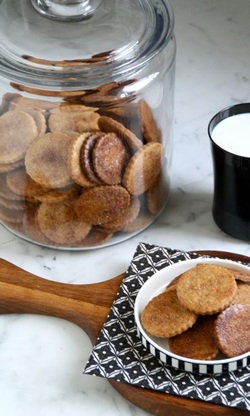 :: Swiss Cinnamon Crisps original recipe - McCall's Cookie Collection (1965) | via Gina DePalma INGREDIENTS: • 3 cups unbleached all-purpose flour • 1 teaspoon kosher salt • 1 tablespoon ground cinnamon • 1 cup (8 ounces) unsalted butter, softened • 1/2 cup light or dark brown sugar • 3/4 cup granulated sugar • 1 large egg • 1 teaspoon pure vanilla extract • Finely grated zest of one lemon TOPPING: • 1 egg • 2 tablespoons milk • 1/4 cup granulated sugar • 1 tablespoon ground cinnamon 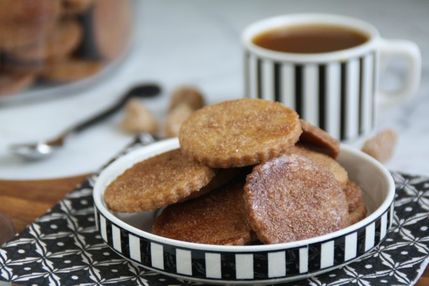 1. In a medium bowl, whisk the flour, salt, and cinnamon together and set aside. 2. Place the butter and both sugars in the bowl of an electric mixer and use the paddle attachment on medium speed to cream them together until light and fluffy, about 1 minute. Beat in the egg, vanilla, and lemon zest, stopping once to scrape down the sides of the bowl, until the egg is fully incorporated. 3. On low speed, slowly beat in the flour mixture, then increase the speed to medium and beat the dough until it comes away from the sides of the bowl. Shape the dough into a large disc and wrap it in a sheet of plastic; refrigerate at least one hour. 4. When you are ready to bake the cookies, preheat the oven to 350˚F. Remove the dough from the refrigerator and break off about 1/4 of the disc. Wrap and return the rest of the dough to the refrigerator. Line 2 cookie sheets with parchment paper. 5. Make the topping by whisking the egg and milk together in a small bowl. In another bowl, combine the sugar and cinnamon. Set both bowls aside. 6. On a lightly floured surface, roll the piece of dough 1/8-inch thick. Using a cookie cutter, cut out desired shape and transfer to the parchment-lined baking sheet, leaving about 1/2-inch between each cookie; fill cookie sheet, getting more dough from the refrigerator as needed. Brush the tops of the cookies with the egg-milk mixture and sprinkle each cookie generously with the cinnamon-sugar. Place the sheet on the center rack of the preheated oven and bake for 10-12 minutes, or until they are golden brown. While these cookies are baking, continue to roll and cut the remaining dough, filling the second cookie sheet, and repeat the glazing and sprinkling of the cinnamon-sugar mixture. 7. When pulled from the oven, let the cookies cool on the baking sheet one minute before removing to a cooling rack. TAKE a LOOK: 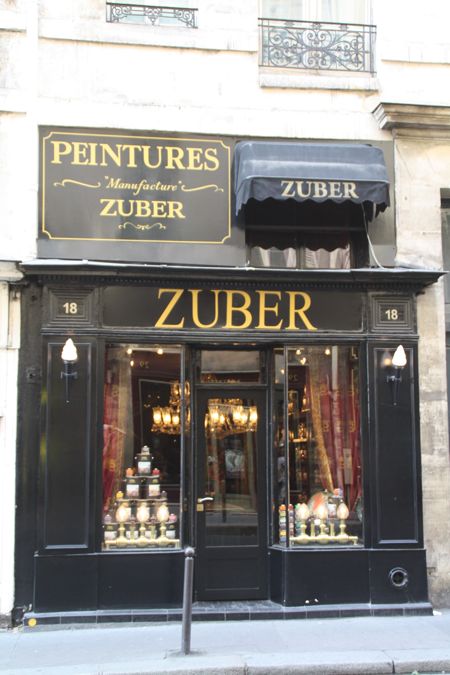 I was first introduced to ZUBER wallpaper about 20+ years ago through a home in Saint Paul, Minnesota. The foyer, larger than my kitchen and big enough to accommodate an Empire sofa, was papered in a pictorial scene that was original to the turn-of-the-century residence. It was, I found, a wallpaper by the French company ZUBER. I appreciate what is involved in the printing of this wallpaper. As a former art major at the Kansas City Art Institute, I often silk-screened and block-printed paper and fabric. But covering the walls in my own home with wallpaper such as this has never appealed to me; a good thing, since hand-printed paper with the legacy of ZUBER is pretty spendy. I was totally infatuated and intrigued, however, by what I had just discovered. You see... my maiden name is Zuber. Probably to my father's dismay (and I am certain, everyone else in my family), I have spent much of the past 20+ years trying to find a connection between my German ancestors and the ZUBER wallpaper dynasty in France. I have always felt I must be French -- not German. My father's family came from Baiertal, Baden-Wurttemberg, Germany. Close, but not that close, to the French border. Zuber in German translates to "wash-tub", not an encouraging insight. Correspondence with the Amana Historical Society in my hometown of Amana, Iowa, Ancestry.com, and the U.S. division of ZUBER has produced absolutely nothing. Turning a corner last week onto rue des Saints Pères, while strolling cobbled streets on the Left Bank of Paris, and suddenly seeing the giant, gold ZUBER name painted on the glossy, black wood surround of the shop's entrance, left my sister and me momentarily speechless -- a rarity to say the least. The shop at 18, rue des Saints Pères, houses the ZUBER paint line.  It consists of two small rooms; the first with floor to ceiling black, enameled shelves, filled with paint cans and stacked, heavy, glass sample bottles with silver lids reminiscent of ink wells. 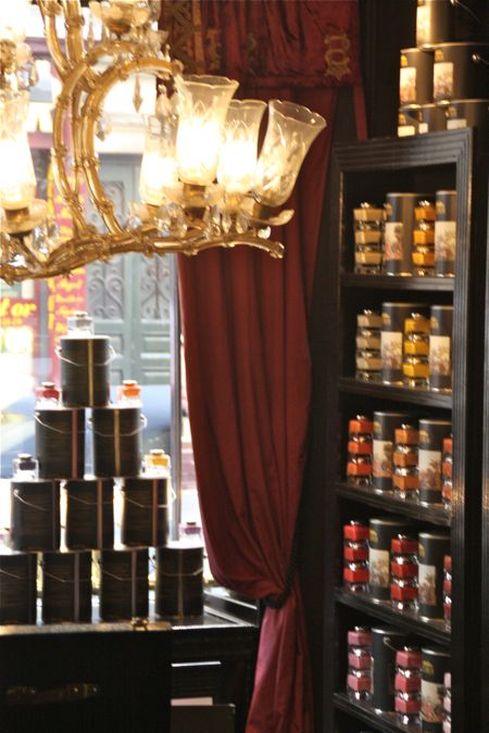 What can I say... a paint store unlike any I've ever seen.  A very old, black-lacquered hat box with the lid covered in ZUBER wallpaper and the interior lined in a glossy, black paper printed with repeat ZUBER's in gold letters was part of a display in the front window.  The second room had a pictorial scene, hand block-printed directly onto the walls with ZUBER paints. The light of the chandelier bouncing off the crystals, and onto the color-saturated stone surfaces was truly magical.  After stepping behind a ZUBER papered folding screen and finding the shop's paint mixing equipment, I felt our enthusiastic welcome was wearing thin, and I put my camera away. I had explained to the young woman in the shop why we were so excited to be there, and she was extremely kind, letting me photograph the interior -- something, I felt, they normally do not allow.  ZUBER wallpaper samples were in a shop three doors down which displayed the paper in a large room where the floor, walls, and fireplace were all constructed of creamy limestone, a simplicity that complemented the elegant papers. And, just in case you're wondering... ZUBER wallpaper is manufactured at 28 rue Zuber, in Rixheim, France. There are show-rooms in Paris, New York, Dubai, London, Nice, and Moscow. Maybe ZUBER needs a mid-west rep in the Twin Cities? TAKE a LOOK: 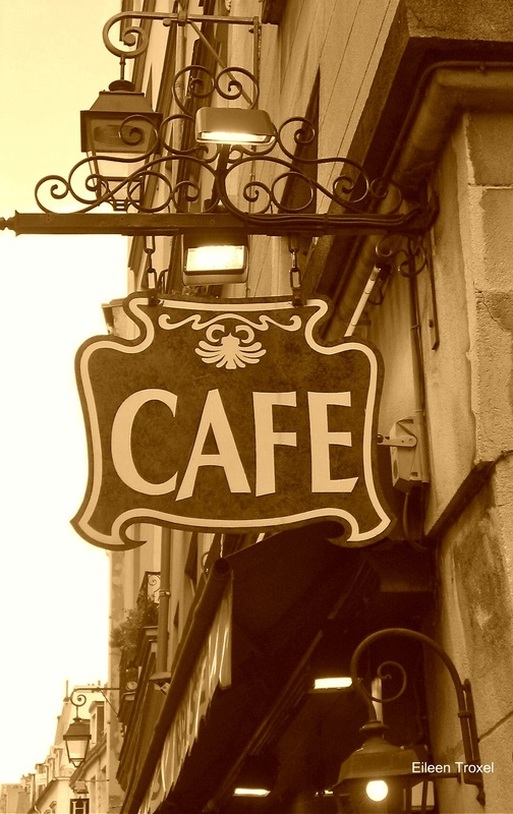 I'm taking off... on a little trip to the City of Lights.  It's been awhile... 3 years since I was last in Paris. All I want to do is walk the cobbled streets, explore the hidden gardens, and absorb the beauty. 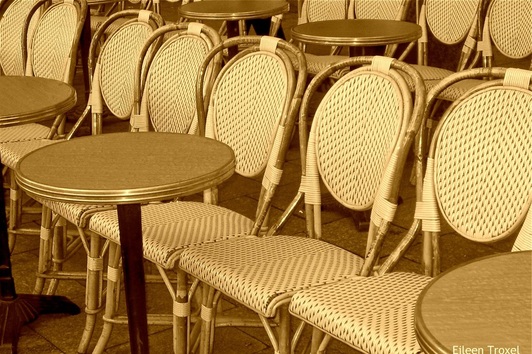 I'm also perfectly happy just sitting and watching the world go by (while sipping a café crème, of course).  I will never tire of La Tour Eiffel... 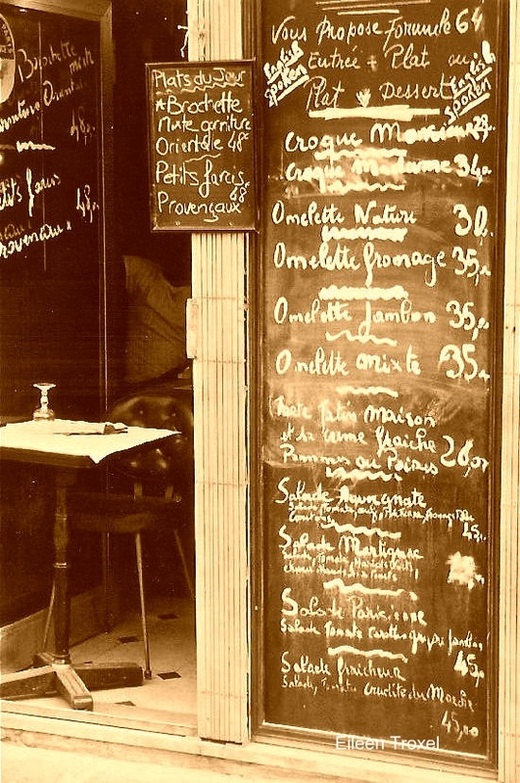 café menus...  or strolling along the Seine.  photo of L.K -- Google Images And if I see Lenny Kravitz eating a falafel, all the better! Back in October... TAKE a LOOK:  I was up before 5 a.m. this morning. The papers were being delivered, I started thinking about a cappuccino, and I just plain couldn't sleep any longer. The problem with that... it was Sunday morning! All week I anxiously look forward to Sundays and being a bit lazy, and laziness to me includes sleeping a little longer. By the time it was 10 a.m. I felt the urge to go back to bed, but instead, I made myself a second cappuccino, grabbed a few magazines, and headed outdoors for the patio. One of the magazines, a 2008 issue of Gourmet magazine titled, PARIS ON A BUDGET, has an article on "Every Parisian's Favorite Cookie". No surprise, the favorite cookie is considered to be a French macaron. Oh yes, a display case full of colorful macarons can take your breath away when you enter a French patisserie; a macaron's taste, plus the texture of the crisp meringue and flavorful, chewy center can again, take your breath away... but my favorite French cookie, or maybe overall favorite cookie, sans French, happens to be this Sablé à l'Orange et Raisins (currants, in this case). I have been making this orange and raisin cookie for several years, but it did not immediately steal my heart. The cookie can be made two ways -- either with the grated zest of one orange, or, with candied orange peel. It is much easier when making them on the spur-of-the-moment to grab an orange and simply grate the rind. This was what I had always done. Making candied orange peel is not at all difficult, but you do need to plan ahead if you intend to use it when making this cookie. The candied orange peel, however, is what finally won me over. Sablés à l'Orange et Raisins is not an overly sweet cookie (another reason I love it... my tastes have changed), and when you bite into the candied orange peel and get that intense jolt of pure orange flavor... well, for me, there's nothing better. Sablés à l'Orange et Raisins adapted from Paris Boulangerie Patisserie by Linda Dannenberg • 1/2 cup plus 2 tablespoons unsalted butter, softened • 1/3 cup sugar • 1 large egg • 1 large egg yolk • 2 tablespoons ground almonds • 1 2/3 cup all-purpose flour • 1 teaspoon baking powder • 1/2 cup raisins or currants (I always use currants) • 1/4 cup chopped, candied orange peel (recipe follows) • 1 large egg beaten with 1 teaspoon water, for glaze 1. In a large bowl with an electric mixer, cream the butter with the sugar until light. Add the egg, egg yolk, and almonds in turn, mixing after each addition until well blended. Sift the flour with the baking powder and add to the butter mixture, mixing just until partially incorporated. Add the currants and orange peel and finish mixing the dough with a large rubber spatula just until blended. Be careful not to overmix. Divide dough in half, and place each half on a sheet of plastic wrap. Roll each piece of dough into a log 1-inch in diameter. Wrap entirely in the plastic and refrigerate at least 1 hour. 2. Preheat the oven to 350˚F. Line 2 baking sheets with parchment paper. Remove the dough from the refrigerator and slice each log in 1/8 to 1/4-inch pieces; place on prepared sheets. Brush the cookies lightly with the egg wash. Bake until light golden, about 13 minutes. Watch carefully so the cookies do not overbake. 3. Cool the pan briefly, then carefully transfer the cookies from the pan to the rack with a spatula. Cool completely. These cookies keep well, stored in an airtight container, up to 2 weeks, or frozen. • I think the cookies taste better a day after baking, after the orange peel has time to infuse its flavor in the cookie. Candied Orange Peels adapted from Four-Star Desserts by Emily Luchetti • 3 organic navel oranges • 2 1/4 cups granulated sugar • 1 1/2 cups water • 1 tablespoon freshly squeezed lemon juice 1. Thinly slice both ends from the oranges, and starting at one end, take a sharp knife and slice the entire length of the orange, taking off a piece that includes some of the white pith (about 1/4-inch thick). Continue, until all of the oranges have been peeled. Lay the pieces on a cutting board and slice them lengthwise into 1/4-inch pieces 2. Fill a medium saucepan with water. Over high heat bring the water to a boil. Add the orange peels and boil for 5 minutes. Strain the peels and discard the water. Fill the saucepan with fresh water and again bring it to a boil. Add the peels and boil for 5 minutes. Strain. Repeat this process of boiling the orange peels 2 more times, each time with fresh water. This will remove the bitter flavor from the peels. 3. In a clean medium saucepan dissolve 2 cups of the sugar in the 1 1/2 cups water and the lemon juice over medium-low heat. Add the orange peels and cook until all the peels are translucent, about 1 to 1 1/2 hours. 4. Strain the orange peels and place them, so they are not touching, on a wire rack. Let sit overnight to air-dry. 5. Toss the citrus peels in the remaining 1/4 cup sugar, coating them thoroughly. • Store peels in an airtight container at room temperature. TAKE a LOOK: 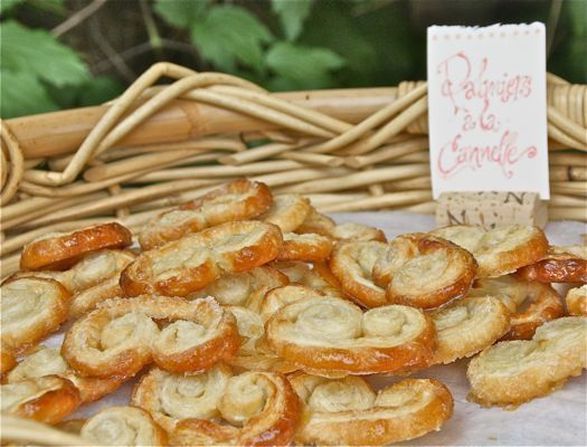 I swore off desserts after the party I had been baking for, for over a month. My days were filled with butter and sugar, and tasting. When my family would ask about dinner after work and school, I sadly explained that it was either frozen pizza or take-out (again). I was exhausted and the thought of composing a meal did not appeal to me in the least! I always approach an event such as this with the feeling, it is better to have too much than not enough. Yes... I went overboard. Desserts were sent home with friends, my husband hauled bagfuls and platefuls to his work, some were frozen. The leftover Palmiers à la Cannelle, however (made by my friend Kathy), were slid into a tin and kept near my espresso machine. These were the exception to the "no more butter and sugar" promise I had made to myself. They were absolutely divine with my cappuccino in the morning... buttery and sweet, but so light and crisp I didn't feel as though I was plying myself with calories, the way I felt after eating a cup of the vanilla buttercream we used to frost the cakes. (Yes, I admit it... an entire cup. My niece disgustingly brought it to my attention... Sorry about that.) As I mentioned, my friend Kathy made the palmiers for the party. I have never made palmiers myself, but I intend to very, very soon. They are easy to assemble with purchased puff pastry, making it simple enough to keep a tin of the palmiers near my espresso machine for a sweet little treat alongside my morning cappuccino.  Palmiers à la Cannelle recipe from About.Com | French Food  • 1/3 cup granulated sugar • 1 1/2 teaspoons ground cinnamon • 1/4 cup butter, melted • 1/2 pound puff pastry ( 1 sheet store bought) • 1 egg, beaten 1. Preheat oven to 400˚F. 2. Stir together the sugar, cinnamon and melted butter until it forms a paste. 3. Roll the pastry dough into a large rectangle, about 15-inches-by-12-inches. Using a pastry brush or spoon, spread the sugar-butter mixture in a thin even layer over the entire surface of the dough. Starting at the long ends of the rectangle, loosely roll each side inward until they meet in the middle. To hold difficult pastry together, brush it with the beaten egg, if necessary. 4. Slice the pastry cross-wise into 1/4-inch pieces -- they will look like little scrolls. Arrange them on a parchment-lined baking sheet. Bake them for 12 to 15 minutes, until they are puffed and golden brown. Remove from the oven and serve warm or at room temperature. Recipe makes approximately 30 palmiers TAKE a LOOK:  I've really been trying hard to stay focused on the things that need to be done at home; painting of the new bathroom, planting of the vegetable garden, and preparing for my daughter's graduation from high school. With all of that on my plate, I haven't been doing a stellar job of planning meals around this place. (We've been eating a lot of burgers.) But one thing I always crave is pastry along with my cappuccino in the morning. When I saw this recipe for Pain au Cinnamon Raisin I knew I had to somehow work it into my schedule. Pain au Cinnamon Raisin from About.com FRENCH FOOD 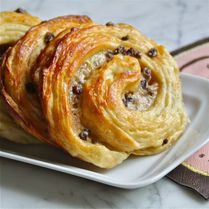 • 3/4 cup raisins ( I used currants) • 3/4 cup water • 1/4 cup Cognac • 4 teaspoons instant dried yeast • 1/2 cup lukewarm water • 3 1/2 cups bread flour • 1/2 cup milk • 1/3 cup granulated sugar • 3 tablespoons unsalted butter, melted and cooled • 1 1/2 teaspoon salt • 1 cup unsalted butter, softened • 1/2 cup vanilla crème patisserie (recipe follows) • 1 tablespoon granulated sugar • 1 teaspoon cinnamon • 1 egg • 2 tablespoons milk 1. Stir together the raisins (currants), water and Cognac. Keep chilled in the refrigerator for 12-24 hours before proceeding with the recipe. 2. Dissolve the yeast in the warm water for 5 minutes. Add the bread flour, milk, 1/3 cup sugar, melted butter and salt to the dissolved yeast and water and mix the dough on medium speed of an electric mixer for about 2 minutes. 3. Shape the dough into a ball and loosely cover it with plastic wrap. Allow it to rest at room temperature for 30 minutes. Roll the dough out into a 10-inch-by-15-inch rectangle, then cover it loosely and allow it to rise for 40 minutes. 4. Brush the rectangle of dough with the softened butter ( I worked the butter into a very soft "paste" in a small mixing bowl using the back of a wooden spoon), and then fold the dough into thirds like a letter. Roll the long, thin rectangle back into the original 10-inch-by-15-inch shape and fold into thirds, again. Place the dough onto a baking sheet, cover loosely with plastic wrap, and let it rest in the refrigerator for 1 hour. Repeat this process one more time. 5. Roll the dough into a 10-inch-by-30-inch rectangle and spread the vanilla crème patisserie evenly over the surface of the rectangle. Drain the raisins (or currants if using instead) and discard the soaking liquid. Scatter the raisins evenly over the pastry cream. Mix together the tablespoon of sugar and the cinnamon and sprinkle evenly over the raisins and pastry cream. 6. Very carefully, roll the dough into a log and cut into 18 slices. Using 2 parchment lined baking sheets, place 9 slices on each baking sheet; try to space the rolls by 2-inches. Cover loosely with plastic wrap and let the rolls rise at room temperature for 60-90 minutes, or until almost double in size. 7. Preheat the oven to 375˚F. Mix together the egg and 2 tablespoons milk and brush onto the tops of the rolls. Bake on the middle rack of the oven for approximately 16 minutes, or until puffed and golden. Remove to a cooling rack. Crème Patisserie (pastry cream) • 1 1/4 cups whole milk • 3 egg yolks • 1/4 cup granulated sugar • 1/8 cup all-purpose flour • 2 tablespoons plus 2 teaspoons cornstarch • 1 teaspoon pure vanilla extract 1. In a small saucepan, warm the milk over low heat until it is just hot enough to steam. While the milk is warming, mix together the egg yolks, sugar, flour and cornstarch until the mixture is completely smooth. 2. Once the milk is steaming, add half of it, whisking constantly, to the egg yolk mixture. Add the egg yolk mixture back into the saucepan of milk and cook about 1-2 minutes, stirring constantly, until the mixture thickens and coats the back of a wooden spoon. Do not let it boil! Remove from the heat and stir in the vanilla extract. Transfer to a small bowl and press plastic wrap onto the surface of the cream. Refrigerate until thoroughly chilled before using. TAKE a LOOK:  Haven't booked that winter get-away yet to Paris? I know... after the record snow, ice and cold most of us have been experiencing recently, we're thinking the tropics in February, not Paris. 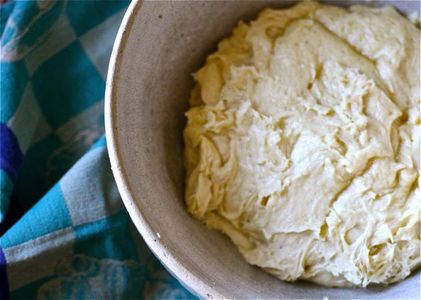 But if you want (or need as I do), to briefly feel like you have been in Paris, and love having your kitchen smell like a French patisserie, make these buttery Brioche Rolls for breakfast. I mixed the bread dough yesterday and thanks to my French Bulldog Pipi, and her desire to eat a biscuit at 4 a.m., I was up and able to form the rolls for their last rise, put them in the oven to bake, and have them on the table at 7 a.m., just in time for breakfast. 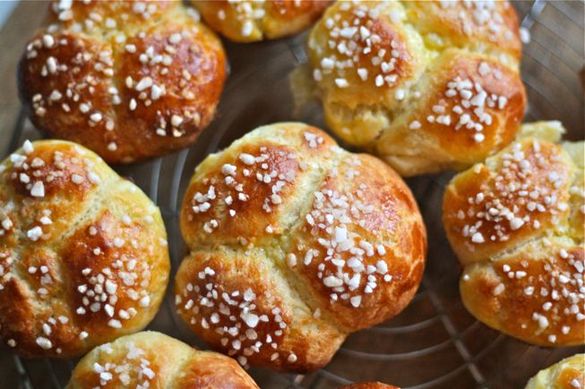 The only thing I changed in this recipe was to sprinkle Hagel Zucker (German coarse sugar) on top of the brushed egg-and-cream glaze before baking, instead of the suggested fleur de sel. 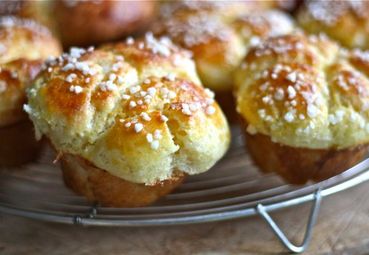 Make a Café Crème or Chocolat Chaud, close your eyes, and dream of being in Paris! 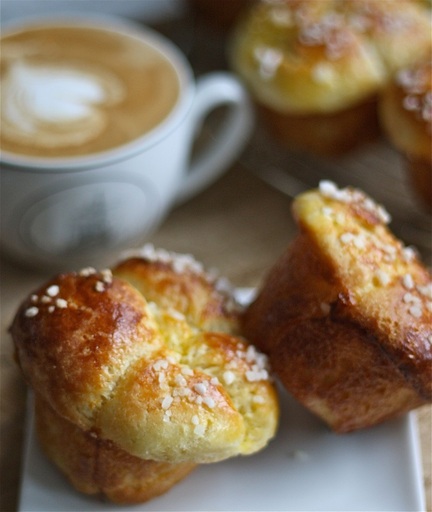 BRIOCHE ROLLS recipe from Studio Restaurant, Laguna Beach | via Bon Appetit, December 2010 It is necessary to make the dough a day ahead, since it needs to chill overnight • 1/3 cup warm water (105˚F to 115˚F) • 1 1/2 teaspoons active dry yeast • Pinch of sugar plus 3 tablespoons sugar • 2 1/4 cups bread flour, divided • 5 tablespoons all-purpose flour • 1 1/4 teaspoons coarse kosher salt • 3 large eggs • 3/4 cup (12 tablespoons) unsalted European-style butter (such as Plugrá), room temperature • 1 large egg yolk, whisked to blend with 1 tablespoon heavy cream (for glaze). • Coarse sugar (recipe calls for fleur de sel) 1. Pour 1/3 cup warm water into large bowl of heavy-duty stand mixer fitted with paddle attachment. Sprinkle with yeast and pinch of sugar; stir to blend. Let stand until yeast dissolves and mixture is slightly foamy, about 10 minutes. 2. Meanwhile, whisk 2 cups bread flour, all-purpose flour, coarse salt, and remaining 3 tablespoons sugar in a medium bowl to blend. Sift flour mixture over yeast mixture in bowl of stand mixer. Mix on low speed 1 minute (mixture will be dry and crumbly and resemble old-fashioned oats). Add eggs 1 at a time, beating 30 seconds on medium speed after each addition, then beat mixture 10 minutes (mixture will be very sticky and cling to sides of bowl but will begin to mass around paddle during last 2 to 3 minutes of beating, with some dough still clinging to sides of bowl). With machine running on medium speed, add butter 1 tablespoon at a time, beating until incorporated before adding more, about 7 minutes total. Continue to beat dough 4 to 5 minutes longer (dough will be soft, smooth, and shiny but still sticky and will begin to pull away from sides of bowl and climb up paddle attachment). 3. Turn dough out onto generously floured work surface. Knead 1/4 cup more bread flour into dough by tablespoonfuls (dough will still be quite sticky but do not add any more flour). Butter large bowl. Transfer dough to bowl; turn to coat with butter. Cover bowl with plastic wrap, then kitchen towel. Let rise in warm draft-free area until almost doubled in volume, 1 hour to 1 hour and 15 minutes. (I must have a cold house. My dough always takes double the recommended time to rise.) Punch dough down. Cover dough again with plastic wrap and kitchen towel and refrigerate dough overnight. 4. Butter 12 standard (1/3 cup) muffin cups. Divide cold dough into 12 equal portions. Divide each portion into 3 equal pieces. Roll each piece into smooth ball (each about 1 to 1 1/4-inches in diameter). Place 3 dough balls in each prepared muffin cup, preferably side by side, forming triangle. Cover loosely with plastic wrap, then kitchen towel. Let rolls rise in warm draft-free area until puffed and extending slightly above sides of muffin cups, about 1 hour. 5. Meanwhile, position rack in center of oven and preheat to 400˚F. 6. Brush tops of rolls with egg glaze; sprinkle with coarse sugar. Bake rolls until deep golden on top, 15 to 16 minutes. Cool in pan 10 minutes, then transfer rolls to rack and cool completely. TAKE a LOOK: |


Categories
All
|