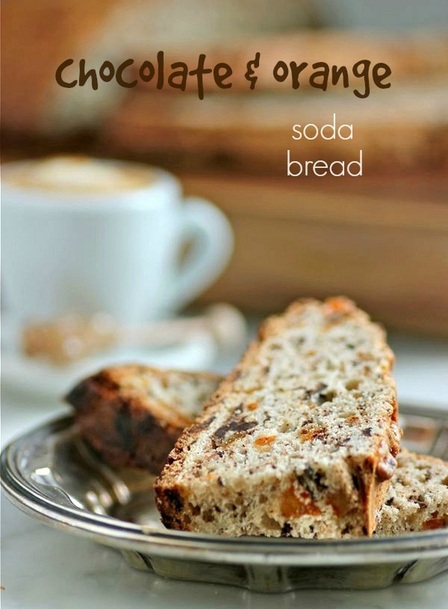
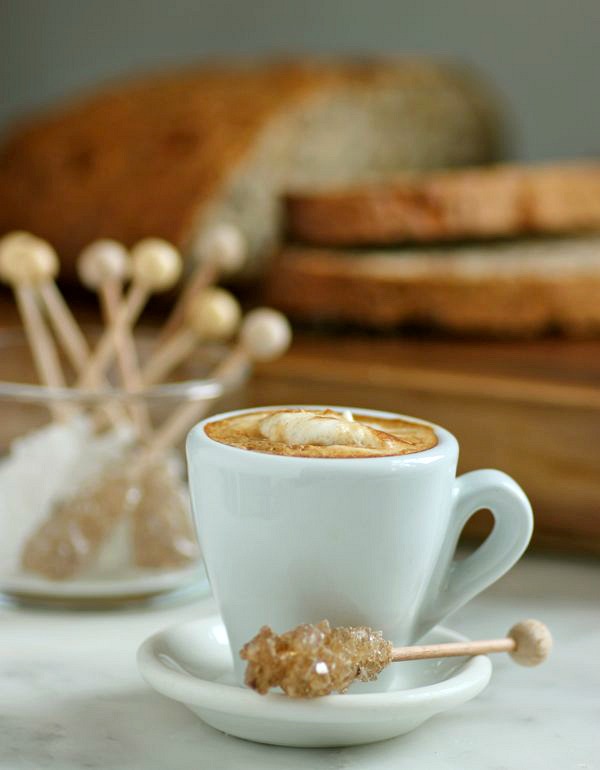
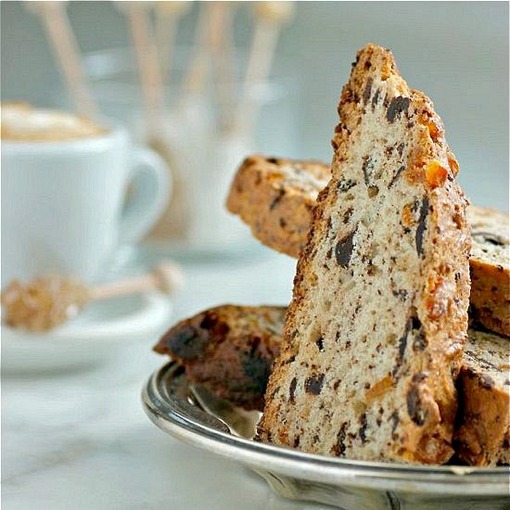
 I know... this post is suppose to be about Irish Brown Bread, and it is. I just thought you might first like to see how my little man, Bisous, is doing. He is now over 3 1/2 months old. I love him and I'm so glad he's become a part of our family. Onto the recipe... 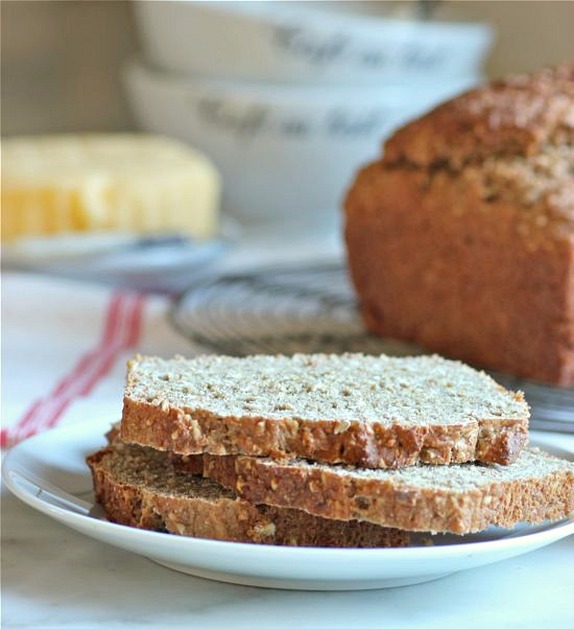 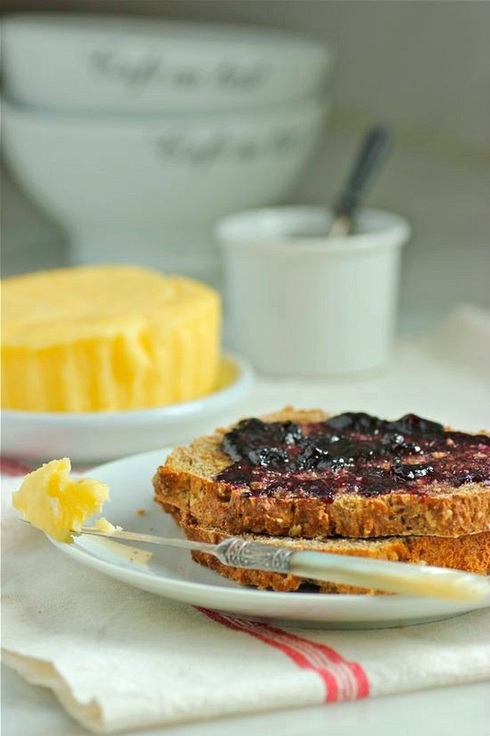 My favorite day of the week is probably Saturday. and the reason for that is the Wall Street Journal. On Saturdays, the WJS has a section called OFF DUTY. It is full of recipes and articles on design and travel. I look forward to it all week. And most likely, there will be a recipe that I cut out and file away with everything else I want to make in my kitchen. (I will always prefer a piece of paper over an electronic version.) This recipe for Irish Brown Bread made it to the front of the need-to-make line. I am very fond of a recipe I've been making for years for Irish Soda Bread with currants, but if you're looking for a whole-grain substitute, this is it. Easy to assemble, it makes two loaves and is full of ingredients that are good for you! 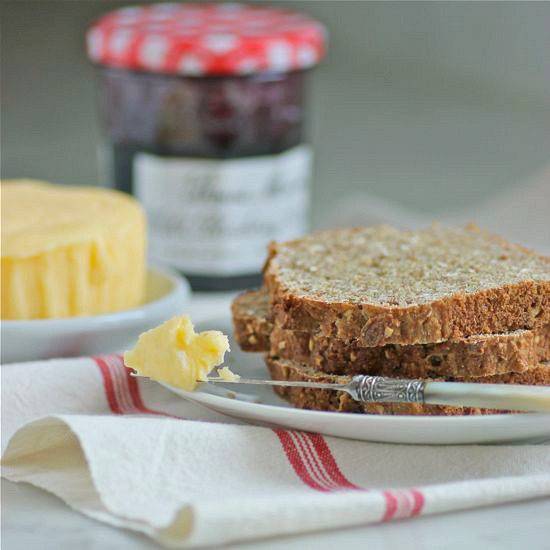  • recipe by Gail Monaghan for the Wall Street Journal • 1 3/4 cups all-purpose flour • 3 1/2 cups King Arthur Irish Style Flour or stone ground whole-wheat flour • 2 teaspoons baking powder • 4 teaspoons baking soda • 4 teaspoons dark brown sugar • 1/2 cup wheat germ • 1 1/2 cups natural bran • 1 1/4 cups steel-cut oats * 2 teaspoons sea salt • 1 quart plus 1/2 cup buttermilk at room temperature 1. Preheat oven to 400˚F. In a large bowl, use a large spoon to mix all dry ingredients until well combine. Add buttermilk and stir until dry ingredients are evenly moist. 2. Divide dough equally between two greased loaf pans (approximately 9 or 10-inches-by-5-inches. 3. Bake in middle of oven until golden and crusty, 50 minutes. Unmold and cool on a wire rack. TAKE a LOOK:
8 Comments
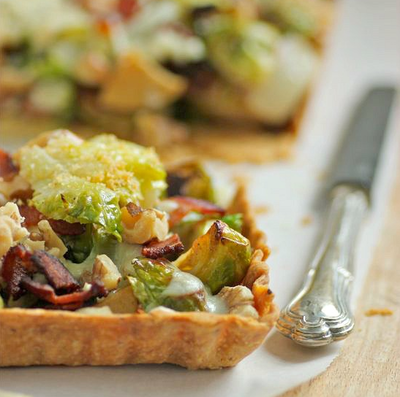
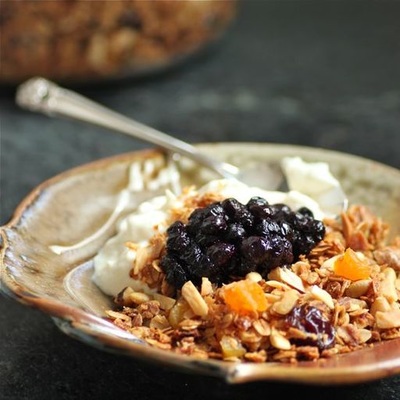
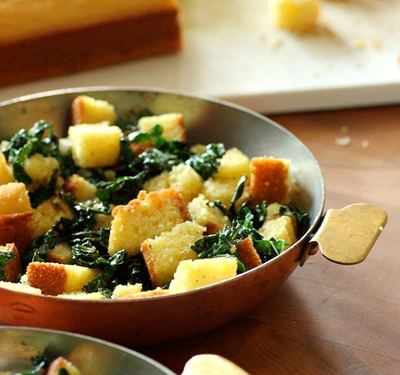
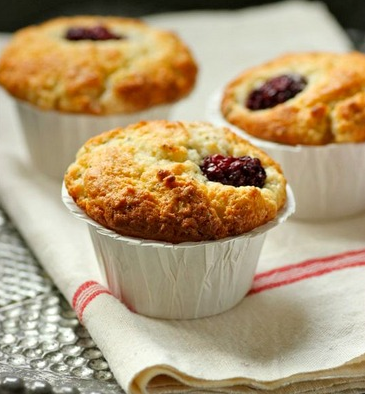
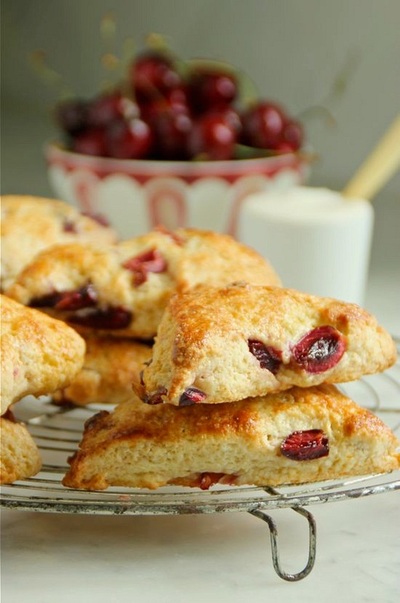
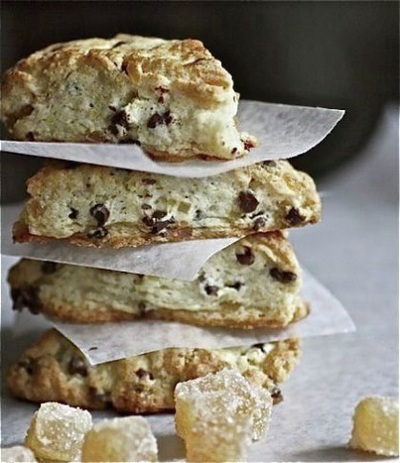
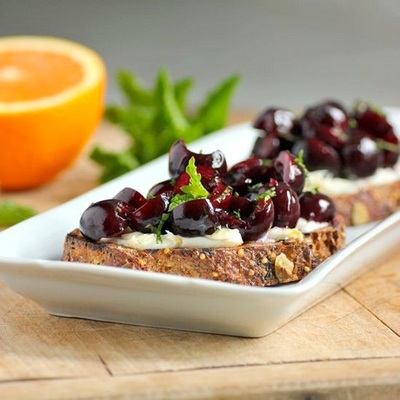
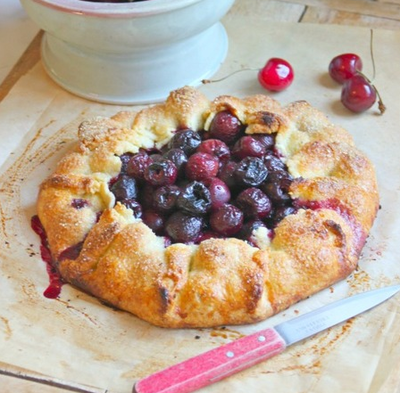
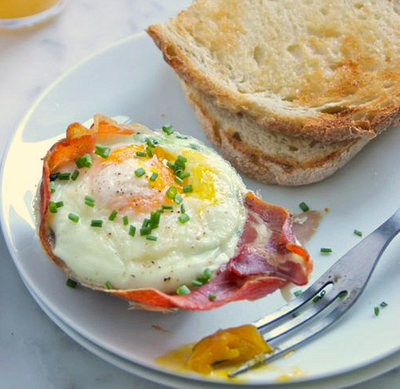
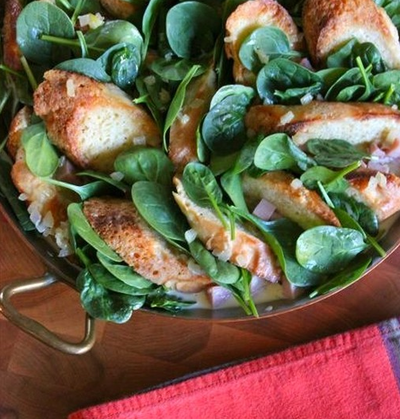
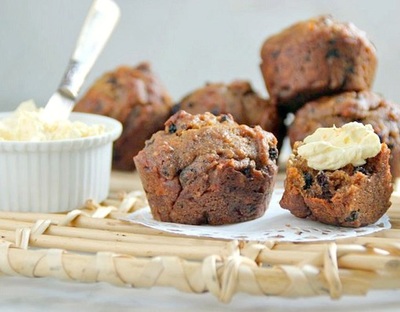
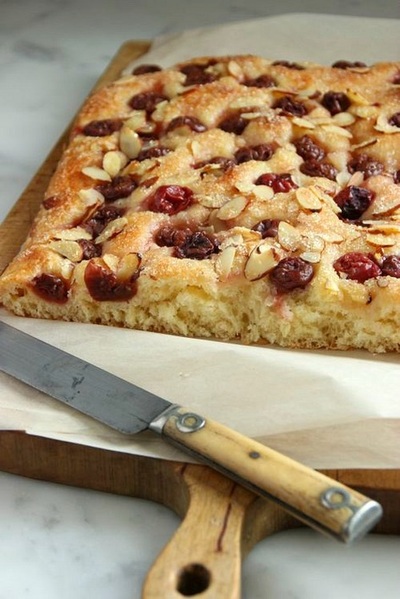
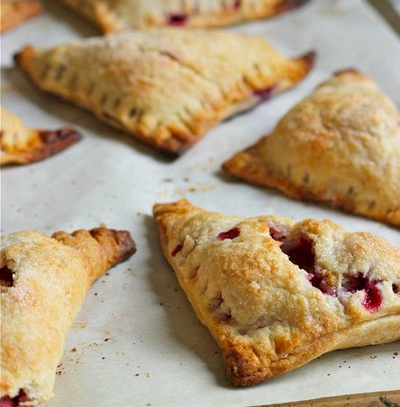
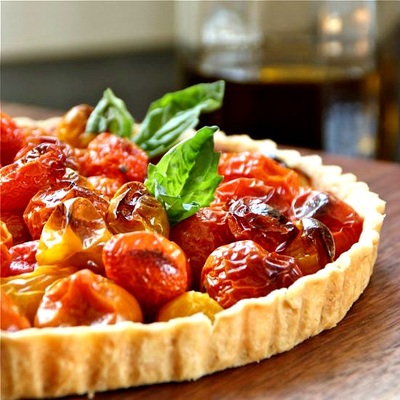
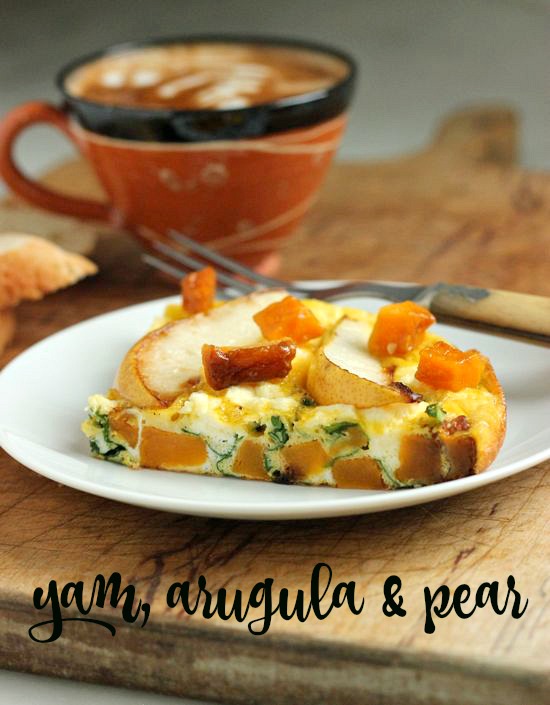  My daughter stopped by yesterday; possibly to see me, but more likely to see the new puppy, Bisous. She opened the refrigerator door and said, "You need to go to the grocery store. There's nothing to eat". I haven't been baking or cooking much this week. My husband is visiting his father (and I've been busy with Bisous), but that gives me the opportunity to eat the kind of simple meals I love. My daughter may have thought there was nothing to eat in the house, but I have eggs, vegetables, and fruit. Perfect...  I eat a LOT of eggs, each and every day. During that horrible stretch of time when we were told to eat eggs sparingly because of cholesterol, I would continue to consume several a day. It didn't stop me. Lately, my morning breakfasts are two fried eggs with toast and smashed avocados. Dinners recently start with salads topped by poached eggs. Sometimes, the salad is followed by a savory tart of vegetables baked in an egg custard. Like I've always said... If something is topped with an egg, that something is better because of it.  I wish the frittata I made this morning for one person, would have been larger (for 4 possibly?). I devoured it quickly and right now I would really like some more. If I had bacon on hand, I probably would have tossed some of that to the mix, also.  Serves 1 person and can be easily increased • 1 yam, cut into small cubes • extra-virgin olive oil • sea salt and freshly ground pepper • 1/2 pear, cut into slices • 1 handful arugula • fresh ricotta (recipe HERE, or purchased) • 3 large eggs, lightly whisked 1. Preheat oven to 375˚F. Toss the cubed yam in a bowl with a drizzle of olive oil and a sprinkling of sea salt. Spread onto a sheet pan and roast in the oven until softened and starting to caramelize. Remove from oven and reserve. 2. Drizzle some olive oil onto a medium skillet over medium heat. Add the pear slices and cook, until they begin to soften and caramelize slightly. 3. Using an 8-inch skillet (for 1 serving), place over medium heat and drizzle with olive oil. Add about 3/4 cup of the cubed yams. Stir briefly, then add the arugula. Toss over the heat until the arugula just starts to wilt. Turn the burner to low and pour the beaten eggs evenly over the top. Spoon generous dollops of the fresh ricotta over the eggs. Season with salt and pepper. Place the pear slices on top and sprinkle with some more of the cubed yams. 4. Place the skillet on the middle rack of the 375˚ oven and bake until the eggs are just set, approximately 10 minutes. NOTE: If increasing the size of the frittata, additional baking time will be necessary. Remove from oven and serve hot or at room temperature. TAKE a LOOK: 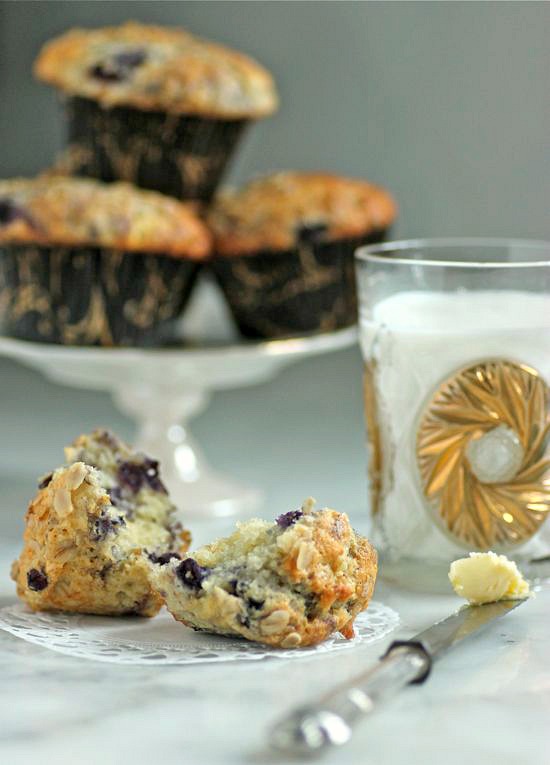 As I've told friends... I remember that puppies are a lot of work. What I forgot is, I'm old. My days and nights are consumed by playing, feeding, and cleaning up after Bisous, who I've renamed, Busy-Baby-Bisous... and I wouldn't have it any other way. We just love him. But these Blueberry, Oat, and Greek Yogurt Muffins are all I've been able to make in my kitchen today. I promise you, it will not take you two hours to make these muffins, as it did me. They are extremely easy to mix up and bake. I just had a few interruptions by little, Busy-Baby Bisous... 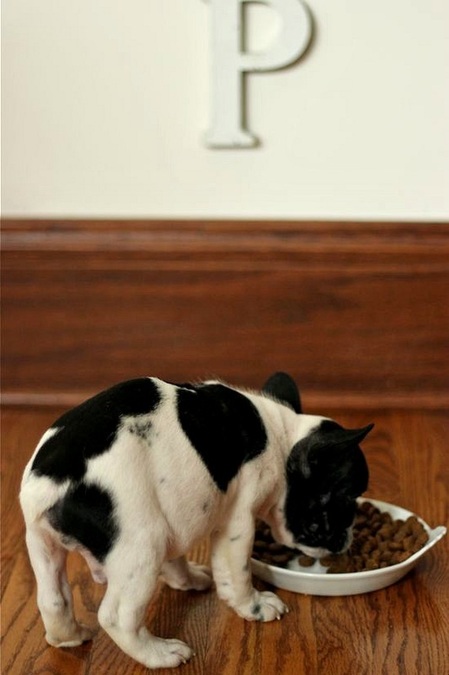 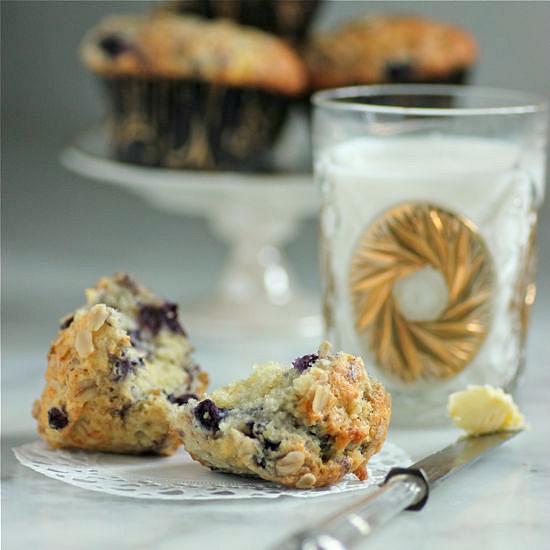  + adapted from a Donna Hay recipe • 2 cups unbleached, all-purpose flour, sifted • 1 tablespoon baking powder • 2/3 cup sugar, plus more for sprinkling • 3 large eggs * 3/4 cup vegetable or canola oil • 1/2 cup thick, natural Greek yogurt • 1 teaspoon vanilla extract • 1/3 cup rolled oats, plus extra for sprinkling • 1 cup frozen blueberries 1. Preheat oven to 375˚F. 2. Place 2 tablespoons of the flour in a small bowl; set aside. In a large mixing bowl, whisk together the remaining flour and the baking powder. Add the sugar, eggs, oil, yogurt, and vanilla to the dry ingredients and mix until just combined. 3. Add the blueberries to the reserved 2 tablespoons flour and toss to coat. Gently fold the blueberries and the oats into the batter in the large mixing bowl. 4. Divide the batter between twelve 1/2 cup-capacity muffin tins lined with paper cases. 5. Sprinkle tops with extra oats and sugar. Place on the middle rack of the preheated oven and bake for 25 to 30 minutes, or until golden. Turn out onto a wire rack to cool. TAKE a LOOK: 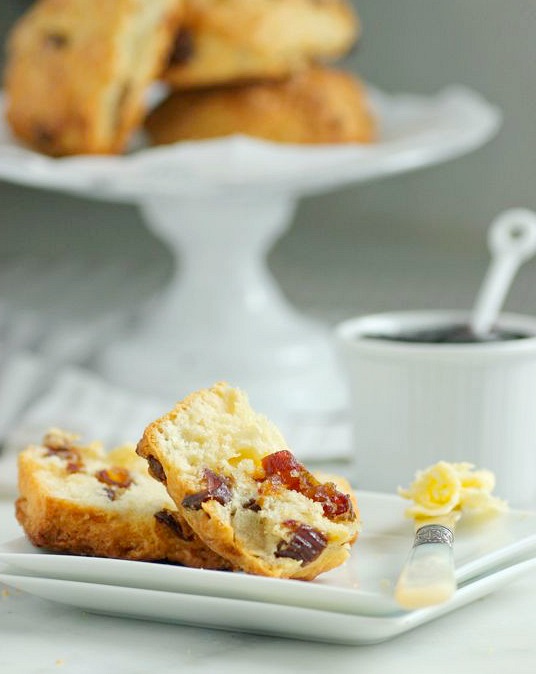 A gray, snowy start to the week in Saint Paul, and baking sounds good on a day like this. What else sounds good? Date Scones with Fleur de Sel whipped Butter. But honestly... these scones are so good unadorned, you can forget making the salted butter... unless you really want it.   + from FOOD & WINE (adapted) BUTTER... optional: • 1 stick unsalted butter, at room temperature • 1/2 tablespoon fleur de sel SCONES: • 2 1/4 cups unbleached, all-purpose flour, plus more for dusting • 1/4 cup granulated sugar • 1 1/2 tablespoons baking powder • 1/4 teaspoon kosher salt • 4 tablespoons cold unsalted butter, cubed • 1 cup chopped pitted dates • 1 1/2 cups heavy cream, plus more for brushing • Turbinado sugar, for sprinkling • Jam, for serving 1. MAKE THE BUTTER: In a bowl, beat the butter with the fleur de sel until fluffy. Reserve. 2. MAKE the SCONES: Line a baking sheet with parchment paper or Silpat. In the bowl of a food processor, combine the 2 1/4 cups of flour, sugar, baking powder, and salt. Pulse a couple of times. Add the butter and pulse until the size of small peas. Transfer to a large mixing bowl. Add the dates and toss to coat in the flour mixture. Drizzle in the 1 1/2 cups of cream and stir until a dough forms. Cover with plaster wrap and let stand for 10 minutes. 3. Turn the dough out onto a lightly floured work surface and knead gently until it comes together. Pat the dough into a 5-by-10-inch rectangle. Cut into 10 equal squares and arrange on the prepared baking sheet. Refrigerate for 30 minutes. 4. Preheat over to 375˚F. Brush the tops of the scones with cream and sprinkle with turbinado sugar. Bake for 25-30 minutes, until golden. Transfer the scones to a rack to cool completely. Serve with the salted whipped butter and jam, if desired. TAKE a LOOK: 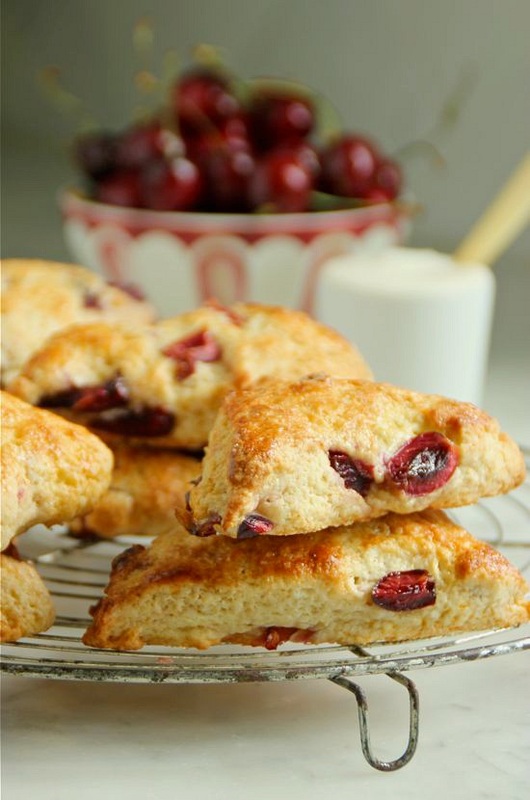 Lately I've been passing up some beautiful berries and stone fruit at the market. You see, I am still chopping away at the endless stalks of rhubarb in my garden... but it's finally time for me to move on. I may bake several more rhubarb tarts before summer's end, but the majority of my rhubarb will now head to the freezer. I couldn't resist these cherries yesterday and since there wasn't even a slice of bread in my kitchen this morning, I quickly got to work mixing up some fresh cherry scones for breakfast. 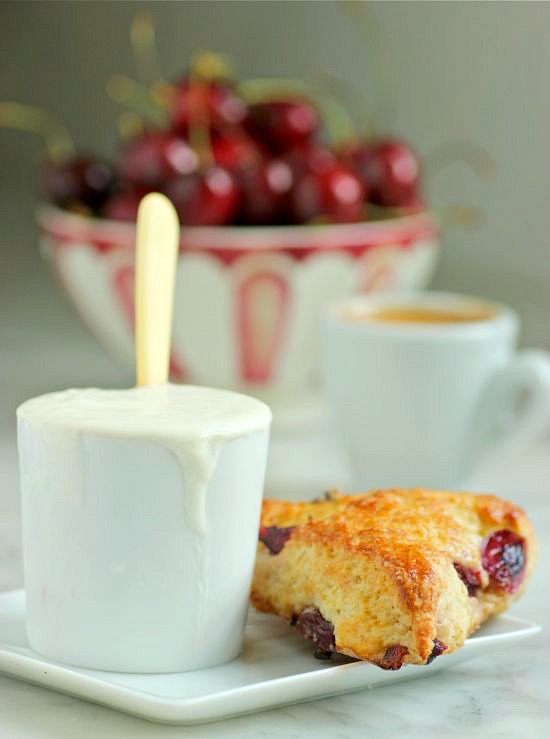 Serving the scones with crème fraîche is optional, but highly recommended! Use either purchased or homemade (recipe HERE). 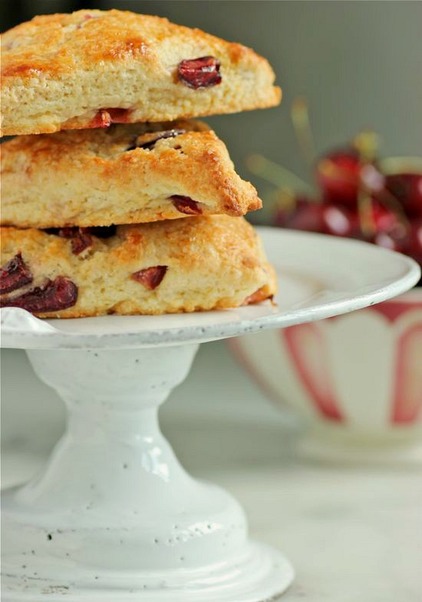 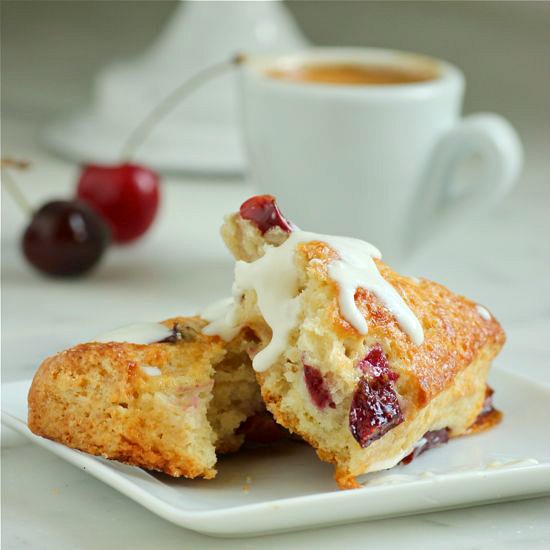  • 1 large egg • 1 teaspoon vanilla extract • 1/8 teaspoon almond extract • 1/2 cup heavy cream • 2 cups unbleached, all-purpose flour • 1/3 cup granulated sugar • 2 teaspoons baking powder • 1/8 teaspoon kosher salt • 1/3 cup cold butter, cubed • 1 cup fresh bing cherries, halved • 1 egg, beaten • Turbinado (raw) sugar, for sprinkling • Crème Fraîche, for serving 1. In a large mixing bowl briefly whisk the large egg. Add the vanilla and almond extracts, along with the heavy cream; whisk to combine. Set bowl aside. 2. In the bowl of a food processor, combine the flour, granulated sugar, baking powder, and salt; pulse several times to combine. Add the cubed butter and pulse until the butter is the size of small peas. 3. Add the flour mixture along with the halved, fresh cherries to the liquid ingredients in the bowl. Using a fork, gently stir until combined. Lightly dust a work surface with flour and place the dough on top. With floured hands, knead the dough 3 or 4 times, then flatten into a 3/4-inch-thick circle. Using a sharp knife, cut dough into 8 wedges. Transfer wedges to a parchment-lined baking sheet, leaving generous space between the scones since they will spread during baking. Brush scones with beaten egg and sprinkle generously with the Turbinado sugar. 4. Place the baking sheet in refrigerator to chill while oven is heating. PREHEAT OVEN to 375˚F. When the oven is preheated, transfer the baking sheet to middle rack of oven. Bake scones for approximately 16 to 20 minutes, or until golden. Remove from oven and cool scones on a rack. Serve with crème fraîche if desired. Scones are always best eaten the day they are baked. TAKE a LOOK: 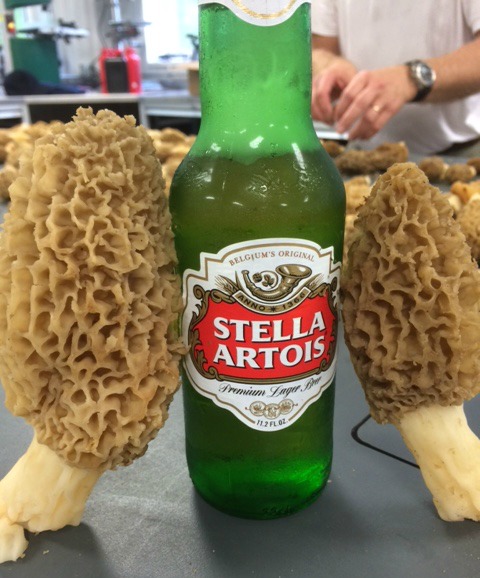 (I think) I know what it's like for diehard morel mushroom hunters. Filled with extreme eagerness to pounce when the moment seems right, the hunter becomes overly aware of the time of year and the weather patterns. Have the temperatures, rain, filtered sunlight been optimal? And once it's determined that mushrooms could possibly appear, abandoned cars are seen parked along woodsy landscapes. Hunters, racing to find the mother lode during that brief window of time... I'm not trying to make anyone jealous here, but this past weekend, that mother lode was found. I won't be bragging proudly to all of you as if this was my discovery, because I did not join in the search. I stayed behind at the cabin (just relaxing). I had nothing to do with any of it. Occasionally, during the two hour hunt by my husband and several others, I heard screams of delight in the far-off distance from my friend Debbie. If anyone was meant to find this haul, it was Debbie. Having never before searched for them herself, Debbie is often the fortunate recipient of morels from all of those who are aware of her intense love for this mushroom. By the way... eating a meal prepared by Debbie with morels is heaven. 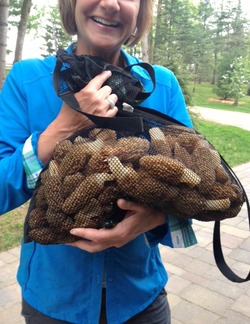 During this search, the small group happened upon a carpet of morel mushrooms so dense, it was hard not to step on them. Our host, who has seriously hunted morels for much of his life, had never seen anything like it. This bag of morels was just one of several.  Morel mushrooms sliced in half and awaiting dehydration. 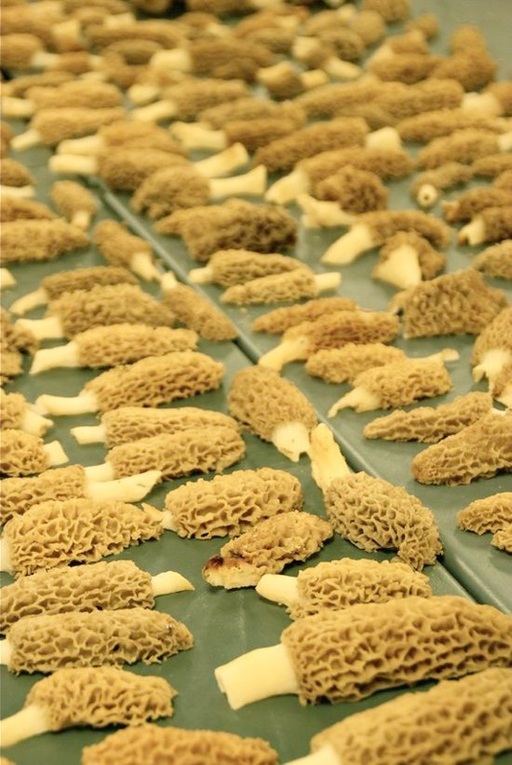 The following day, I went out to comb the forest floor myself. I found one. ONE! And that was only because Debbie called me over to the area she was searching. I stood there; my eyes slowly scanning the ground. After a short time, Debbie pointed me in which direction to face. Then she told me how far away the mushroom was. Time passed... nothing... more time passed... finally... Eureka! I found a morel. A single morel. I wonder how many I actually walked past and never noticed. I was not, however, shy about taking several of the fresh morel mushrooms home with me. Debbie told me how she would prepare her morels that night and I did the same -- Scrambled Eggs with Morels and Chives. Since I barely had anything other than eggs in my refrigerator when we returned from the cabin, it was the perfect dish. It is amazing how a morel mushroom can elevate a simple dish of scrambled eggs into something so extraordinarily delicious. Just as a truffle does. Better than a truffle? Possibly. I hope we're invited back to the cabin next spring... please?   Serves 2 • 4 large morel mushrooms • 6 large eggs • Butter • 2-3 tablespoons sour cream • Salt and freshly ground pepper • Fresh chives, minced 1. Gently brush the morels to clean, then dice. In a small skillet, melt 1 tablespoon butter. Sauté the mushrooms over medium heat until juices are released and mushrooms are reduced. 2. In the meantime, crack the eggs into a bowl and whisk briefly to blend. Season with salt and pepper. Melt 1 to 2 tablespoons of butter in a medium non-stick or cast iron skillet over medium-low heat. Add the eggs and gently cook, stirring almost constantly. I like using a thin metal spatula to turn the eggs over as they scramble. When almost done, add the sour cream and stir into the eggs. 3. Divide scrambled eggs between two plates. Top with the sautéed morels and sprinkle with chives; adjust seasonings. TAKE a LOOK: 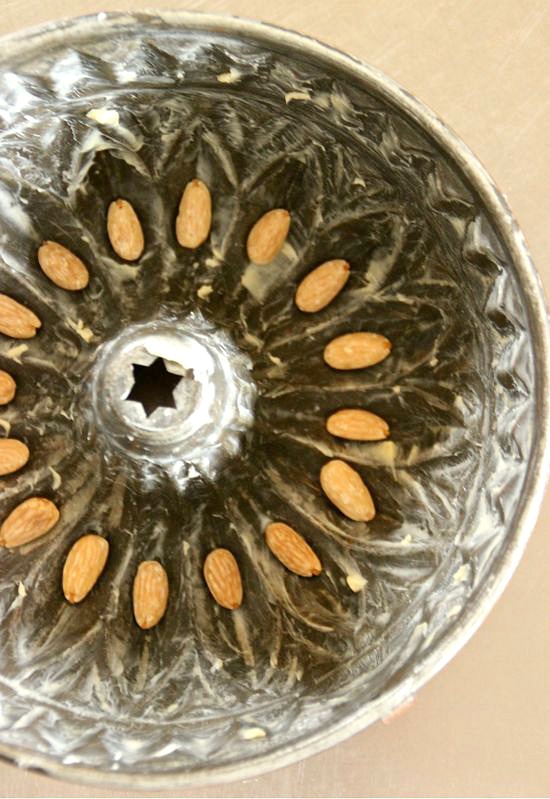 Kugelhopf (also Gugelhupf, Guglhupf, Gugelhopf, kougelhopf, kouglof, etc.) is a baked, sweet bread similar to brioche that has taken on a life of its own in my mind -- just like French Canelés did last year. And as with the Canelés, I had never eaten one, but was obsessed with the thought of baking a picture-perfect Kugelhopf. 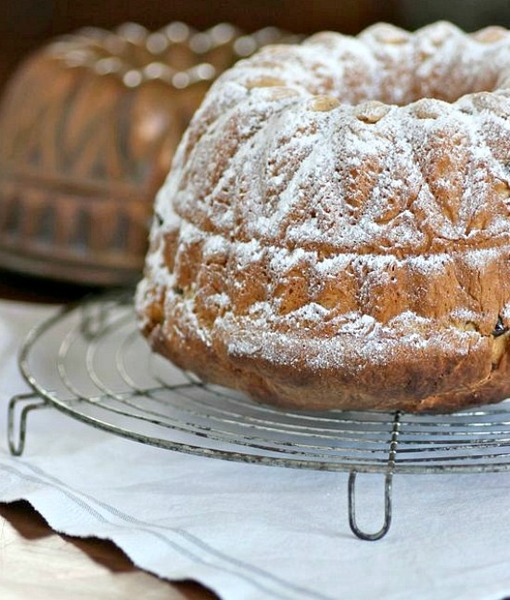 Kugelhopf originated in the Alsace, but Germany, Austria, and Switzerland also lay claim to this yeasty coffee cake. There are also many variations to the dough. The recipe I used is from André Lerch: Pâtisserie-Boulangerie Alsacienne, in Paris' 5e. This Kugelhopf is made with milk and brandy, but many use just water. It is advised that the cake is left wrapped and uneaten for a day or two after baking. There is a general agreement Kugelhopf is at its best when slightly dry -- making the coffee cake all the better when dipped into your morning Café au Lait! 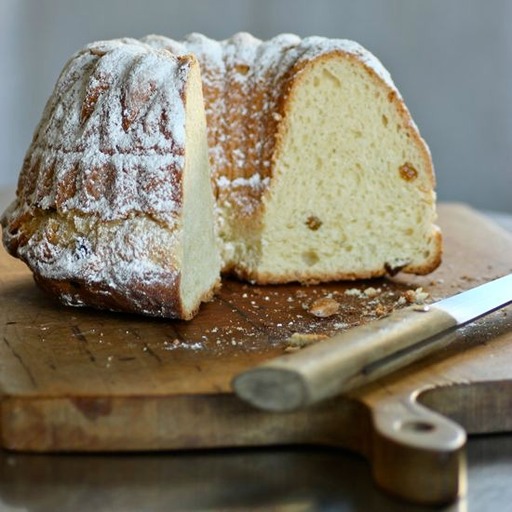 In my plans to make a Kugelhopf, I became obsessed with finding a true, earthenware Kugelhopf mold (which, as you can see, I did not). They are traditionally baked in a tall, ceramic tube mold with angled ribs that resemble a Turk's turban. Whole, blanched almonds are placed at the base of each "rib" before the yeast dough is added, resulting in an almond-studded crown when the cake is unmolded. I ended up using a decorative copper tube pan from the late 1800s that my sister loaned to me and has since given me upon seeing the photos of the coffee cake (with the stipulation that I bake and send one to her). So, yes... substitute a Bundt pan if you are unable to find the traditional Kugelhopf mold. 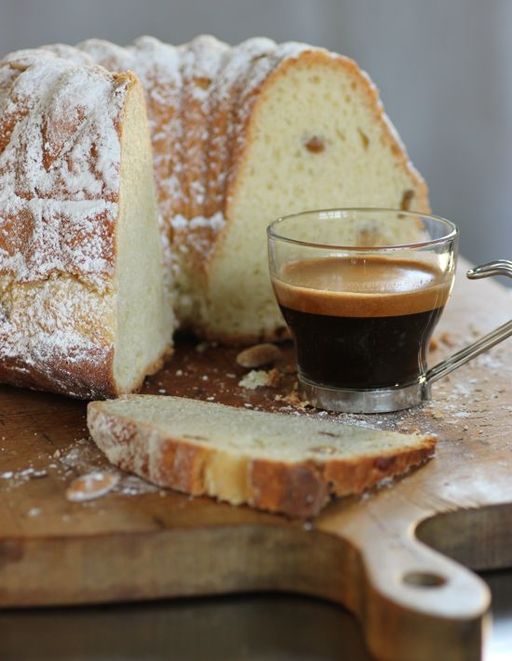 When in Paris, you will see Kugelhopfs in many pâtisseries; often the smaller, individual-sized cakes. I was always fascinated by them, and although I photographed Kugelhopfs, I never purchased one to eat. Crazy... I know. On one visit to Pierre Hermés I purchased a salted caramel macaron, but it was my sister that left the pâtisserie with a Kugelhopf to snack on!  Small Kugelhopfs at Gérard Mulot, 76 rue de Seine, Paris 6e 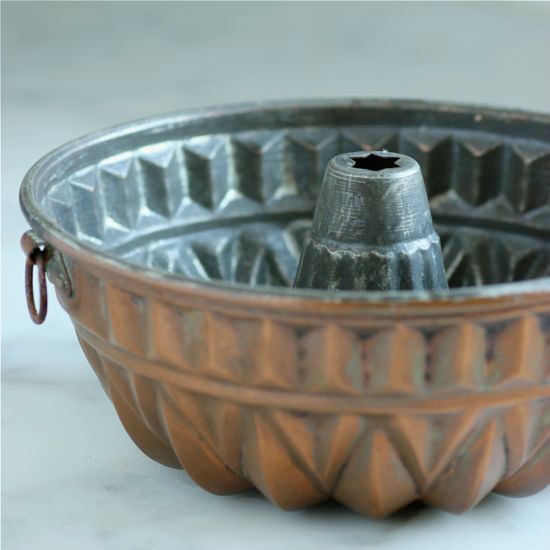 The recipe below will give you enough dough to make two Kugelhopfs. I halved the recipe and made one cake (thinking... I only have one mold). Had I known this cake would be so good, I would have made enough dough for two Kugelhopfs and kept half of the dough refrigerated until needed. That is certainly what I will do the next time. Also, while kneading the dough, additional flour will probably be necessary. I was working with a very wet dough for some reason and needed much more flour. Add the flour, a generous tablespoon at a time, until the dough begins to clean the sides of the mixer bowl and you hear a slapping sound. You want a smooth, shiny dough that is still a bit sticky upon completion.  + recipe from Paris Boulangerie Pâtisserie by Linda Dannenberg + This recipe will make enough dough for two 2-quart Kugelhopf molds or Bundt pans. Halve the ingredients if you only want to make one Kugelhopf. • 1 cup golden raisins • 1/4 cup kirsch or brandy • 2 1/2 cups lukewarm milk • 1 cup (2 sticks) unsalted butter, softened • 5 teaspoons (2 packages) dry yeast • 5 1/2 cups all-purpose flour, or more as needed • Softened butter for molds • 1/2 cup whole blanched almonds • 3/4 cup plus two tablespoons granulated sugar • 4 teaspoons salt • 2 large eggs • Confectioners' sugar for dusting 1. Place the raisins in a small bowl and cover with the brandy. Let soak while preparing the starter. 2. STARTER: In a small saucepan combine 3/4 cup of the milk with 4 tablespoons of the butter. Heat, using a low temperature, until lukewarm. Transfer to a mixing bowl and sprinkle the yeast over the milk mixture; stir in 1 cup of the flour until almost fully incorporated. Place a piece of plastic wrap loosely over the bowl and set bowl aside to rise until almost double, about 1 hour. 3. Generously butter two 2-quart Kugelhopf molds or Bundt pans. Press almonds into the buttered grooves at the bottom of each mold. 4. In a large mixing bowl or the bowl of an electric stand mixer with a dough hook, combine the remaining lukewarm milk and butter; add the flour, granulated sugar, salt, and eggs. Mix well. Pour in the yeast starter and mix well until thoroughly combined. Knead by hand on a lightly floured work surface, or using a stand mixer at medium-high speed, for about 10 minutes. The dough should be smooth and shiny and feel soft and slightly sticky. As you knead, add more flour or milk if necessary to adjust the consistency. (I ended up adding quite a bit more flour to my dough. Add it slowly, if needed. The dough should be slightly sticky when you are finished kneading.) 5. Drain the raisins and reserve the liquid. Knead the raisins into the dough by hand, while in the bowl, until well distributed. Cover the bowl with plastic wrap and allow dough to rise to 1 1/2 times its size, approximately 1 1/2 hours. 6. PREHEAT OVEN to 375˚F. Place oven rack about one-third distance from the oven floor. Gently divide the dough in half and form into two balls. Using your thumbs, stretch a small opening in the center of each ball. Place the ring of dough over the center tube of the mold. Ideally, the dough should fill 3/4 of the mold. Cover mold with a sheet of plastic wrap and allow to rest for 10 minutes. 7. Place the molds on the rack of the preheated over and bake for 45-50 minutes. The Kugelhopfs should be golden brown and sound hollow when tapped. Cover Kugelhopfs with foil toward the end of baking if browning too quickly. Remove from oven and cool Kugelhopfs on a rack for several minutes before unmolding. They should release nicely if the molds were well buttered. Cool thoroughly on racks, then dust generously with Confectioners' sugar. Wrap tightly in plastic for 1 to 2 days before eating. Dust with Confectioners' sugar again before slicing. TAKE a LOOK: 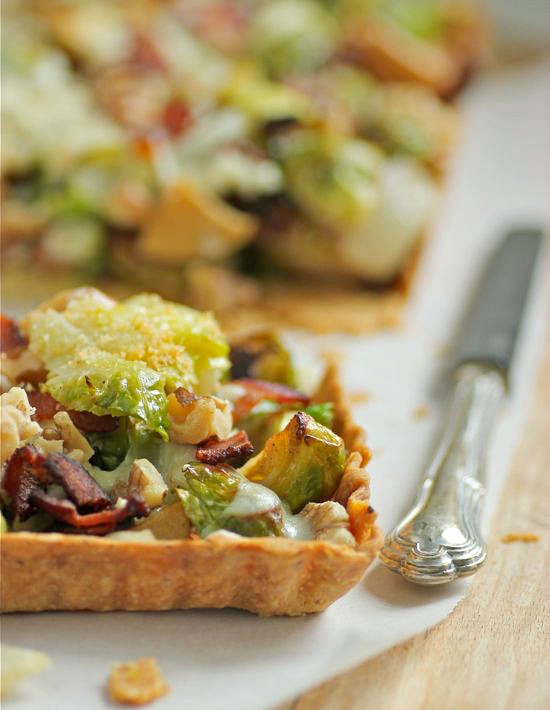 Recently I was contacted by a company asking me to promote their lifestyle by writing a post on my philosophy for healthy living in Minnesota during the winter months... and to create a recipe to accompany my musings on wellness. Honestly, I don't know what it was about Passions to Pastry that made me seem like a plausible candidate for this. I dislike being outdoors when it's cold and much of what comes out of my kitchen includes fat, usually in the form of butter. 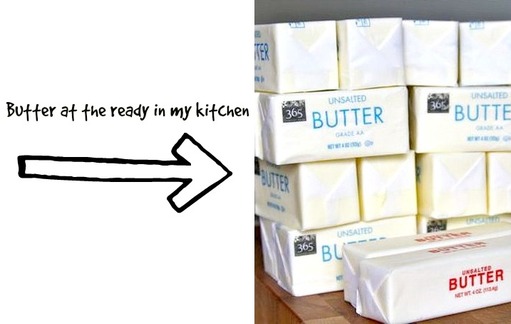 What I first considered a very odd request, eventually got me thinking about my general health. Do I exercise enough, especially in the winter? Even though I'm in my kitchen cooking and baking for hours every day, do I really eat well? And probably my biggest concern... how is my mental health? Something I believe is connected to exercise, good nutrition, and a positive attitude (which is sometimes lacking in my winter demeanor). While I was thinking about all of this today, my husband had a health assessment at the health club where we belong. He was told that he must be eating really good fats, because numbers and percentages on his tests were excellent. We eat butter. I bake with butter and I cook mostly with olive oil. We eat eggs. LOTS of eggs. I only purchase whole milk and whole milk products, such as yogurt, sour cream and cottage cheese. I do not believe in low-fat or non-fat. Seventeen years ago I eliminated hydrogenated oils from my kitchen and our lives. That changed everything. It's a no brainer as far as I'm concerned. And I must ask... why do doctors' offices and hospitals serving coffee to their patients, always offer a powdered creamer that's full of hydrogenated oils? It makes absolutely no sense whatsoever. 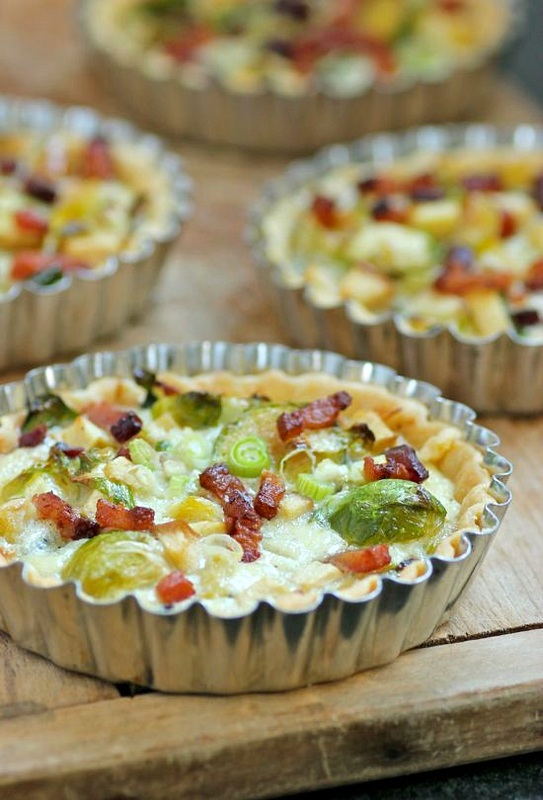 Summers are easy for me. I spend much of my time in my vegetable garden, bike 15 to 20 miles several times a week along the Mississippi river, and entertain often, serving alfresco meals on the patio made with organic produce from my garden. That is when I am the happiest... and healthiest. Admittedly, winter becomes more difficult. I tend to hibernate, filling my time with indoor projects, baking of bread, and thoughts plus plans for the upcoming gardening season... and travel; something I prefer doing during the summer months instead of winter. It's a balance and a trade-off I cherish. I can't imagine living anywhere else. 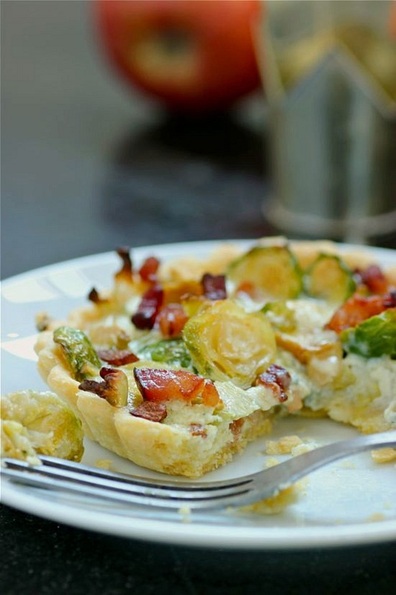 I often make savory tarts during this time; combining a flaky pastry with healthy fruits and vegetables in addition to rich cheeses, eggs, and cream. (Make this a vegetarian version by removing the bacon and adding chopped walnuts.) Meals like this help get me through a long, northern winter! 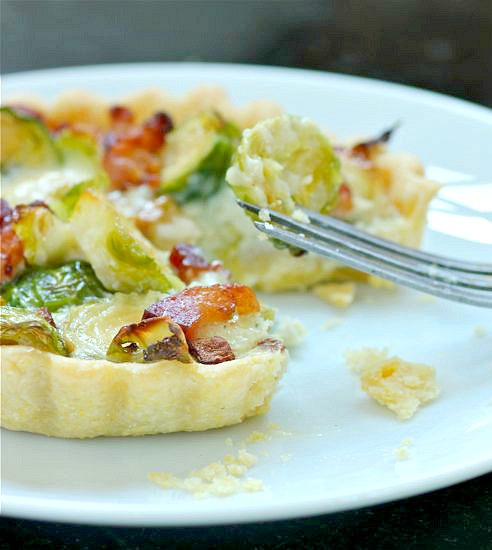  • recipe makes six 4-inch tarts or one 10-inch tart CRUST • 1 1/4 cup unbleached all-purpose flour • 1/4 cup cornmeal • 1/2 teaspoon salt • 8 tablespoons cold unsalted butter, cut into 1/2-inch cubes • 3 to 4 tablespoons ice water FILLING • 4 strips apple-smoked bacon • 10 ounces brussels sprouts • 1 small apple, diced (I used Fuji) • Olive oil • 3/4 cup blue cheese, diced • 1/2 cup Half & Half or whole milk • 2 large eggs • Salt and freshly-ground pepper • 2 green onions, white and pale green part, thinly sliced 1. To make the crust... Combine the flour, cornmeal and salt in the bowl of a food processor. Pulse a couple of times. Add the butter and pulse until the size of small peas. Add the ice water, 1 tablespoon at a time, while pulsing until the dough just starts to come together. You will use 3 to 4 tablespoons of water. 2. Transfer the tart dough to a large piece of plastic. Press into a disk, wrap in the plastic; place in the refrigerator for 1 to 2 hours. 3. In the meantime, make the filling... Slice the bacon into 1/4-inch pieces. Place bacon in a skillet over medium-low heat; cook until brown but not crisp. Drain and set bacon aside. 4. Preheat oven to 375˚F. Trim and slice brussels sprouts. Cut the apple into small dice. Combine on a baking sheet with 1-inch sides; drizzle with olive oil and sprinkle with salt and pepper. Bake in the center of the oven, stirring occasionally, until the brussels sprouts just start to brown, about 20 minutes. Remove pan and increase oven temperature to 400˚F. 5. Remove the tart dough from the refrigerator and transfer to a work surface. Place the disk on a sheet of lightly-floured wax paper or parchment. Dust the top of the disk lightly with flour and cover with a sheet of plastic wrap -- If making individual tarts, divide the dough into 6 equal pieces before rolling. Roll the dough slightly larger than the tart tin(s) and gently press into the pans. Do not stretch the dough. Trim the top edge and place in freezer for 5 minutes. Remove and line pan with a piece of aluminum foil. Fill with dried beans or rice, transfer to the preheated oven, and bake for 15 minutes. Remove the foil and beans and return the tart pan(s) to oven. Continue to bake until crust is golden brown. Remove and reduce oven temperature to 375˚F. 6. Scatter the blue cheese evenly onto the tart crust (or divide equally between the individual tarts). In a medium bowl combine the cream or milk with the eggs and salt and pepper to taste. Whisk by hand just briefly until smooth. Add the sliced green onions. 7. Fill the tart shell(s) with the brussels sprouts-apple mixture. Sprinkle with the reserved bacon and slowly pour the egg mixture over the filling. 8. Bake in the center of the oven for approximately 20 minutes, or until the custard filling is set. Great for a light dinner with a salad or as part of a brunch. TAKE a LOOK: 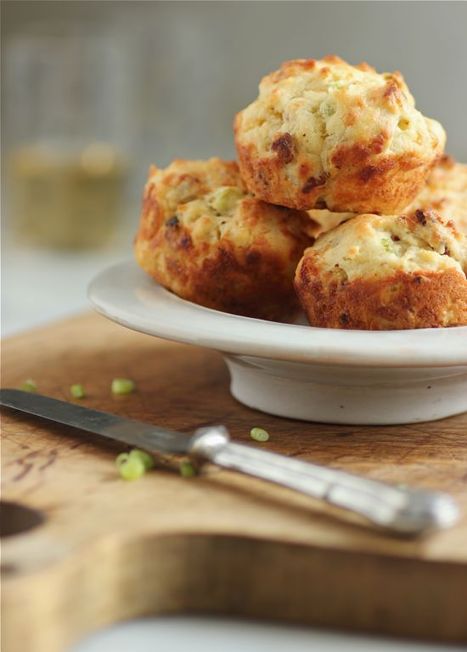
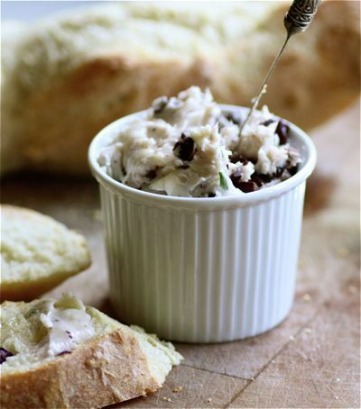
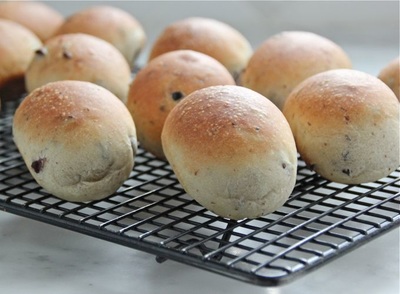
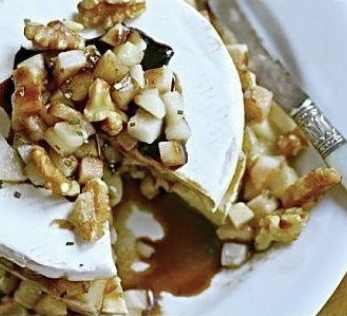
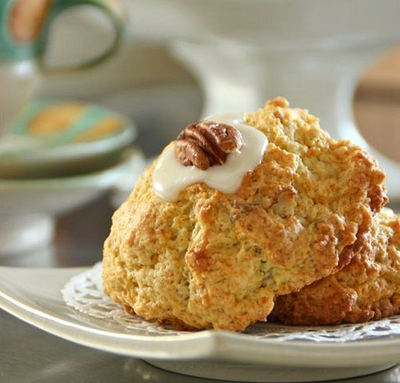
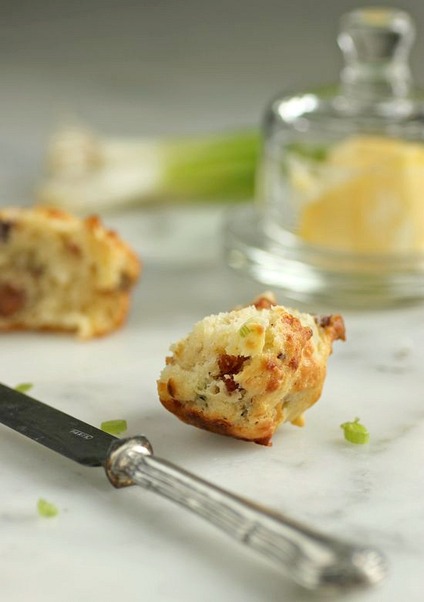
Savory Bacon, Gruyère, and Scallion Muffins. Great as a little pre dinner snack with an apéritif! 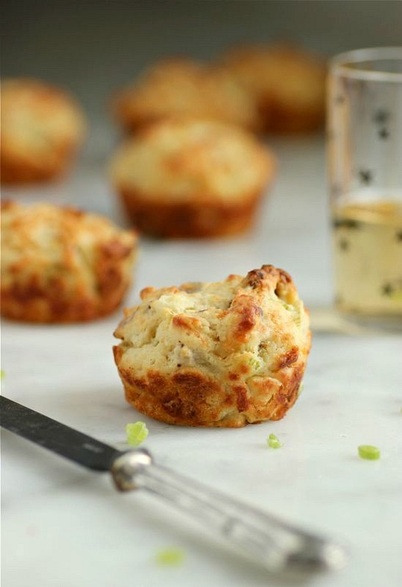

|


Categories
All
|