Living Tastefully
  • Home
  • PAINTINGS
  • About
  • Passions-to-Pastry Blog
  • Contact
  • Recipes

Jalapeño Havarti Custard with a Honeyed Sauce, Grilled Shrimp and a Cornmeal Cookie

2/25/2015

2 Comments

 
Picture

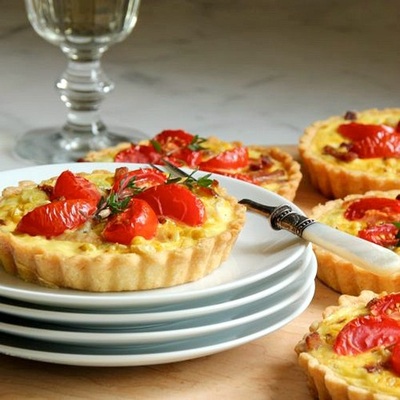
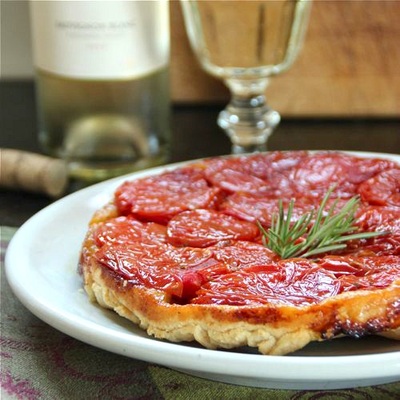
     Whenever I visit France, I'm there in search of inspiration.  And France never disappoints.  Last summer in the south of France, it seems as though every amazing meal I ate incorporated a savory shortbread into the dish. 


Picture

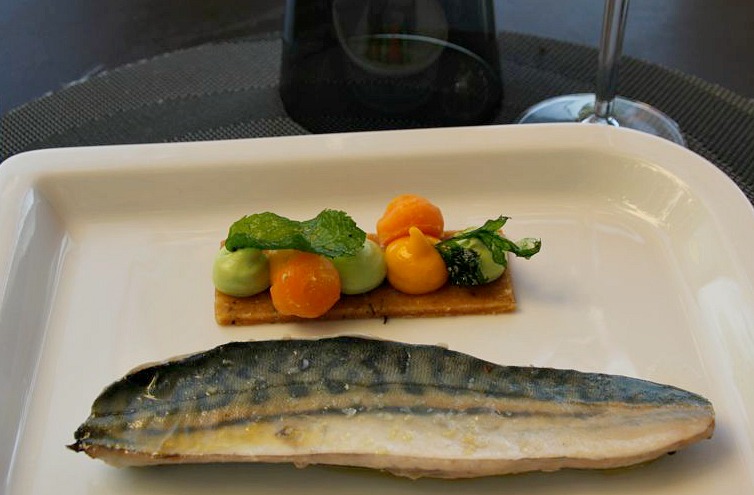
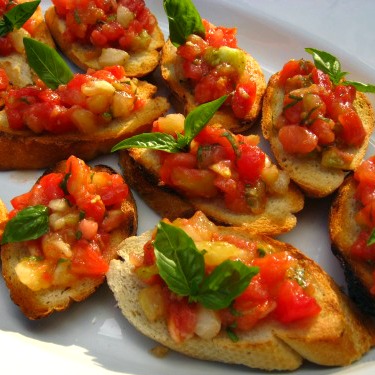
     At Le Château de Mazan (check out the beautiful hotel and restaurant HERE) assorted chilled vegetable purées were piped atop a thin savory cookie.


Picture

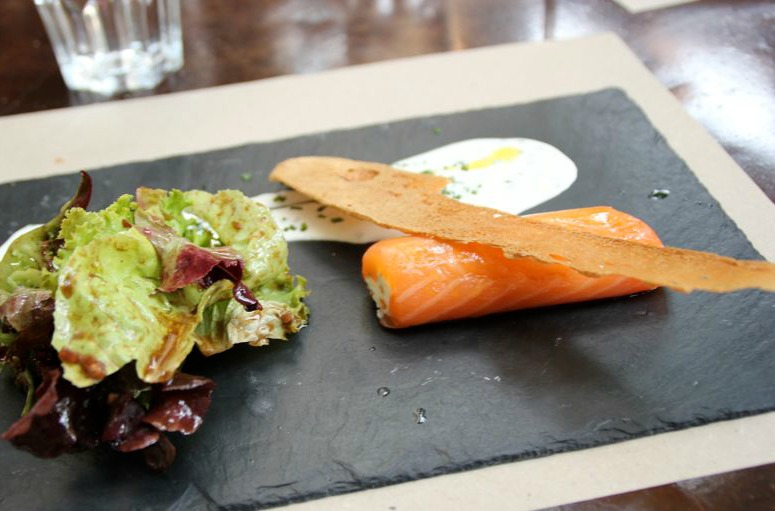
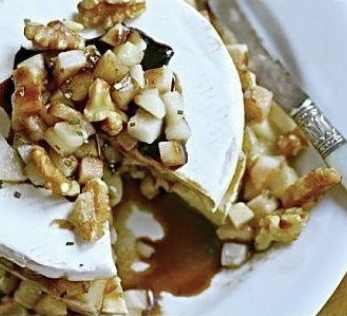
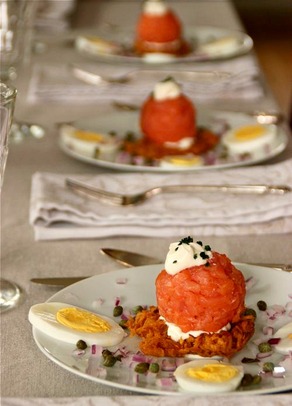
     At Chez Serge in Carpentras, my first course balanced a savory cookie over my smoked salmon.


Picture

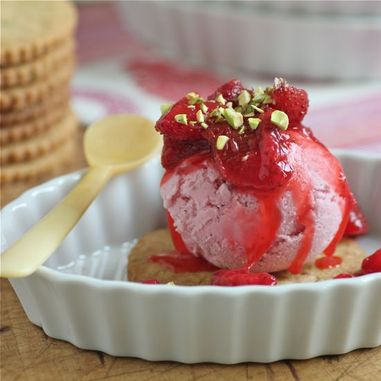
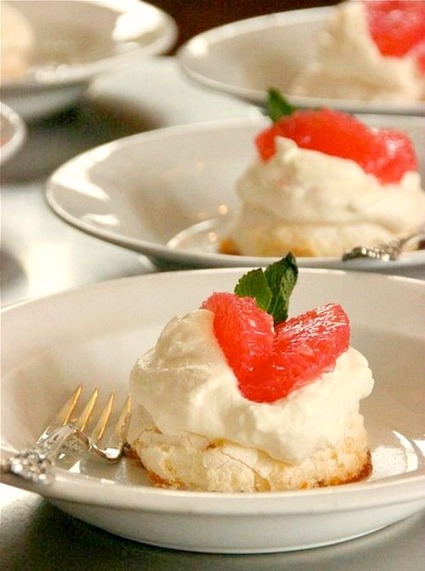
     When I returned home with thoughts of cookies, savory and sweet, I made this dessert of fresh strawberry ice cream topped with strawberry rhubarb compote, and placed it on a pistachio cookie.
    
     ... and I continue to dream of ways to include savory pastries (and cookies) in the meals I create.

Picture

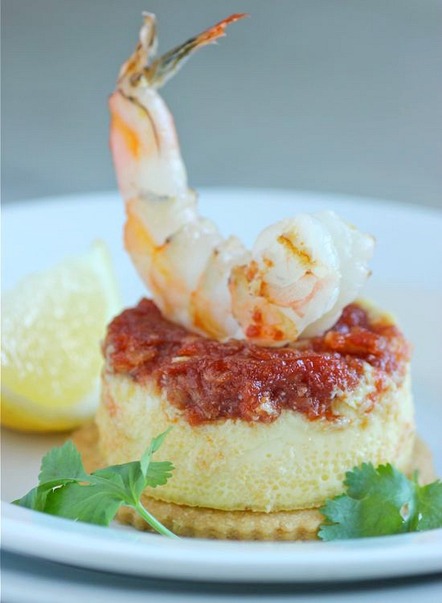
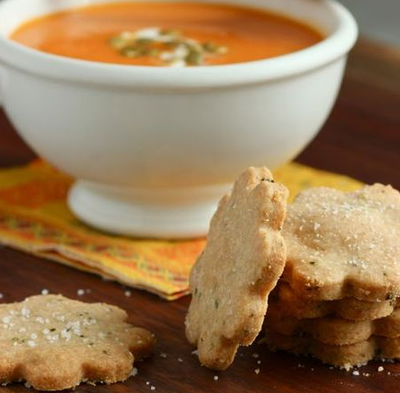
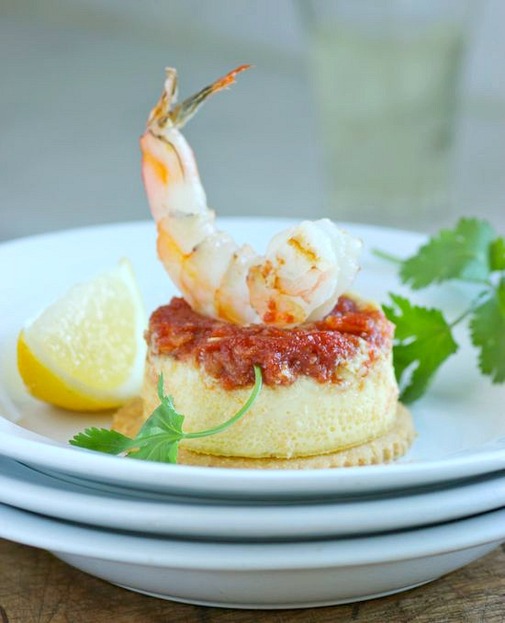
     For this appetizer or first course, I rested a savory jalapeño Havarti custard with honeyed cocktail sauce on top of a delicate cornmeal cookie, then crowned it all with a giant grilled, lemon shrimp.  I can't wait to make this part of an al fresco meal on the patio this summer!
     I fortunately had some leftover cocktail sauce that a friend made, and which I used in this recipe.  * Ina Garten's cocktail sauce (recipe HERE) would be a good substitute.  An excellent commercial brand of cocktail sauce would also work as a coating for the custard.


Picture
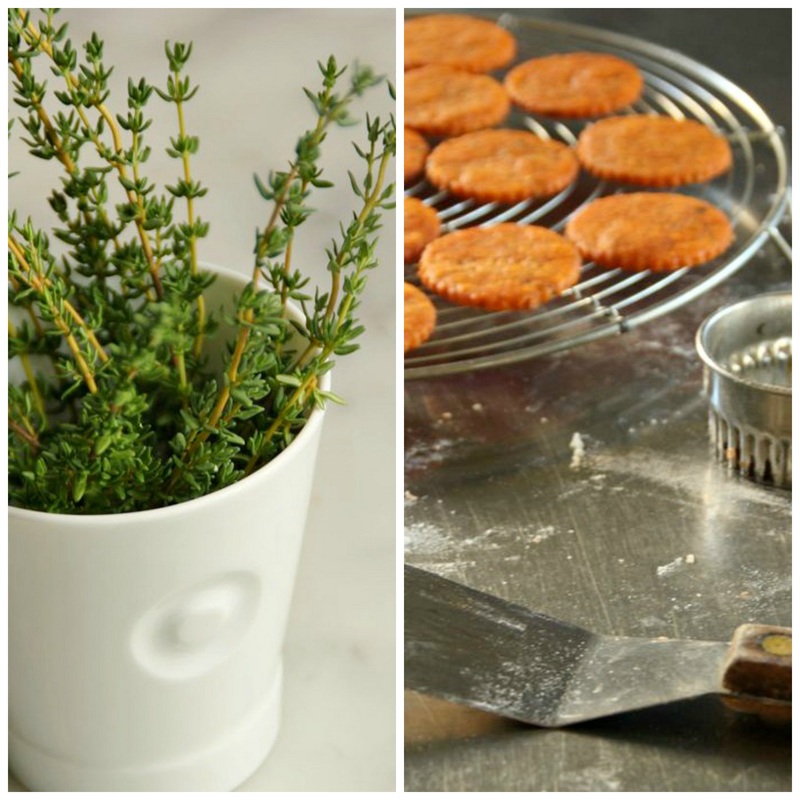
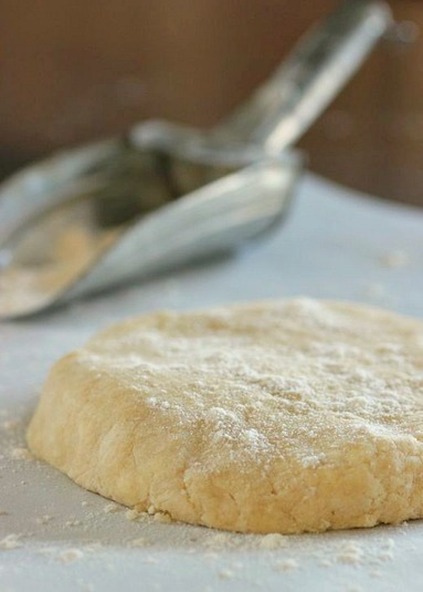
SAVORY CORNMEAL COOKIES
makes 8 cookies

• 1 cup unbleached, all-purpose flour
• 1/8 cup cornmeal
• 1/2 teaspoon Maldon salt or fleur de sel
• 6 tablespoons cold unsalted butter, cubed
• 1 large egg yolk
1.  Preheat oven to 350˚F.  Line a baking sheet with a piece of parchment paper and set aside.
2.  Combine the flour, cornmeal and salt in the bowl of a food processor; pulse once or twice.  Add the cubed butter and pulse until small pieces form.  Add the egg yolk and pulse briefly until the mixture just starts to come together.  Do not over mix.
3.  Transfer the mixture to a lightly floured work surface.  Roll dough to approximately 3/8-inch thickness and cut out 3 1/2-inch to 4-inch rounds.  Place cookies on prepared baking sheet.
4.  Bake the cookies on the middle rack of the preheated oven for 25 minutes, or until golden.  Remove and allow to cool.


JALAPENO HAVARTI CUSTARDS
makes 4 servings

• 3 large eggs
• 3/4 cup whole milk
• 1/2 teaspoon kosher salt
• 1/3 cup finely diced Jalapeño Havarti
• 2 tablespoons honey
• 4 tablespoons cocktail sauce (see
* above)
1.  Preheat oven to 375˚F
2.  Prepare four 1/2 cup ramekins by drizzling 1/2 tablespoon honey into each.  Gently spread 1 tablespoon cocktail sauce over the honey, evenly coating the bottom of the ramekin.
3.  In a medium bowl, whisk together the eggs, milk, salt, and Jalapeño Havarti.  Divide the custard evenly between the ramekins.  Place the ramekins in a baking pan and make a bain-marie (water bath) by pouring hot water in the pan to reach halfway up the sides of the ramekins.
4.  Gently slide the baking pan onto the middle rack of the oven and bake the custards for 30 minutes, or until set.  When finished baking, remove from the oven and then remove the ramekins from the bain-marie.  Cool for 10 minutes.
5.  Prepare and grill shrimp while custards are resting.

GRILLED LEMON SHRIMP

• 1 to 2 large shrimp for each serving of savory custard
• Olive oil
• grated lemon zest
• kosher salt
• cilantro, for serving
1.  Peel and devein shrimp.  In a bowl, toss the shrimp with a good drizzle of olive oil.  Add lemon zest and sprinkling of salt.
2.  Grill shrimp either on a preheated grill pan indoors or on an outdoor charcoal or gas grill until pink and cooked through.

TO ASSEMBLE:

1.  Using a small paring knife, run the tip around the outside of the custards.  Top  custard with a small plate and invert.  Shake to release custard.  Place a cookie on a serving plate and using a thin metal spatula center a custard on the cookie.  Crown the custard with a grilled shrimp and sprinkle with chopped cilantro.  Repeat with remaining cookies, custards, and shrimp.  Serve immediately.


TAKE a LOOK:


2 Comments

Bacon, Gruyère, and Scallion Savory Muffins

2/24/2015

2 Comments

 
Picture

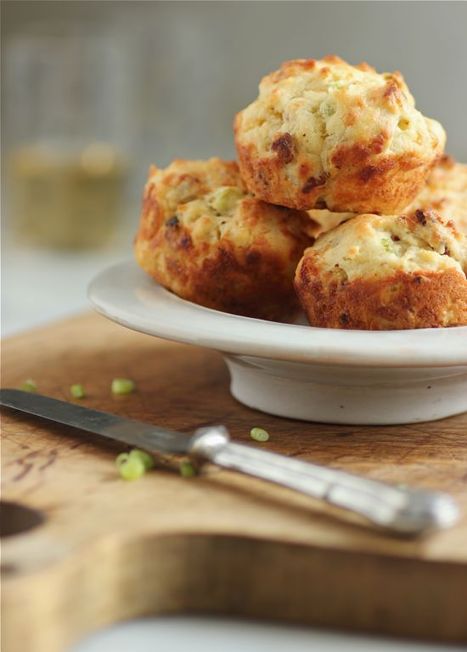
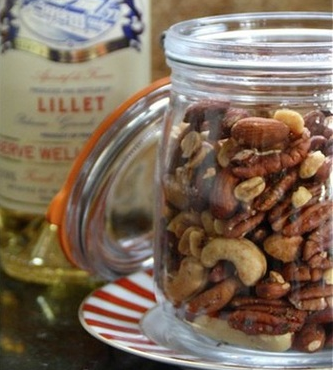
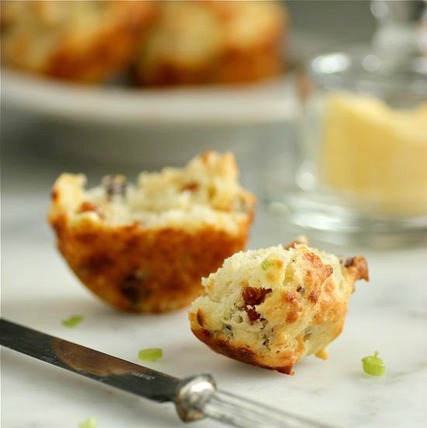
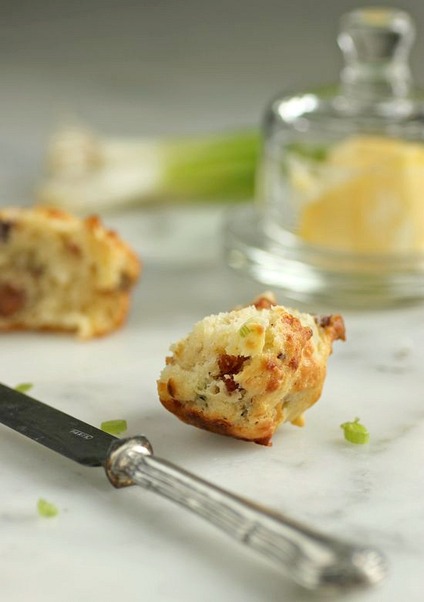
     Savory Bacon, Gruyère, and Scallion Muffins.  Great as a little pre dinner snack with an apéritif!
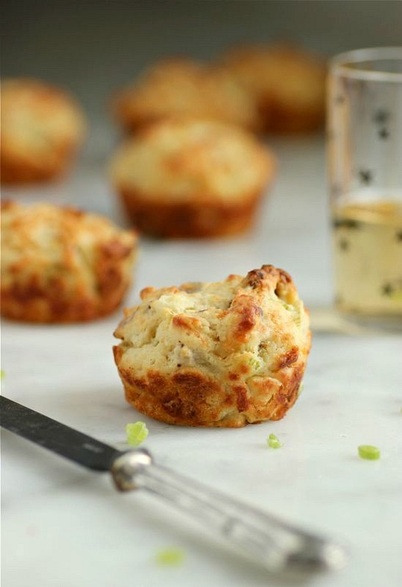
Picture

Picture


Picture


 Bacon, Gruyère and Scallion Savory Muffins


+ an adapted Gourmet Magazine recipe

• 6 slices apple-smoked bacon
• 1 1/2 cups unbleached, all-purpose flour
• 2 teaspoons baking powder
• 1 1/2 teaspoons sugar
• 1/2 teaspoon salt
• 4 ounces grated Gruyère cheese
• 1/3 cup finely chopped scallion
• 3/4 cup milk
• 1 large egg
• 1 tablespoon Dijon mustard
•  Extra-Virgin olive oil, if needed

1.  Preheat oven to 425°F. and butter twelve 1/3-cup muffin tins.
2.  Slice bacon into 1/4-inch wide pieces.  In a skillet cook bacon over moderately low heat until crisp and transfer to paper towels to drain, reserving 1/4 cup bacon fat.  Add olive oil to the bacon fat, if necessary, to equal 1/4 cup.
3.  In a bowl whisk together flour, baking powder, sugar, salt, Gruyère, scallion, and bacon. In a small bowl whisk together milk, egg, mustard, and reserved bacon fat. Add milk mixture to flour mixture, stirring until just combined (do not over mix).
4.  Divide batter evenly among muffin tins and bake in middle of oven 15 to 20 minutes, or until golden and a tester comes out clean.


TAKE a LOOK:


2 Comments

Grissini

1/24/2015

0 Comments

 
Picture

     If you haven't worked much with yeast, Grissini (Italian for breadsticks) is a great place to start; a fun start, actually, with so many possibilities.  The dough is easy to assemble.  Precision isn't necessary, really, in rolling the dough.  Whatever their shape, they have a unique artisnal appeal.  Chop up a little rosemary, thyme, or dill and work the herb of choice into the bread dough.  You can also roll the Grissini over poppy seeds or sesame seeds before the final rise.  Try a grinding of pepper. Or press flakes of Maldon salt down the breadsticks' length.  My favorite way to eat them?  Plain, with a dish of room temperature salted, European butter for dipping or spreading; I'm pretty happy with just that, but alongside a bowl of soup is a close contender.

Picture

Picture
+ adapted recipe from the Los Angeles Times
• 1/2 cup warm water
• 1 packaged (2 1/4 teaspoons) active dry yeast
• 1 teaspoon honey
• 1 1/4 cup unbleached, all-purpose flour, divided
• 1/2 cup whole wheat flour
• 2 tablespoons extra-virgin olive oil
• 1 teaspoon kosher salt


1. In a mixing bowl, add the water along with the yeast, honey, and 1/2 cup of the unbleached all-purpose flour. Set aside for 10 minutes, until bubbly.

2. Stir in the remaining unbleached all-purpose flour, wheat flour, olive oil, and salt.  Knead the dough, along with fresh herbs, if using, until smooth and elastic, about 5 minutes. Wash out the bowl and coat it with a thin layer of olive oil. Place the dough in the bowl, cover with plastic wrap and allow to rise in a warm place for 1 hour.

3. Remove the dough from the bowl and divide it into four pieces on a lightly-floured surface. Roll out each piece into a rectangle, 4 by 8 inches. Cut the dough lengthwise into one-third-inch-wide strips (a pizza cutter is good for this). Using your hands, roll the strips of dough back and forth on top of the work surface until approximately 12-inches in length.  If you plan to roll the grissini in poppy seeds or sesame seeds, do this now (a sheet pan with the seeds in it for rolling works well). Place the strips about one-half-inch apart on a baking sheet lined with parchment paper. Repeat with the remaining dough. Allow the grissini to rise until puffed, about 30 minutes. Meanwhile, heat the oven to 400˚F.

4. Bake the grissini, in several batches (I used 4 baking sheets), on the top shelf of the oven until lightly browned, about 10 minutes, rotating halfway through. Cool on a rack and continue until all the grissini are baked. Cool.  Store grissini in a long, airtight container.


TAKE a LOOK:


0 Comments

Savory Chocolate-Cayenne Cocktail Biscuits 

12/16/2014

2 Comments

 
Picture
    
     Still in the kitchen baking cookies.  This time, however, I've gone the savory route.  These Chocolate-Cayenne Cocktail Biscuits will be packaged as gifts, along with bottles of red wine.
.. HAPPY HOLIDAYS!


Picture


• 1 1/2 cups all-purpose flour
• 1/2 cup unsweetened cocoa powder
• 1/2 teaspoon cayenne pepper
• 1/2 teaspoon fine sea salt
• 2 sticks (16 tablespoons) unsalted butter, softened
• 1/3 cup confectioners' sugar
• 2 tablespoons granulated sugar
• 1 large egg yolk
• Maldon salt, for sprinkling

1.  Sift the flour, cocoa powder, cayenne and sea salt into a bowl and whisk to combine. In a standing mixer fitted with the paddle, beat the butter with both sugars at low speed until creamy. Add the egg yolk and beat until smooth, then add the dry ingredients and beat until incorporated.                                           
2.  Turn the dough out onto a work surface and knead gently until it comes together. Divide the dough in half and press each half into a disk. Roll out each disk between 2 sheets of wax paper to about 1/4 inch thick. Slide the wax paper–covered disks onto a baking sheet and freeze for at least 1 hour, until very firm.
3.  Preheat the oven to 350° and line 2 large baking sheets with parchment paper. Working with one piece of dough at a time, peel off the top sheet of wax paper. Using a 1 1/2-inch round cookie cutter, stamp out the cookies as close together as possible. Arrange the cookies about 1 inch apart on the parchment paper–lined baking sheets and sprinkle with some Maldon salt.

4.  Bake the cookies for about 15 minutes, until they are just firm; shift the baking sheets from top to bottom and front to back halfway through. Let the cookies cool on the baking sheets for 3 minutes, then transfer them to a wire rack to cool completely.


TAKE a LOOK:


2 Comments

Savory Tomato-Thyme Shortbread with Olive Gremolata

9/9/2014

2 Comments

 
Picture

     No... I didn't drop off the face of the earth.  I have been turning out meals and desserts daily, but lately it seems like everything is eaten before I even have a chance to pull out my camera. 
     The Savory Tomato-Thyme Shortbread and Olive Gremolata is a fabulous appetizer.  I'm paraphrasing here... but a friend that joined us for dinner remarked that the savory shortbread and olive gremolata on their own are amazing, but combined they're magical.  I have to agree.  I also made this appetizer more labor-intensive than need be.  I rolled the dough and used a round cutter to stamp out the savory cookies -- but if you follow the original recipe and form the dough into a sliceable log, the baking of this shortbread will take you (almost) no time at all.  I'll even go out on a limb here to say that if you are really short on time, just make the olive gremolata and serve with purchased (buttery) crackers.  It's pretty delicious.

    
Picture


Tomato-Thyme Shortbread with Olive Gremolata
 • recipe by Melia Marden | Food & Wine • April 2014


SHORTBREADS:
• 1 cup all-purpose flour
• 1/4 cup tomato paste
• 1 tablespoon sugar
• 1 tablespoon finely grated Parmigiano-Reggiano cheese
• 1 tablespoon fresh thyme leaves
• 1/2 teaspoon kosher salt
• 1/4 teaspoon cayenne pepper
• Pinch of finely ground black pepper
• 1 stick (8 tablespoons) cold, unsalted butter, cubed
GREMOLATA:
• 1/2 cup finely chopped pitted, green olives, such as Castelvetrano
•
1/2 cup finely chopped pitted kalamata olives
• 3 tablespoons extra-virgin olive oil
• 2 tablespoons finely chopped flat leaf parsley
• 1 1/2 teaspoon finely grated lemon zest
• 1 teaspoon fresh lemon juice
• 1 small garlic clove, minced
• Kosher salt
• Freshly ground black pepper

1.  TO MAKE THE SHORTBREAD:  In the bowl of a food processor, combine the flour, tomato paste, sugar, Parmigian-Reggiano cheese, thyme leaves, kosher salt, cayenne, and black pepper.  Pulse the mixture until the tomato paste is evenly distributed throughout.  Add the butter and pulse until the dough starts to come together.  Transfer to a sheet of plastic wrap and roll the dough into a log 8-inches long and 1 1/2-inches in diameter.  Wrap in the plastic and chill in the refrigerator for at least one hour.
2.  MAKE THE GREMOLATA:  Combine all of the ingredients in a medium-size bowl.  Season with salt and black pepper.  Set aside.
3.  PREHEAT OVEN to 350˚F.  Line 2 baking sheets with parchment paper.  Slice the shortbread log into 1/4-inch thick rounds (I rolled my shortbread dough just a little over 1/8-inch thick and used a round cutter, instead).  Place shortbread rounds on prepared baking sheets. Bake the shortbreads on upper third and center racks of oven for about 18 minutes, or until edges are lightly browned; rotate the baking sheets from top to bottom and front to back halfway through baking.  (If baking a thinner, rolled shortbread as I did, bake for 12 -15 minutes.)  Transfer the shortbreads to a wire rack and allow to cool completely.  Serve as an appetizer with the olive gremolata.


TAKE a LOOK:


2 Comments

Easy Kale Chips

7/14/2014

4 Comments

 
Picture

     I never planned to write about Kale Chips.  I just assumed that with the popularity of kale, just about everyone had made, or at the very least, eaten them.
     I was late jumping on the kale bandwagon.  I had read about the health benefits of eating kale, but am embarrassed to say, had never cooked with it.  It's high in vitamins A,C, and K, filled with antioxidants that fight cancer, and if that's not enough, kale is low in calories.  It's a no brainer that we all should be eating it.  But it wasn't until last summer that I first ate a kale chip.  My sweet next door neighbor called me one evening and said, "Pour yourself a glass of wine.  I'm bringing you some kale chips".  It was love at first bite.


Picture
    
     I've planted two different varieties of kale in my garden this year.  My favorite, for the beautiful, slender blue-green leaves, is the Lacinato Kale (above).
     Curly Kale is pictured below.

Picture
    
     Nearly everyone that has come to our patio for dinner this summer has been served Kale Chips when they arrive.  Guests love them (really love them!) and I'm surprised when even the most devoted kale eaters tell me they haven't eaten kale chips before.  So I am now giving you my directions for making Kale Chips, hoping that if you haven't done it yet, you will start baking them now!
    
Picture
• Fresh kale leaves (I will use about 6-7)
• Extra-Virgin olive oil
• Kosher salt

+ Kale chips are extremely easy to make, but you want to be sure
that once rinsed, they are perfectly dry before proceeding with the recipe.  I pat dry my leaves with a paper towel.

1. 
Rinse kale leaves and dry thoroughly.  Using a sharp paring knife, slice down the center of the kale along both sides of the stem and remove.  Slice the remaining kale leaves in 2 to 3-inch pieces and place in a medium size bowl.
2.  Drizzle a small amount of olive oil over the leaves.  I use about one tablespoon of oil.  Take a thin metal spatula and very gently toss the leaves.  I do this slowly, over and over.  The goal is to have a thin film of oil coating both sides of the leaves.  You DO NOT want them drenched in oil. 
3.  Preheat oven to 300˚F and line two baking sheets with parchment paper.  Arrange kale leaves in a single layer on a baking sheet.  Sprinkle lightly with kosher salt.  Place baking sheet on center rack of oven and bake for approximately 10 minutes.  Check at 8 minutes and watch closely after that.  Ovens differ and you do not want them to burn.  Prepare second baking sheet while the first is in the oven. 
4.  Gently transfer kale chips to a bowl for serving.  I will use my same metal spatula to remove the chips from the baking sheet.  They are very delicate and can shatter easily.
+  Enjoy, and know you are eating a healthy treat!


TAKE a LOOK:


4 Comments

Savory Shortbread, Chocolate Sandwich Cookies, and fun with French stamps!

4/17/2014

11 Comments

 
Picture

     I spent a day playing in my kitchen this week.  Last month I received a gift from a dear friend.  I got to know Kate through LivingTastefully (one of the upsides of having a blog!) and last September I met Kate and her husband, John, when Bill and I were in New York attending a wedding.  We were welcomed into their beautiful home and still talk about the wonderful time we had with them in the historic town of Canajoharie.

Picture

     Kate surprised me with Sablés Maison, a French cookie stamp with three interchangeable silicone disks -- one of the Eiffel Tower, Sacré-Coeur, and the Arc de Triomphe -- with a book of French cookie recipes included.  Kate knows (oh, how she knows) of my love for France and French pastry, and she was correct in assuming that I would love this gift.

Picture

     I made both a sweet and a savory cookie. Sablés Tout Chocolat, one of the recipes that accompanied the stamps and sandwiched with Espresso Crème, was the sweet cookie; the savory is a spice-filled, buttery shortbread flavored with curry, tumeric, cumin, and cayenne.  It's a great little treat along with an apéritif and is extremely easy to craft as a sliced log cookie.  Don't feel like you need to own a set of these stamps to enoy this savory shortbread. 
Picture
• 3/4 cup unsalted butter, softened
• 2 tablespoons sugar
• 1 teaspoon salt
• 1 teaspoon curry powder
• 1/2 teaspoon ground cumin
• 1/2 teaspoon freshly-ground black pepper
• 1/4 teaspoon ground tumeric
• 1/4 teaspoon cayenne
• 1 1/4 cups unbleached, all-purpose flour, plus extra for shaping into a log

1.  In the bowl of an electric mixer beat together the butter and sugar until smooth.  Add the salt, curry powder, cumin, pepper, tumeric, and cayenne.  Scrape down the sides of the bowl with a rubber spatula and beat until combined.  Add the flour and continue to mix until incorporated.
2.  Turn the shortbread dough out onto a large sheet of waxed paper.  With floured hands, press the dough into a strip about 2-inches wide with a length of 12-inches.  Wrap the dough in the waxed paper and refrigerate for about 15 minutes.  This will make it easier to shape.  Transfer dough to a piece of plastic wrap and using the plastic as an aid, roll the dough back and forth into a log.  Wrap and return to the refrigerator for at least an hour.
3.  PREHEAT OVEN to 325˚F.  Line a baking sheet with parchment paper.  Remove the shortbread log from the refrigerator.  Using a very sharp paring knife (or a piece of fine thread) slice the log into 1/4-inch-thick disks.  Transfer pieces to baking sheet, spacing 1/2-inch apart.
4.  Place baking sheet on the center rack of oven and bake until set, about 12 minutes.  Transfer to a rack to cool.  Shortbread can be kept in an air-tight container for up to 2 months.


Picture


Picture


Picture
Picture
Picture
• 200 grams unbleached, all-purpose flour, plus additional for rolling cookies
• 80 grams granulated sugar
• 40 grams Dutch-processed cocoa powder, plus additional for rolling cookies

• Pinch of ground cinnamon
• 1/2 cup (1 stick) unsalted butter, at room temperature
• 1 extra-large egg, room temperature
• Espresso Crème, for filling (recipe below)

1. 
In a medium-size bowl, sift together the flour, sugar, cocoa powder, and cinnamon.
2.  Place the butter in the bowl of an electric mixer and beat until smooth.  Add the egg and beat until light and fluffy, scraping down the sides of the bowl when necessary.
3.  Add the dry ingredients to the butter-egg mixture and beat until just combined and no streaks of flour can be seen.   Wrap dough in plastic and refrigerate for at least an hour.

4.  PREHEAT OVEN to 325˚ F.  Remove dough from refrigerator and let warm a bit.  This is a rather dry dough and will roll easier if it is not very cold.  Line a baking sheet with parchment paper.  On a lightly-floured work surface (I like to combine some flour with some cocoa powder), and using about 1/4 of the dough at a time, roll to a 1/8-inch thickness.  Use a 1 1/2-inch round cookie cutter (or any other shape, or size) to cut the cookies. Dust off any traces of flour with a pastry brush if necessary.  Transfer to the baking sheet.  Repeat with remaining dough.
5.  Bake the cookies on the middle rack of the preheated oven for approximately 13 minutes; transfer to a cooling rack.
6.  While the
cookies are cooling, mix together the Espresso Crème.

ESPRESSO CRE
ME
• 1/2 cup unsalted butter, softened
• 1 1/2 cups Confectioners' sugar
• 1/8 teaspoon salt
• 1 1/2 tablespoons espresso powder (such as Medaglia D'Oro) dissolved in 1/8 cup hot water

• 1 teaspoon Cognac
1.  Combine the butter and Confectioners' sugar in a medium bowl and mix until smooth.  Add the remaining ingredients and stir until fully combined and smooth.
2.  Either spread or pipe espresso cream in between cooled wafer cookies to create a sandwich. 


TAKE a LOOK:


11 Comments

Cherry Tomato Tart (and dreaming of summer)

2/19/2014

2 Comments

 
Picture

     Honestly, this is a tart that should really be made at the height of tomato season.  Since cherry tomatoes are all that fill this buttery tart shell, having the best-tasting ingredients possible will really make it shine.  After the winter we have endured, and with more snow and below zero temps predicted, I am just so desperate for the warmth and tastes of summer.  Ignoring my better judgement, I succumbed to temptation and made a tart with cherry tomatoes.  Large tomatoes are something I never purchase out of season, but cherry tomatoes will have a sweetness to them even this time of year, and the long slow roast in the oven concentrates the flavor and sweetness of these little tomatoes even more.  This tart is certainly the way to go if you are craving fresh tomatoes like me.
     I am showing the recipe below just as it appeared in Food & Wine magazine.  In the tart I made, I veered a bit from the recipe below by substituting a favorite tart dough recipe from Alice Waters (recipe HERE)...  Bon Appétit


Picture
   • 1 1/2  cups all-purpose flour
   • Salt
   • 7 tablespoons unsalted butter, cubed
   • 1/2 cup cold heavy cream
   • 2 pints cherry or grape tomatoes
   • 2 tablespoons shredded basil leaves
  1. Butter a 9-inch tart pan with a removable bottom. In a food processor, pulse the flour with a pinch of salt and the butter until the mixture resembles coarse meal. Add the cream and pulse until the dough nearly comes together. Turn the dough out onto a floured work surface and knead a few times. Cover and refrigerate for at least 30 minutes or overnight.
  2. Preheat the oven to 325°. Roll out the dough to a 14-inch round. Press the round into the tart pan; trim off any excess. Mound the tomatoes in the shell. Bake for about 1 hour and 40 minutes, or until the dough is evenly browned. Let cool. Season with salt, garnish with the basil and serve.


TAKE a LOOK:


2 Comments

Leek Tart

2/11/2014

4 Comments

 
Picture


Picture


Picture


Was this ever good!  Dinner tonight was a Leek Tart; recipe from Alice Waters.  The leeks were meltingly sweet.  The crust was buttery and flaky.  Pretty perfect.  I served it with a simple green salad. The tart dough "galette" recipe makes enough for two crusts and this coming weekend I will make the Leek Tart again as an appetizer. 


Picture


Picture
Picture
                 adapted recipe from Chez Panisse Vegetables by Alice Waters

• 3 pounds leeks
• 3 tablespoons unsalted butter
• 1 1/2 tablespoons water
• 8 sprigs thyme (I substituted about 2 teaspoons dried thyme leaves)
• Salt and pepper
• 1/2 recipe Galette Dough (recipe follows)
• 1 tablespoon flour
• 1 egg beaten
• 1 tablespoon cream
1. 
Trim ends and using just the white part of the leeks, cut in half lengthwise.  Slice leeks crosswise into 1/4-inch pieces.  Place sliced leeks into a colander and rinse under cold water to remove all dirt.  Shake off excess water.
2.  Heat a large sauté pan over medium-low heat.  Add the butter and water.  Once the butter has melted, add the leeks and thyme; season with salt and pepper.  Stir the mixture and cook, covered, for 10 minutes or until the leeks become soft and tender, stirring occasionally.   Add a little more water if you find they are drying out.  Set leeks aside to cool.
3.  PREHEAT OVEN to 400˚F. 
4.  Place the tart dough on a piece of parchment paper that has been dusted with flour.  Sprinkle the top of the dough lightly with flour and cover with a sheet of plastic wrap.  Roll the dough into a 12-inch circle.  Slide the parchment paper and rolled tart dough onto a baking sheet.  Transfer to the refrigerator for about 5 minutes.
5.  When ready to assemble, dust the top of the dough with 1 tablespoon of flour.  Spoon the leeks onto the dough to within 1 1/2-inches of the edge.  Pleat the uncovered edge of dough over the leeks.  Mix the egg with the cream and brush over the the pleats.  BAKING TIP:  When brushing on the egg, make sure to get it underneath each "pleat".  This helps to keep the edge from sliding down during baking.
6.  Bake the tart on the lowest shelf of the oven for 20 to 30 minutes, or until the crust is golden.  I found it necessary to cut a round of foil to place over the leeks two-thirds of the way through baking to prevent burning.

GALETTE DOUGH
• 2 cups flour
• 1/2 teaspoon salt
• 1/4 teaspoon sugar
• 6 ounces unsalted butter (butter should be cool, not cold and hard)
• 1/3 cup ice water
1.  Combine the flour, salt, and sugar either in a mixing bowl or in the bowl of a food processor. 
Divide the butter in half.  Work it into (or pulse if using food processor) the flour mixture until the texture of coarse cornmeal.  Cut the remaining butter into cubes and incorporate into the flour mixture until the size of small peas.  Slowly add the ice water and mix (or pulse) just until uniformly moistened.  Transfer the dough to plastic wrap and press into 2 smooth disks.  Refrigerate the dough for at least an hour before rolling.  (Dough can be kept in refrigerator for one day and frozen longer.)  Allow dough to warm slightly when removed from refrigerator so it is soft enough to roll.
• makes dough for two 10-inch tarts


TAKE a LOOK:


4 Comments

Brunch -- January 1, 2014

1/2/2014

4 Comments

 
Picture
     New Years Day Brunch is now just a memory.  An hour of champagne toasts (of which I no longer partake -- too much of a risk factor in the success of the ensuing meal) were followed by 3 courses and 5 hours at the dining table.   It is a tradition that we have celebrated with the same friends for 25+ years.

Picture
Picture
Picture
                        MIMOSAS with PROSECCO
                        SMOKED SALMON with LATKES and HARD-BOILED EGGS
                        POPOVERS
                        BRIOCHE with PROSCIUTTO, GRUYèRE, and EGG
                        CITRUS PAVLOVAS with GRAPEFRUIT and MINT

Picture

First course was the Smoked Salmon with Latkes and Hard-Boiled Eggs.  This was an appetizer I had this past summer at a lodge in Glacier National Park and knew immediately I would be including it in my New Years Day Brunch.   I made the latkes ahead and froze them, reheating them directly from the freezer to oven (350˚ for 15 minutes).  They were delicious; tender on the inside with a crispy outside.  Recipe for the latkes HERE.

Picture
Picture
Picture


Salmon balls were made by mincing Norwegian smoked salmon with a chef's knife, then formed by hand into balls (24 ounces for 8 servings).  The potato latkes were placed upon a dollop of sour cream with additional sour cream to secure the salmon;  another small spoonful on top was sprinkled with chives. 
Surround with sliced hard-boiled eggs and toss on chopped red onion and capers.  Amazing!


Picture

     Second course was Brioche with Prosciutto, Gruyère, and Egg; a recipe by Suzanne Goin.  I chose to make my own brioche that was sliced thick, spread with salted European butter and placed under the broiler.  The bread was then topped with Gruyère, melted under the broiler and finished off with an arugula salad (frisée was called for but what I found at the grocery was disappointing), prosciutto, and a fried egg --  my kind of salad!  With purchased brioche, it would go together quite fast.

Picture

     And for dessert...
    
Picture
                       
                        Citrus Pavlovas with Grapefruit and Mint

Picture
    
     Just the kind of dessert needed after the rich excesses of the holidays; baked meringues flavored with citrus beneath a cloud of orange marmalade whipped cream, and fresh grapefruit segments.

+ Citrus Pavlovas with Grapefruit and Mint
      recipe from the Jewels of New York
• 4 large egg whites
• Pinch of salt
• 1 cup sugar
• 1 teaspoon cream of tartar
• 1 teaspoon orange extract
• juice of half a lime
• 1 cup fully whipped cream
• 1/4 cup orange marmalade
• 2 grapefruits, segmented for garnish
• mint sprigs, for garnish

• honey for drizzling

1.  Preheat the oven to 225˚F. Whisk the egg whites and salt together until firm peaks form. Gradually add the sugar while continuing to whip th e egg whites. Add the cream of tartar, orange extract and lime juice. Mix together until well combined. On a piece of parchment paper, use a teacup to trace six circles, each 4 inches in diameter. Spoon the meringue onto the parchment paper, using the circles as a guide. Place in the oven and bake for about 2 hours, until crisp on the outside and soft in the center.
2.  Fold the orange marmalade into the whipped cream. Place pavlovas on a serving dish and garnish with a generous dollop of the marmalade cream mixture, a few segments of grapefruit, mint sprigs and a drizzle of honey, if desired.


TAKE a LOOK:


4 Comments
<<Previous
Forward>>
    Picture


    Picture
    Picture
    Enter your Email

    Preview | Powered by FeedBlitz


    Categories

    All
    Amana
    Appetizers
    Beef
    Breads
    Breakfast
    Cakes
    Chocolate
    Condiments
    Cookies
    Daring Bakers Challenge
    Desserts And Sweets
    Drinks
    Eggs
    Espresso
    Etcetera
    Fish
    French Bulldogs
    Friday Night Dinner
    Fruit
    Germany
    Gratins
    Great Kitchens
    Grilling
    Ice Cream
    Lamb
    Main Dishes
    Muffins
    My Garden
    My Kitchen Renovation
    New Years Day Brunch
    Paris
    Pasta
    Pork
    Poultry
    Provence
    Restaurants
    Rhubarb
    Rice
    Salads
    Scones
    Seafood
    Side Dish
    Soup
    Sunday Mornings
    Sweet And Savory Tarts
    Thanksgiving
    Tomatoes
    Vegetables
    Vegetarian

  • Home
  • PAINTINGS
  • About
  • Passions-to-Pastry Blog
  • Contact
  • Recipes