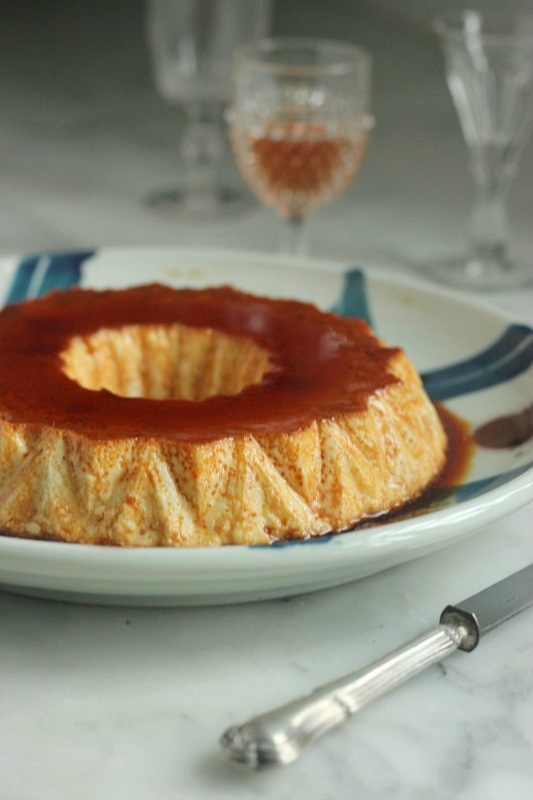
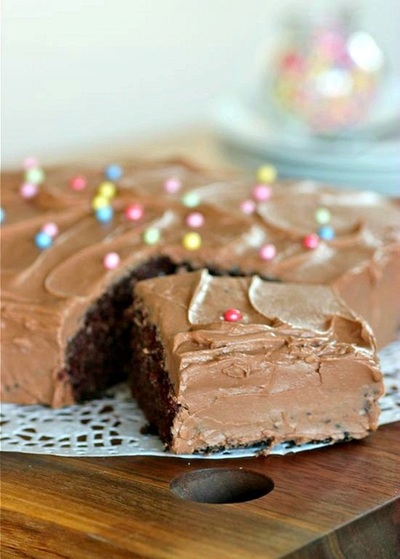
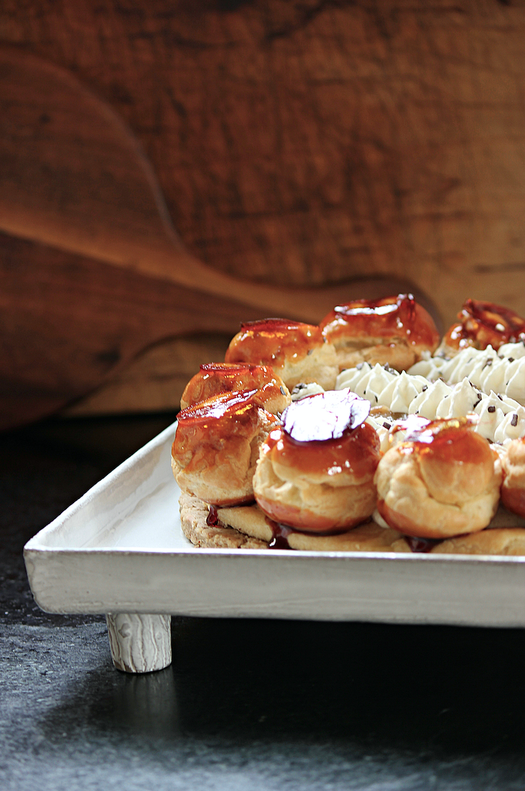
 Today is my daughter Claire's 26th birthday and since Mondays are busy for everyone, our family celebrated this milestone yesterday. Claire is a 6th grade stem-science teacher, and one week before her spring break began she said to me, "Let's go somewhere together!" New Orleans is where we ended up... my first time there. After having some great meals, and a roasted banana Gâteau Saint Honoré one night for dessert, this is what my daughter requested for her birthday cake. This is my rendition of the Banana Gâteau Saint Honoré. I've been debating whether or not to print out the recipe. I can't say it's a difficult dessert to make, but there were endless steps that I customized to make it exactly what I wanted the end result to be... pecan pâte brisée, choux pastry, roasted bananas, banana pastry cream, chiboust, caramel, whipped cream. Many components. Email me if interested?? Below are several of my favorite photos from our trip to New Orleans. Low 80's and humidity felt really good after experiencing the winter from hell in Minnesota this year.  The birthday girl...
3 Comments
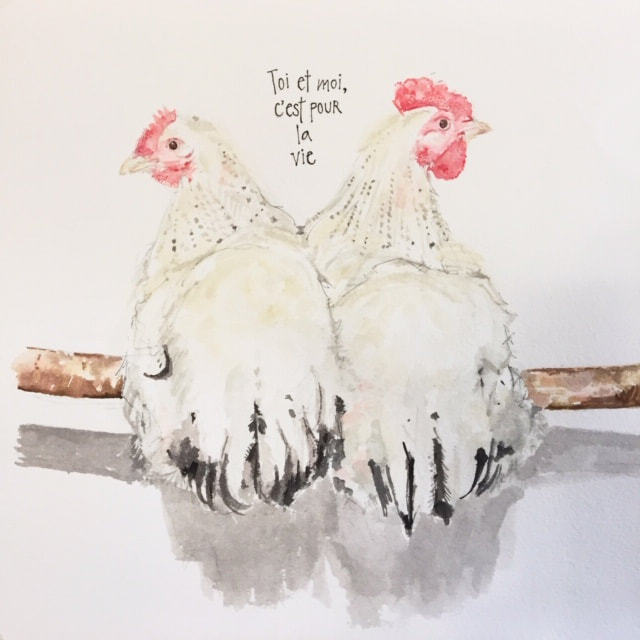 •my latest watercolor painting• "It's you and me forever"
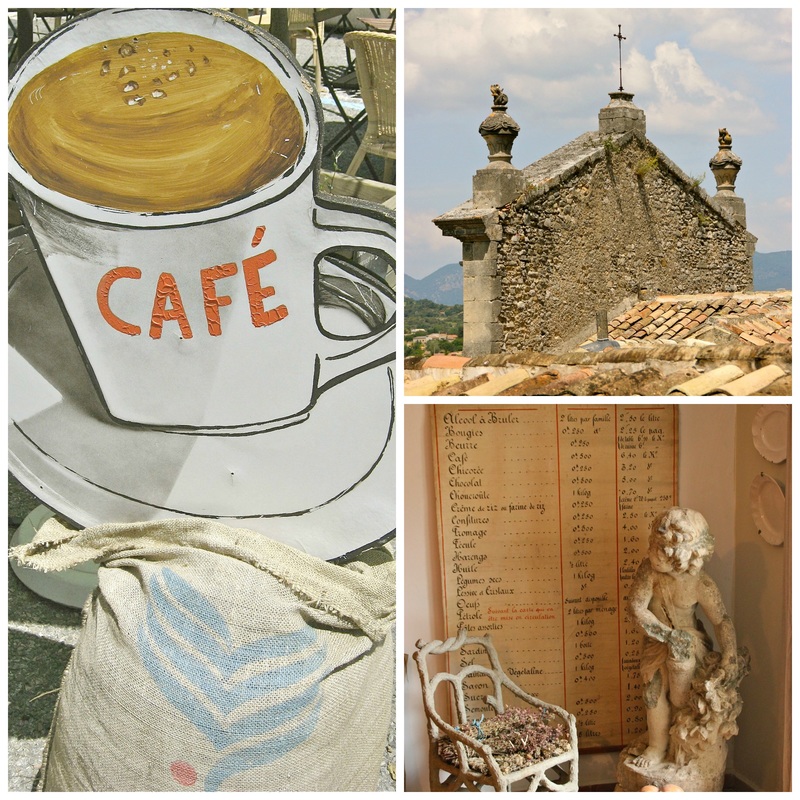
 This month, for the first time, I traveled to Italy; visiting Venice, Florence, and Rome. It was just what I needed to refuel my imagination. I'm happy to say, this trip was good for me, and I am eager to cook, bake, and paint again!  Beauty abounds in Italy and it felt good to be behind my camera lens again, capturing the images that inspire me.  The food I enjoyed in Italy was everything I hoped it would be, except for one disappointing meal The Spaghetti Carbanara was eaten in the shadow of the Rialto Bridge in Venice; our table just inches from the canal. The Cacio e Pepe is a favorite of my daughter, Claire, and insisted I have some in Rome. 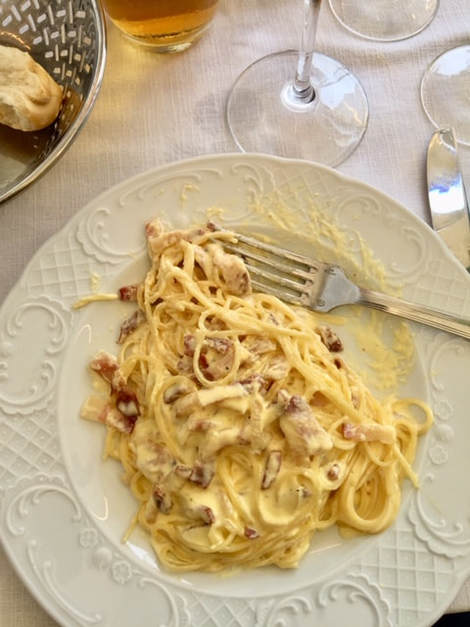 Spaghetti Carbonara 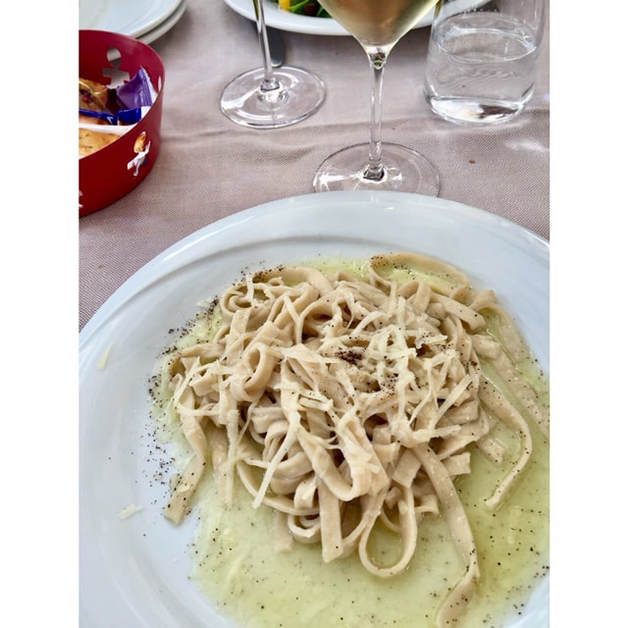 Cacio e Pepe 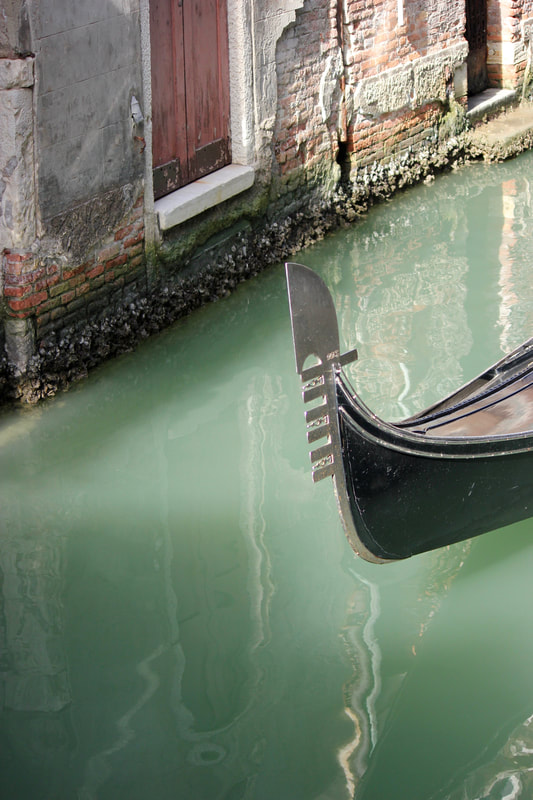 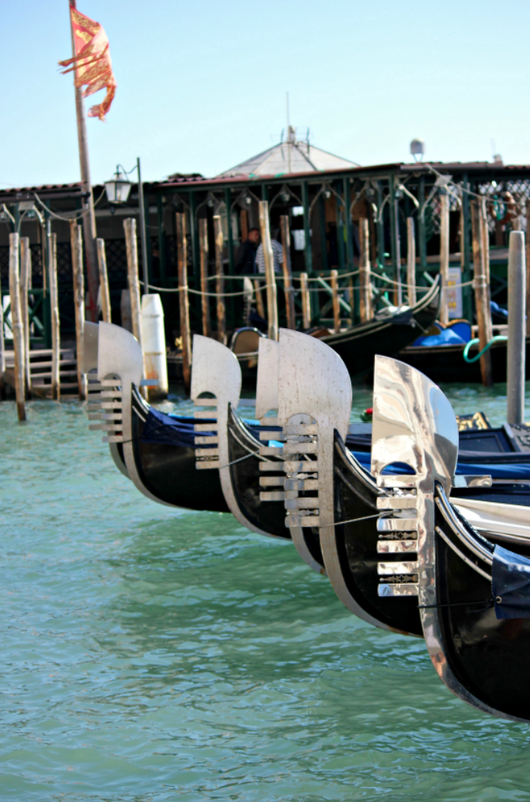 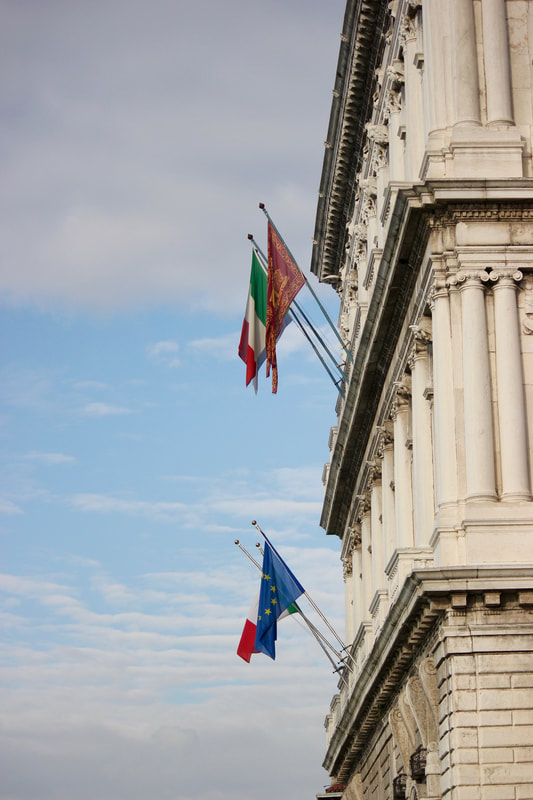 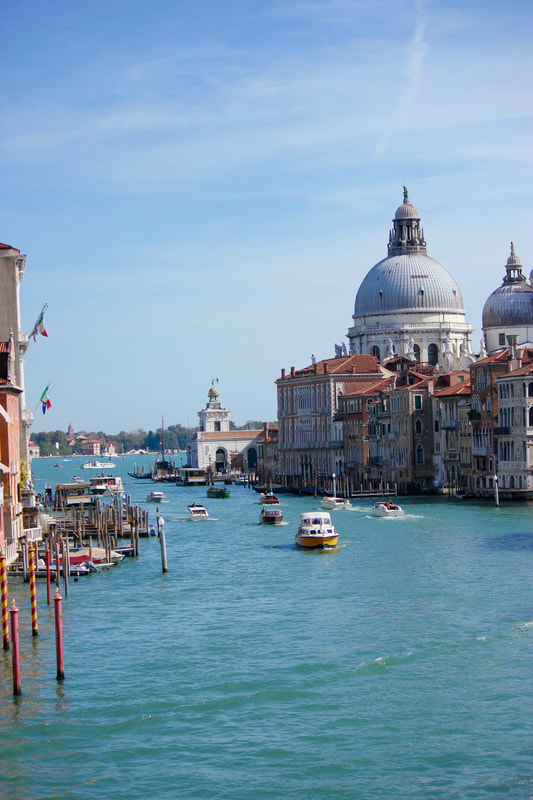 I hauled back a conservative load of food items from Italy -- an enormous wedge of Parmigiano Reggiano, a small bottle of balsamic, and olive oil. Also, ingredients for Tagliatelle with Truffles (my best meal in Florence), but that was it. And when I use those ingredients in the coming weeks, it will make me happy. Before I left for Italy, I read an article by a Venetian writer on her love of Orecchiette Pasta with Pistachio Pesto. I found the recipe below and have made it twice. I absolutely love it, as does my family. Purchasing shelled pistachios make this an easy and quick pasta to prepare. Please try it and let me know how you like it! 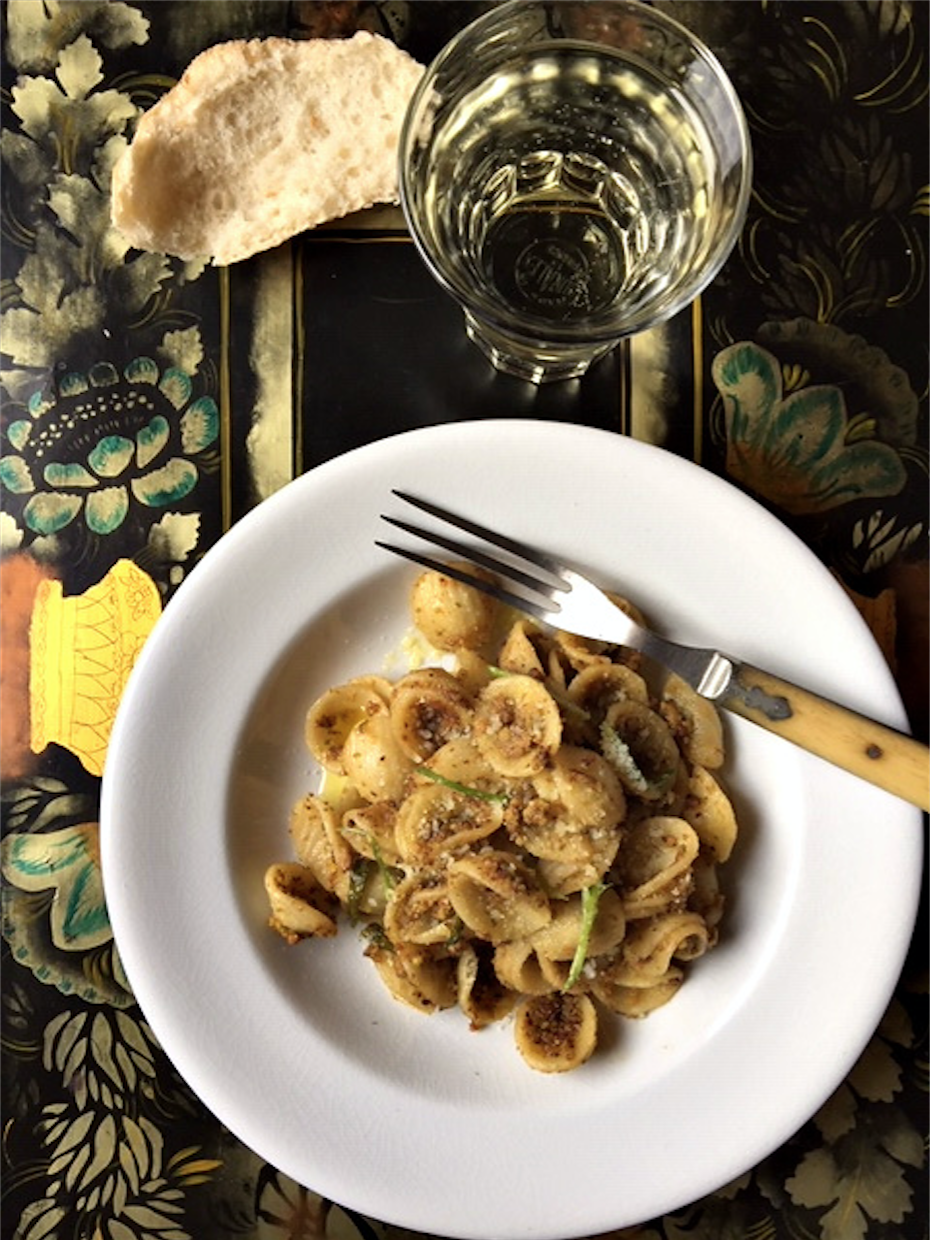  Recipe by Frank Falcinelli and Frank Castronovo • 7 ounces unsalted roasted shelled pistachios (1 1/2 cups)
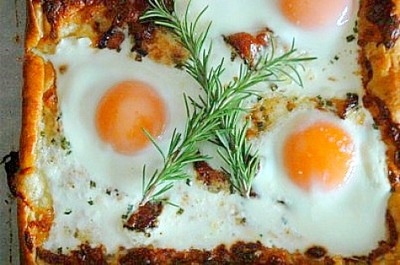
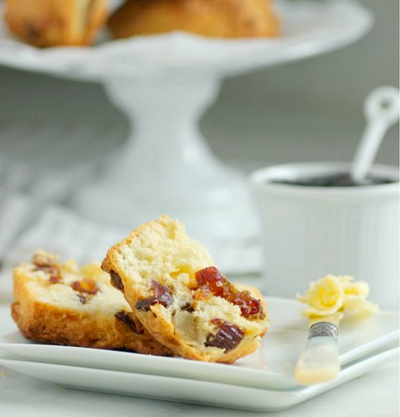
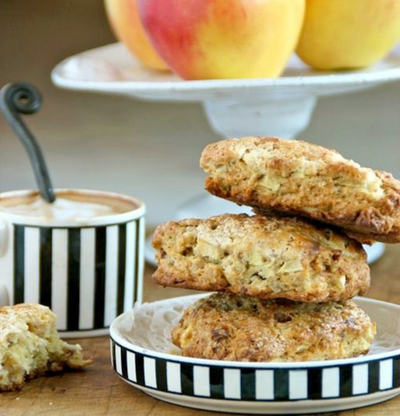
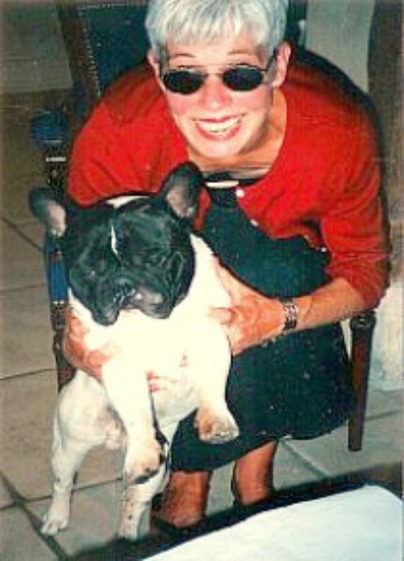
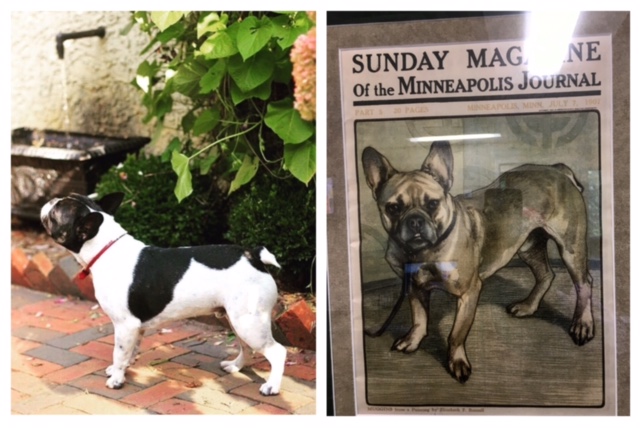
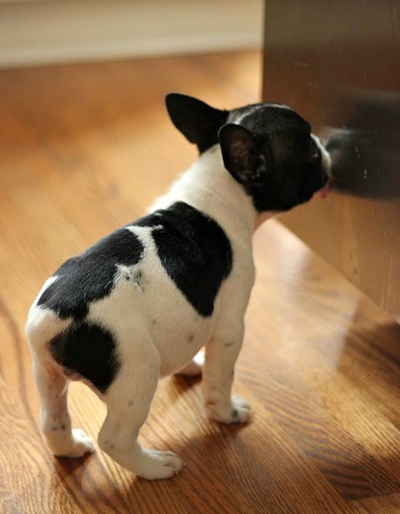
• 1/2 cup extra-virgin olive oil • 2 tablespoons chopped mint • 1 garlic clove, minced • 1/2 cup finely shredded pecorino cheese, plus more for serving • 2 scallions, cut into 2-inch lengths and julienned • salt • 1 pound orecchiette 1. In a food processor, chop the pistachios. Add the olive oil, mint and garlic and pulse to combine. Transfer to a bowl, stir in the 1/2 cup of cheese and the scallions; season with salt 2. In a large pot of salted boiling water, cook the pasta until al dente; drain, reserving 1/2 cup of the cooking water. Return the pasta to the pot. Add the cooking water and the pesto and cook over low heat, tossing, until coated. Serve, passing more cheese at the table. 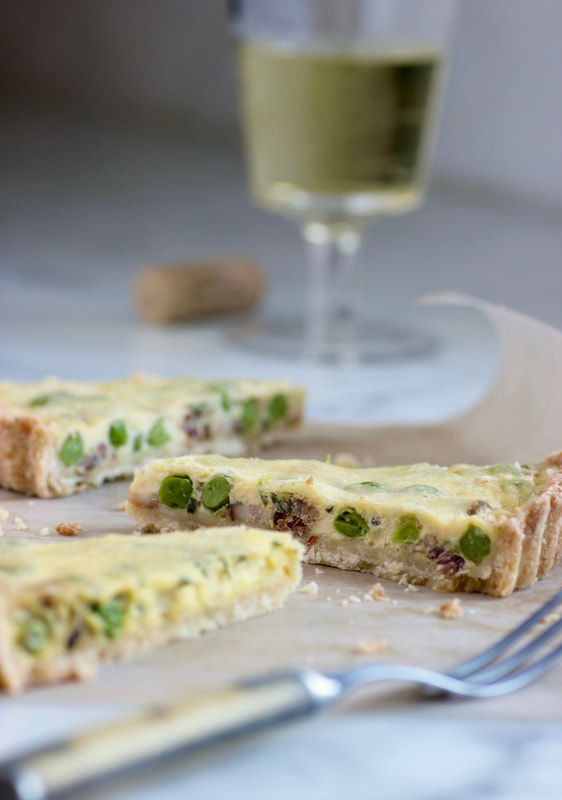 I thought it was time I made an appearance, before LivingTastefully no longer recognizes me and refuses to let me post onto my blog. I also want to let you know what I've been up to the past couple of months. You might find this hard to believe, but I haven't been spending as much time in my kitchen. I have a new granddaughter who was born in September. Monday is Liv's day with "Oma Lady"... a name not chosen by me. The other days of the week, I am usually in my studio (a.k.a. the sunroom). I started painting again last spring after stopping 45 years ago (geez, that's a long time!) when, at the last minute, I switched from painting to fiber before classes started at the Kansas City Art Institute. It scared me how consumed I was by painting and didn't think I could live like that. I'm seeing signs of it again now, but I'm so happy to be painting it doesn't matter. I feel I have so much lost time to make up. I had always painted in oils, but decided this time to plunge into watercolor. It's a struggle. I found oils easy... watercolor for me is a challenge. I like to layer... After doing a couple of paintings for Liv, my daughter convinced me to start a little business with her. It will be called Winks & Inks Design. I abhor the business part of anything I do creatively. That's my daughter's job in our collaboration. But she has recently returned to her real job after having baby Liv and that has slowed down the launch of Winks & Inks. Our offerings will consist of birth certificates for framing, invitations, etc., and what I've really enjoyed... paintings with French phrases. Of course, dogs are playing a starring role in all of these. The majority of items will be archival pigment ink prints (giclée, if you like), but I will also have some originals for sale, framed in vintage frames (examples below). I have my sister to thank for that. She deals in European antiques (German and French) and concentrates heavily on frames and mirrors -- tramp art being both of our passion. Although, she deals in what I consider rare and sometimes extravagant frames, I prefer them to be very simple. 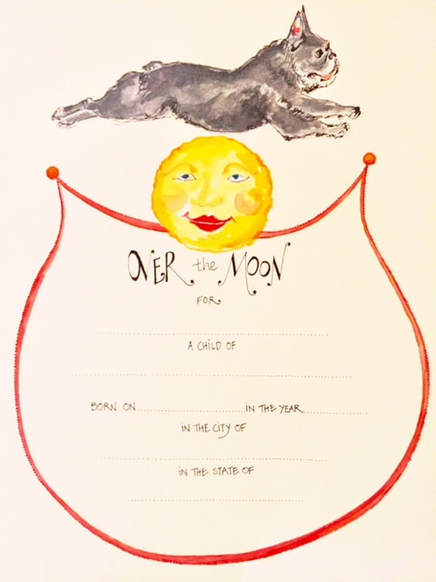  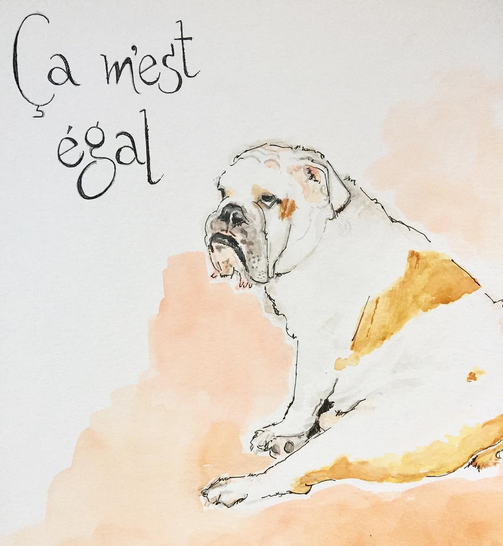 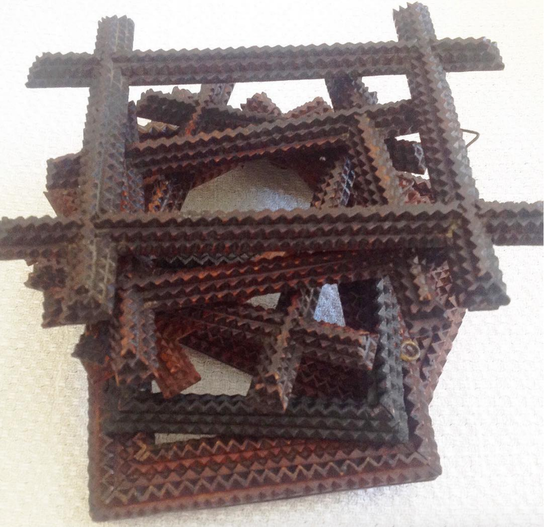 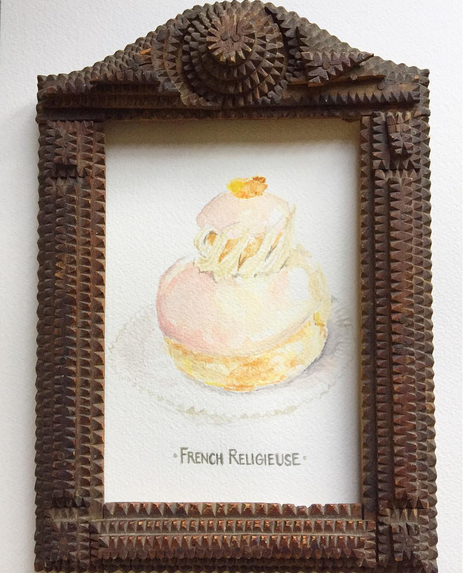  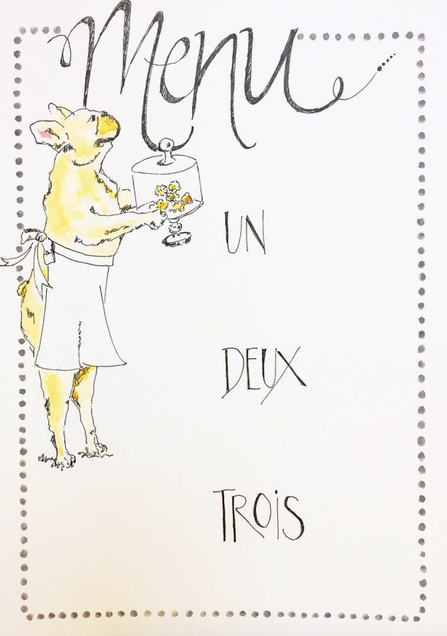 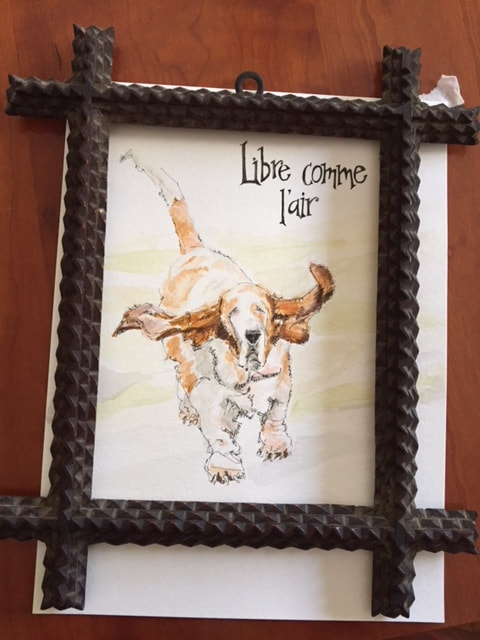 I may occasionally put framed paintings and prints that are available onto Instagram. If interested, follow me HERE. Those of you as passionate about French Bulldogs as I am, can also see the occasional photo of Bisous on my Instagram. He will be, unfortunately, having surgery this month on a Luxating Patella. Oddly enough, this hasn't slowed him down. But the constant limping/skipping made it quite obvious that something was terribly wrong. He/we will endure an 8 week recovery. Anyone who knows Bisous well, understands how difficult those 8 weeks will be. Bisous is not about sitting still. And above... the Bacon, Green Peas, and Tarragon Tart (recipe HERE). This tart, and several other recipes, are in David Lebovitz's latest book, L'appart, where he writes about the grueling year-long purchase and renovation of his home in the 10th arrondissement of Paris. This book totally confirmed my husband's belief that buying an apartment in Paris (or France for that matter) would not be in our best interest. This week, for the second time this year, I will be making David's French Beef Stew with Olives (also in the book). My son-in-law said he could eat it everyday. I might have to agree with him. The deep-freeze has returned and this stew is perfect Minnesota winter food! 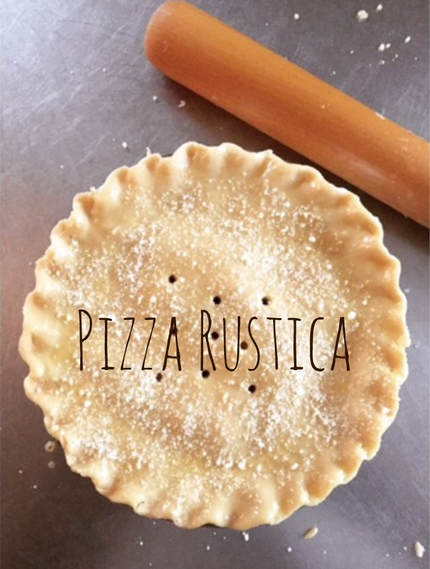 I consider savory foods encased in pastry about as good as it gets, and this Pizza Rustica has been in my baking repertoire for many years. When the temperatures drop and daylight hours wane, I start craving meals like this. The following post is from Passions to Pastry's 2008 archives: My daughter was in NYC over New Years. She was born 18 miles from Manhattan, across the George Washington Bridge, when we lived there for two years in the 1980's. I spent much of those two years exploring NYC. I rarely would take the subway. I preferred walking so I could see everything there was to see. One day I covered 112 blocks. When friends came for a visit, we would go into the city and the first place I would take them was a food emporium. My favorites were Zabar's, Balducci's and Dean & DeLuca. Luckily, most of my friends felt the same way about food as I did, but occasionally there would be the visitor who was wondering why we weren't at the Empire State Building or the Statue of Liberty. So, when my daughter was planning her trip to NYC and asked me for suggestions on where to eat, knowing how I roamed and combed that city, I realized the names I gave her were restaurants I read about and would like to try the next time I visited NYC. Many of the places I frequented when we lived there almost 25 years ago no longer exist. The average life expectancy for a restaurant in NYC is 2 years. But it got me thinking about the places I used to go and one of my favorites was the DDL Foodshow on the Upper West Side. DDL stood for Dino De Laurentiis, movie producer, restaurateur and grandfather of Giada De Laurentiis of Food Network fame. My favorite item on the menu was the Pizza Rustica. I had never eaten it before and this one was really good! Giada has a Pizza Rustica recipe (possibly her grandfathers??). I don't know if it's the same one that was served at the restaurant, but it is very good and it's the one I now make and you see in these photos. 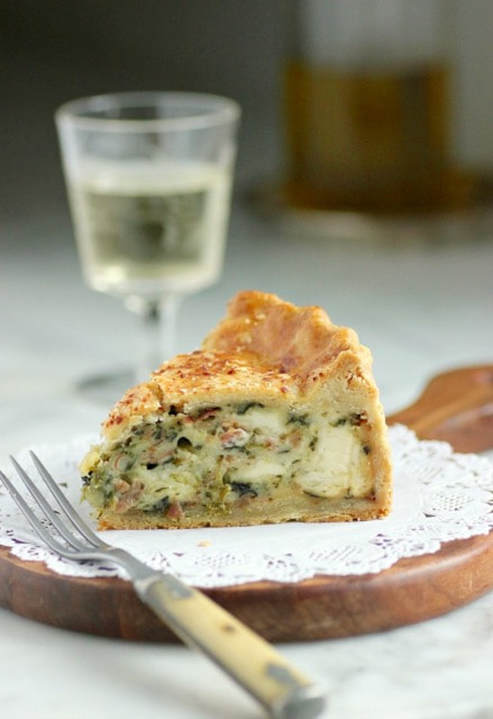 PIZZA RUSTICA | Giada De Laurentiis • 2 tablespoons olive oil • 8 ounces hot Italian Sausage, casings removed • 1 teaspoon minced garlic • 1 16 ounce bag chopped, frozen spinach, thawed and drained • 1 15 ounce container whole milk ricotta • 12 ounces Mozzarella cheese, shredded • 1/3 cup plus 2 tablespoons freshly grated Parmesan cheese • 4 ounces thinly sliced prosciutto, coarsely chopped • 4 large egg yolks, beaten to blend • Pastry dough, recipe follows • 1 large egg, beaten to blend 1. Position rack on the bottom of the oven, and preheat oven to 375˚F. 2. Heat 1 tablespoon of olive oil in a heavy, large frying pan over medium heat. Add the sausages and sauté until golden brown, breaking the sausages into pieces, about 5 minutes. Add the garlic and sauté until fragrant, about 1 minute. Remove from heat. 3. Into a large bowl, add egg yolks and beat lightly. Stir in the ricotta, mozzarella, and 1/3 cup Parmesan cheese. Add the sausage, the spinach, and the prosciutto, and stir to combine. 4. Roll out the larger piece of dough on a floured work surface to a 17-inch round. Transfer the dough to a 9-inch springform pan (I used a 9-inch high-sided tart pan with a removable bottom). Trim the dough overhang to 1-inch. Spoon the ricotta mixture into the dough-lined pan. Roll out the remaining dough into a 12-inch round. Place the dough over the filling. Pinch the edges of the doughs together to seal, then crimp the dough edges decoratively. Brush the beaten 1 large egg over the pastry top. Sprinkle the remaining 2 tablespoons Parmesan cheese over the top. Bake on the bottom shelf until the crust is golden brown; about 1 hour. 5. I let my Pizza Rustica set for about 1 hour before unmolding. The recipe says to unmold after 15 minutes, but I have had the hot filling break through the pastry before, so I like to be certain the filling has cooled sufficiently. PASTRY DOUGH... • 3 1/2 cups all-purpose flour • 12 tablespoons cold, unsalted butter, cut into pieces • 1/4 cup cold, solid vegetable shortening, cut into pieces • 1 teaspoon salt • 3 eggs, beaten to blend • 2 to 4 tablespoons ice water 1. Blend the flour, butter, vegetable shortening and salt in the bowl of a food processor until the mixture resembles coarse meal. Blend in the eggs. With the machine running, add the water 1 tablespoon at a time until the dough forms. Gather the dough into a ball. Divide the dough into two pieces with 1 piece twice as large as the second piece. Flatten the dough pieces into disks. Wrap the dough in plastic wrap and refrigerate until firm, about 30 minutes. 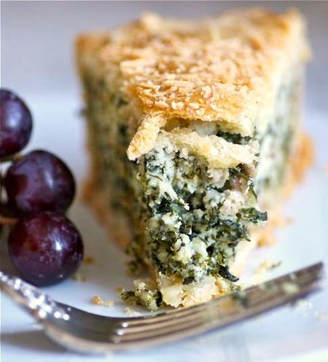 TAKE a LOOK: 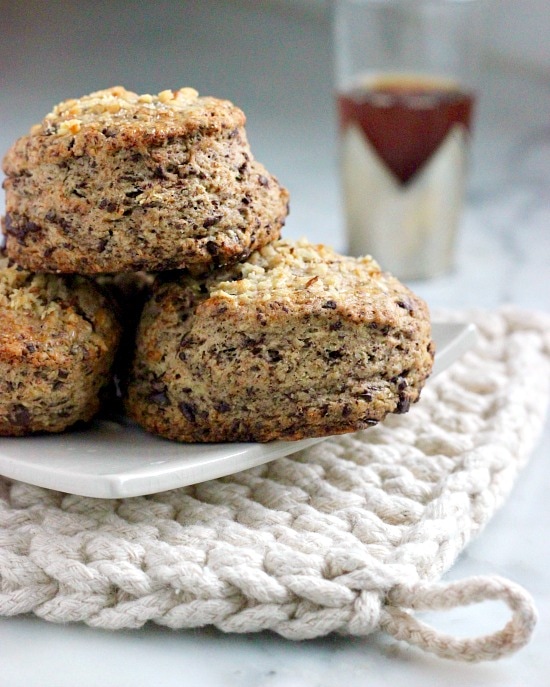 I'm back in my kitchen after a 2600 mile road trip to Texas. Anymore, I'd prefer to step on a plane and fly to my destination instead of sitting for 9 hour stretches in a car... especially when the destination is 1200 miles south of the Twin Cities. But we have a Bisous, and I am not ready to leave him behind just yet. Our first stop was in Dallas where we stayed with a good friend , Lynn (from my days at the Kansas City Art Institute), and her husband, John. We think it has been 15+ years since we last saw each other... how can that be?? Our time together was brief, but filled with what I enjoy most -- food. I have to agree with Lynn that Dallas has the best grocery store anywhere -- HEB's Central Market. It's at least unlike anything in Minnesota. It was our first stop. The variety of oranges, apples and tomatoes is endless. The kind of place I could be left alone to explore for hours... just drop me off in the morning and pick me up at night. 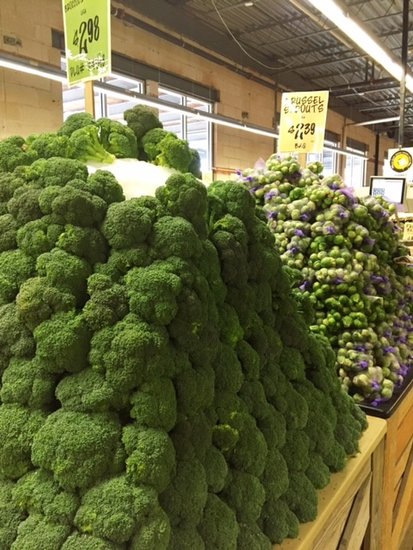 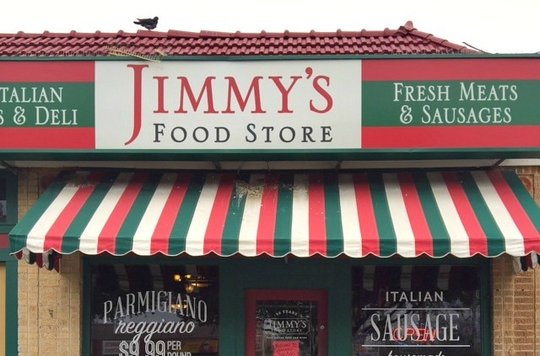 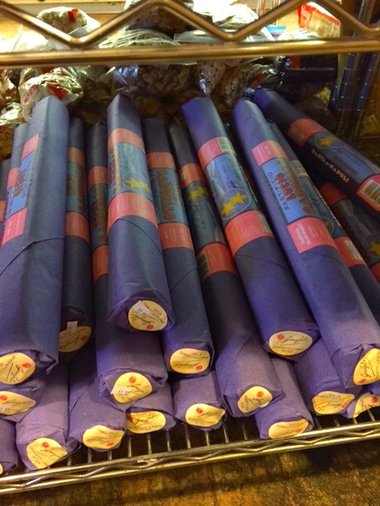 JIMMY'S, a small Italian grocery, was another stop while in Dallas. Small, but packed full of the most wonderful Italian foods! I had never seen 2-foot-long spaghetti before, or, I suppose, wild boar sausage. (I know... I need to go to Italy; a trip I'm hoping isn't too far off.) 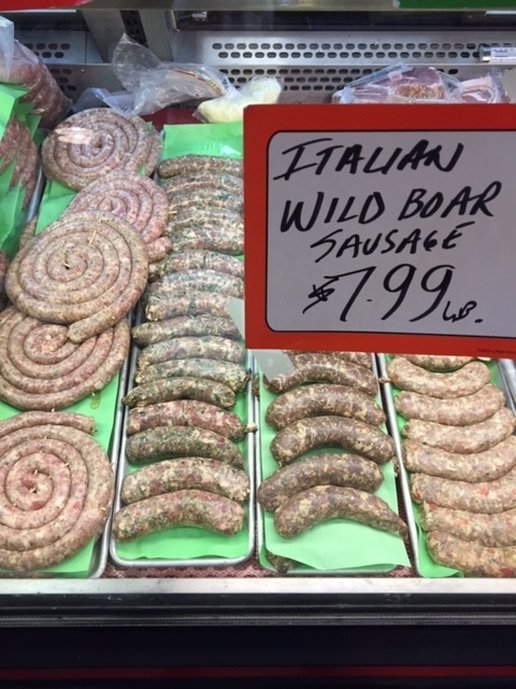  I brought home a shopping bag full of different pastas. I am still amazed that these foot long macaroni didn't break beneath piles of luggage. My husband and I were joined in Dallas by our daughter and her boyfriend, who continued with us on our drive through Texas. A night was spent in Waco with relatives before our final destination of Austin. And, I've got to say, we all loved Austin! My husband had an office in Austin many years ago, but I never accompanied him there. In fact, for a while we thought we'd be making a move there for his work. I'm now thinking it might not have been a bad thing. It's a great city and food truck heaven. 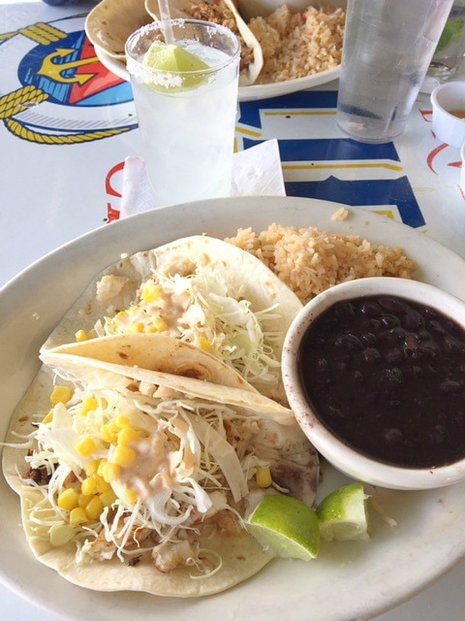  One of the few actual restaurants we ate at while in Austin was Guero's Taco Bar on South Congress. It was warm enough in Austin to sit outdoors for meals and these fish tacos were possibly the best I've ever eaten. Yes, you heard me... the best. 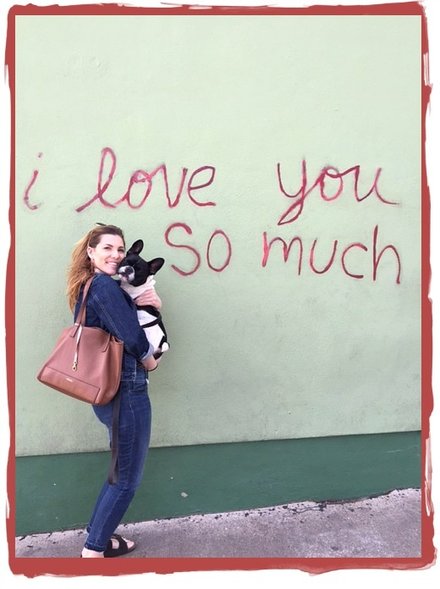 Bisous far succeeded my expectations as a travel companion. He was so good!   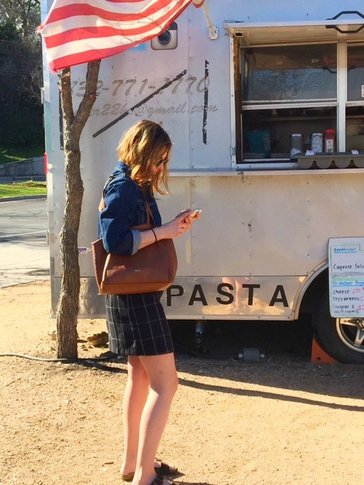 Our second day in Austin, we stopped on Barton Springs Road where there was a large group of food trucks (area called The Picnic). When I saw my daughter ordering from an Italian food truck, I asked her why would she do that when there were taco trucks just steps away! My mistake... she offered me a taste, and it was the best pasta I have ever eaten... ever! I went to the truck's window and told Salvatore, the owner and chef, exactly how I felt. He said he makes all of the fresh pasta himself, daily. When we returned again the next day, just to eat more pasta, I realized I was not the only one heaping praise onto Salvatore. I heard others telling him it was the best pasta they had ever eaten. So, there you are... it's true. If you visit Austin, you must go to Cannone Cucina Italiana. You will thank me. 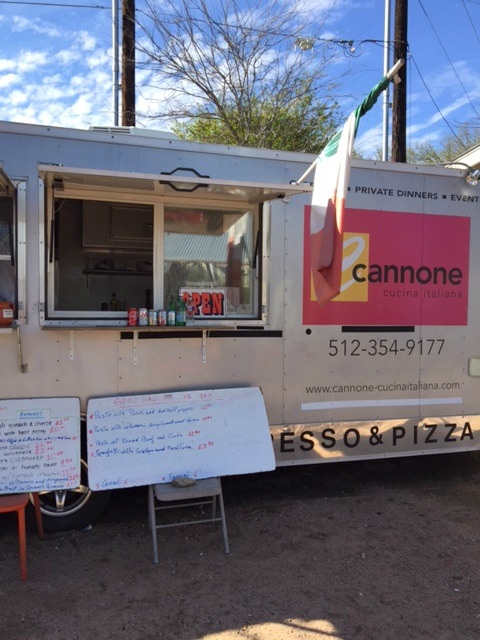 The road trip is over, and I am (slowly easing) back in my kitchen. For several mornings after our return, I had nothing to eat alongside my cappuccino, and I really need that. But, I finally got baking and made Nancy Silverton's chocolate-walnut scones. I never question a recipe if Nancy Silverton's name is on it. Years ago whenever my husband was in the Los Angeles area on business, he'd always make the drive to LaBrea Bakery, early in the morning, before his flight home. He'd return with a bag of Nancy's bread for me. I even flew out to L.A. once (back in the days of endless airline miles), for 24 hours, just to eat at Nancy Silverton and Mark Peel's restaurant Campanile. And many years later, I went back to L.A. to eat at Osteria Mozza where she creates small plates at her mozzarella bar in the center of the restaurant (and Pizzeria Mozza next door, the following day). I just find Nancy Silverton fascinating beyond her culinary accomplishments, and have recently streamed her on Amazon Prime, with Emeril Lagasse on Emeril's EAT THE WORLD and on Netflix's, Chef's Table (season 3). Now, back to these scones. I think they are my favorite... ever. Tender, with a lovely, flaky crumb, and not very sweet. My plan is to always have a bag full of these scones, unbaked, in my freezer, ready to pop in my oven whenever I need one. NOTE: The original recipe calls for a 1 1/2-inch round cutter for stamping out the disks, and grouping 3 together in a clover shape before baking. I chose to use a 2-inch cutter and baked individual scones.  • 1 1/4 cups walnuts, divided • 7 tablespoons granulated sugar, divided • 2 3/4 cups unbleached all-purpose flour • 1 tablespoon plus 1 teaspoon baking powder • Pinch of salt • 1/2 cup (1 stick) plus 2 tablespoons unsalted butter, cut into 1-inch cubes and frozen • 1 cup (6 ounces) finely chopped bittersweet chocolate • 1 cup plus 2 tablespoons whipping cream, divided • 1/4 cup crème fraîche or sour cream • 1 tablespoon vanilla extract 1. Place oven rack on middle shelf of oven and preheat to 325˚F. Spread the walnuts on a baking sheet and toast in oven until lightly browned, about 8 minutes. Shake pan halfway through so nuts toast evenly. Remove from oven and cool completely. Increase oven temperature to 350˚F. 2. In a food processor fitted with the steel blade, combine 1 cup of the nuts with 3 tablespoons sugar and process until the mixture is the consistency of fine meal. Add 3 more tablespoons sugar with the flour, baking powder and salt and pulse to incorporate. Add the butter and pulse on and off until the mixture is the consistency of fine meal. 3. Transfer the mixture to a large bowl and stir in the chocolate pieces. Make a large well in the center and pour in 1 cup whipping cream, the crème fraîche (or sour cream), and the vanilla. Whisk the liquids together. Using one hand, draw in the dry ingredients and mix until just combined. The mixture will be crumbly. 4. Turn the dough out onto a lightly floured work surface and knead gently a few times, then gather it into a ball. Roll or pat the dough into a circle 1 1/2 inches thick. Spray the inside of a 2-inch round cutter with nonstick spray and cut out circles, cutting them as close together as possible and keeping the trimmings intact. 5. Gather the scraps, press them back together, and cut out additional circles. (If the dough gets too soft to cut, refrigerate it for 15 minutes.) Place the circles parchment-lined baking sheet, spacing 2 inches apart. Freeze until firm, about 1 hour. 6. Brush the tops with the remaining 2 tablespoons cream and sprinkle with the remaining 1 tablespoon sugar. Using the large hole of a box grater, grate some of the remaining one-fourth cup nuts over the top of each scone. Bake for 30 to 34 minutes, until slightly firm to the touch and lightly browned. + If you do not want to bake all of the scones at this time, keep in freezer for later use. TAKE a LOOK: 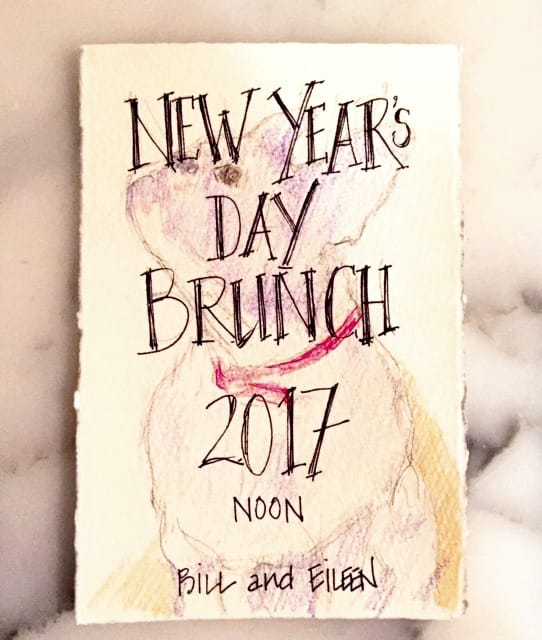 This is usually the way it goes... Two, maybe three, or even four months before New Years Day, I start thinking about the brunch menu. I piece together the different courses, in my head, of what I'm going to prepare for the first day of the new year. I'm confident about all of the details, so... I stop thinking about it. That, however, never seems to be the New Year's Day brunch menu I end up preparing. At the last minute I usually change everything.  I hosted a time consuming luncheon plus a dinner the week between Christmas and New Years... I ended up taking a more relaxed approach to my brunch. Below are photos of New Year's Day and the recipe for our main course.      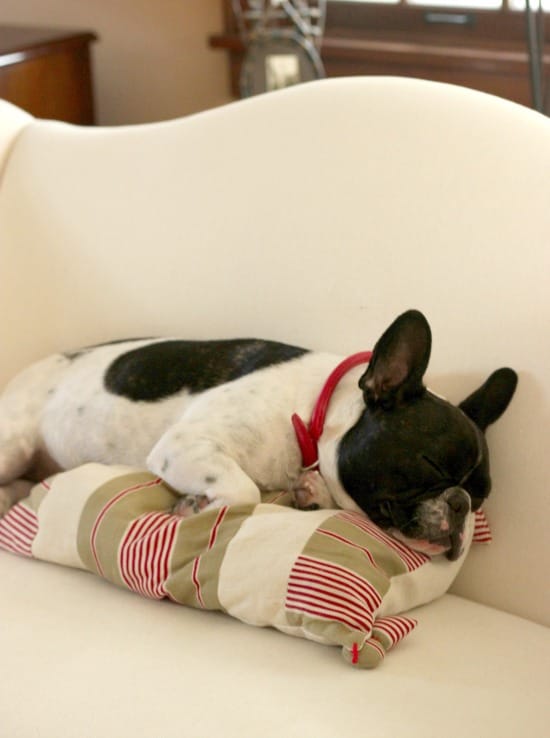 Bisous taking a break while the rest of us are eating our meal... 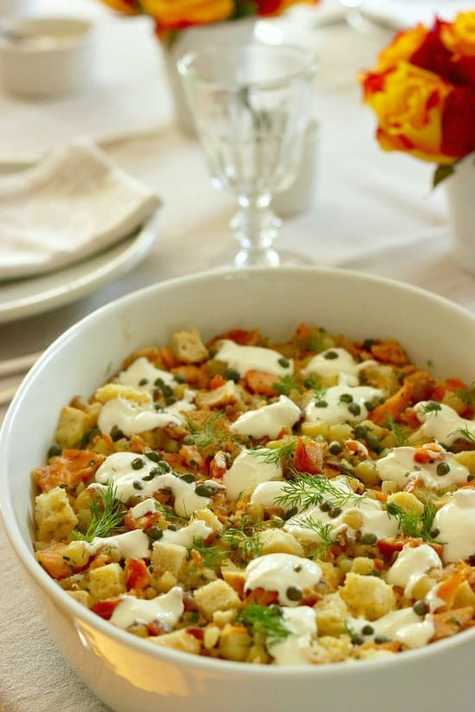
|


Categories
All
|