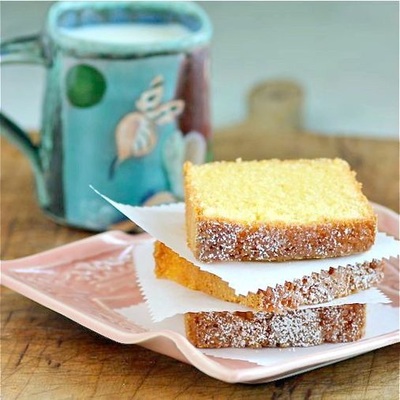
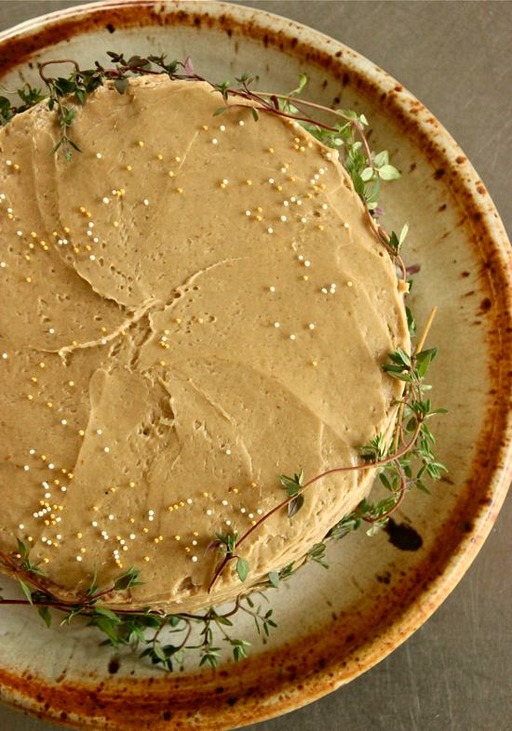
 May is a busy time for me with birthdays and baking. I made this cake last week. We visited friends at their cabin and I was asked to bring this cake along. Honestly, at first I thought we should be eating rhubarb. It is definitely rhubarb season! Spice cakes, for me anyway, conjure up thoughts of fall and cooler temps. This however, was the perfect cake for our weekend get away and easily one of my favorite cakes ever. A very bold statement for me to make; I have eaten and baked a lot of cakes in my 62 year life. I beg of you... make this cake! And don't wait until fall. The only change I made to this recipe was to add more powdered (confectioners') sugar to the frosting. The 3/4 cup in the original recipe didn't make it thick and fluffy enough for me. 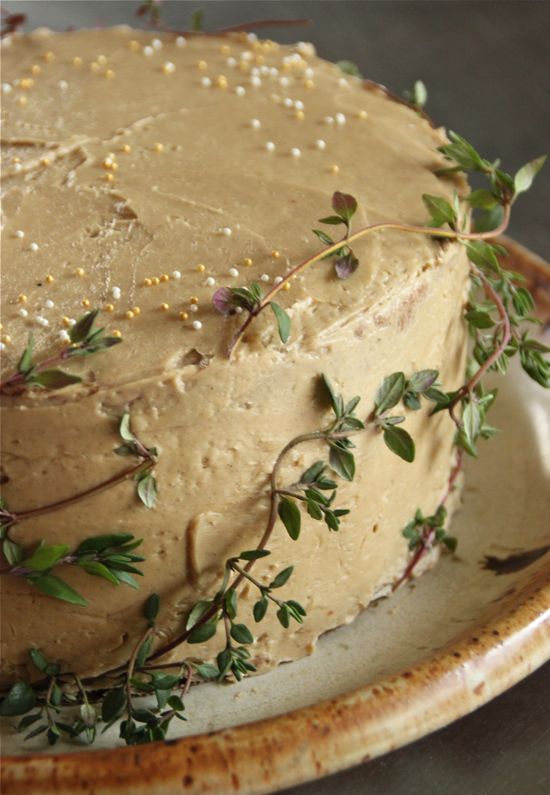  • 2 1/4 cups unbleached flour • 1 teaspoon baking powder • 1 teaspoon baking soda • 1/2 teaspoon salt • 1 teaspoon ground cinnamon • 1/2 teaspoon ground cloves • 1/2 teaspoon ground black pepper • 1/2 teaspoon ground cardamom • 1 stick(1/2 cup) unsalted butter, softened • 1/2 cup dark brown sugar • 1 cup white granulated sugar • 2 eggs • 1 teaspoon vanilla • 1 1/4 cups buttermilk • Espresso-Cardamon Frosting (recipe follows) 1. Preheat oven to 350 degrees F. Grease and flour 2 (8-inch) or 1 (13x9-inch) baking pans. 2. Sift flour, baking powder, baking soda, salt and spices together; set aside. 3. In a large bowl, cream butter, brown sugar and white granulated sugar together, then add eggs one at a time then vanilla, mixing until light and fluffy (about 5 minutes), scraping the sides of the bowl while mixing. 4. Beat in dry ingredients alternating with the buttermilk, beginning and ending with the flour mixture. Beat until just smooth, about a minute. Pour into prepared pans. 5. Bake in a preheated 350 degree F oven for about 30-35 minutes for layers, 40-45 minutes for the oblong cake, or until cake tests for doneness. Remove from oven and cool on racks about 10 minutes, then remove from pans (13x9-inch cake may be left in the pan) and finish cooling on racks. 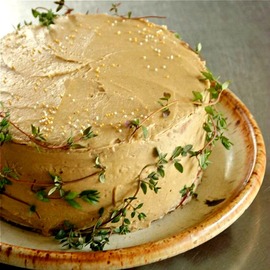 ESPRESSO-CARDAMOM FROSTING • 1/4 cup milk • 1 tablespoon espresso powder • 1 teaspoon ground cardamom • 1 teaspoon vanilla • 2 sticks (1 cup) butter, softened • 3/4 cup confectioners' sugar, plus additional to make thicker and fluffier. I used at least 1 cup -- possibly more. 1. Heat the milk and dissolve the espresso powder in it, then allow it to cool. 2. Beat together the remaining ingredients for the icing together, then add the coffee/milk mixture and continue beating until fluffy. TAKE a LOOK:
4 Comments
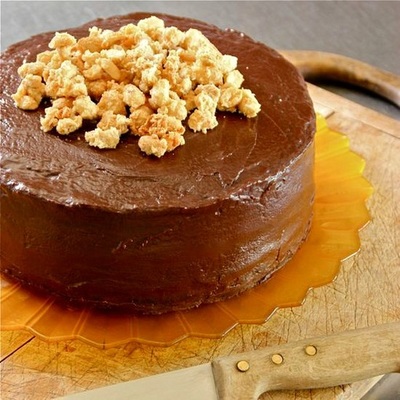
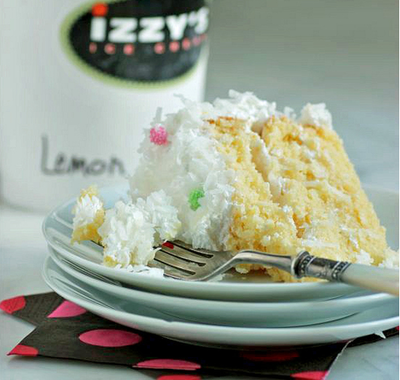
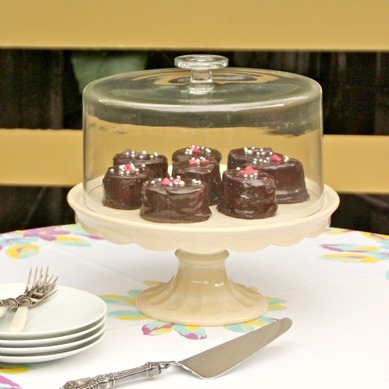
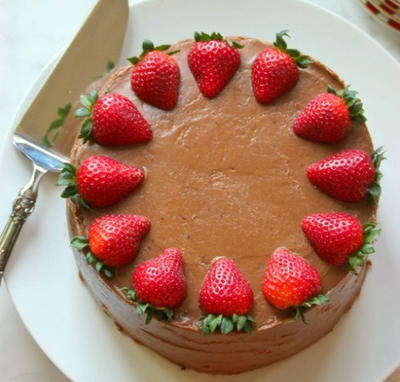
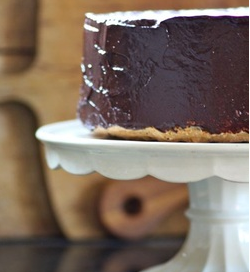
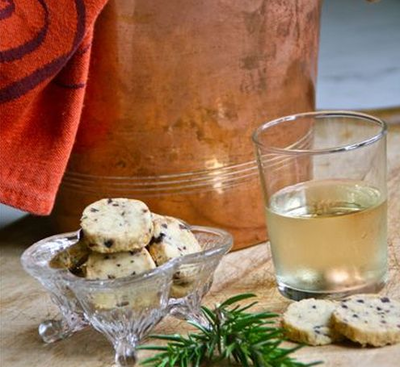
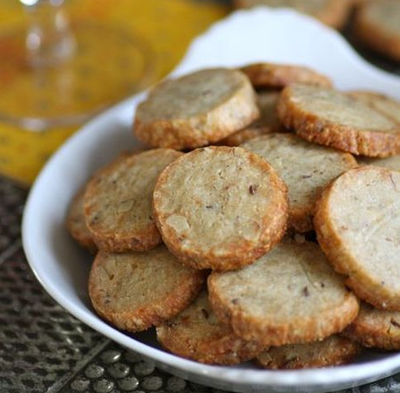
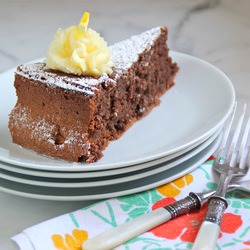
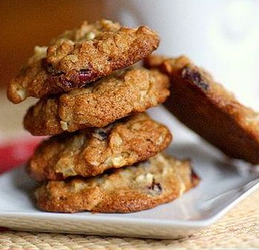
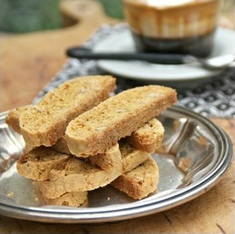
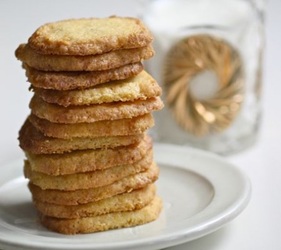
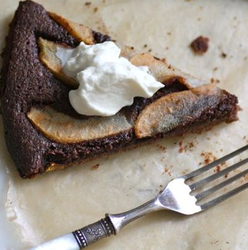
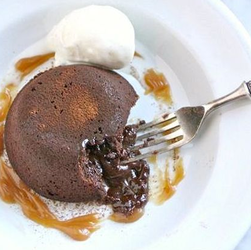
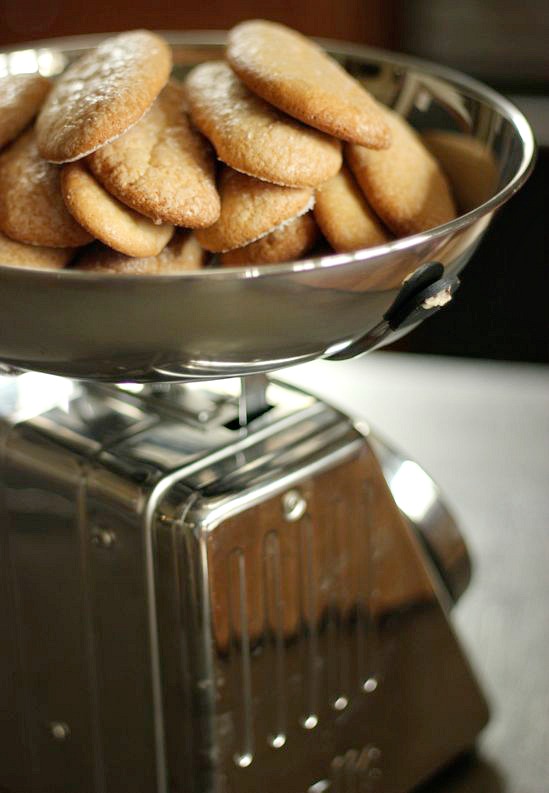 I had already planned the cake I was going to make for my daughter's twenty-second birthday and purchased all of the ingredients. It would be full of fresh, organic strawberries and orange cream. That was until she told me, at nearly the last minute, that she wanted tiramisù. Of course that changed everything. I always honor birthday requests, so I put the cartons of strawberries aside and started thinking tiramisù "cake". I did not want to serve tiramisù from a dish. I wanted it to look like a cake. For a birthday you need a cake. I also had to consider my other daughter. She cannot eat gluten. If I was going to make tiramisù the ladyfingers, a key ingredient of Italian tiramisù, could not be a ready-made Italian, grocery store variety. They needed to be homemade, by me, with my Turkey Red flour, a heritage flour my daughter can painlessly digest, from Sunrise Flour Mill in Minnesota. I chose a tiramisù recipe that included whipped heavy cream, not always a tiramisù ingredient. When combined with the mascarpone cheese and egg yolks, then layered between the espresso-soaked ladyfingers it guaranteed the loaf cake, when unmolded, would hold its shape. I used a nifty, French loaf pan with sides that collapse, but any pan of similar capacity and lined in plastic wrap will release the cake when inverted. The only minor problem I encountered was in making the ladyfingers. I've realized I need to start measuring my egg whites or purchase medium sized eggs. The large organic eggs I've recently been using could easily pass for extra-large. When working with any batter that is piped, if it is too liquid it will spread. I've lately run into this with choux pastry and some cookies. I was tempted to remake the ladyfingers that, as you can see above, spread during baking. But they tasted great and worked beautifully in the making of my tiramisù, so I left them as is... My (sometimes feeble) attempt at not needing everything to always be perfect... They were, however, perfect in the end result. 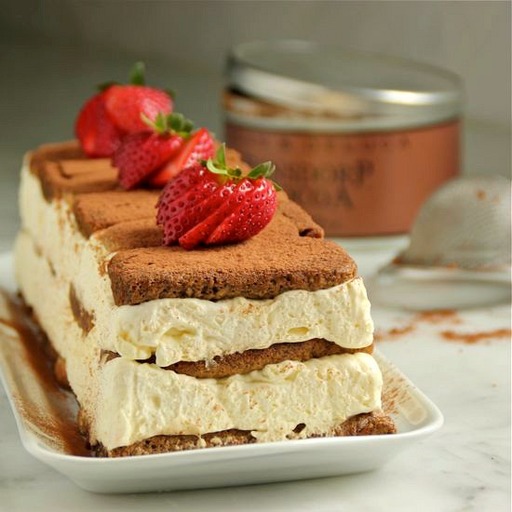  Ladyfingers | (adapted) recipe by Emeril Lagasse • 2 tablespoons butter • 3/4 cup plus 2 tablespoons all-purpose, unbleached flour • 4 egg yolks • 1/2 cup sugar • 4 egg whites, beaten until stiff, but not dry • Pinch of salt • 1 teaspoon vanilla extract • Confectioners' sugar for dusting PREHEAT OVEN to 350˚F 1. Grease two baking sheets with 2 tablespoons of the butter. Dust each baking sheet entirely with flour. 2. Combine the egg yolks with the sugar in a large bowl and beat with an electric mixer until the mixture is yellow, thick, and has tripled in volume, about 8 to 10 minutes. Add to this the whipped egg whites, salt, and vanilla. Fold the mixture while slowly sifting in the 3/4 cup flour. Fold the mixture well until smooth. 3. Fill a large pastry bag, fitted with a 1/2-inch plain tip, with the batter. Pipe twelve, 4-inch lengths, well spaced, onto each baking sheet. Dust the lady fingers with the Confectioners' sugar. Bake until just firm on the outside and light brown in color, about 15 to 18 minutes. 4. Remove from oven and transfer ladyfingers to a cooling rack. Tiramisù Loaf Cake | (adapted) recipe from Renée Kemps • 250 ml double cream • 75 gr sugar • 4 eggs (yolks) • 500 gr mascarpone cheese • 5 tbs coffee liqueur (optional) • 200 ml espresso coffee • 250 gr ladyfingers (made with recipe above, or purchased) • Cocoa powder, for dusting 1. Line an 11-inch-by-3 1/2-inch loaf pan (or any pan of similar capacity) with plastic wrap extending 2-inches over each side. Set aside while you mix up the tiramisù. 2. Whip the cream just until stiff peaks form. Do not over beat. 3. Separate the egg yolks from the whites. In a large bowl beat the yolks with the sugar until very light and fluffy, about 10 minutes. Stir the mascarpone cheese into the egg-sugar mixture. Fold in the whipped cream. 4. Mix the espresso and the liqueur (I used Kahlua) in a shallow dish. Take the ladyfingers and trim them to fit crosswise into the loaf pan. Dip the ladyfingers into the espresso and place a row over the bottom of the loaf pan, using any leftovers, dipped,from the trimmings to cover completely. 5. Pour half of the filling over the ladyfingers and spread mixture evenly. Repeat this step one more time, ending with a layer of espresso-dipped ladyfingers on top. Fold the extending plastic wrap over the top of the tiramisù and refrigerate for at least one day. If you can allow it to chill for two to three days, that's even better. 6. To unmold, fold back the plastic wrap and position a serving plate over the top of the tiramisù. Invert the tiramisù onto the plate and carefully lift off the loaf pan/mold. Gently remove the plastic wrap. Dust the top of the tiramisù liberally with the cocoa powder. Refrigerate until ready to serve. TAKE a LOOK: 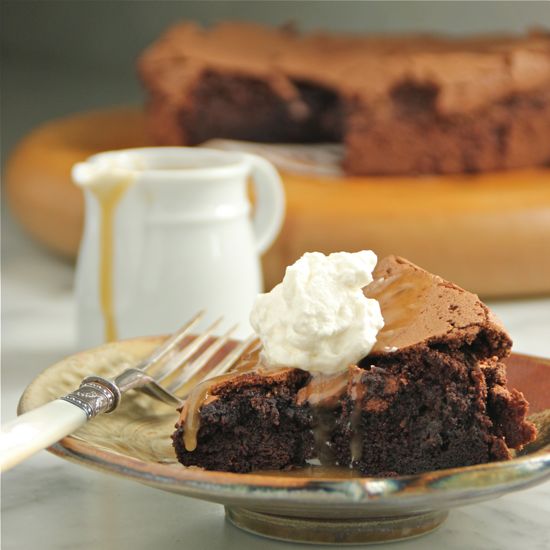 I haven't been around much lately, have I? An occasional post here and there. I've basically taken a break... before I take a break (a.k.a. vacation). Spring projects, indoors and out, have been keeping me busy. And after several nights of near-freezing temperatures, I can finally return to my vegetable garden. Seeds for cool-weather crops -- lettuces, peas, and radishes -- have already been sown. I am somewhat confident that the cold weather is now behind us (... actually, no,not so confident at all) and can finish up with everything else that was held back to avoid the recurring cold snaps. Good news is... the first rhubarb tarts have been made. The asparagus that were planted last year survived the brutal winter and have given us several spears. And a birthday cake was made yesterday for yet another birthday. Yes... I am now 61. You heard me... 61. How can that be?... But back to important things, like the cake. I worked with what I had in my kitchen -- chocolate and espresso. It's the kind of cake I love. Dense chocolate with a crispy exterior. I usually serve slices of a cake like this in a pool of Crème Anglaise, but this time settled on a Very Salty Caramel Sauce. It was definitely the way to go. Eight of us devoured a cake that should have served many more. I am not making any promises for additional Passions to Pastry posts in the next few weeks. The garden will consume much of my time, and on June 1, I will be off to the south of France; a highly-anticipated trip with Antique-of-the-Week Susan and my childhood friend, Renate. I am certain I will return inspired from all I have seen and tasted.  the cake is an adapted recipe from Martha Stewart • 3 tablespoons unsalted butter, plus more for the cake pan • 6 ounces bittersweet chocolate, chopped • 6 large eggs, separated, at room temperature • 1 cup sugar, divided • 3 tablespoons instant espresso powder, such as Medaglia d'Oro • 1/4 teaspoon coarse salt • 1 teaspoon pure vanilla extract • whipped heavy cream, for serving 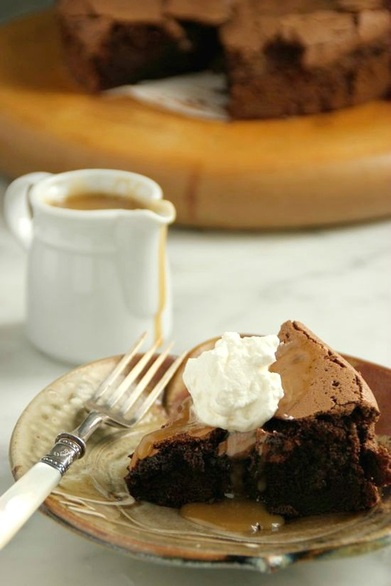 1. Preheat oven to 350˚F. Line a 9-inch springform pan with a parchment round; butter parchment and sides of pan. Melt butter and chocolate, stirring until smooth, in a bowl set over a saucepan of simmering water or in 15 second intervals in a microwave oven. 2. Beat together egg yolks and 1/2 cup sugar with a mixer on medium-high speed, about 3 minutes; mixture should be thick and pale. Add espresso powder and salt; beat until combined, about 1 minute. Add vanilla and melted-chocolate mixture; beat 1 minute longer. 3. In another bowl, beat egg whites on medium-high speed until foamy. Increase speed to high; gradually add remaining 1/2 cup sugar, beating until stiff peaks form, about 5 minutes. Stir about 1/2 cup into the chocolate mixture to lighten, then fold remaining egg whites into chocolate mixture in 3 additions. Transfer batter to pan and bake until set, 40 to 45 minutes. Let cake cool completely in pan on a wire rack. Remove side of pan; transfer cake to a serving plate. Drizzle slices with Very Salty Caramel Sauce (recipe below) before serving. Top with a dollop of whipped, heavy cream. very SALTY CARAMEL SAUCE • 1/2 cup butter • 1 cup brown sugar • 3/4 teaspoon Fleur de Sel • 1 teaspoon vanilla extract • 1/2 cup heavy cream 1. Melt the butter and brown sugar in a small saucepan over medium heat. Bring to a boil, stirring with a whisk. Remove from the heat and add the Fleur de Sel, vanilla, and heavy cream. Stir again with the whisk. 2. The Very Salty Caramel Sauce can be made ahead and kept refrigerated in a jar until needed. Reheat gently on the stove top or in a microwave. TAKE a LOOK:  I spent a day playing in my kitchen this week. Last month I received a gift from a dear friend. I got to know Kate through LivingTastefully (one of the upsides of having a blog!) and last September I met Kate and her husband, John, when Bill and I were in New York attending a wedding. We were welcomed into their beautiful home and still talk about the wonderful time we had with them in the historic town of Canajoharie.  Kate surprised me with Sablés Maison, a French cookie stamp with three interchangeable silicone disks -- one of the Eiffel Tower, Sacré-Coeur, and the Arc de Triomphe -- with a book of French cookie recipes included. Kate knows (oh, how she knows) of my love for France and French pastry, and she was correct in assuming that I would love this gift.  I made both a sweet and a savory cookie. Sablés Tout Chocolat, one of the recipes that accompanied the stamps and sandwiched with Espresso Crème, was the sweet cookie; the savory is a spice-filled, buttery shortbread flavored with curry, tumeric, cumin, and cayenne. It's a great little treat along with an apéritif and is extremely easy to craft as a sliced log cookie. Don't feel like you need to own a set of these stamps to enoy this savory shortbread.  • 3/4 cup unsalted butter, softened • 2 tablespoons sugar • 1 teaspoon salt • 1 teaspoon curry powder • 1/2 teaspoon ground cumin • 1/2 teaspoon freshly-ground black pepper • 1/4 teaspoon ground tumeric • 1/4 teaspoon cayenne • 1 1/4 cups unbleached, all-purpose flour, plus extra for shaping into a log 1. In the bowl of an electric mixer beat together the butter and sugar until smooth. Add the salt, curry powder, cumin, pepper, tumeric, and cayenne. Scrape down the sides of the bowl with a rubber spatula and beat until combined. Add the flour and continue to mix until incorporated. 2. Turn the shortbread dough out onto a large sheet of waxed paper. With floured hands, press the dough into a strip about 2-inches wide with a length of 12-inches. Wrap the dough in the waxed paper and refrigerate for about 15 minutes. This will make it easier to shape. Transfer dough to a piece of plastic wrap and using the plastic as an aid, roll the dough back and forth into a log. Wrap and return to the refrigerator for at least an hour. 3. PREHEAT OVEN to 325˚F. Line a baking sheet with parchment paper. Remove the shortbread log from the refrigerator. Using a very sharp paring knife (or a piece of fine thread) slice the log into 1/4-inch-thick disks. Transfer pieces to baking sheet, spacing 1/2-inch apart. 4. Place baking sheet on the center rack of oven and bake until set, about 12 minutes. Transfer to a rack to cool. Shortbread can be kept in an air-tight container for up to 2 months.  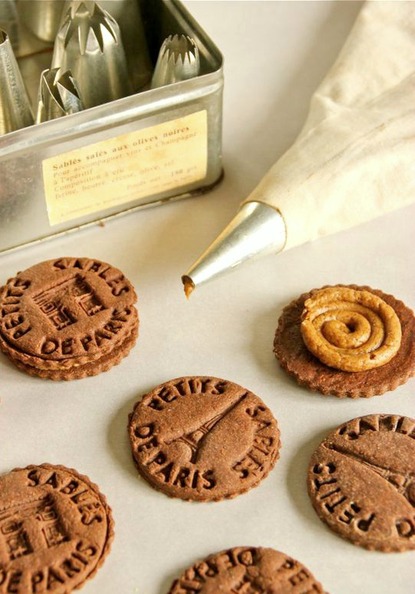 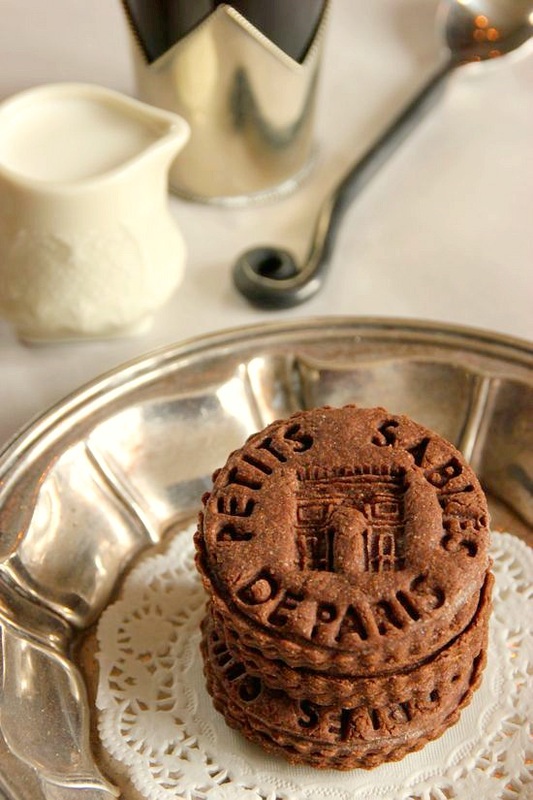   • 200 grams unbleached, all-purpose flour, plus additional for rolling cookies • 80 grams granulated sugar • 40 grams Dutch-processed cocoa powder, plus additional for rolling cookies • Pinch of ground cinnamon • 1/2 cup (1 stick) unsalted butter, at room temperature • 1 extra-large egg, room temperature • Espresso Crème, for filling (recipe below) 1. In a medium-size bowl, sift together the flour, sugar, cocoa powder, and cinnamon. 2. Place the butter in the bowl of an electric mixer and beat until smooth. Add the egg and beat until light and fluffy, scraping down the sides of the bowl when necessary. 3. Add the dry ingredients to the butter-egg mixture and beat until just combined and no streaks of flour can be seen. Wrap dough in plastic and refrigerate for at least an hour. 4. PREHEAT OVEN to 325˚ F. Remove dough from refrigerator and let warm a bit. This is a rather dry dough and will roll easier if it is not very cold. Line a baking sheet with parchment paper. On a lightly-floured work surface (I like to combine some flour with some cocoa powder), and using about 1/4 of the dough at a time, roll to a 1/8-inch thickness. Use a 1 1/2-inch round cookie cutter (or any other shape, or size) to cut the cookies. Dust off any traces of flour with a pastry brush if necessary. Transfer to the baking sheet. Repeat with remaining dough. 5. Bake the cookies on the middle rack of the preheated oven for approximately 13 minutes; transfer to a cooling rack. 6. While the cookies are cooling, mix together the Espresso Crème. ESPRESSO CREME • 1/2 cup unsalted butter, softened • 1 1/2 cups Confectioners' sugar • 1/8 teaspoon salt • 1 1/2 tablespoons espresso powder (such as Medaglia D'Oro) dissolved in 1/8 cup hot water • 1 teaspoon Cognac 1. Combine the butter and Confectioners' sugar in a medium bowl and mix until smooth. Add the remaining ingredients and stir until fully combined and smooth. 2. Either spread or pipe espresso cream in between cooled wafer cookies to create a sandwich. TAKE a LOOK:  • • • • • • • • • 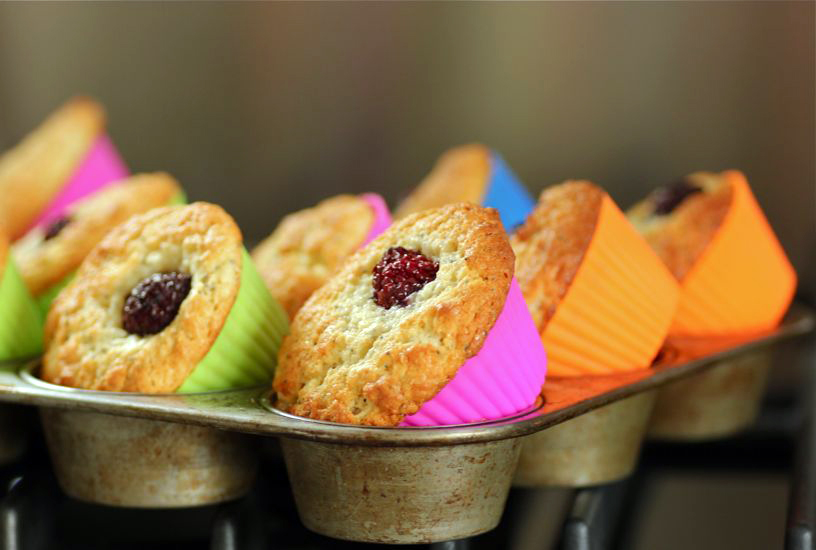 It's well known (by family and some friends) that I'm not much good for anything unless I've had my morning cappuccino. On rare occasions, I have been forced to dash out of the house without one. It is not an ideal situation. Even my French Bulldog Pipi knows there's no hope of a walk unless I've downed a double espresso first. Breakfast can wait, and usually does, until later. When I get myself out of bed, down the stairs, and into the kitchen, it's all about the cappuccino and nothing else... well, a little cookie or muffin on the side is always welcome :)  BREAKFAST: Lemon Poppy Seed Muffins and a Cappuccino • 1/2 cup unsalted butter, softened • 1 cup sugar • 2 large eggs, room temperature • 1 cup plain Greek yogurt • Finely grated zest of 1 small, organic lemon • 1 teaspoon almond extract • 1 tablespoon poppy seeds • 2 cups unbleached, all-purpose flour • 1/2 teaspoon salt • 1/4 teaspoon baking soda • 1 teaspoon baking powder • 12 fresh blackberries 1. PREHEAT OVEN to 400˚F. Line a 12 cup muffin tin with paper or silicone baking cups. 2. In a large bowl, cream butter with sugar until light and fluffy. Beat in eggs, one at a time. Add yogurt, lemon zest, almond extract, and poppy seeds. Mix well. 3. In a medium bowl, sift together flour, salt, baking soda, and baking powder. Stir into the creamed mixture. Spoon batter evenly into the prepared muffin tin. Press a blackberry into the center of each muffin. 4. Place tin on the middle rack of oven. Bake for 25 minutes or until golden brown; cool for 5 minutes before serving. TAKE a LOOK: 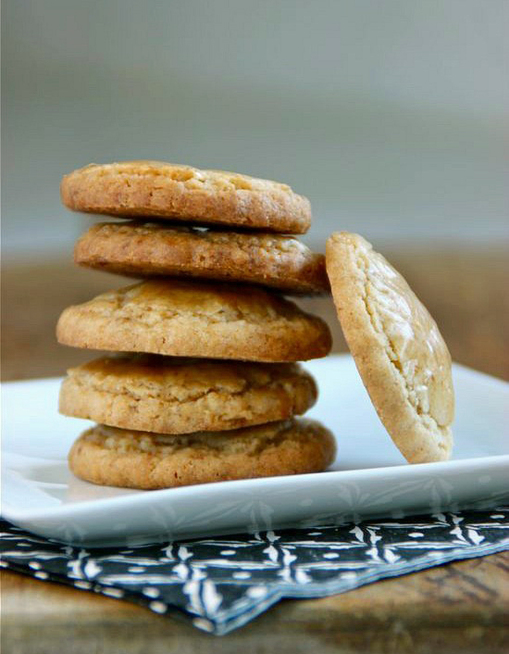 Sablés avec Espresso -- rich butter cookies filled with espresso. I have made the original recipe from Simply Sensational Desserts by Francois Payard for many years; rolled and cut butter cookies brushed with an espresso-egg glaze. This time, I added the espresso powder directly to the dough and I have to say, for me at least, this is the way to go. The flavor of espresso is much more pronounced with the powder added to the mix versus brushing it on as a glaze -- just the way I like it. These cookies are a really sweet treat!    an adapted recipe... • 2 1/3 cups cake flour • 1 tablespoon plus 1 teaspoon baking powder • 1 1/4 teaspoons salt • 1 tablespoon instant espresso • 4 large egg yolks • 1 cup sugar • 1/2 pound (2 sticks) unsalted butter, softened • 1 egg, lightly beaten with 1 teaspoon water 1. Sift together the flour, baking powder, salt, and instant espresso in a medium bowl; whisk briefly to combine. 2. In electric mixer fitted with a whisk attachment, beat the egg yolks and sugar at medium speed until combined. Beat in the butter, just until combined. Add the dry ingredients and mix at low speed until blended, stopping to scrape down the sides of the bowl when necessary. Cover the bowl with plastic wrap and refrigerate until cold, at least 2 hours. 3. PREHEAT OVEN to 350˚F. Line 2 large baking sheets with parchment paper. 4. On a lightly-floured work surface, * roll a scoop of the dough to a thickness just shy of 1/4-inch (refrigerate unused dough). Using a 1 1/2-inch round cookie cutter, cut out cookies and place them 3/4-inch apart on a prepared baking sheet. Gather up left-over pieces of dough and adding additional dough from the refrigerator, roll and cut more cookies. When one baking sheet is filled, brush tops of cookies with egg glaze and place on the middle rack of the oven. Bake for approximately 13 to 16 minutes, or until golden. While the first batch of cookies is baking, roll and cut cookies to fill the second baking sheet. 5. Cool the cookies on a wire rack. Store in an airtight container in a cool, dry place for up to 2 weeks. * It is not in my DNA to roll "thick" cookies. And by thick, I mean the 1/4-inch the original recipe calls for. I like thin, crisp cookies; but you do want these cookies more than my usual 1/8-inch. If making a 1/4-inch thick cookie, you will need to increase the baking time by a few minutes. Keep an eye on them and judge for yourself the amount of time necessary. TAKE a LOOK: 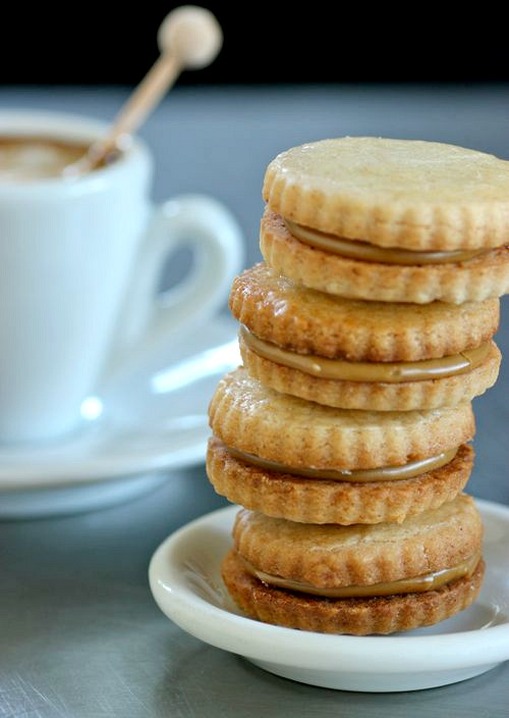 I am now back from my September travels and look forward to what I consider... the baking season. The trip I just returned from in upstate New York, brought into focus the best part of having a food blog -- the wonderful people I have gotten to know worldwide. On this trip, I was able to meet for the first time a dear friend I have made through LivingTastefully. Cathy and her husband John live in the historic village of Canajoharie. They welcomed my husband and me into their beautiful 18th century home, fed us (over lively conversation), and revealed to us the historic riches of the area. Our visit was one I will never forget. Thank you so much for everything, Cathy and John! I have returned home to a change in the weather and much cooler temps. Cinnamon Espresso Cream Sables and a cup of coffee (or espresso!) are just the ticket for the fall days ahead. 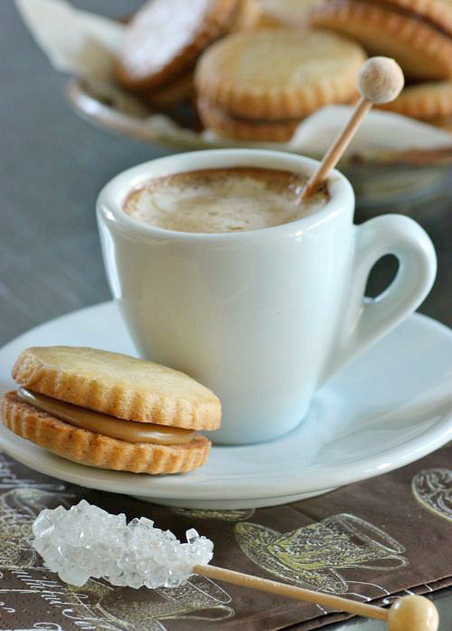  adapted recipe from Rebecca Franklin | About.com: FRENCH FOOD • 2 cups all-purpose unbleached flour • 1/2 teaspoon ground cinnamon • 1/2 teaspoon baking powder • Pinch sea salt or kosher salt • 10 tablespoons unsalted butter, room temperature • 1/2 cup granulated sugar • 1 large egg • 1 teaspoon vanilla extract EGG WASH: • 1 egg white • 2 teaspoons water ESPRESSO CREAM: • 1 1/2 cups confectioners' (powdered) sugar • 2 teaspoons instant espresso powder • 1/2 teaspoon vanilla extract • 2 - 4 teaspoons milk 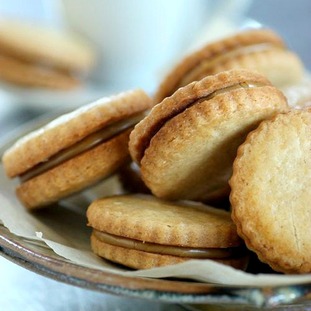 1. In a medium-size bowl, mix together the flour, cinnamon, baking powder, and salt. In the bowl of an electric mixer, cream the butter and sugar until smooth. Add the egg and vanilla and mix well. Slowly add the dry ingredients and mix until fully combined. 2. Form the dough into a disk and wrap in a sheet of plastic wrap. Refrigerate for at least an hour. Preheat oven to 350˚F. Make the egg wash by whisking together the egg white and water. Remove cookie dough from the refrigerator and roll to a thickness of 1/4-inch. Cut the cookies with a round, 1 1/2-inch fluted cutter and place on a parchment paper lined cookie sheet. Brush the tops of the cookies with egg wash and bake for 15 minutes or until golden. Transfer cookies to a cooling rack. 3. TO MAKE the ESPRESSO CREAM FILLING: In a medium-size bowl and using a hand-held mixer, combine the confectioners' sugar, espresso powder, vanilla, and 1/2 teaspoon of milk at a time, until all of the ingredients are moistened and the consistency of really, creamy peanut butter. 4. TO FILL THE COOKIES: Place a small scoop of espresso cream, about the size of a malted milk ball, in the center of a cookie. Top with another cookie and gently press together. You want the espresso cream to almost reach the edge of the cookie. Adjust the filling amount if necessary. Repeat with the rest of the cookies. TAKE a LOOK: 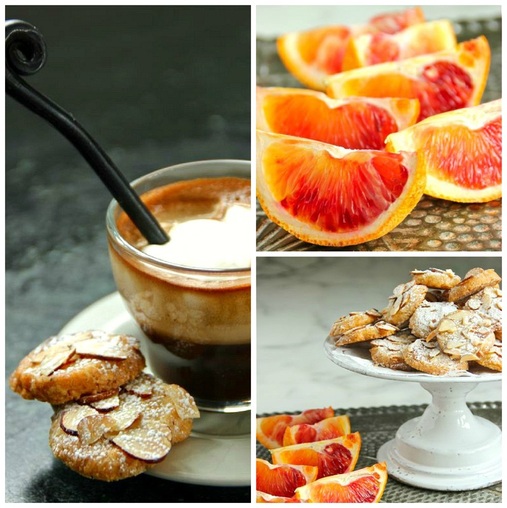 My mother had a very large vegetable garden behind our family home in Amana, Iowa. Tending to this garden demanded much of my mother's time during the growing season. But, oddly enough, I have vague memories of my mother in her garden. Instead, my memories are of baskets (beautiful handmade Amana "bushel" baskets) full of produce set by the kitchen door... and the production that was always underway in my mother's kitchen. The reason I remember the fruits and vegetables more than my mother actually working the garden is because she was usually finished with her weeding, watering, and harvesting before I even woke up... and I woke up early! My mother did her chores before the sun was high and summer's heat made tending a garden unbearable.  And after a good amount of work had been completed by my mother, there was always a mid-morning coffee break. Everything stopped, coffee was made, and some sort of sweet treat was served. Now when I bake brioche, cookies, tarts, etc., I wish my mother were here to enjoy it all with a cup of coffee, and me. 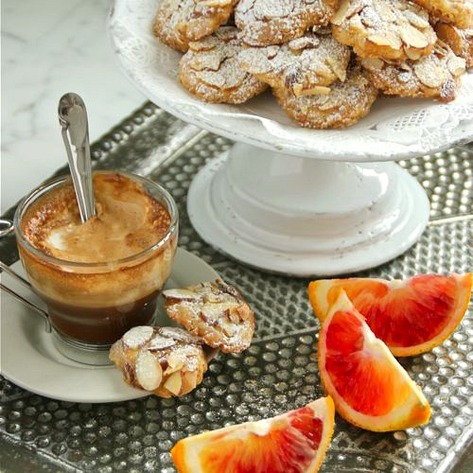 I've been stacking several of these Almond & Blood Orange Cookies on my husband's coffee cup saucer in the mornings. This is one of the best cookies I've made (and eaten) in a long time. And there's another bonus in addition to the wonderful taste -- the citrusy, almond-laced aroma in the kitchen after you bake these cookies. 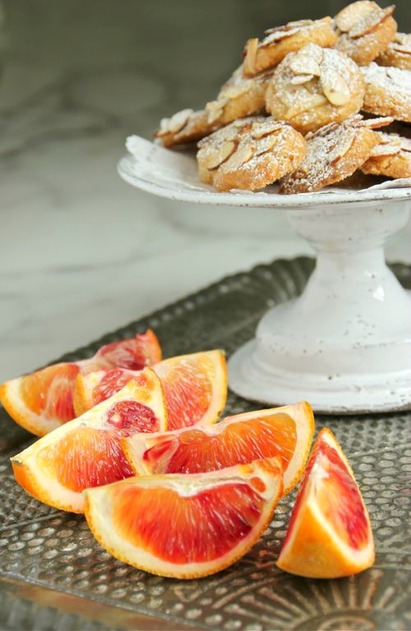 My mother told me that when she was a little girl, she would receive a fresh orange in her Christmas stocking. We now take fruits like oranges for granted, having access to them year-round in our grocery stores. But in the early 1900's, that wasn't the norm by any means. It was very special, indeed, to be able to eat an orange in the winter. And I wonder what my mother would think of the crimson-fleshed Blood Oranges. Their color and taste can't be beat. But be warned -- the Blood Orange growing season is short. Buy them now!  Coffee break with an Espresso Con Panna (a double shot of hot espresso with cold, softly-whipped, heavy cream on top). 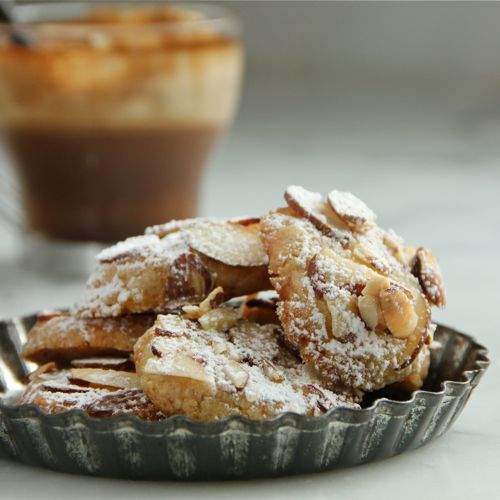  recipe from Carrie Vasios | Serious Eats: sweets + Italian Almond & Blood Orange Cookies are served with Espresso Con Panna NOTE: To toast the almonds, preheat oven to 325˚F. Spread the almonds onto a baking sheet and bake for about 7 minutes, or until golden. • 1/2 cup sliced, blanched almonds, toasted and cooled (see note above) • 2 cups all-purpose flour • 1/2 teaspoon baking powder • 1/2 teaspoon salt • 16 tablespoons (2 sticks) unsalted butter, at room temperature • 1 cup sugar • 1 egg yolk (white reserved) • 1 teaspoon vanilla • 1 packed teaspoon blood orange zest (from 1 blood orange) COATING: • 1 egg white (reserved from egg above) • 1 1/2 cups sliced, blanched almonds • Confectioners' sugar (for dusting) 1. In the bowl of a food processor, pulse the toasted almonds until the consistency of cornmeal. Transfer almonds to a mixing bowl; add the flour, baking powder, and salt. Whisk to combine and set aside. 2. In a large bowl and using an electric mixer, beat the butter and sugar together until light and fluffy, about 3 minutes. Add the egg yolk, vanilla, and blood orange zest; beat mixture to combine. Slowly add the dry ingredients to the moist and beat until a dough forms. Divide dough in half and on a sheets of plastic wrap, roll each half into a log, 1 1/4-inch in diameter. Wrap each log in the plastic and refrigerate for at least an hour. 3. Line 2 baking sheets with parchment paper. Position oven racks in the upper and lower third of the oven. Preheat oven to 350˚F. Place the reserved egg white in a medium-size shallow bowl (I added about 1/2 teaspoon water to the white; stir to combine). Fill another medium-size shallow bowl with the blanched almonds. Remove the cookie dough logs from the refrigerator. Using a sharp paring knife, slice each log into 1/4-inch pieces. Take a slice and dip one side in egg white (leave slice in egg white for about 10 seconds helps the almonds to adhere), then dip in the sliced almonds, pressing firmly into the almonds; place on baking sheets. Repeat with remaining cookie slices. 4. Place a cookie sheet on each shelf of the preheated oven. Bake for 15 minutes or until golden, switching position of the sheets half way through baking. Remove from the oven and cool for 5 minutes before transferring cookies to a cooling rack. Dust with confectioners' sugar. TAKE a LOOK: 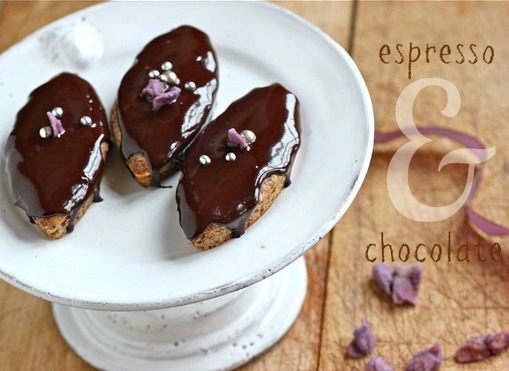
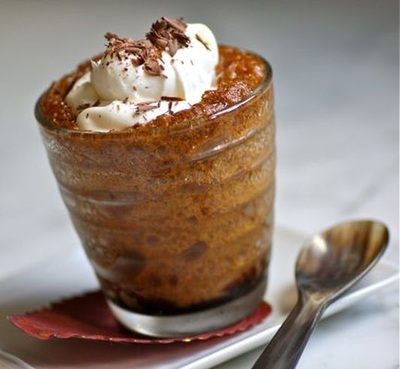
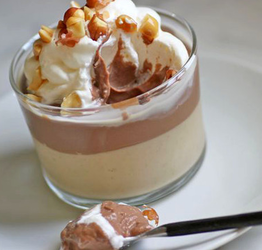
A gray, rainy day... perfect for baking. I LOVE IT! I feel as though it's been weeks (and it probably has) since I've had a day by myself, in my kitchen. 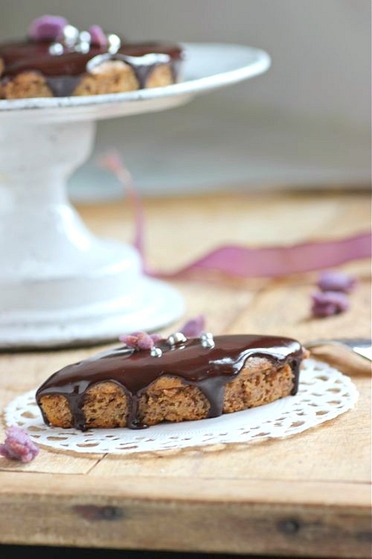
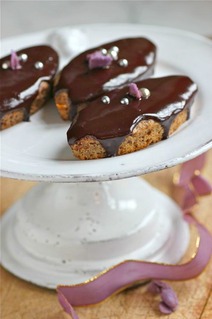
And doesn't chocolate always sound good on a cold, gray, rainy day? I made an espresso and chocolate batter, then filled muffin cups and financier molds. And to make them just a bit more decadent, I drizzled the little baked cakes with a bittersweet ganache. 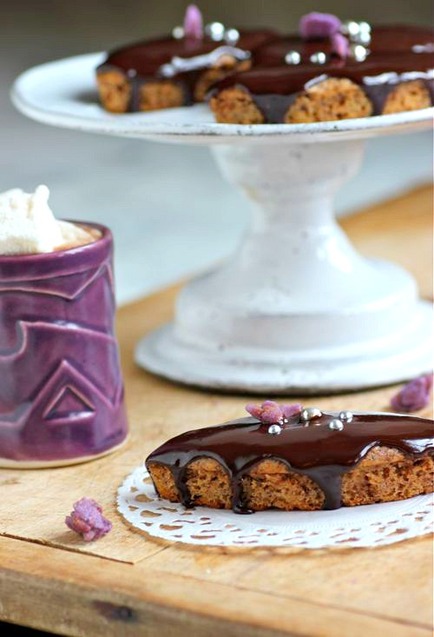
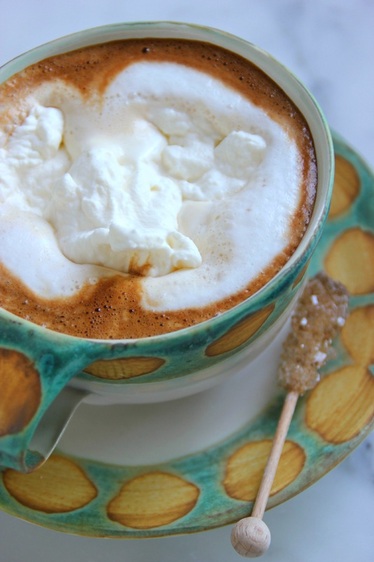
And served them with hot chocolate + homemade marshmallows. 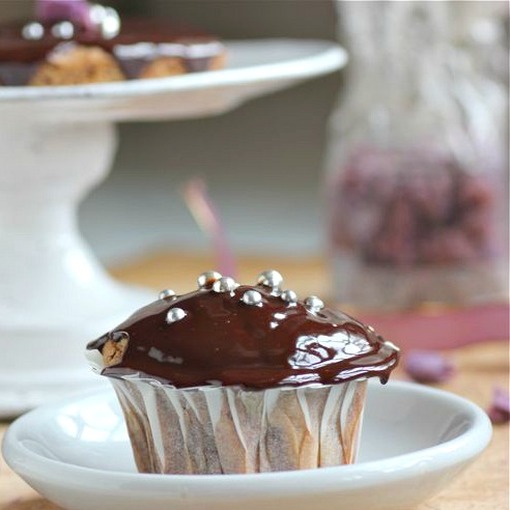

 adapted from coffee journal | autumn 1996 MAKES 12 MUFFINS • 3/4 cup milk • 1/4 cup heavy cream • 1/2 cup unsalted butter, cut into pieces • 2 cups flour • 3/4 cup + 1 tablespoon sugar • 1 tablespoon baking powder • 1 tablespoon instant espresso • 1/2 teaspoon salt • 1 egg, room temperature • 1 teaspoon vanilla extract • 3/4 cup grated bittersweet chocolate PREHEAT OVEN to 350˚F 1. Position oven rack in lower-third of oven. 2. In a small saucepan, heat the milk, cream, and butter over low heat, stirring occasionally, until the butter has melted. Set aside to cool. 3. Place the flour, sugar, baking powder, espresso, and salt in a large mixing bowl and whisk to combine. 4. Whisk the egg and vanilla extract into the cooled milk mixture. Stir liquid ingredients into dry ingredients until just combined. Fold in grated bittersweet chocolate. 5. Fill 12 lined muffin cups with the batter (I filled 9 muffin cups and 9 financier molds) and bake for 18 to 20 minutes, or until a toothpick inserted in the center of the muffin comes out clean. Financier molds will take approximately 13 to 15 minutes. 6. If desired, drizzle the cooled cakes will chocolate ganache: Heat 3 ounces heavy cream until hot. Remove from heat. Add 4 ounces chopped bittersweet chocolate and let set for a couple of minutes. Stir mixture until smooth. Spoon chocolate sauce over muffins. TAKE a LOOK: 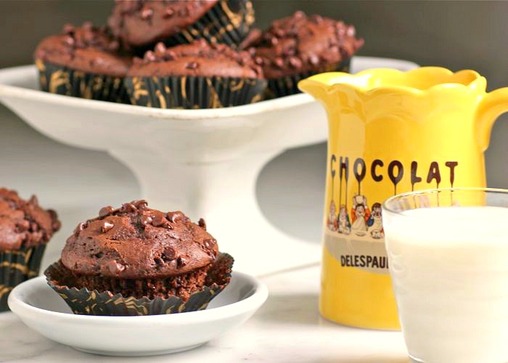
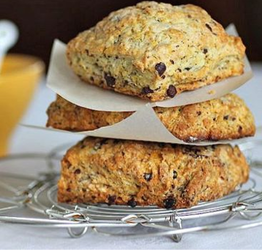
During the summer months, I'm rather lukewarm towards chocolate. Desserts made with berries and stone-fruit are what I'm craving. But once the temperatures cool, chocolate works its way back into my baking. I've been slowly rebuilding my chocolate inventory over the past few weeks, so when that chocolate urge hits, I have available what I need. Bittersweet, milk, and white chocolate are purchased in bulk. Natural and Dutch cocoa are picked up by the bagfuls at Penzey's. And semi-sweet chocolate chips, that have endless uses, are stored in a large French canning jar in my cupboard. 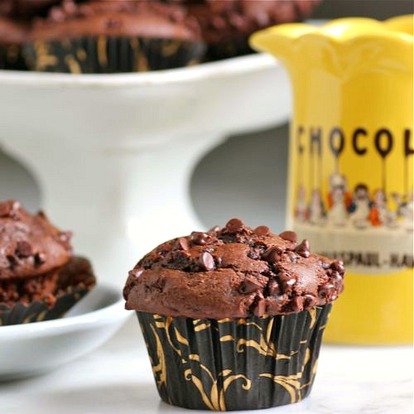
And, the chocolate urge just hit big-time. I've had this recipe on file for several months, and today was the perfect day -- cool and drizzly -- to mix up this intense chocolate batter. These are excellent with a glass of ice-cold milk. I know this to be true -- I ended up having two! 
adapted recipe by Yvonne Ruperti | via Serious Eats • 2 cups (10 ounces) all-purpose flour • 1/2 cup (1 1/2 ounces) cocoa powder • 2 teaspoons baking powder • 1/2 teaspoon baking soda • 1/2 teaspoon salt • 3/4 cup (5 1/4 ounces) granulated sugar • 2 large eggs • 1/3 cup canola oil • 1 cup plus 2 tablespoons milk • 1 teaspoon pure vanilla extract • 1 tablespoon espresso powder • 1 1/4 cups mini chocolate chips, divided PREHEAT OVEN TO 375˚F 1. Line 16 muffin cups with paper. Set aside. 2. In a large bowl, combine the flour, cocoa, baking powder, baking soda, salt, and granulated sugar. 3. In the bowl of an electric mixer, whisk the eggs until thick and pale yellow. Mixing slowly, add the canola oil, milk, vanilla, and espresso. Increase speed, and mix just briefly, until well-combined. Add the dry mixture to the liquid at low speed and mix just until combined. Stir in 1 cup of the chocolate chips. 4. Divide the batter evenly between the 16 muffin cups. Sprinkle the remaining 1/4 cup mini chocolate chips evenly over the batter. 5. Bake on the middle rack of preheated oven for approximately 18-20 minutes, or until done. TAKE a LOOK: |


Categories
All
|