 Designed and built to thwart an attack by the biggest black crow I've ever seen! 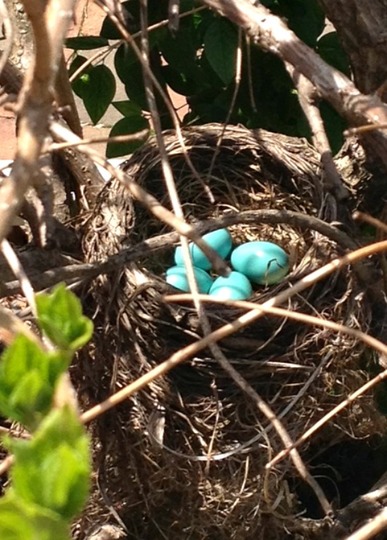
3 Comments
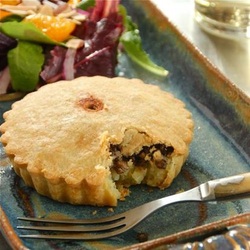
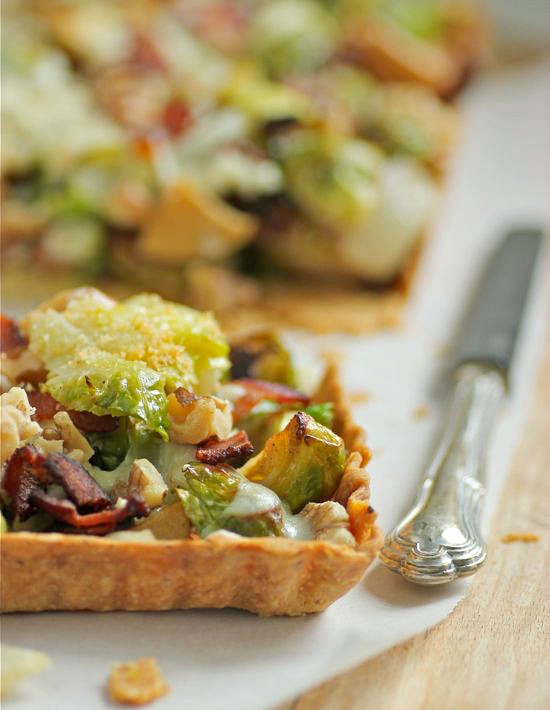 Recently I was contacted by a company asking me to promote their lifestyle by writing a post on my philosophy for healthy living in Minnesota during the winter months... and to create a recipe to accompany my musings on wellness. Honestly, I don't know what it was about Passions to Pastry that made me seem like a plausible candidate for this. I dislike being outdoors when it's cold and much of what comes out of my kitchen includes fat, usually in the form of butter. 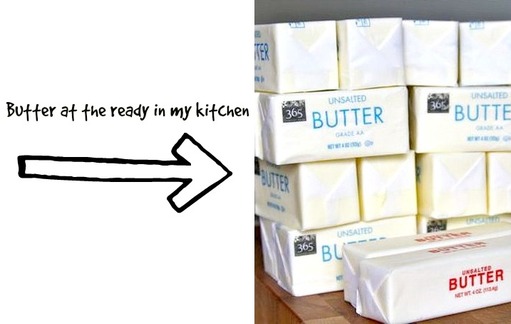 What I first considered a very odd request, eventually got me thinking about my general health. Do I exercise enough, especially in the winter? Even though I'm in my kitchen cooking and baking for hours every day, do I really eat well? And probably my biggest concern... how is my mental health? Something I believe is connected to exercise, good nutrition, and a positive attitude (which is sometimes lacking in my winter demeanor). While I was thinking about all of this today, my husband had a health assessment at the health club where we belong. He was told that he must be eating really good fats, because numbers and percentages on his tests were excellent. We eat butter. I bake with butter and I cook mostly with olive oil. We eat eggs. LOTS of eggs. I only purchase whole milk and whole milk products, such as yogurt, sour cream and cottage cheese. I do not believe in low-fat or non-fat. Seventeen years ago I eliminated hydrogenated oils from my kitchen and our lives. That changed everything. It's a no brainer as far as I'm concerned. And I must ask... why do doctors' offices and hospitals serving coffee to their patients, always offer a powdered creamer that's full of hydrogenated oils? It makes absolutely no sense whatsoever. 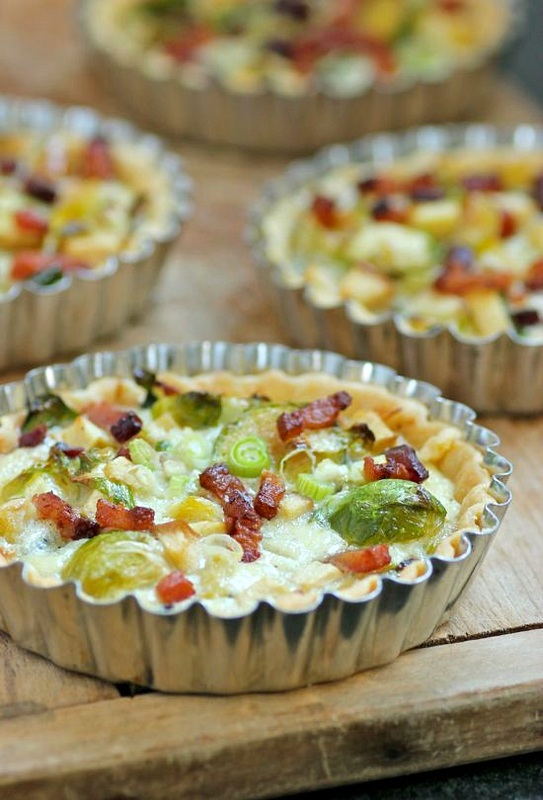 Summers are easy for me. I spend much of my time in my vegetable garden, bike 15 to 20 miles several times a week along the Mississippi river, and entertain often, serving alfresco meals on the patio made with organic produce from my garden. That is when I am the happiest... and healthiest. Admittedly, winter becomes more difficult. I tend to hibernate, filling my time with indoor projects, baking of bread, and thoughts plus plans for the upcoming gardening season... and travel; something I prefer doing during the summer months instead of winter. It's a balance and a trade-off I cherish. I can't imagine living anywhere else. 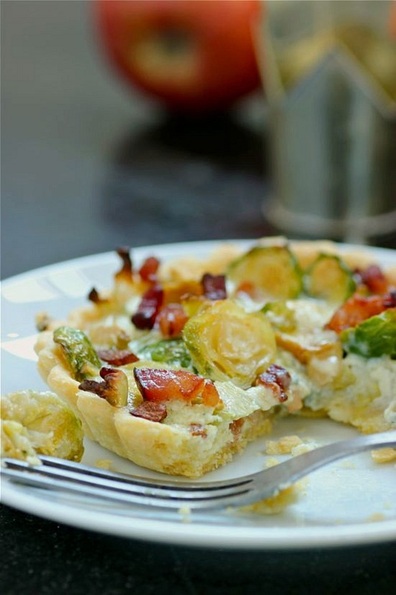 I often make savory tarts during this time; combining a flaky pastry with healthy fruits and vegetables in addition to rich cheeses, eggs, and cream. (Make this a vegetarian version by removing the bacon and adding chopped walnuts.) Meals like this help get me through a long, northern winter! 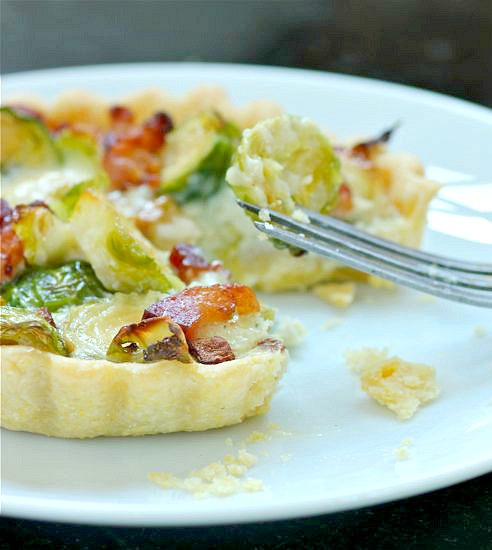  • recipe makes six 4-inch tarts or one 10-inch tart CRUST • 1 1/4 cup unbleached all-purpose flour • 1/4 cup cornmeal • 1/2 teaspoon salt • 8 tablespoons cold unsalted butter, cut into 1/2-inch cubes • 3 to 4 tablespoons ice water FILLING • 4 strips apple-smoked bacon • 10 ounces brussels sprouts • 1 small apple, diced (I used Fuji) • Olive oil • 3/4 cup blue cheese, diced • 1/2 cup Half & Half or whole milk • 2 large eggs • Salt and freshly-ground pepper • 2 green onions, white and pale green part, thinly sliced 1. To make the crust... Combine the flour, cornmeal and salt in the bowl of a food processor. Pulse a couple of times. Add the butter and pulse until the size of small peas. Add the ice water, 1 tablespoon at a time, while pulsing until the dough just starts to come together. You will use 3 to 4 tablespoons of water. 2. Transfer the tart dough to a large piece of plastic. Press into a disk, wrap in the plastic; place in the refrigerator for 1 to 2 hours. 3. In the meantime, make the filling... Slice the bacon into 1/4-inch pieces. Place bacon in a skillet over medium-low heat; cook until brown but not crisp. Drain and set bacon aside. 4. Preheat oven to 375˚F. Trim and slice brussels sprouts. Cut the apple into small dice. Combine on a baking sheet with 1-inch sides; drizzle with olive oil and sprinkle with salt and pepper. Bake in the center of the oven, stirring occasionally, until the brussels sprouts just start to brown, about 20 minutes. Remove pan and increase oven temperature to 400˚F. 5. Remove the tart dough from the refrigerator and transfer to a work surface. Place the disk on a sheet of lightly-floured wax paper or parchment. Dust the top of the disk lightly with flour and cover with a sheet of plastic wrap -- If making individual tarts, divide the dough into 6 equal pieces before rolling. Roll the dough slightly larger than the tart tin(s) and gently press into the pans. Do not stretch the dough. Trim the top edge and place in freezer for 5 minutes. Remove and line pan with a piece of aluminum foil. Fill with dried beans or rice, transfer to the preheated oven, and bake for 15 minutes. Remove the foil and beans and return the tart pan(s) to oven. Continue to bake until crust is golden brown. Remove and reduce oven temperature to 375˚F. 6. Scatter the blue cheese evenly onto the tart crust (or divide equally between the individual tarts). In a medium bowl combine the cream or milk with the eggs and salt and pepper to taste. Whisk by hand just briefly until smooth. Add the sliced green onions. 7. Fill the tart shell(s) with the brussels sprouts-apple mixture. Sprinkle with the reserved bacon and slowly pour the egg mixture over the filling. 8. Bake in the center of the oven for approximately 20 minutes, or until the custard filling is set. Great for a light dinner with a salad or as part of a brunch. TAKE a LOOK: 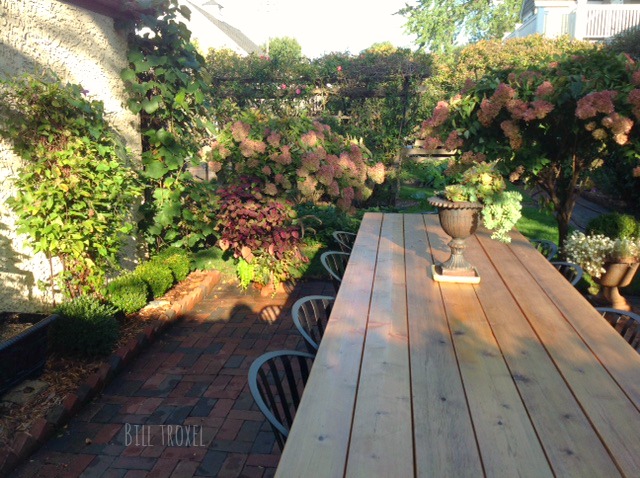
I'm off to visit Antique-of-the-Week Susan for a few days. Here's a photo of what I will leave behind. The patio in early fall -- still a beautiful setting for al fresco meals. 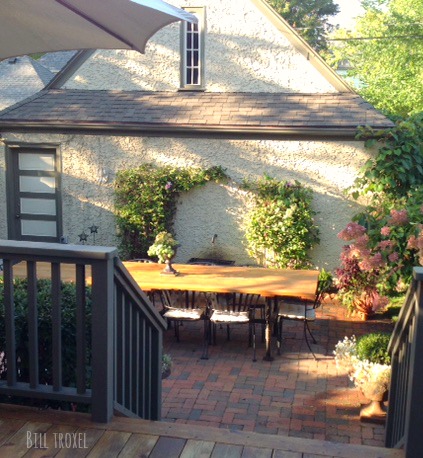
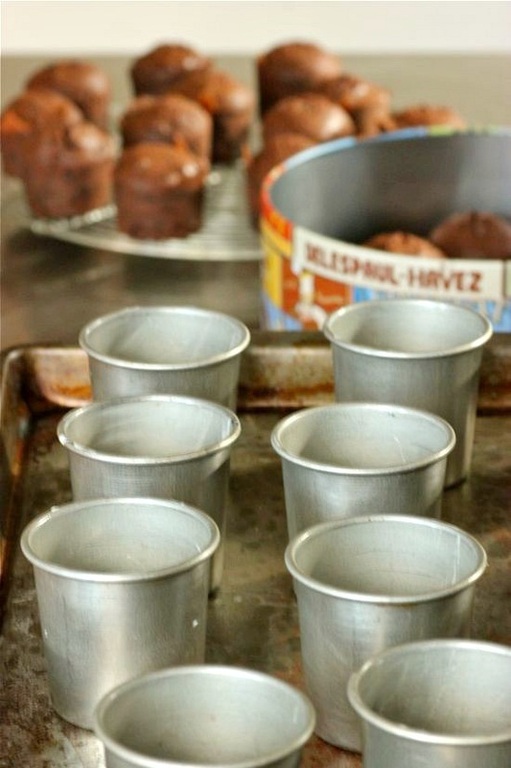
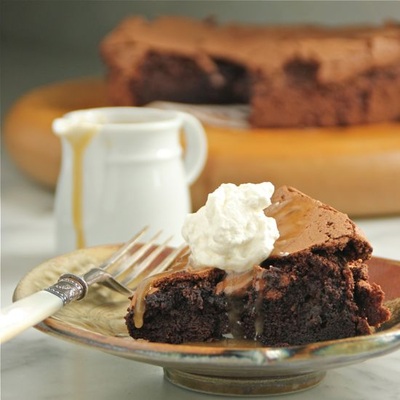
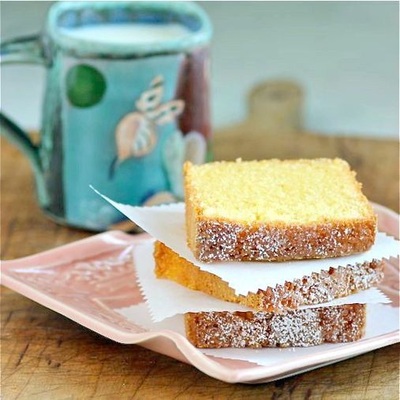
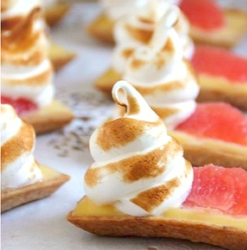
Last spring I was asked if I would like to be one of several to bake desserts for the "Grand Re-opening Gala of the Minnesota Governor's Residence". I didn't think about it very long -- I said "yes" almost immediately. The desserts I made consisted of French Chocolate Bouchons, French Canelés, and little Lemon Pound Cakes with Lemon Drizzle and French Lavender Bud Sprinkles. 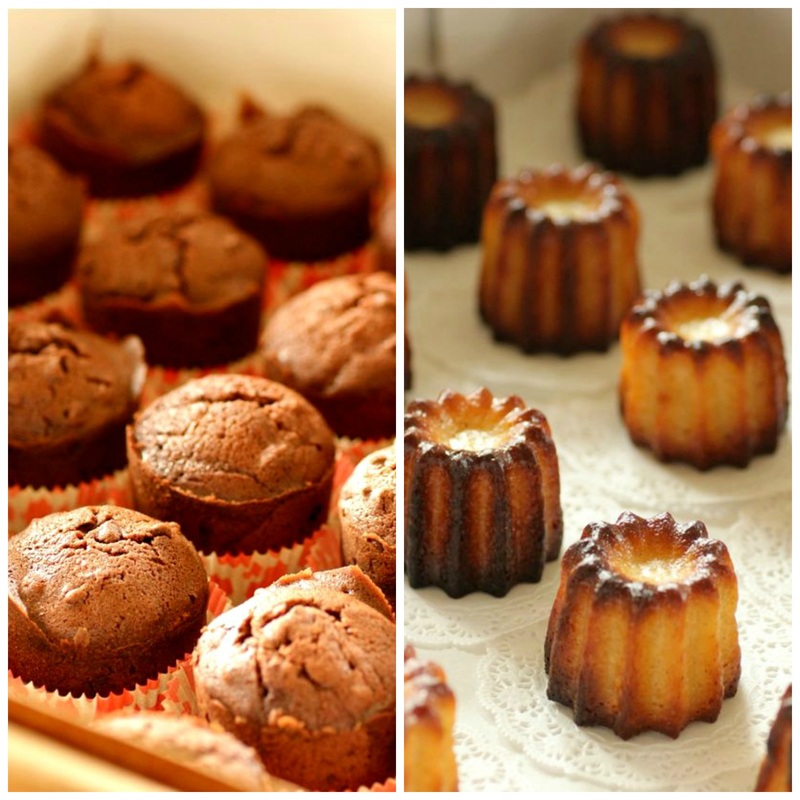
That gala took place this past weekend. I considered my contribution to the event, of 50-plus individual servings, as little French bites. 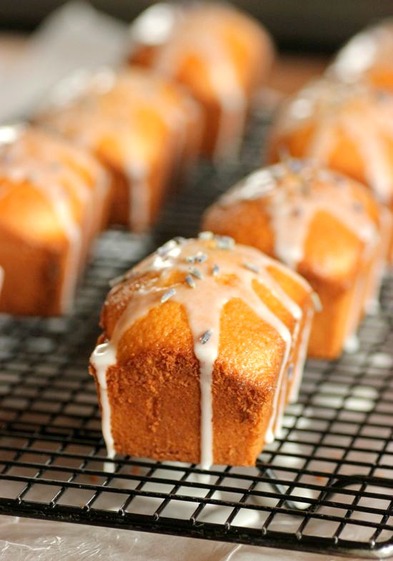
Little Lemon Pound Cakes with Lemon Drizzle and Lavender Bud Sprinkles... 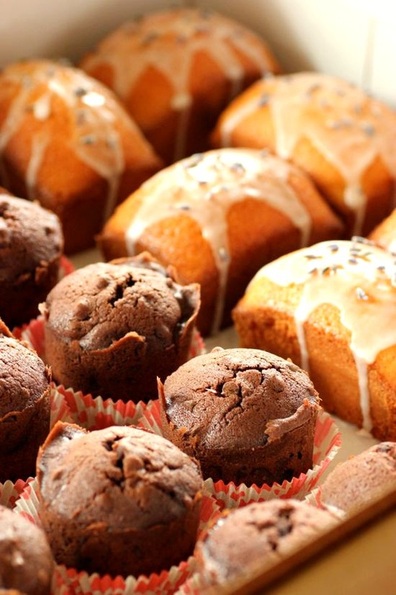
Individual desserts packed up for delivery... 
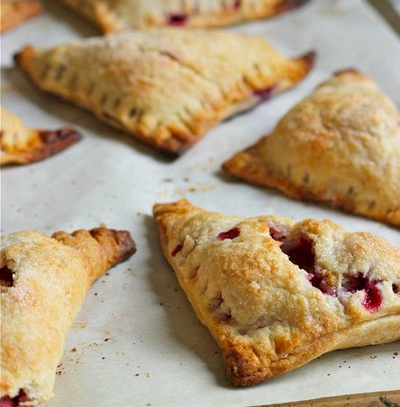
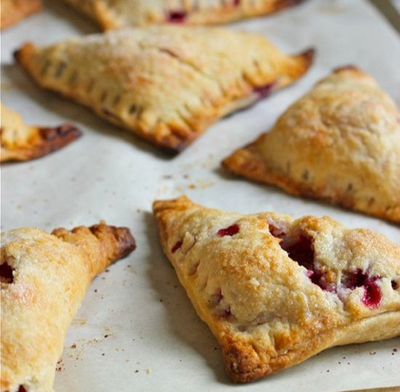
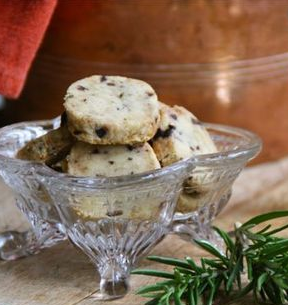
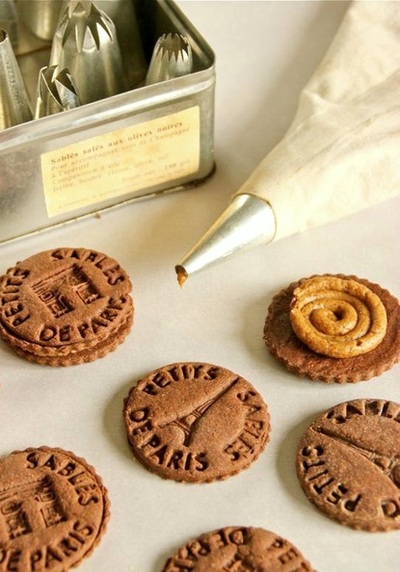
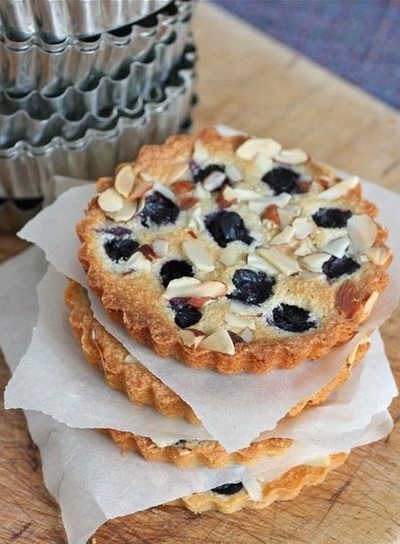
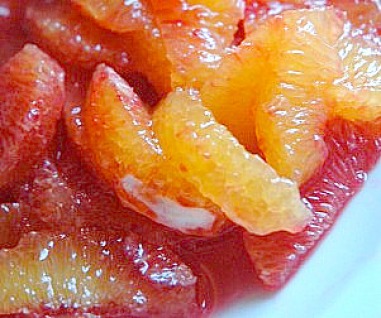
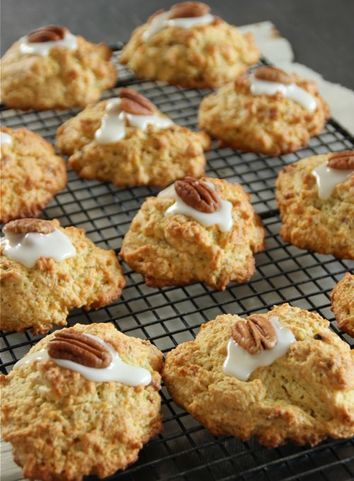
• a recipe by Norman Love | BAKING WITH JULIA, written by Dorie Greenspan NOTE: The recipe below uses one 9-inch-by-5-inch bread pan. I used eight 3 1/2-inch-by-2 1/2-inch pans and needed to adjust down my bake time. FOR POUND CAKE: • 4 large eggs, room temperature • 1 1/3 cups sugar • Pinch of salt • Grated zest of 3 large lemons • 1 3/4 cups cake flour • 1/2 teaspoon baking powder • 1/2 cup heavy cream, at room temperature • 5 1/2 tablespoons unsalted butter, melted and cooled to room temperature FOR LEMON DRIZZLE: • 1 cup Confectioners' sugar • Fresh lemon juice • Culinary lavender, optional 1. Position a rack in the center of the oven and preheat the oven to 350˚F. Butter a 9- by 5-inch loaf pan (see note above) and dust with flour, shaking out the excess. 2. Working in a large bowl, whisk together the eggs, sugar, and salt for just a minute, until foamy and smoothly blended; the mixture should not thicken. Whisk in the grated zest. 3. Spoon the flour and baking powder into a sifter and sift about a third of the dry ingredients over the foamy egg mixture. Whisk the flour into the eggs, mixing lightly--do not beat. Sift the flour over the eggs in two more additions and whisk only until everything is incorporated. Whisk the heavy cream into the mixture. Switch to a rubber spatula and gently and quickly fold in the melted butter. 4. Pour the batter into the prepared pan. Bake for approximately 60 minutes, or until a toothpick inserted in the center comes out clean. Remove cake to a cooling rack to rest for 10 minutes, then unmold. 5. Place the Confectioners' sugar in a small bowl. Add enough fresh lemon juice to make a good drizzling consistency. Spoon the lemon drizzle over the lemon cake. Sprinkle with lavender buds. TAKE a LOOK: 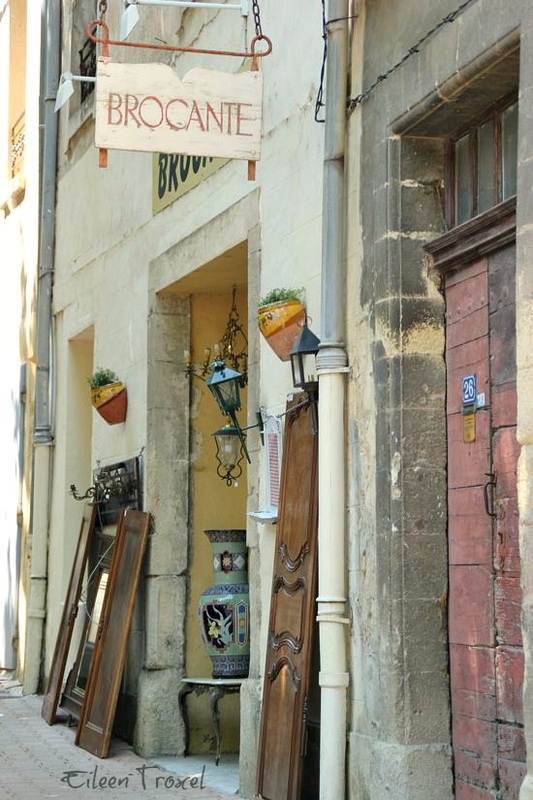 + Brocante in Malaucène, France It seems as though trips to Provence always center around antiquing... or visiting "La Brocante" -- a shop or outdoor market dealing in second-hand goods. It probably has something to do with the fact that my sister is the designated driver when we travel... and her passion is antiquing. When she hears about a brocante that, "you will always find good stuff" at, it becomes our destination, and there is nothing I can do about it. I cannot lie... I also love scouring second-hand stores and brocante markets almost as much as Susan does, but there is a huge difference between my sister's purchases and mine. Susan is a serious "collector" and always in search of specific items (Antique-of-the-Week). I, on the other hand, am a collector of nothing in particular. I am open to anything and everything. An eclectic piece that I find fascinating usually ends up going home with me -- if it's cheap.  + Brocante market on the edge of the Ramparts... the walled, medieval city of Avignon And sometimes, when going to a weekly brocante market such as this one in Avignon, it means that we cannot have breakfast at our B&B since we need to get there, "before everything is gone!", as Susan would say. I really look forward to my café crème with a croissant and brioche in the morning. And did I mention the French lavender honey??? Going without my Petit Déjeuner puts me in a foul mood. But if you arrive at La Brocante hungry, this is what you can purchase for breakfast!      + A Brocanteur's means of travel 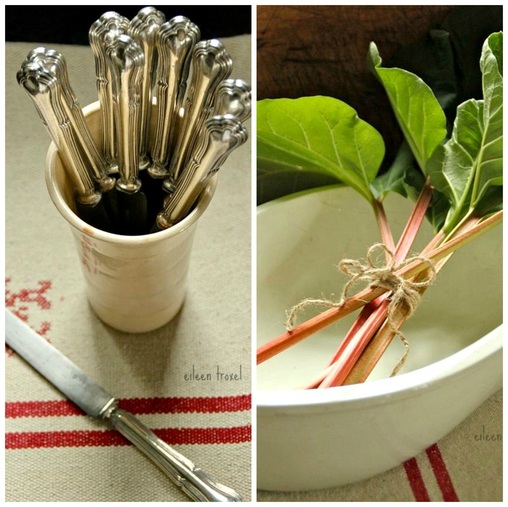 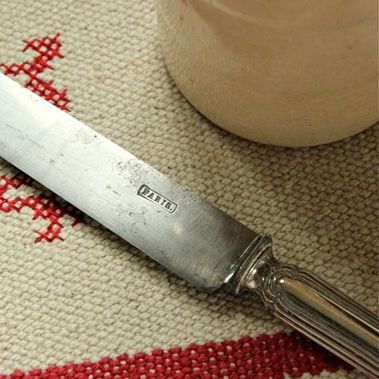  I don't know what I was thinking when I bought this white French ironstone bowl, especially when I kept preaching to Susan and friend Renate about the risks of traveling with breakables. The knives, however, didn't pose a problem for my luggage. And how could I not bring them home with me? They have "Paris" stamped on the blades. 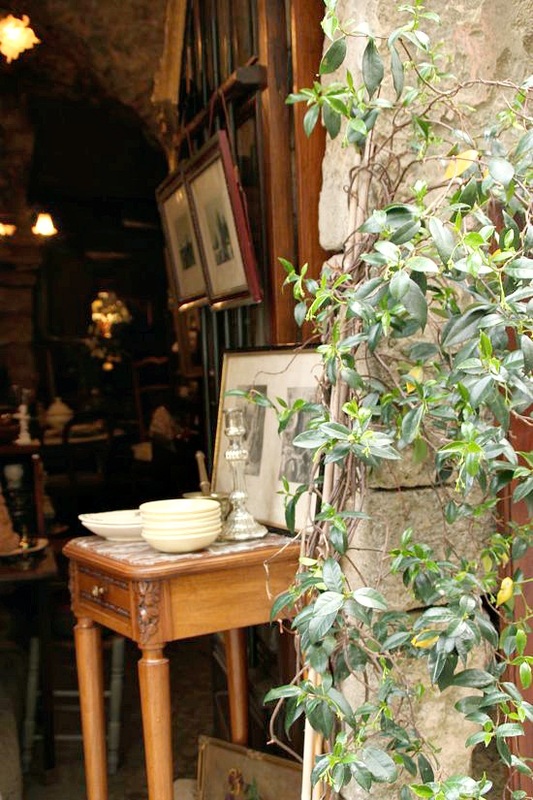 + In search of antiques in Bonnieux, France 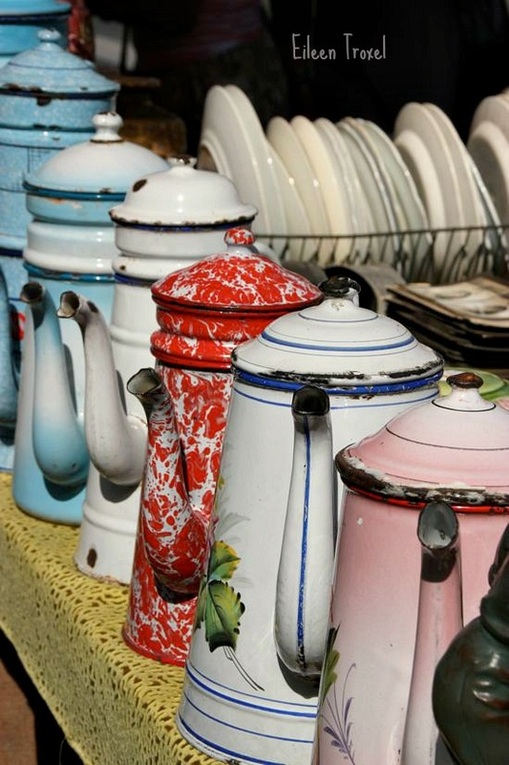 + Sunday brocante in L'Isle-sur-la-Sorgue 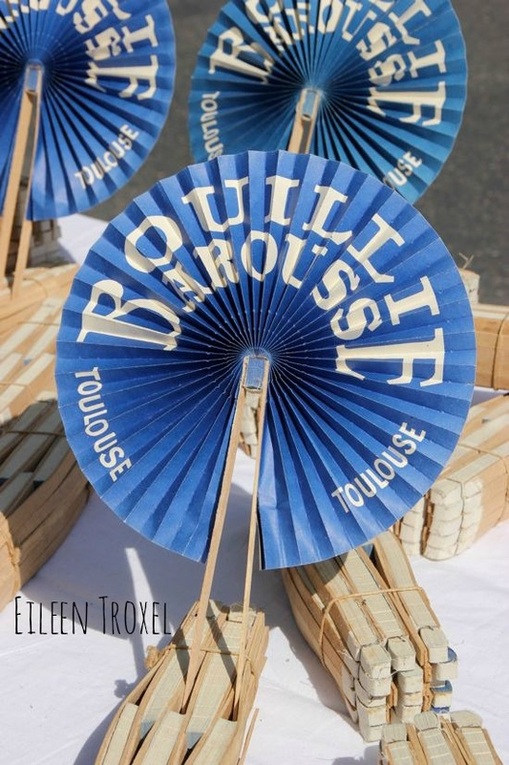 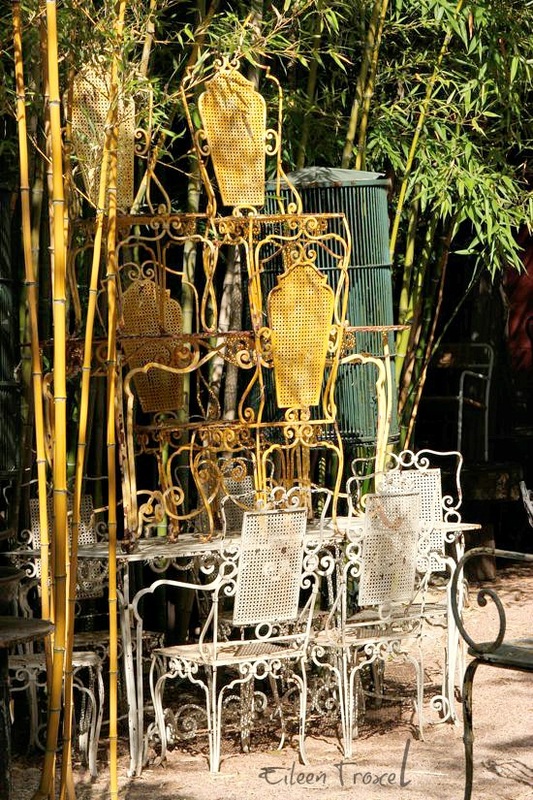 The L'Isle-sur-la-Sorgue Sunday brocante market and shops are where you go to view the really beautiful stuff, but not necessarily buy. It's a huge tourist destination; second only to Paris for antiques. And hugely expensive. This was also our first day with heat of 98 degrees +.  I could easily find a place for this iron chair with striped fabric at my house... if I could only fit it into my luggage.  Monday, 9 June, was "Fête de la transhumance" in St. Rémy-de-Provence; a festival that celebrates moving the sheep to higher grounds and pasture lands. In the morning 3000 sheep are paraded through the town. We missed that yearly tradition, but did stroll the holiday's brocante market later in the day. A carousel is set up near the brocanteurs to entertain the children. 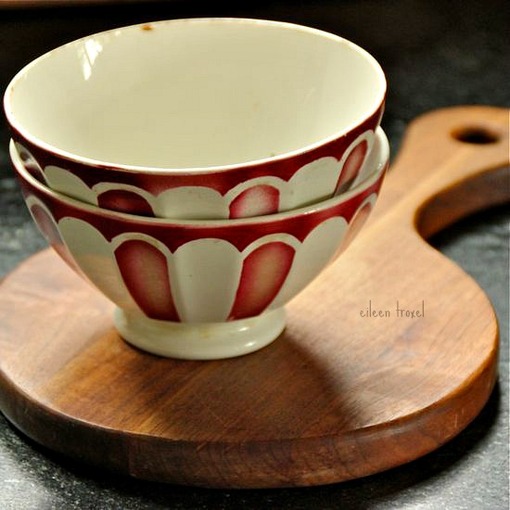 Somehow, these old, French café au laits bols made it back home with me... I'm sure that sister Susan will soon have a post or two on her brocante purchases, too. I'll let her tell you about the tin sconces off a French chateau that dominated space in her luggage... TAKE a LOOK: 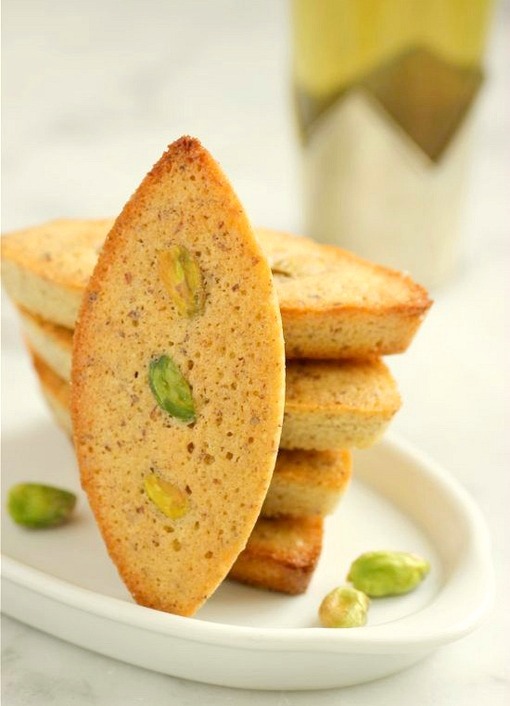 French Financiers are super-simple to make. The basic recipe for these little cakes is only 5 ingredients. They go together quickly, bake in a matter of minutes, and are heavy in almond aroma! A great little treat with a cup of tea or coffee. I followed Jing Tio's recipe in Food & Wine magazine and studded my Financiers, as he did, with pistachios. Consider, instead, marching fresh raspberries or blueberries down the center. 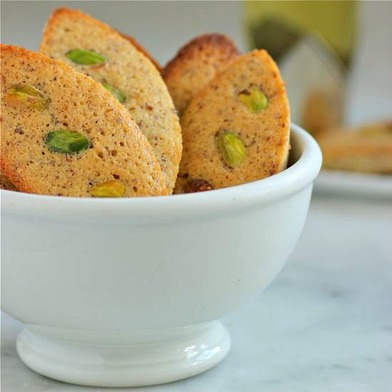  • 1 cup almond flour (or 1 cup whole, blanched almonds chopped, then finely ground in a food processor) • 1/2 cup sugar • 2 large eggs, beaten • 5 tablespoons unsalted butter, melted • 3 tablespoons all-purpose flour • 24 to 30 shelled pistachios PREHEAT OVEN to 400˚F 1. Butter and flour sixteen 3 1/2-inch-long barquettes or 30 mini muffin pan cups. 2. In a bowl, mix the almond powder and sugar. Whisk in the eggs until incorporated, then whisk in the melted butter, followed by the flour. Spoon the batter into the prepared barquette molds or mini muffin cups and decorate with the pistachios. Bake the cakes until golden brown, about 12 to16 minutes. Let cool slightly, then run a knife around each cake and transfer them to a rack to cool. • • • • • • • • 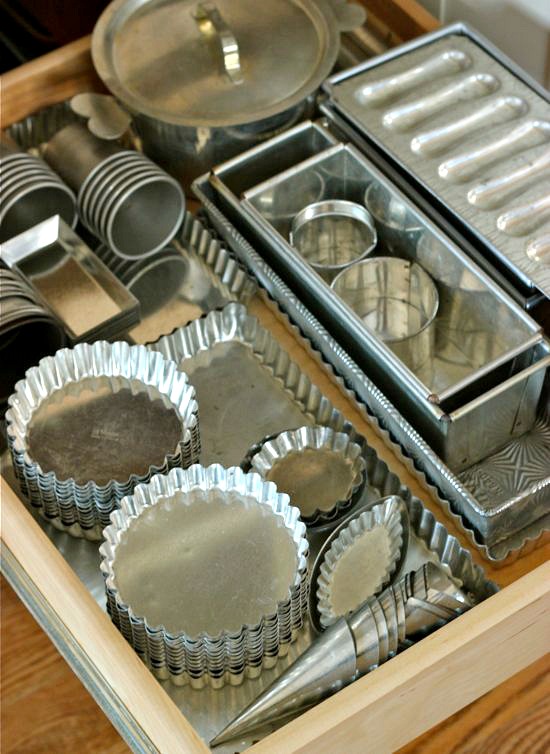 I thought I'd also show you some of my baking paraphernalia. It isn't necessary to have drawers full of molds; there are basics that can serve you well. I've just been enamored since a very young age with fanciful tins, French in particular. It started when I was a child and dreamed of opening a bakery. When I moved just outside of New York City, I would roam Greenwich Village and Soho, and started amassing my collection of French tinware when it was still cheap. Luckily, there are now so many companies worldwide that are producing bakeware, you have options as far as costs go. Bakeware basics to have are... • 9 x 1 1/2-inch round cake pans (at least 2) • 9 x 9 x 1 1/2-inch square baking pan • 13 x 9 x 2-inch rectangular baking pan • 12 1/2 x 17 1/2 x 1-inch jellyroll pan • 9 x 5 x 3-inch loaf pan • 2 3/4 x 1 1/2-inch, 12 cup muffin tin • 9 1/2-inch and 11-inch tart pan with removable bottom The items above, for the most part, should get you by. Below are a few more of my favorites, in case you feel like expanding your paraphernalia.  The rectangular (barquette) and oval tin molds, plus the silicone baking mold were the ones I used to bake the Pistachio Financiers. 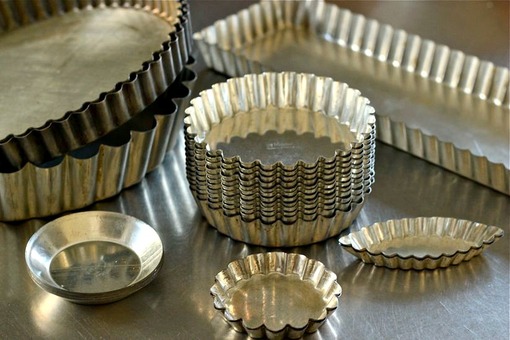 Some of my tart pans... I often use the 4-inch x 1-inch to bake individual sweet and savory tarts. The majority of my pans were made by the French company MATFER. It is possible to purchase Matfer products on Amazon and the website Pastry Items. If you happen to be visiting Paris, stop by the century-old shop E. Dehillerin. It's a baker's paradise! 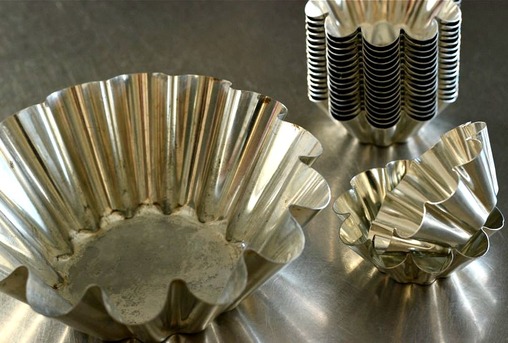 Brioche Molds...for baking brioche, of course, but I have also made cakes and custards in these beautiful tins. 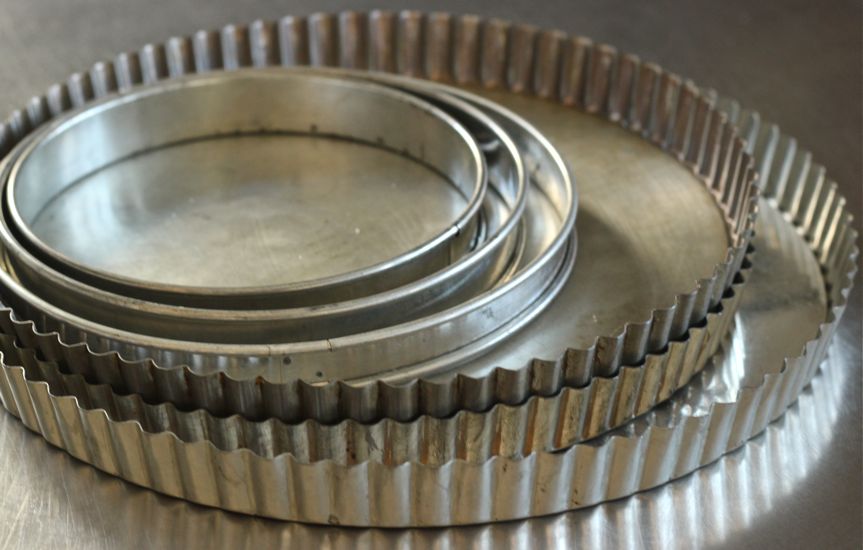 You can never have too many tart pans if your first love is baking tarts. 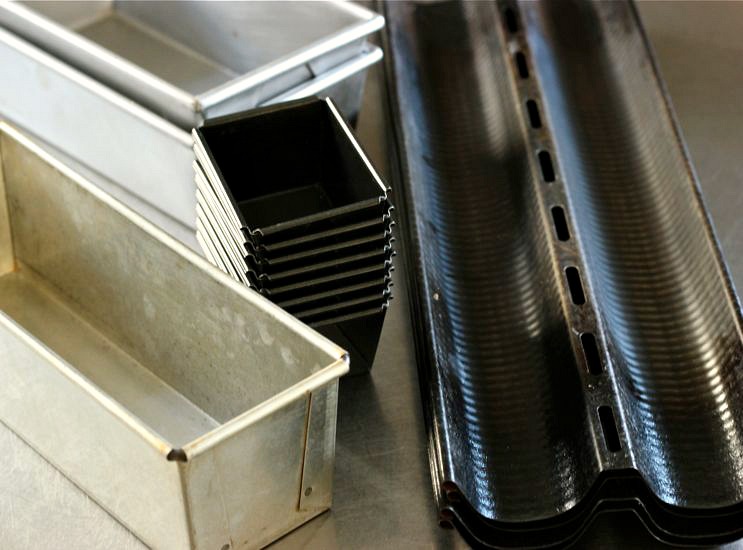 My most-used bread pans. 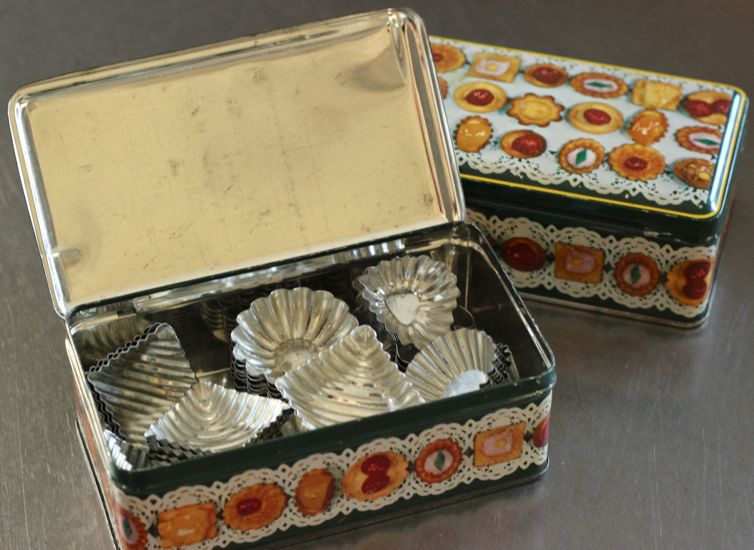 I use these mini Mafter molds when I'm hosting big events. 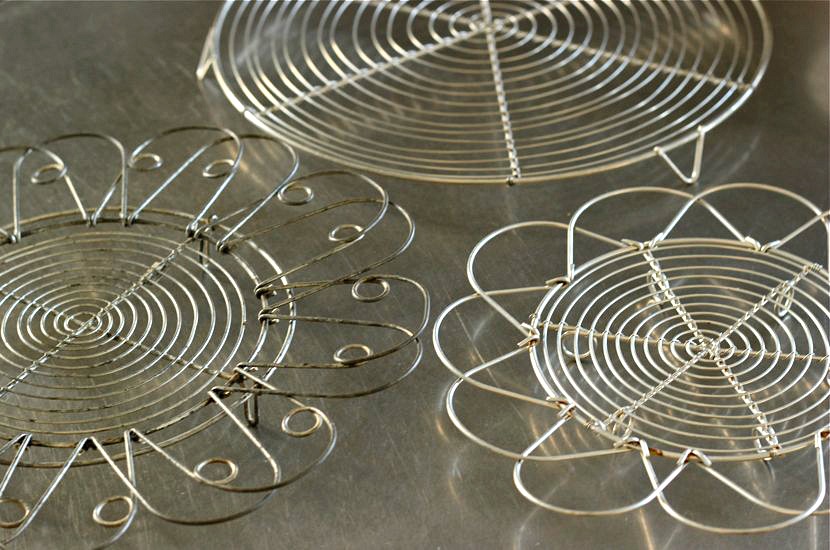 Everyone needs cooling racks!  TAKE a LOOK: 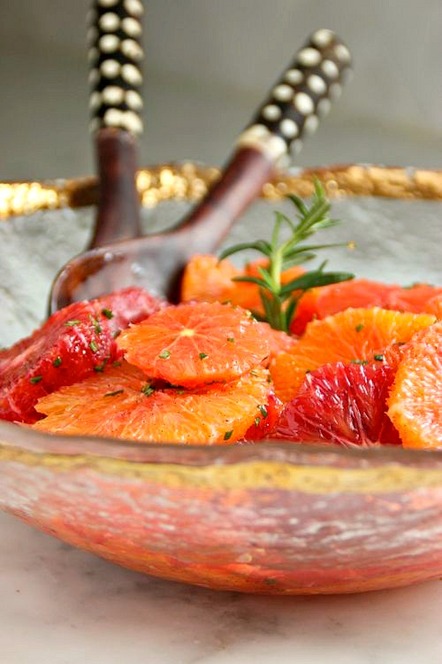 It sounds as though just about everyone in the country is dealing with extreme cold today. All of the public schools in the state of Minnesota are closed and residents are urged not to venture outdoors unless absolutely necessary.  Well... it's necessary. The Frenchie that resides in my house still wants to go outside. Getting dressed for the cold takes longer than the time we actually spend in the -21 degrees. Under any other circumstances, Pipi would be embarrassed looking like this, but today, she's good with it. 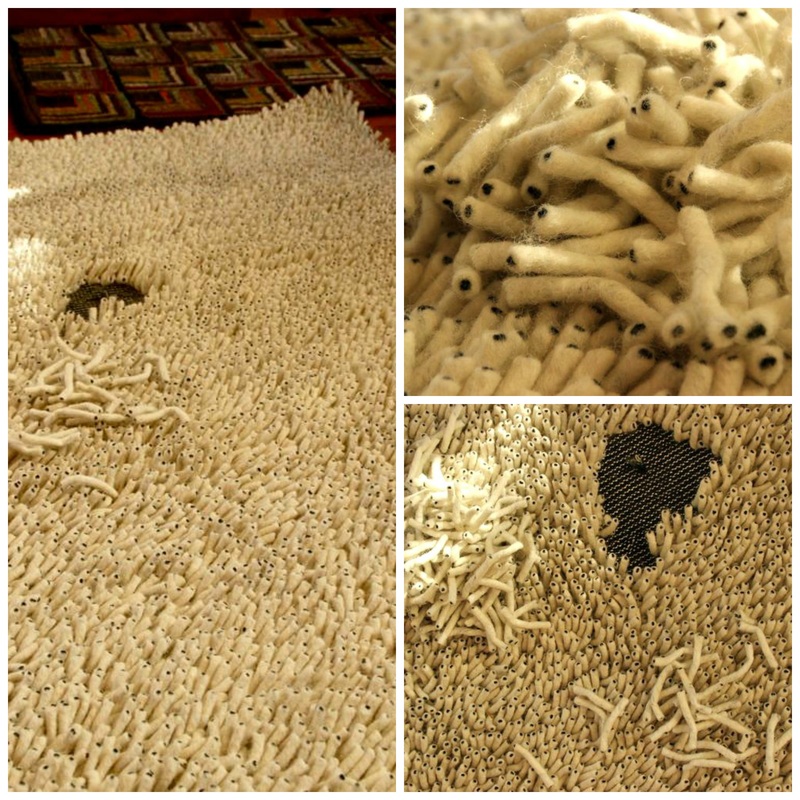 When I'm not bundling up to take my Frenchie outside, I've been repairing a rug that was brought to me a few weeks ago. I put it aside during the holidays, but now have the time to replace the felted, fat, wool, chunky "threads". Apparently, people that repair/restore handmade rugs and manufactured carpeting locally are now a rare commodity. My name has been circulated throughout the Twin Cities as one of those that still works on Oriental piles and flat-weaves and damaged carpeting. I've become rather selective with the jobs I accept but could not refuse this rug made in the Netherlands. The felted wool pieces were ripped out by the owner's German Shepherd puppy. It is unlike any rug I have ever worked on before. I love walking across it with bare feet! 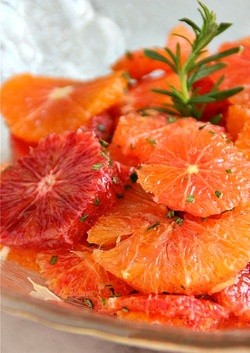 And... I've been cooking. I pulled a large ham from the freezer that I never got around to baking during the holidays. I made it last night and served it with a broccoli-cauliflower gratin, roasted fingerling potatoes, and this Orange Salad with Vanilla Bean and Rosemary. Come this time of year, I crave citrus. I devour clementines one after the other, eat grapefruit for breakfast, and guzzle fruit juices. These refreshingly-sweet orange slices with vanilla bean seeds and rosemary are a perfect pairing to a salty ham. Oranges with Vanilla Bean and Rosemary 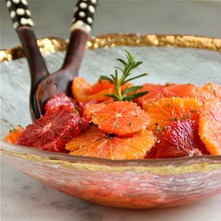 • 8 Cara Cara Oranges (or a mix of Cara Cara and Blood oranges) • a generous 1/8 cup sugar • 1 vanilla bean • 2 tablespoons chopped, fresh rosemary 1. Using a sharp knife, cut the peel from the oranges. Slice the oranges into 1/4-inch thick pieces and place in a large bowl. 2. Place the sugar in a small bowl. Slice the vanilla bean down the length of the pod. Scrape the inside of the vanilla bean with the tip of the knife to remove the seeds; add to the sugar. Using the back of a spoon, press the vanilla seeds into the sugar until they are distributed evenly throughout. Pour the sugar over the orange slices. Add the chopped rosemary; stir gently to combine. 3. Refrigerate for one hour before serving. TAKE a LOOK:  Jennifer from Shawnee, Kansas, was the winner of Mastering the Art of French Eating! Thanks to everyone who left a comment for this drawing. If you are anything like me and constantly dream of being in France, constantly dream of living in France, or just have the desire for a short visit to immerse yourself in France's culinary history, this is the book for you. (Read the Wall Street Journal's review of Mastering the Art of French Eating, HERE). Author Ann Mah writes of her life in Paris after moving there with her diplomat husband in 2008, only to find herself on her own when he is transferred to Iraq for a year. The book chronicles Mah's process of acclimating into French life and discovering the unique foods of different French regions. When I am left only to my dreams, experiencing France through Ann Mah's writing is the next best thing to actually being there! Ann Mah's publisher, Penquin Group, will be giving away one copy of Mastering the Art of French Eating to a LivingTastefully reader. All you need to do to be entered into the drawing is leave a comment in the comment section of this post by the end of the day December 13th. At publisher's request, entries will be limited to the U.S. and Canada.  Since the book giveaway is about all things French, the recipe today is for Sablés de Trouville; a rolled, fan-shaped French cookie filled with almonds and lemon -- possibly one of my favorite flavor combinations. And to amp up the citrusy lemon taste just a bit, I drizzled the tips of the cookies with a mix of confectioners' sugar and fresh lemon juice; then sprinkled the glaze of icing with coarse, sparkly sugar (think holiday cookie platters!).   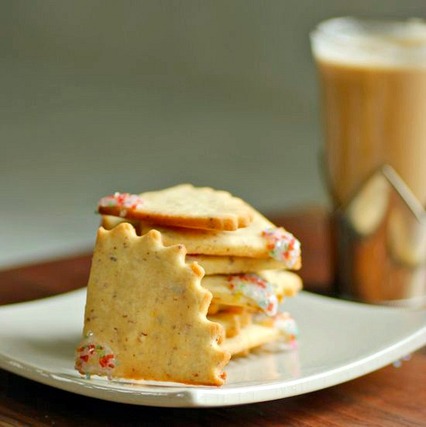  an adapted recipe from Debra F. Weber, About, inc. • 1/2 teaspoon grated lemon zest • 1/2 teaspoon almond extract • 1/2 teaspoon vanilla extract • 1/2 cup unsalted butter, softened • 1/2 cup sugar • 1/2 cups ground, blanched almonds • 2 large egg yolks • 1 1/2 cups sifted all-purpose flour • Confectioners' sugar • Fresh lemon juice 1. Beat butter together with lemon zest, almond extract and vanilla extract until fluffy. 2. Gradually beat in the sugar and ground almonds until combined. 3. Beat in the eggs yolks. 4. Working slowly, beat in flour a little at a time. 5. Gather the dough into a ball and refrigerate, wrapped in plastic, for at least 2 hours. 6. PREHEAT OVEN to 400˚F 7. Divide dough into 3 portions. Keep portions you are not working with in the refrigerator until needed. 8. Roll the dough between 1/8 to 1/4-inch thick (see NOTE below). Using a round cookie cutter approximately 5-inch in diameter (or a 5-inch bowl or plate as a guide), cut dough into circles; then cut each circle into quarters. 9. Transfer each triangle to a cookie sheet lined with parchment paper or silpat. Bake for approximately 6-8 minutes. 10. Cool cookies on a rack. When completely cooled, mix together Confectioners' sugar and lemon juice in a small bowl, using proportions to create a mixture the consistency of heavy cream. Spoon a small amount of the lemon-sugar mixture onto the tips of the cookies and sprinkle with coarse, decorative sugar. NOTE: The original recipe instructs to roll cookies to 1/4-inch and bake for 5 to 6 minutes. I always prefer a thinner (crisper) cookie and a little browness around the edges; therefore I have increased my baking time by a couple of minutes. Roll and bake cookies to your preference. TAKE a LOOK: 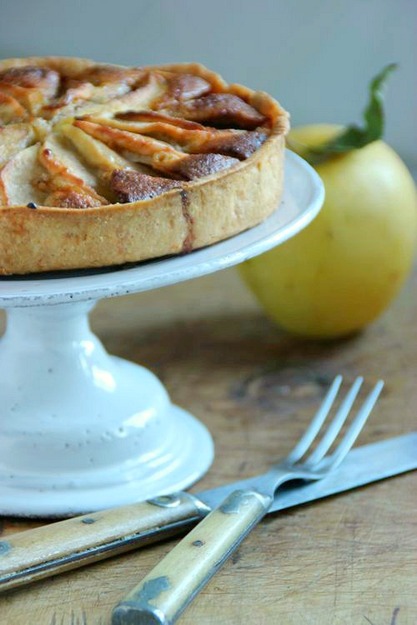 Every fall my husband tries to get back to the family farm in southwest Iowa to help with the harvest. And when he goes, I give him a list of wants. 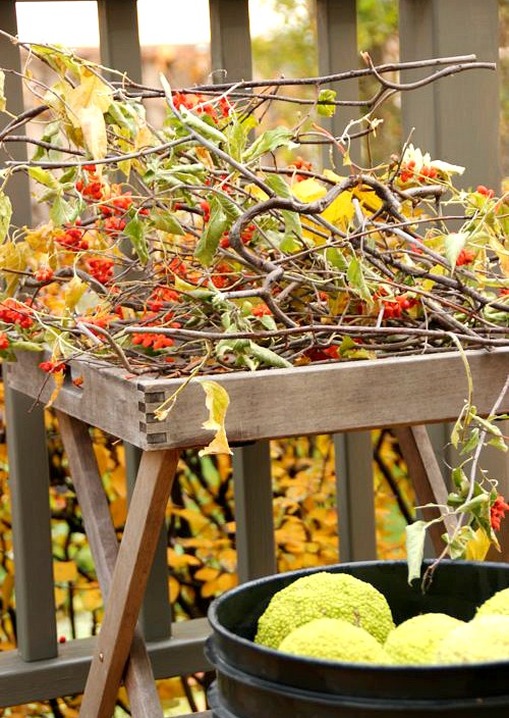 Always topping the list is bittersweet. I have a wreath I made several years ago from bittersweet that grows wild on the farm and every year since I plug it with additional fresh bittersweet. When he hasn't been able to make it down to the farm in the fall, I've grudgingly purchased bittersweet at local floral shops to replenish the wreath. It's quite the pricey poisonous and invasive vine! 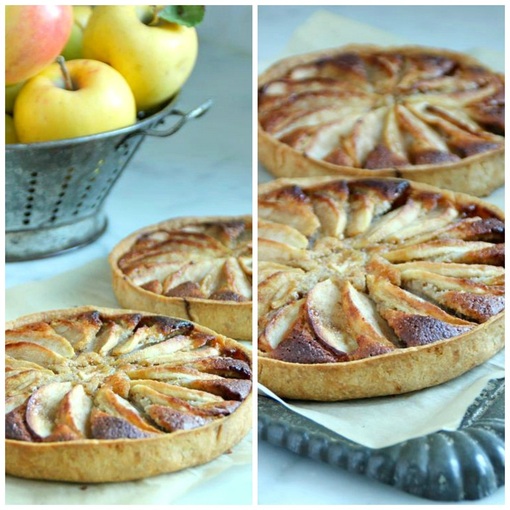 In addition to the bittersweet I also received buckets full of acidy-green hedge balls to fill urns on my front stoop, plus bags full of black walnuts (any volunteers to help crack shells and pick out the nutmeat? I didn't think so... ). But maybe the best gift from the farm was the Golden Delicious apples my husband brought back; big, beautiful, and sweet! I immediately got to work making tarts; turning to my favorite Almond Cream Apple Tart recipe (French, of course). 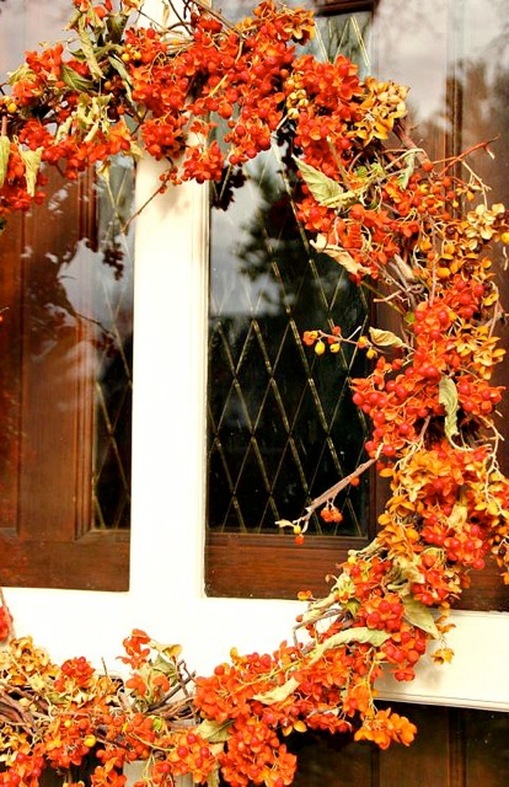 I have come to believe that ground almonds added to anything makes that anything taste better. I love almonds and this French Apple Tart is full of almonds in the form of almond cream, also called frangipane. Make your own ground almonds for this recipe by processing slivered almonds. Or if you have access to a Trader Joe's, the grocery store chain has 16-ounce bags of almond meal for $4.99 -- an excellent price! 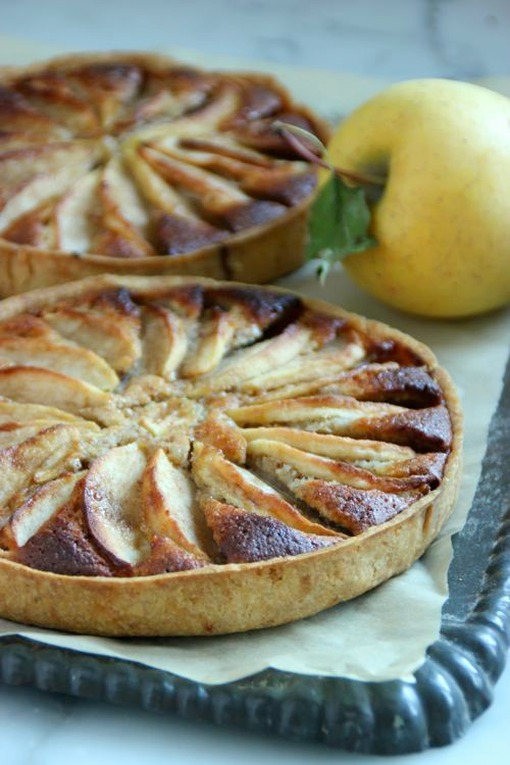 If you are like me and include an apple dessert in your Thanksgiving menu, consider this tart. Along with pumpkin pies, I usually bake an apple tart or My Mother's Apple Crisp (recipe HERE) for one of our Thanksgiving desserts. Originally, I made this Almond Cream (or Frangipane) Apple Tart as one large tart. The two tarts I made this week were smaller, baked in 7-inch rings. 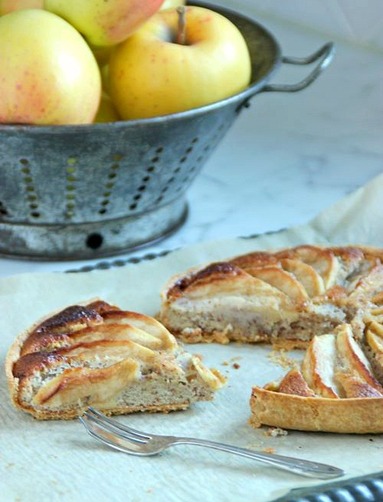  adapted recipe by Ewen Lemoigne and Pierre Jancou NOTE: Following the original recipe, the tarts in this post were baked at 400˚F. That gave these tarts a rustic, baked-in-a-woodburning-oven look. In the recipe below, I give an oven temperature of 375˚F -- see the final results for a tart baked at that temperature HERE. • 1 cup slivered almonds • 1/2 cup granulated sugar • 1/4 cup unbleached all-purpose flour • 1/4 teaspoon salt • 4 tablespoons unsalted butter, softened, plus 1 tablespoon melted butter for brushing • 2 large eggs • 1 tablespoon dark rum • Baked pastry shell (recipe below) • 3 large Golden Delicious apples, peeled, halved, cored and sliced 1/8-inch thick • 1/4 cup light brown sugar 1. Preheat the oven to 375˚F. In a mini processor, pulse 3/4 cup of the almonds until finely ground. Transfer to a medium bowl. Pulse the remaining 1/4 cup of almonds, until coarsely chopped. Transfer to the bowl, add the granulated sugar, flour and the salt and toss gently to combine. 2. In another bowl, using a handheld mixer, beat the 4 tablespoons of butter until creamy. Add the almond mixture and beat until blended. Beat in the eggs, one at a time, beating well after each addition. Beat in the rum. 3. Spread the almond filling in the baked pastry shell. Arrange the apple slices on top in concentric circles. Brush the apple slices with the melted butter and sprinkle with the brown sugar. 4. Bake the tart for 45 to 50 minutes, until the filling is set and the apples are browned and tender. (Start watching the tart closely after 35 minutes.) Transfer the tart to a rack to cool slightly. Remove the ring and serve the tart warm or at room temperature. Tart Crust Recipe: • 1 1/4 cups unbleached, all-purpose flour • 1/4 teaspoon salt • 5 tablespoons cold, unsalted butter, cut into small piece • 1 large egg yolk • 2 to 3 tablespoons ice water 1. Preheat the oven to 400°. In a food processor, pulse the flour and salt. Add the butter and pulse until the mixture resembles small peas. Add the egg yolk and 2 tablespoons of ice water and pulse just until the dough holds together when pinched; if necessary, add the remaining 1 tablespoon of ice water. Transfer the dough to a lightly floured surface and knead until smooth. Flatten into a disk, wrap in plastic and chill until firm, 1 hour. 2. On a lightly floured surface, roll out the dough to a 12-inch round, about 1/8 inch thick. Transfer to a 9-inch fluted tart pan with a removable bottom. Push a rolling pin over the top to trim any overhang. Prick the bottom in several places with a fork. 3. Line the tart shell with foil and fill with pie weights. Bake for 25 minutes, until the shell is lightly colored around the edge. Remove the foil and weights and bake for 10 minutes, or until golden. Let cool before filling. TAKE a LOOK:  I'm having a hard time letting go of summer. Tomatoes continue to ripen in my garden and I continue to make Insalata Caprese, for as long as I can, savoring what I know are dwindling, end-of-season heirlooms. I just purchased a beautifully ripe cantaloupe and will make one last salad of Cantaloupe, Sopressata Salami, and Chives for this year. And when I saw black missions figs at the local Whole Foods I quickly grabbed a carton, knowing I may not see them on my next visit. I spent a cool and rainy afternoon baking Financiers à la Figues while greedily popping the remaining fresh figs into my mouth. Yes... it's almost time to kiss good-bye my routine of gathering much of our dinner from the garden. Other than the cabbages that will find their way into fall soups and the beets that will be cleaned and stored in the refrigerator for roasting, it's over until next year... now if I can only remember to record my successes and failures (note to self -- do not plant the same variety of cucumbers next spring!). 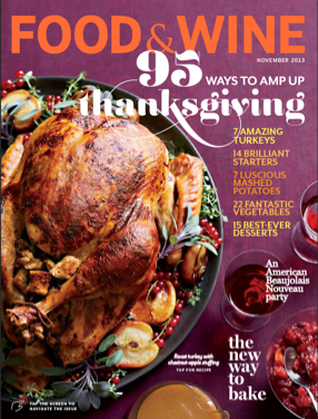 on newsstands October 15 And now the news! I am extremely proud to announce that Food & Wine has included, in their November issue, an article on my kitchen and me. Surprise doesn't adequately describe my reaction when the magazine contacted me this past summer. I feel very honored that Food & Wine found both my kitchen and LivingTastefully worthy of publication. And may I say, they were a pleasure to work with throughout this process.  adapted from a recipe in the New York Times | August 29, 2012 Italy to Brooklyn, Fig by Fig by Melissa Clark • 1/2 cup unsalted butter, plus additional for greasing the pan • 1 1/4 cups confectioners' (powdered) sugar • 1/2 cup almond meal • 1/3 cup unbleached, all-purpose flour • Pinch of salt • 4 large eggs whites (to equal 1/2 cup), room temperature • 3/4 teaspoon vanilla extract • 3 Ripe figs, ends trimmed and each sliced into 3 rounds 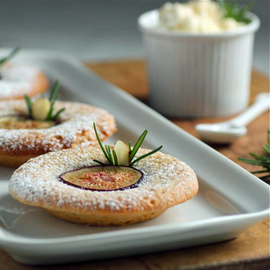 • I used ten 2 3/4-inch tartlette pans for my financiers. The original recipe uses muffin tins for baking the little individual cakes. PREHEAT OVEN to 400˚F 1. Butter and flour nine 1/2-cup muffin cups. Set aside. 2. In a small saucepan over medium-low heat, melt the butter and cook until it turns brown. Remove from heat and pour butter through a fine sieve into a small bowl. Let cool. 3. In the bowl of a mixer, combine the almond meal, flour, and salt. Add the egg whites and using the whisk attachment to the mixer, beat until the dry ingredients are moistened. Add the melted butter and whisk on medium-high until the mixture is smooth; about two minutes. Stir in the vanilla extract. (At this point, the batter may be refrigerated for up to four days.) 4. Distribute the batter evenly between the nine muffin cups. Gently press a fig slice in the center of each financier. Place the muffin pan on the middle rack of the preheated oven and bake until golden brown and the tops spring back when lightly pressed, about 15 minutes. Let the financiers cool completely on a wire rack before unmolding. HONEYED RICOTTA: Combine 1 cup of whole milk ricotta with 3 to 4 tablespoons of honey. Sprinkle with freshly-ground black pepper and gently mix to combine. Serve alongside a Financier à la Figue. TAKE a LOOK: |


Categories
All
|